はじめに
最近ROSを扱うよう司令が出ました。
何ができるのか確認するため、まずVagrant上でサンプルを動かしてみます。
最終的に、複数のVirtualBox上にROSノードを分散させて、サンプルを動かすところまでやります。
この記事の内容
- Ubuntu-14.04のインストール
- ROS indigoのインストール
- turtlesim (ROSサンプル) を動かしてみる
- 仮想環境を複製する
- 複製した仮想環境で別々にROSノードを起動する
実施環境
- Mac OS Sierra v10.12.2
- Vagrant 1.8.7
- VirtualBox 5.1.8
ROSとは
ROS Wikiより
ROS (Robot Operating System)はソフトウェア開発者のロボット・アプリケーション作成を支援するライブラリとツールを提供しています. 具体的には, ハードウェア抽象化, デバイスドライバ,ライブラリ,視覚化ツール, メッセージ通信,パッケージ管理などが提供されています.
ロボットなど機械制御のアプリケーション作成を支援するフレームワーク/ミドルウェアです。OSと名がついていますが、どちらかというと、ノード間通信プロトコルとしての側面が強いです。また、ROSに準拠したノードがすでにたくさん公開されており、それらを利用することで簡単にロボットアプリケーションを作成できるライブラリ群としても利用できます。
単一ホストでサンプル実行
VagrantでUbuntu-14.04を準備
Ubuntu-14.04のBoxをダウンロード
参考1:Vagrant+VirtualBoxでUbuntu環境構築 - Qiita
参考2:【Mac】vagrantでrosを使えるまで - Qiita
以下からBoxを探します。
A list of base boxes for Vagrant - Vagrantbox.es
今回は Ubuntu 14.04 (based on amd64 server iso file) を利用しました。(ROS Indigoがサポートする最新版が14.04のため)
vagrantにadd
vagrantにaddしますが、エラーが出ます。
$ vagrant box add ubuntu-14.04 https://github.com/kraksoft/vagrant-box-ubuntu/releases/download/14.04/ubuntu-14.04-amd64.box
==> box: Box file was not detected as metadata. Adding it directly...
==> box: Adding box 'ubuntu-14.04' (v0) for provider:
    box: Downloading: https://github.com/kraksoft/vagrant-box-ubuntu/releases/download/15.04/ubuntu-14.04-amd64.box
An error occurred while downloading the remote file. The error
message, if any, is reproduced below. Please fix this error and try
again.
どうやら下記によれば、vagrantのバグとのこと。curlを使用不可にしてから再度実行すると成功しました。
参考:Vagrant1.8.7でbox addがエラーになる – ただいま名刺を切らしておりまして
$ sudo mv /opt/vagrant/embedded/bin/curl /opt/vagrant/embedded/bin/curl.bak
$ vagrant box add ubuntu-14.04 https://github.com/kraksoft/vagrant-box-ubuntu/releases/download/14.04/ubuntu-14.04-amd64.box
vagrantでUbuntu起動
ディレクトリを切り、Vagrantfileを作成します。
$ mkdir ~/Vagrant/ros_sample
$ cd ~/Vagrant/ros_sample
$ vi Vagrantfile
今回は複数ホストにノードを分散させたり、外からアクセスさせたりしたかったのでVagrantfile(その2)のようにしましたが、同一ホストで動かすだけならVagrantfile(その1)だけで大丈夫と思います。
- IPを
192.168.33.10に - ROSの使用ポート
11311をホストからゲストにフォワード
# -*- mode: ruby -*-
# vi: set ft=ruby :

Vagrant.configure(2) do |config|
  config.ssh.forward_agent = true
  config.vm.box_url = "https://cloud-images.ubuntu.com/vagrant/trusty/current/trusty-server-cloudimg-amd64-vagrant-disk1.box"
  config.vm.box = "ubuntu14.04"
end
# -*- mode: ruby -*-
# vi: set ft=ruby :

Vagrant.configure(2) do |config|
  config.ssh.forward_agent = true
  config.vm.box_url = "https://cloud-images.ubuntu.com/vagrant/trusty/current/trusty-server-cloudimg-amd64-vagrant-disk1.box"
  config.vm.box = "ubuntu14.04"
  config.vm.network "private_network", ip: "192.168.33.10"
  config.vm.network :"forwarded_port", guest: 11311, host: 11311 # ROSの使用ポート
end
起動してSSHで接続します。
$ vagrant up
$ vagrant ssh
GUI関連のインストール
サンプル(turtlesim)がGUI環境で動くので、GUI関連の設定を整えます。
参考2に記載のある通りにインストールしていくと、ラスト2行(コメントアウトの行)は、その前のインストールの途中で自然とインストールされたので、スキップしました。
$ sudo apt-get install -y xfce4
$ sudo add-apt-repository ppa:gnome3-team/gnome3
$ sudo apt-get update
$ sudo apt-get install -y gnome-shell ubuntu-desktop
$ # sudo apt-get install gdm
$ # sudo dpkg-reconfigure gdm
Ubuntu上にROSをインストール
参考:ja/indigo/Installation/Ubuntu - ROS Wiki
時刻設定
なくてもいいかもですが、参考2の通りに設定しておきました。
$ sudo apt-get install -y chrony
$ sudo ntpdate ntp.nict.jp
ROSリポジトリと公開鍵の追加
公開鍵はhttps://raw.githubusercontent.com/ros/rosdistro/master/ros.keyから取得する流儀もあるようです。
$ sudo sh -c 'echo "deb http://packages.ros.org/ros/ubuntu $(lsb_release -sc) main" > /etc/apt/sources.list.d/ros-latest.list'
$ wget http://packages.ros.org/ros.key -O - | sudo apt-key add -
ROSのインストール
ROS Wikiによると、sudo apt-get install ros-indigo-***は、幾つか選択肢があるらしいです。好みに合わせて変えてください。
- すべてのデスクトップ環境のインストール (推奨) : ros-indigo-desktop-full
- デスクトップ環境のインストー : ros-indigo-desktop
- ROSベース (最小構成) : ros-indigo-ros-base
$ sudo apt-get update
$ sudo apt-get install -y ros-indigo-desktop-full
依存関係rosdepの初期化
$ sudo rosdep init
$ rosdep update
環境設定
$ echo "source /opt/ros/indigo/setup.bash" >> ~/.bashrc
$ source ~/.bashrc
rosinstallのインストール
$ sudo apt-get install -y python-rosinstall
環境変数のロード
$ source /opt/ros/indigo/setup.bash
ROSワークスペースの作成と初期化
$ mkdir -p ~/catkin_ws/src
$ cd ~/catkin_ws/src
$ catkin_init_workspace
$ cd ~/catkin_ws/
$ catkin_make
$ source ~/catkin_ws/devel/setup.bash
ROS環境設定
.bashrcにROS用の設定を追加して読み込み。
$ vi ~/.bashrc
$ source ~/.bashrc
Vagrantfileと同様、同一ホストで動かすだけなら.bashrc(その1)で大丈夫だと思います。今回は複数ホストにノードを分散させるため、今回は.bashrc(その2)のようにしました。
ちなみに、末尾にsource /opt/ros/indigo/setup.bashの記載があるはずですが、これはsource ~/catkin_ws/devel/setup.bashへ書き換えちゃうのが正解みたいです。
source ~/catkin_ws/devel/setup.bash

export ROS_HOSTNAME=localhost
export ROS_MASTER_URI=http://${$ROS_HOSTNAME}:11311
export DISPLAY=:0

alias cw='cd ~/catkin_ws'
alias cs='cd ~/catkin_ws/src'
alias cm='cd ~/catkin_ws && catkin_make'
$ROS_IPはVagrantfileと合わせます。
source ~/catkin_ws/devel/setup.bash

export ROS_IP=192.168.33.10
export ROS_MASTER_URI=http://192.168.33.10:11311
export DISPLAY=:0

alias cw='cd ~/catkin_ws'
alias cs='cd ~/catkin_ws/src'
alias cm='cd ~/catkin_ws && catkin_make'
サンプルを動かしてみる
マスター起動
ROSマスター(roscore)を起動します。
$ roscore
操作される側のシミュレータ起動
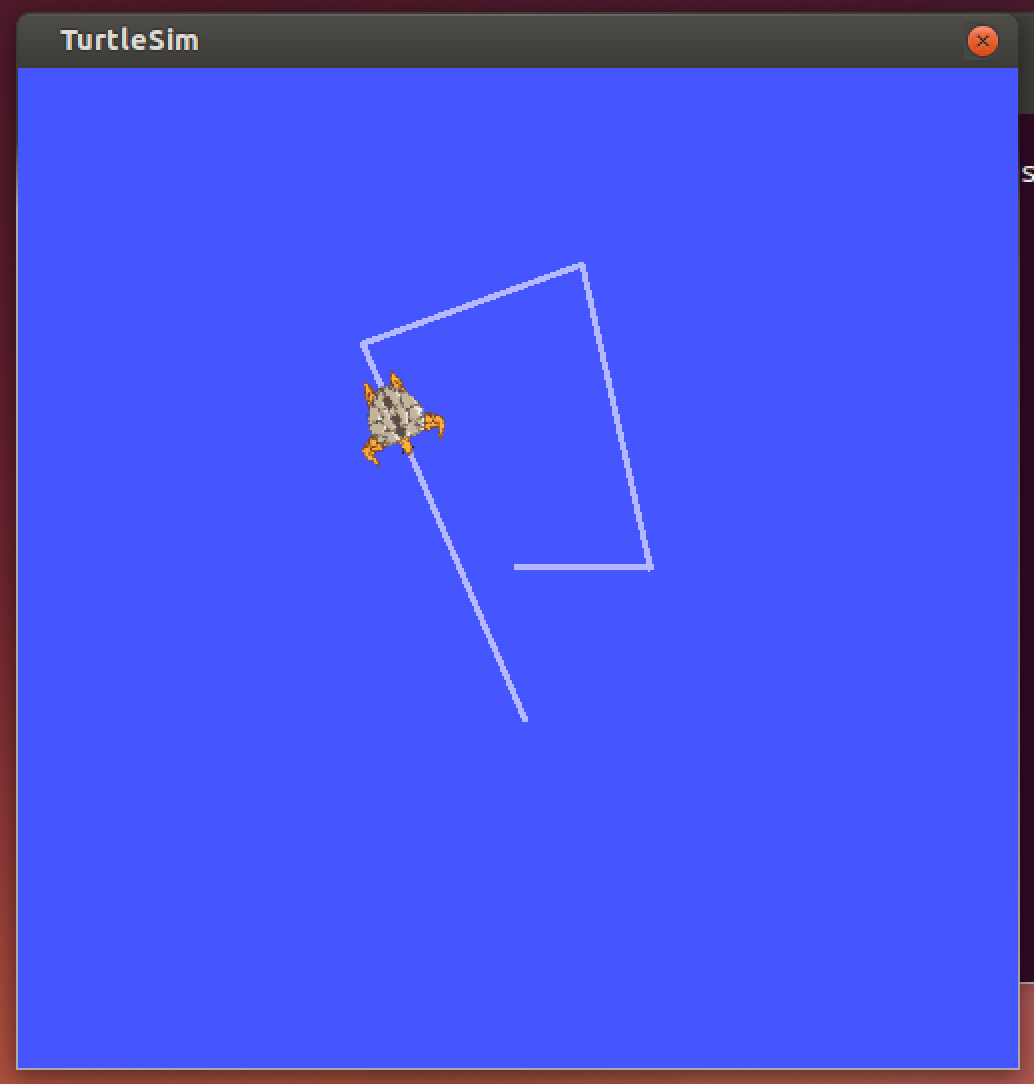
これはGUI環境で起動してください。亀さんが出てきます。
$ rosrun turtlesim turtlesim_node

操作する側のコンソール起動
起動したら、十字キーで亀を操作できます。
$ rosrun turtlesim turtle_teleop_key
分散環境でサンプル実行
仮想環境を複製する
分散環境での実行を試してみるため、VirtualBoxを複製します。
Vagrantをパッケージ化
$ cd ~/Vagrant/ros_sample
$ vagrant package
$ vagrant box add ros_on_ubuntu-14.04 ./package.box
新しいVirtualBoxを起動
$ mkdir ~/Vagrant/ros_sample2
$ cd ~/Vagrant/ros_sample2
$ vi Vagrantfile
$ vagrant up
# -*- mode: ruby -*-
# vi: set ft=ruby :

Vagrant.configure(2) do |config|
  config.ssh.forward_agent = true
  config.vm.box_url = "file:///Users/ryosuke/Vagrant/ros_sample/package.box"
  config.vm.box = "ros_on_ubuntu-14.04"
  config.vm.network "private_network", ip: "192.168.33.11"
end
ROS環境設定の変更
.bashrcにROS用の設定を追加して読み込み。
$ vi ~/.bashrc
$ source ~/.bashrc
-
$ROS_IPはVagrantfileと合わせます。 -
$ROS_MASTER_URIは先に作成したホストのIPに合わせます。
source ~/catkin_ws/devel/setup.bash

export ROS_IP=192.168.33.11
export ROS_MASTER_URI=http://192.168.33.10:11311
export DISPLAY=:0

alias cw='cd ~/catkin_ws'
alias cs='cd ~/catkin_ws/src'
alias cm='cd ~/catkin_ws && catkin_make'
サンプルを動かしてみる
マスター起動
先に作成したホスト192.168.33.10で起動します。
$ roscore
操作される側のシミュレータ起動
複製したホスト192.168.33.11で起動します。先程同様、GUI環境で起動してください。
$ rosrun turtlesim turtlesim_node
操作する側のコンソール起動
先に作成したホスト192.168.33.10で起動します。
$ rosrun turtlesim turtle_teleop_key