OpenWhiskを使って、お天気情報をSlackに通知します。

お天気情報の取得方式については、以下の記事にて記載しています。
今回は、WeatherCompanyで取得したデータをSlackに通知する流れについて記載します。
Slackのパッケージカタログを使用する
BluemixのOpenWhiskの画面も新しいデザインになりました。可愛いです。

Slackを使う場合も、Weather Companyと同一です。アクションの編集画面から、右上の「カタログの表示」を選択します。

「SLACK」を選択します。

Slackのパッケージが表示されます。

サンプル入力を見てみます。Slackに通知するためには、JSONで以下のようなパラメータを入れてあげれば良いようです。
{
    "channel": "myChannel",
    "text": "Hello OpenWhisk!",
    "url": "https://hooks.slack.com/services/XYZ/ABCDEFG/12345678",
    "username": "openwhisk"
}
中身は、SlackのWebhookのURL、ユーザ名、チャンネル名。そして、通知するテキストです。左側のNEW BIDINGを選択します。

通知したいslackに合わせてurlとchannelを、そして任意のユーザ名を入力して、構成を保存します。これで、あとは通知するテキストを作るだけです。
WeatherCompanyで取得した情報をSlack通知用に加工する
前回の記事で、WeatherCompanyで取得したデータは以下のようなものです。
{
  "metadata": {
    "latitude": 35.68,
    "status_code": 200,
    "longitude": 139.76,

...(省略)...

  },
  "observation": {
    "dewPt": 1,
    "blunt_phrase": null,
    "pressure_tend": 2,
    "pressure_desc": "Falling",

...(省略)...

    "wx_phrase": null,
    "terse_phrase": null,
    "uv_index": 3
  }
}
必要なパラメータを取得して、Slackに、textパラメータに詰め込んであげるコードを少し書きます。
「アクションの作成」を選択します。

アクションは現在、Swift、Node.js、 Python、Dockerが使えます。今回は、Pythonを選択しました。

コーディングはいつも通り、頑張りません。
import sys

def main(dict):
    slack = {}

    latitude = dict["metadata"]["latitude"]
    longitude = dict["metadata"]["longitude"]
    pressure = dict["observation"]["pressure"]
    temp = dict["observation"]["temp"]
    rh = dict["observation"]["rh"]

    message = "temperature:" + str(temp) + "\n" + "Humidity:" + str(rh) + "\n" + "Atomosheric pressure:" + str(pressure)

    slack["text"] = message
    return slack
WeatherCompanyから受け取ったパラメータが辞書型で受け渡されるので、欲しいパラメータだけ抽出して、slackのtextに詰め込みます。
textは日本語で表示したくて試行錯誤してみたのですが、うまくいかず、仕方なく英語で記載しました。日本語のJSONの受け渡しは可能なのでしょうか?
シーケンスで、処理の流れを指定して実行
アクションの準備はできました。それぞれのアクションを組み合わせた「シーケンス」を作って、実行してみます。先ほど作成したアクションから、右下「シーケンスにリンク」を選択します。

先ほど設定したSLACKを選択します。

左側のBINDは、今回設定したBINDを選択してください。
「シーケンスに追加」をクリックします。

今回作ったWeather_to_slackから、Slackパッケージに渡す流れができました!
次は、データ取得元のWeatherCompanyを追加します。右下「拡張」を選択します。

「WEATHER」を選択します。

WEATHERも、左側のBINDは前回設定したBINDを選択し、「シーケンスに追加」をクリックします。

繋がりました!!

・・・が、アクション実行順が、コレジャナイ。ソコジャナイ。
でも大丈夫です。Weatherのアクションの右上についている矢印をクリックすることで、アクションの実行順を入れ替えることができます。
- Weatherでお天気情報を取得して
- 作ったアプリケーションでお天気情報をslackのtextに詰め込む加工をして
- slackに投げる。
のアクションの流れを変更します。
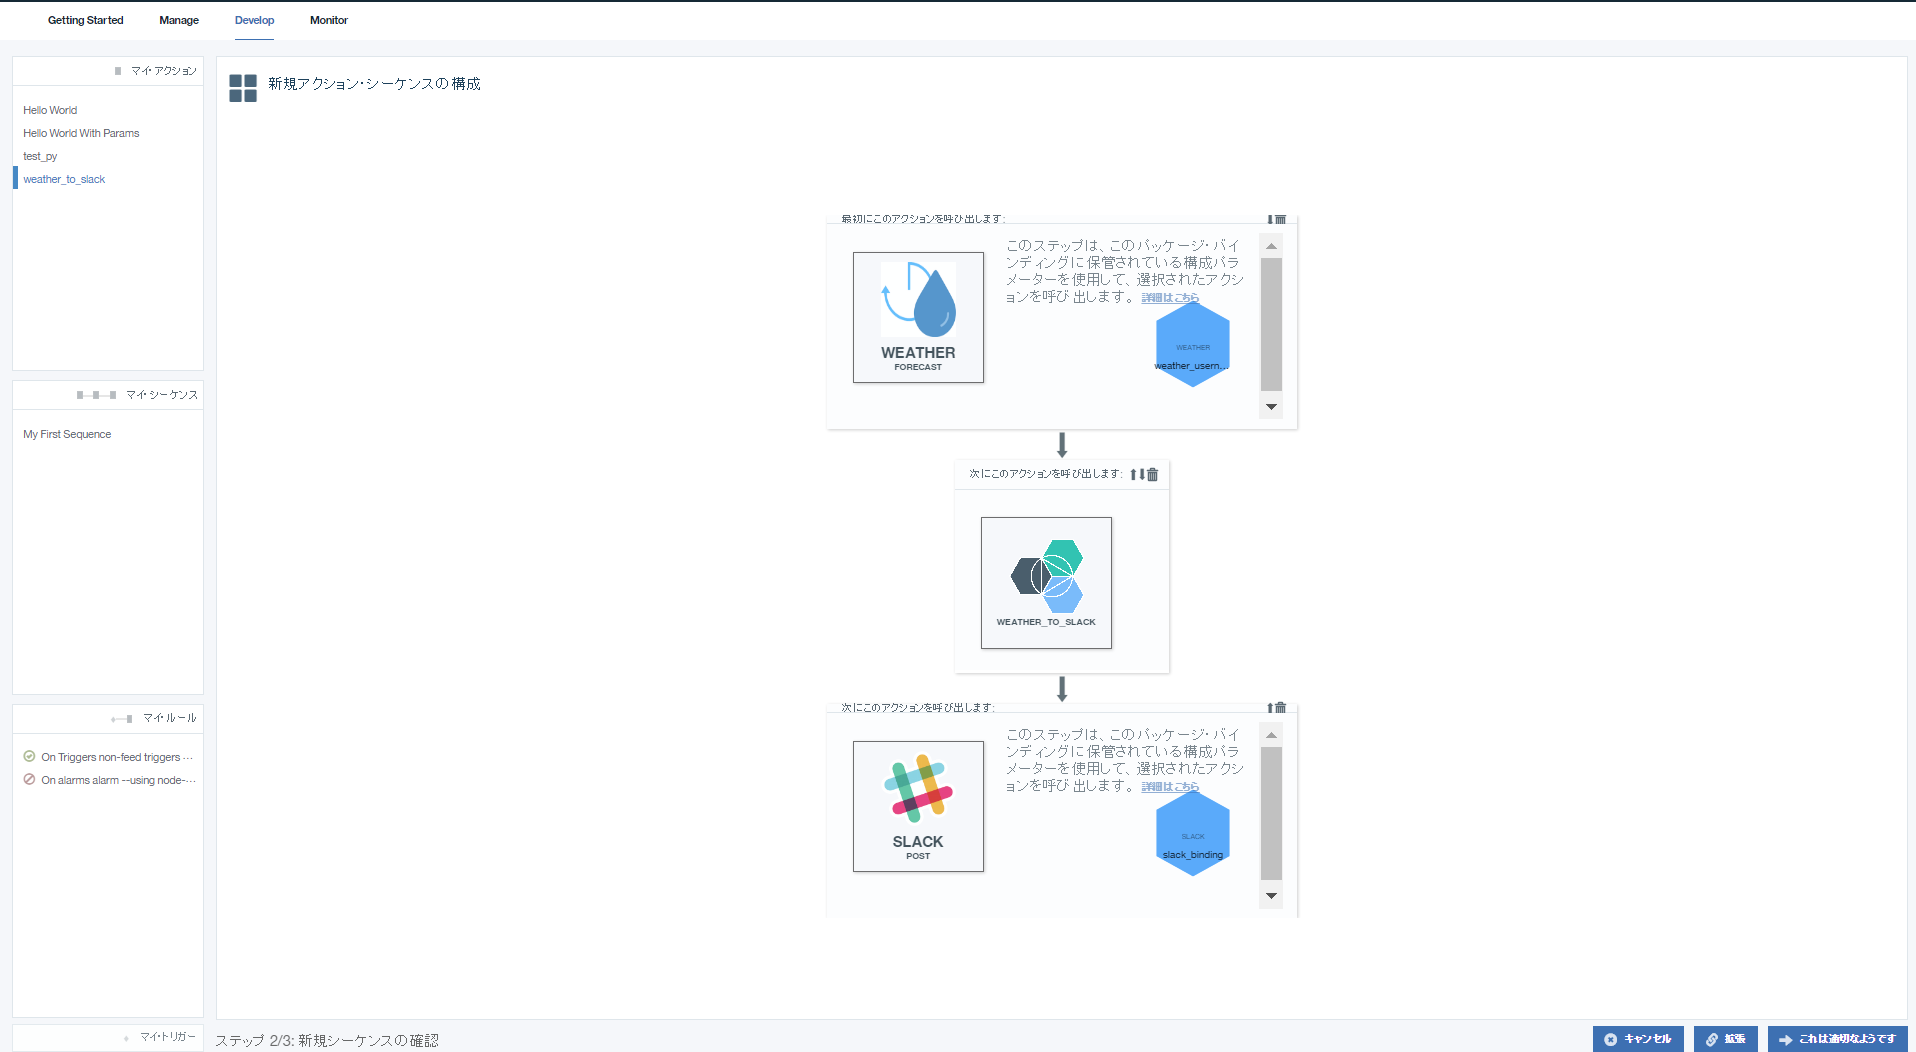
正しい順番になりました!
右下の「アクションシーケンスの保存」をクリックし、シーケンスの名前をつけます。
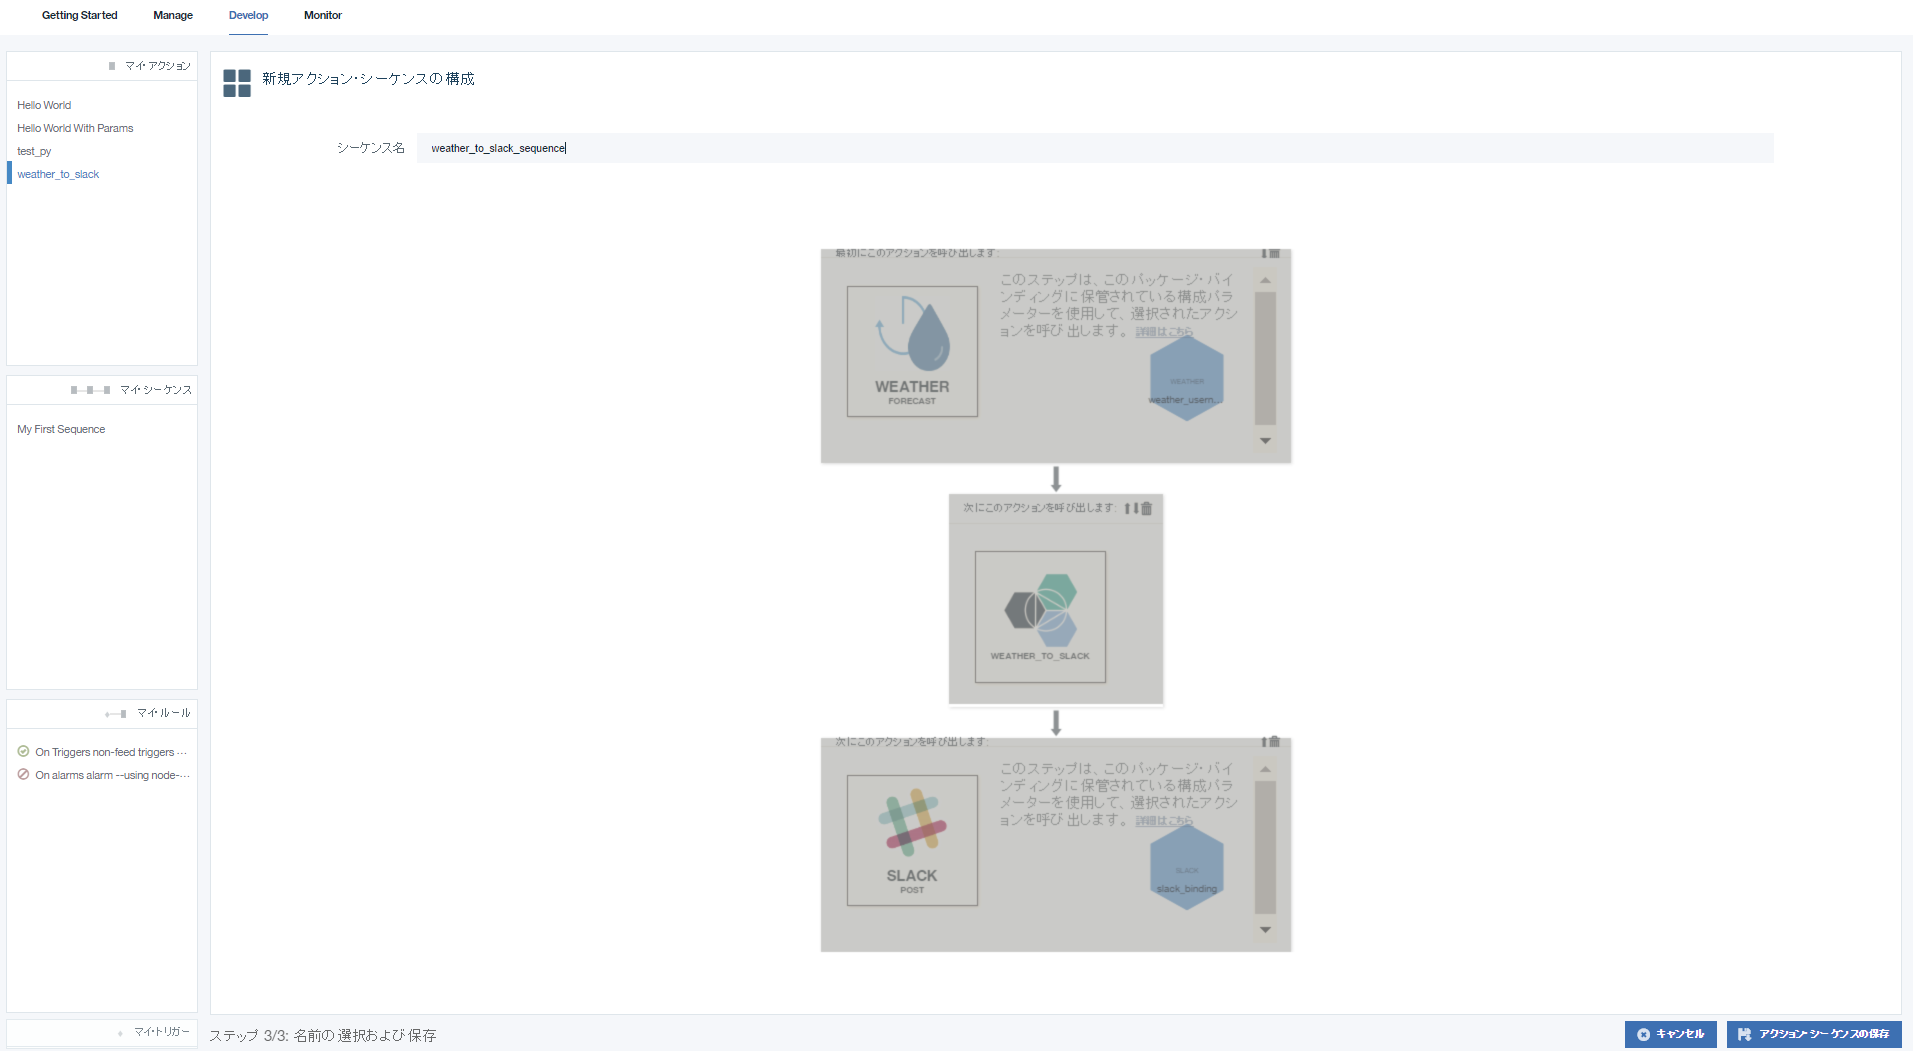
保存されました!
作成したシーケンスをクリックし、「このシーケンスを実行」をクリックすると

お天気情報がSlackに通知されます。

おわりに
この検証を行ったときから、Watson系のパッケージカタログが拡張されております。TextToSpeechやSpeechToTextなどもぜひ使ってみて遊んでみようと思います。