BluemixのOpenWhiskでお天気情報を取得する方法を記載します。
BluemixのOpenWhiskでは、
あらかじめWeather Companyを利用できるカタログが
用意されているため、Web画面からの操作だけで
お天気情報を取得できます。
WeatherCompanyの登録
お天気情報は、BluemixのWeather Companyというサービスを使ってデータを取得します。Weather Companyは、カタログのデータ&分析サービスにあります。

サービスを選択すると、左側に不穏な文章が……↓
ここは気にせず、サービスを作成します。
(この文章の意味は、記事の後半にて判明します)

Weather Compabyは、1分あたり10呼び出し、1月あたり10,000呼び出しまでは、
無料プランで利用できます。今回は無料プランを選びます。

データ取得のための認証キーを発行します。
この認証キー(usernameとpassword)は
OpenWhiskで使用するため、メモ帳に張り付けておきます。

OpenWhiskとWeather CompanyのBIND
OpenWhiskを開始します。

最初は、Hello Worldを実行するアクションの編集画面が現れます。

右上にある「カタログの表示」を選ぶと、
準備されたアプリケーションを選択する画面が現れます。

WatsonやSlackもありますね!
ここでWeatherと書かれたアイコンを選択します。
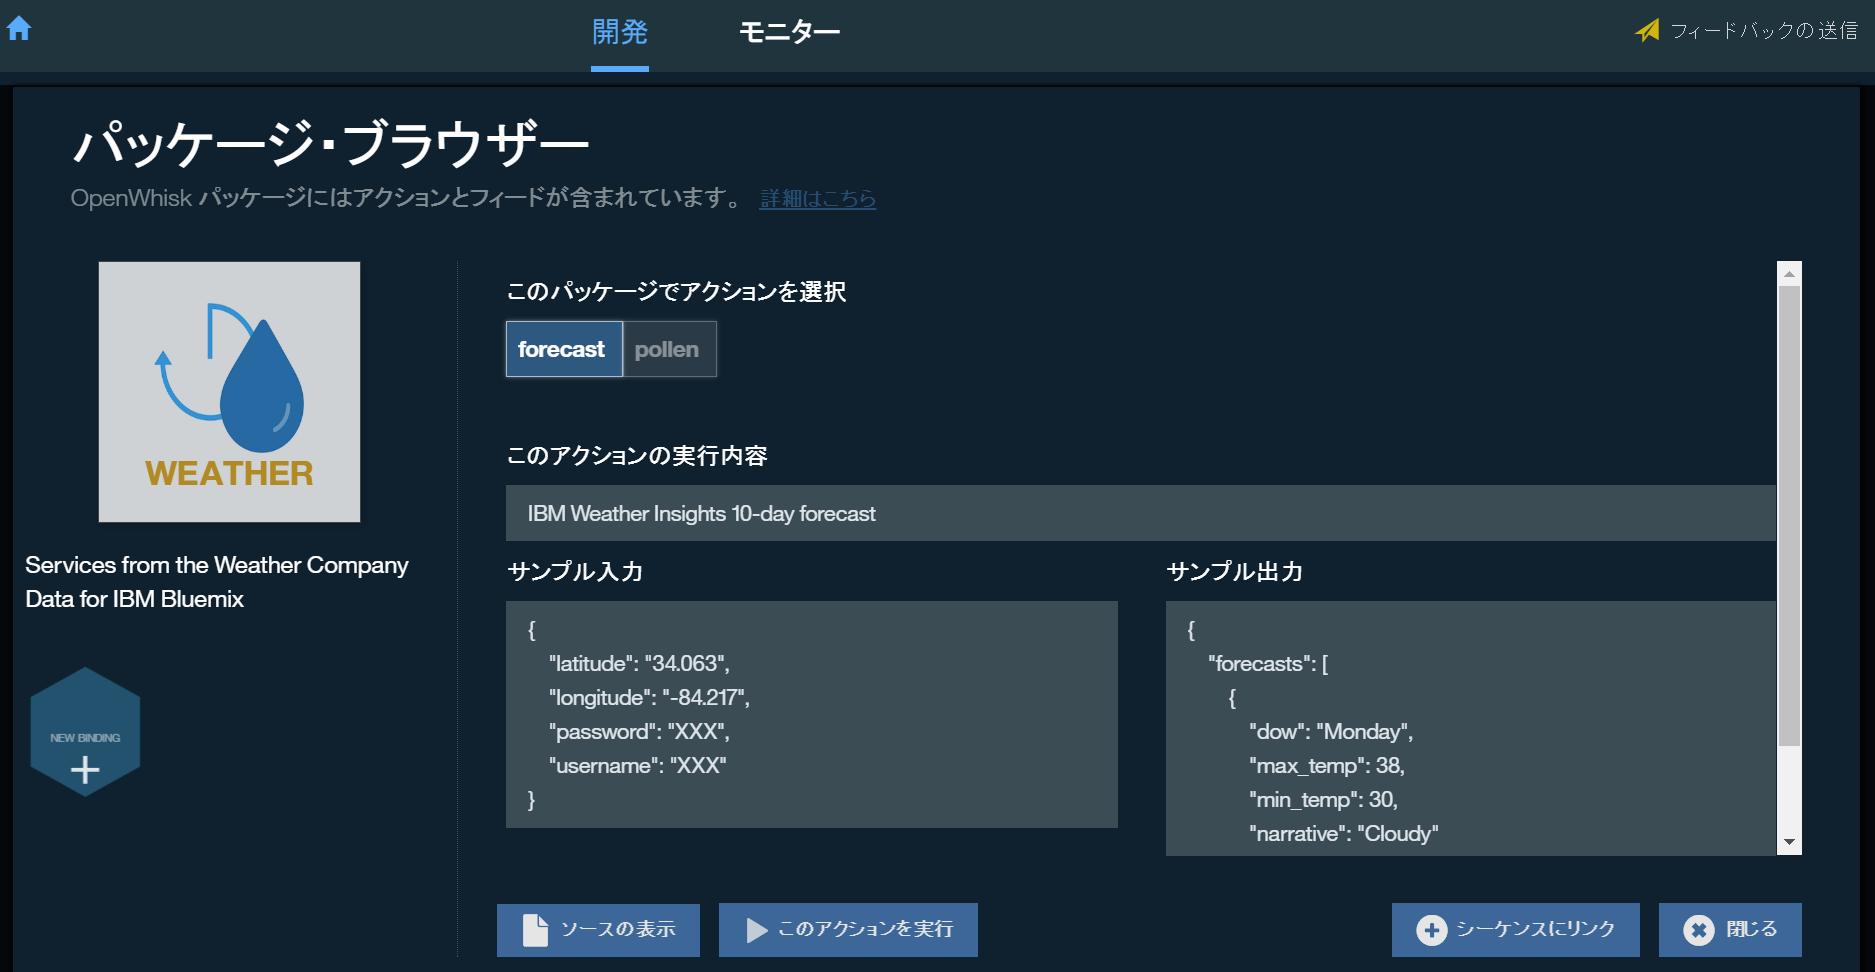
選択した画面です。わくわくしてきましたが、まだ実行はできません。
アクション実行するためにはBINDを選択する必要があります。
左側の、NEW BINDINGと書かれた6角形を選択してください。

Configuration名はBIND設定の名前ですので、
自分がわかりやすい名前をつけます。
既存のサービスインスタンスの選択では、
先ほど登録したWeather Companyが表示されますが、
「最初から開始したい」を選択し、usernameとpasswordを入れてください。
構成の保存を選択し、BIND完了です。
NEW BINDを使わずとも、先ほど登録したWeather Companyを選択すればよいのでは?
と思われるかもしれません。が、2016.11現在、自動バインドを設定すると、
なぜかデータが取得できないので、上記の方法でバインドしています。
(原因不明。余計なデータがバインドされているのかな?)
お天気情報を取得しよう
JSONサンプル入力は、以下のような入力値を入れてみてください。
これは、東京駅の緯度(latitude)と経度(longitude)、そして取得情報(timePeriod)は、現在情報(current)です。
timePeriodは、他にも、「48hour」、「timeseries」、「10day」などを指定できるようです。
{
    "latitude": "35.68",
    "longitude": "139.76",
    "timePeriod": "current"
}
実行することで、以下のようなJSONが出力されます。
{
  "metadata": {
    "latitude": 35.68,
    "status_code": 200,
    "longitude": 139.76,
    "version": "1",
    "transaction_id": "1480739103827:281227878",
    "language": "en-US",
    "expire_time_gmt": 1480744800,
    "units": "m"
  },
  "observation": {
    "dewPt": 1,
    "blunt_phrase": null,
    "pressure_tend": 2,
    "pressure_desc": "Falling",
    "primary_swell_period": null,
    "feels_like": 14,
    "precip_hrly": null,
    "qualifier": null,
    "pressure": 1021.9,
    "obs_name": "Tokyo",
    "gust": null,
    "primary_wave_height": null,
    "rh": 39,
    "wc": 14,
    "heat_index": 14,
    "min_temp": null,
    "obs_id": "47662",
    "primary_wave_period": null,
    "vis": null,
    "qualifier_svrty": null,
    "max_temp": null,
    "primary_swell_height": null,
    "key": "47662",
    "secondary_swell_height": null,
    "day_ind": "D",
    "icon_extd": null,
    "water_temp": null,
    "clds": null,
    "wspd": 4,
    "expire_time_gmt": 1480744800,
    "temp": 14,
    "snow_hrly": null,
    "uv_desc": "Moderate",
    "wdir": 310,
    "valid_time_gmt": 1480737600,
    "wx_icon": null,
    "secondary_swell_direction": null,
    "class": "observation",
    "primary_swell_direction": null,
    "wdir_cardinal": "NW",
    "secondary_swell_period": null,
    "precip_total": null,
    "wx_phrase": null,
    "terse_phrase": null,
    "uv_index": 3
  }
}
パラメータにnullが多いですね。
はい、そうなんです。
現在、Weather Companyで
東京の天気を「予報」する情報は提供されていません。
では、ニューヨークの位置を指定するとどうなるでしょうか?
自由の女神像の緯度と経度を指定してみます。
{
    "latitude": "40.70",
    "longitude": "-74.25",
    "timePeriod": "current"
}
出力結果はこちら
{
  "metadata": {
    "latitude": 40.7,
    "status_code": 200,
    "longitude": -74.25,
    "version": "1",
    "transaction_id": "1477836300490:1798903958",
    "language": "en-US",
    "expire_time_gmt": 1477842300,
    "units": "m"
  },
  "observation": {
    "dewPt": 13,
    "blunt_phrase": "Much warmer than yesterday.",
    "pressure_tend": 0,
    "pressure_desc": "Steady",
    "primary_swell_period": null,
    "feels_like": 20,
    "precip_hrly": 0,
    "qualifier": "OQ0002",
    "pressure": 1013.6,
    "obs_name": "Newark International Airport",
    "gust": null,
    "primary_wave_height": null,
    "rh": 65,
    "wc": 20,
    "heat_index": 20,
    "min_temp": 7,
    "obs_id": "T72502000",
    "primary_wave_period": null,
    "vis": 16,
    "qualifier_svrty": "2",
    "max_temp": 20,
    "primary_swell_height": null,
    "key": "T72502000",
    "secondary_swell_height": null,
    "day_ind": "D",
    "icon_extd": 2600,
    "water_temp": null,
    "clds": "OVC",
    "wspd": 11,
    "expire_time_gmt": 1477842300,
    "temp": 20,
    "snow_hrly": 0,
    "uv_desc": "Low",
    "wdir": 260,
    "valid_time_gmt": 1477835100,
    "wx_icon": 26,
    "secondary_swell_direction": null,
    "class": "observation",
    "primary_swell_direction": null,
    "wdir_cardinal": "W",
    "secondary_swell_period": null,
    "precip_total": 0,
    "wx_phrase": "Cloudy",
    "terse_phrase": "Much warmer than yesterday.",
    "uv_index": 0
  }
}
そのため、最高気温(max_temp)や最低気温(min_temp)、
降水確率(precip_hrly)などが表示されていますね!
他にも、「今日の天気を一言で言うと?」といった
コメント情報も取得できています。
Weather Companyの登録時の不穏な文章は、
日本では取得データが少ないということだったんですね。
でも、現在の気温データなどが取得できるだけでも面白いですね。
おわりに
OpenWhiskといえば、Chainによる処理連携。
カタログには、Slack通知も用意されているので、
お天気情報をSlack通知するアプリケーションも、
少しのコードで実現できてしまいます。