swift3で新規アプリを作ることになったので備忘録です。
他の備忘録
- StoryBoardを使わないでプロジェクト作成(Xcode8,Swift3)
- アプリ開発でdebug/staging/release環境があるならbundleは3種類あったほうが捗る
- Staging用の環境設定をXcodeに追加する
- 設定画面をコードだけで書く時いつも悩む
前提
たいていWebサーバ側はDebug、Staging、Production環境を作ってるところが多いかと思います。Xcodeの設定もをれに合わせてURLを変えたりしたいので、環境を作ります。すでにDebugとReleaseはあるので、Stagingを追加します。
手順
-
- Configurationsをコピーして追加
-
- コード内で#ifで分岐できるようにFlagを追加
-
- Debug、Staging、Releaseを切り替えて実行
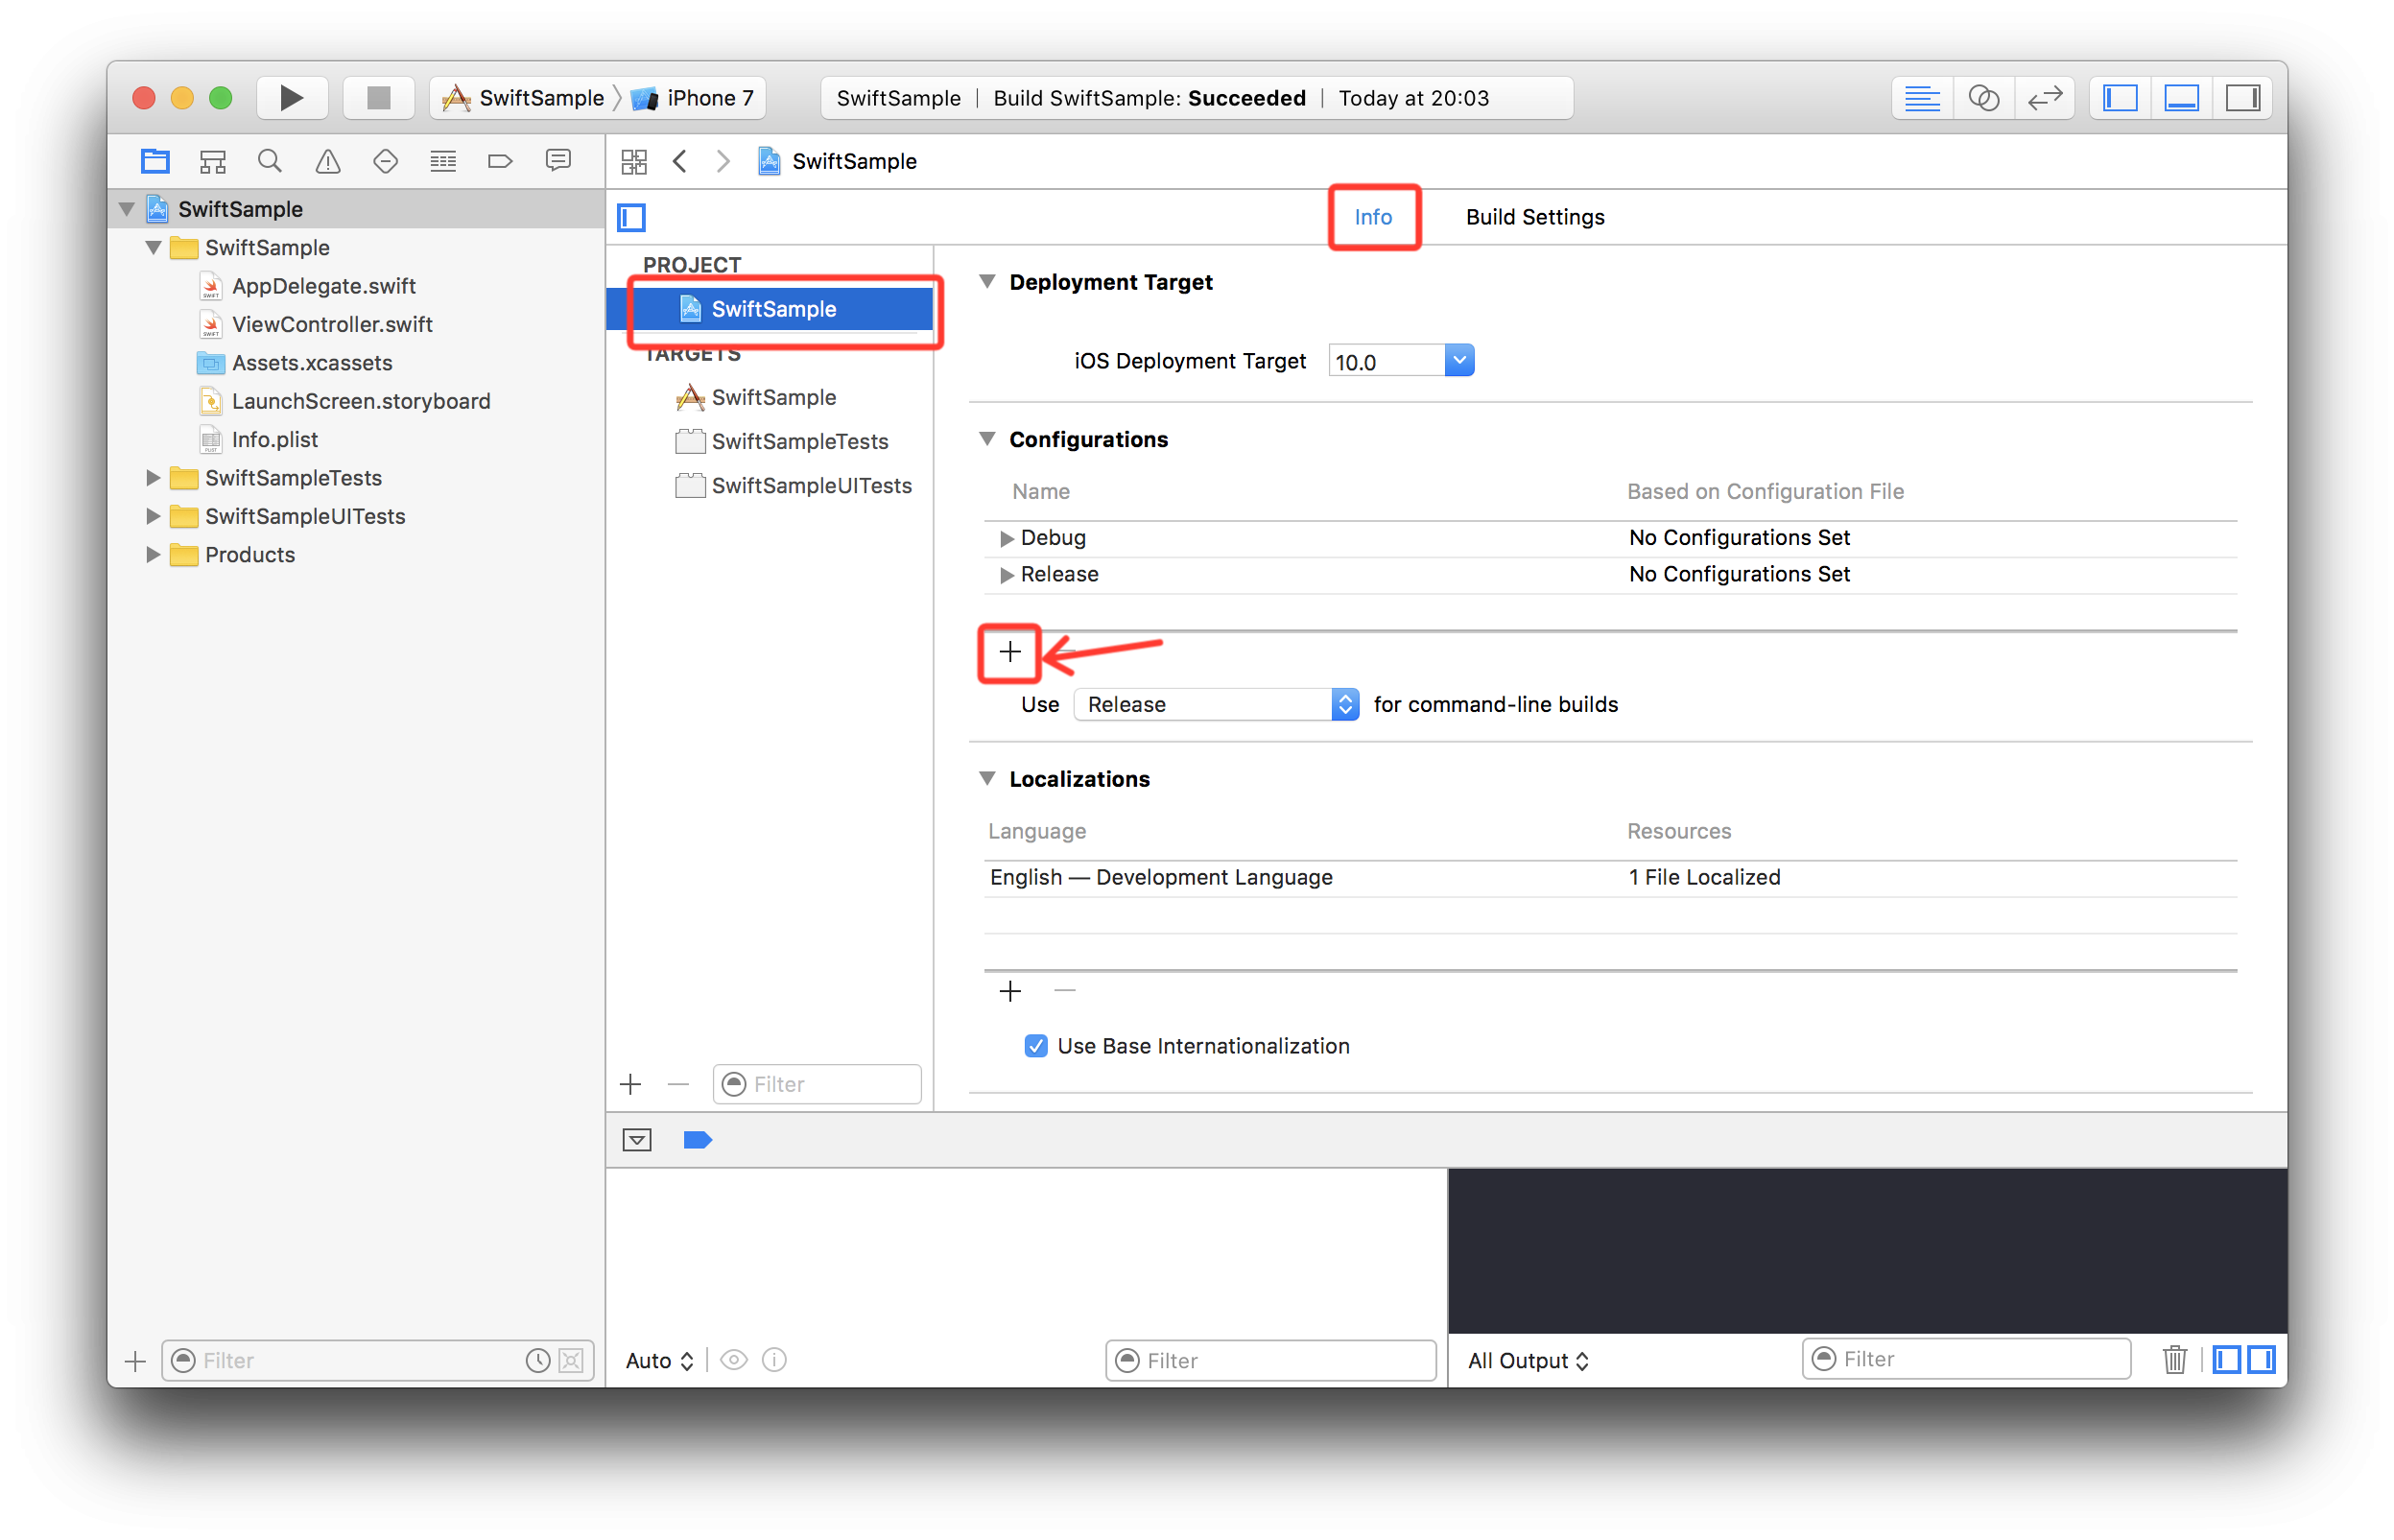
1. Configurationsをコピーして追加する。
DuplicateはDebugでもReleaseでもどちらでもいいかな。。。

2. コード内で#ifで分岐できるようにFlagを追加する

こうすると、コード内で分岐できます
# if DEBUG
    print("でばっぐー")
# elseif STAGING
    print("すてーじんぐー")
# else
    print("ほんばんー")
# endif
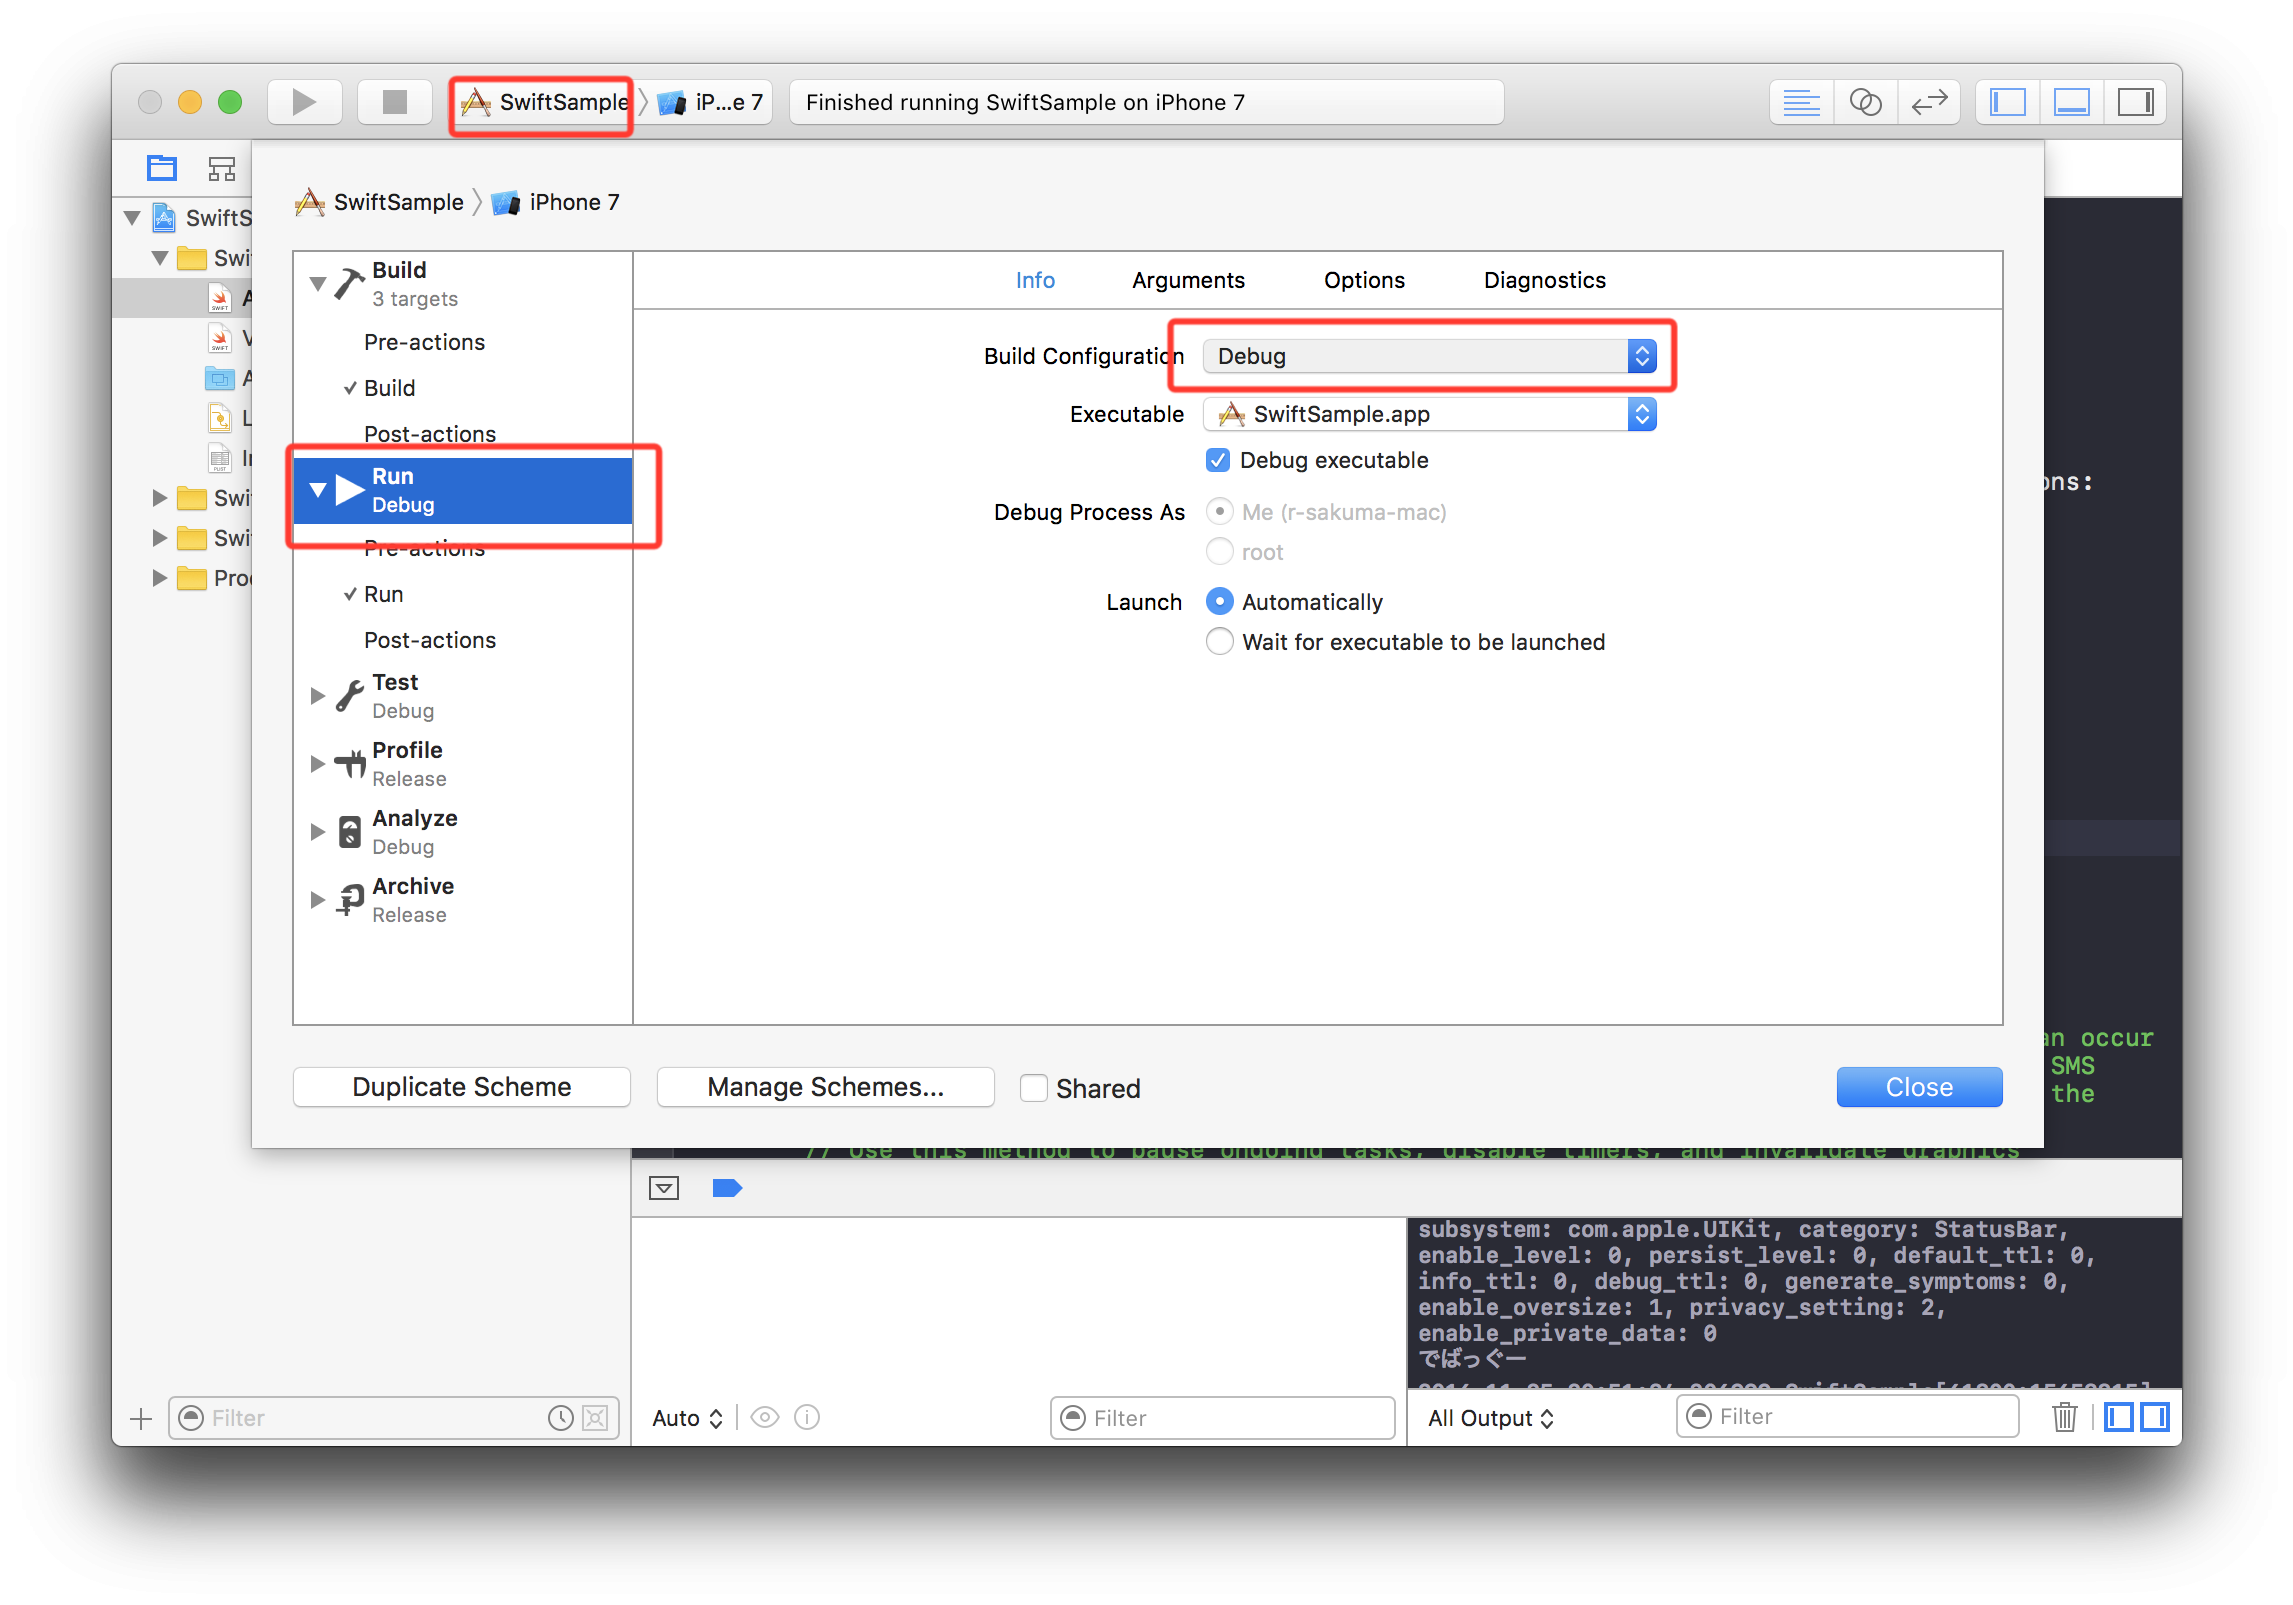
3. Debug、Staging、Releaseを切り替えて実行する
上部のドロップダウンからEditSchemeを選んで画像の部分で選択します。
