これはなに
「OpenStackクラウドインテグレーション オープンソースクラウドによるサービス構築入門」の実習をSoftLayerの無料ベアメタルで行う記録である。

第14章 Dockerの基本機能を利用環境の準備
当章ではOpenstackの仮想マシン上でDockerを利用する。
当章の支援ファイルはこちら。
14.1 Dockerを利用するメリット
Dockerの簡単な説明。
14.2 Dockerの基本機能と利用環境の準備
14.2.1 Dockerの基本機能
Dockerのコンテナ間」は仮想ブリッジで直接通信できるが、外部ネットワークとはNAPTかポートフォワーディングで通信する。
14.2.2 Dockerの動作確認と仮想マシンイメージの作成
新しい仮想マシンにDockerを導入して動作確認を行う。
Dockerを自動導入・自動起動するようにuserdata_docker.txt を作る。
[root@step-server ~]# cat userdata_docker.txt
# !/bin/bash
yum -y install epel-release
yum -y install docker-io
chkconfig docker on
service docker start
[root@step-server ~]# export MY_WORK_NET=`neutron net-show work-net | get_uuid`

[root@step-server ~]# echo $MY_WORK_NET
1fcd9570-8fb4-4929-99c8-94b410b8e1d6


[root@step-server ~]# nova boot \
>    --flavor standard.xsmall \
>    --image centos-base \
>    --key-name key-for-internal \
>    --user-data userdata_docker.txt \
>    --security-groups sg-all-from-console \
>    --availability-zone az1 \
>    --nic net-id=${MY_WORK_NET} \
>    docker
+--------------------------------------+----------------------------------------------------+
| Property                             | Value                                              |
+--------------------------------------+----------------------------------------------------+
| OS-DCF:diskConfig                    | MANUAL                                             |
| OS-EXT-AZ:availability_zone          | nova                                               |
| OS-EXT-STS:power_state               | 0                                                  |
| OS-EXT-STS:task_state                | scheduling                                         |
| OS-EXT-STS:vm_state                  | building                                           |
| OS-SRV-USG:launched_at               | -                                                  |
| OS-SRV-USG:terminated_at             | -                                                  |
| accessIPv4                           |                                                    |
| accessIPv6                           |                                                    |
| adminPass                            | W38PFTCABU4g                                       |
| config_drive                         |                                                    |
| created                              | 2015-04-02T06:46:50Z                               |
| flavor                               | standard.xsmall (100)                              |
| hostId                               |                                                    |
| id                                   | 92ab2230-e91a-4180-881e-4ecc981722cb               |
| image                                | centos-base (098f948e-e80b-4b1a-8a46-f8d2dd57e149) |
| key_name                             | key-for-internal                                   |
| metadata                             | {}                                                 |
| name                                 | docker                                             |
| os-extended-volumes:volumes_attached | []                                                 |
| progress                             | 0                                                  |
| security_groups                      | sg-all-from-console                                |
| status                               | BUILD                                              |
| tenant_id                            | 106e169743964758bcad1f06cc69c472                   |
| updated                              | 2015-04-02T06:46:50Z                               |
| user_id                              | 98dd78b670884b64b879568215777c53                   |
+--------------------------------------+----------------------------------------------------+
ログインプロンプトを確認する。
[root@step-server ~]# nova console-log --length 5 docker

CentOS release 6.6 (Final)
Kernel 2.6.32-504.el6.x86_64 on an x86_64

docker login:
ログインする。
[root@step-server ~]# nova list --field name,networks
+--------------------------------------+-------------+------------------------------------+
| ID                                   | Name        | Networks                           |
+--------------------------------------+-------------+------------------------------------+
| 92ab2230-e91a-4180-881e-4ecc981722cb | docker      | work-net=10.0.0.3                  |
| 65d3400d-3467-4563-9ff5-9c0e30c7157e | step-server | work-net=10.0.0.1, 192.168.100.131 |
+--------------------------------------+-------------+------------------------------------+

[root@step-server ~]# ssh -i key-for-internal.pem root@10.0.0.3
The authenticity of host '10.0.0.3 (10.0.0.3)' can't be established.
RSA key fingerprint is b6:d3:04:8a:d3:65:13:00:23:43:b3:04:66:6e:aa:41.
Are you sure you want to continue connecting (yes/no)? yes
Warning: Permanently added '10.0.0.3' (RSA) to the list of known hosts.
docker info で情報が表示される。
[root@docker ~]# docker info
Containers: 0
Images: 0
Storage Driver: devicemapper
 Pool Name: docker-252:1-402386-pool
 Pool Blocksize: 65.54 kB
 Data file: /var/lib/docker/devicemapper/devicemapper/data
 Metadata file: /var/lib/docker/devicemapper/devicemapper/metadata
 Data Space Used: 305.7 MB
 Data Space Total: 107.4 GB
 Metadata Space Used: 729.1 kB
 Metadata Space Total: 2.147 GB
 Library Version: 1.02.89-RHEL6 (2014-09-01)
Execution Driver: native-0.2
Kernel Version: 2.6.32-504.el6.x86_64
Operating System: <unknown>
CPUs: 1
Total Memory: 996.4 MiB
Name: docker
ID: PL75:6U5C:V2II:6OH6:NBOC:PJ56:GMU5:AUQQ:ABBM:RL64:PIWE:S2GX
centosのコンテナイメージをダウンロードし確認する。
[root@docker ~]# docker pull -a centos
centos:5: The image you are pulling has been verified
511136ea3c5a: Pull complete
511136ea3c5a: Already exists
511136ea3c5a: Already exists
511136ea3c5a: Already exists
511136ea3c5a: Already exists
511136ea3c5a: Already exists
511136ea3c5a: Already exists
511136ea3c5a: Already exists
511136ea3c5a: Already exists
511136ea3c5a: Already exists
511136ea3c5a: Already exists
511136ea3c5a: Already exists
511136ea3c5a: Already exists
511136ea3c5a: Already exists
511136ea3c5a: Already exists
5b12ef8fd570: Already exists
b58de3b24eb7: Pull complete
5c5681003a50: Already exists
2b8d6139a545: Already exists
centos:centos6: The image you are pulling has been verified
5c5681003a50: Already exists
2b8d6139a545: Already exists
ad3d57cba393: Already exists
b58de3b24eb7: Already exists
centos:latest: The image you are pulling has been verified
Status: Downloaded newer image for centos

[root@docker ~]# docker images
REPOSITORY          TAG                 IMAGE ID            CREATED             VIRTUAL SIZE
centos              7.1.1503            b58de3b24eb7        39 hours ago        226 MB
centos              centos7.1.1503      b58de3b24eb7        39 hours ago        226 MB
centos              7                   2b8d6139a545        39 hours ago        226 MB
centos              centos7             2b8d6139a545        39 hours ago        226 MB
centos              latest              2b8d6139a545        39 hours ago        226 MB
centos              5.11                2e4a66ce2189        4 weeks ago         466.9 MB
centos              centos5.11          2e4a66ce2189        4 weeks ago         466.9 MB
centos              6.6                 0bc55ae673f7        4 weeks ago         215.8 MB
centos              centos6.6           0bc55ae673f7        4 weeks ago         215.8 MB
centos              7.0.1406            99d42dc65aa6        4 weeks ago         224.1 MB
centos              centos7.0.1406      99d42dc65aa6        4 weeks ago         224.1 MB
centos              5                   861c710fef70        4 weeks ago         466.9 MB
centos              centos5             861c710fef70        4 weeks ago         466.9 MB
centos              6                   f6808a3e4d9e        4 weeks ago         215.7 MB
centos              centos6             f6808a3e4d9e        4 weeks ago         215.7 MB
コンテナを起動する。
[root@docker ~]# docker run -itd --name web -p 80:80 centos:centos6 /bin/bash
03e99f8ba9a689254ba327a3d4308c829c00b2792bc44157544ee1bd548d61c4
コンテナに接続し内部プロセスを確認する。
[root@docker ~]# docker attach web

[root@03e99f8ba9a6 /]# ps -ef
UID        PID  PPID  C STIME TTY          TIME CMD
root         1     0  0 07:10 ?        00:00:00 /bin/bash
root        15     1  0 07:16 ?        00:00:00 ps -ef
[root@03e99f8ba9a6 /]# df
Filesystem           1K-blocks    Used Available Use% Mounted on
rootfs                10190136  245324   9420524   3% /
/dev/mapper/docker-252:1-402386-03e99f8ba9a689254ba327a3d4308c829c00b2792bc44157544ee1bd548d61c4
                      10190136  245324   9420524   3% /
tmpfs                   510172       0    510172   0% /dev
shm                      65536       0     65536   0% /dev/shm
/dev/vda1             10189112 3487636   6177240  37% /etc/resolv.conf
/dev/vda1             10189112 3487636   6177240  37% /etc/hostname
/dev/vda1             10189112 3487636   6177240  37% /etc/hosts
tmpfs                   510172       0    510172   0% /proc/kcore
172.17.0.2 が割り当てられている。
[root@03e99f8ba9a6 /]# ifconfig
eth0      Link encap:Ethernet  HWaddr 02:42:AC:11:00:02
          inet addr:172.17.0.2  Bcast:0.0.0.0  Mask:255.255.0.0
          inet6 addr: fe80::42:acff:fe11:2/64 Scope:Link
          UP BROADCAST RUNNING  MTU:1400  Metric:1
          RX packets:6 errors:0 dropped:0 overruns:0 frame:0
          TX packets:6 errors:0 dropped:0 overruns:0 carrier:0
          collisions:0 txqueuelen:0
          RX bytes:468 (468.0 b)  TX bytes:468 (468.0 b)

lo        Link encap:Local Loopback
          inet addr:127.0.0.1  Mask:255.0.0.0
          inet6 addr: ::1/128 Scope:Host
          UP LOOPBACK RUNNING  MTU:65536  Metric:1
          RX packets:0 errors:0 dropped:0 overruns:0 frame:0
          TX packets:0 errors:0 dropped:0 overruns:0 carrier:0
          collisions:0 txqueuelen:0
          RX bytes:0 (0.0 b)  TX bytes:0 (0.0 b)
httpdを導入し起動する。
[root@03e99f8ba9a6 /]# yum -y install httpd
~~~~~~~

Installed:
  httpd.x86_64 0:2.2.15-39.el6.centos

Dependency Installed:
  apr.x86_64 0:1.3.9-5.el6_2                      apr-util.x86_64 0:1.3.9-3.el6_0.1       apr-util-ldap.x86_64 0:1.3.9-3.el6_0.1
  httpd-tools.x86_64 0:2.2.15-39.el6.centos       mailcap.noarch 0:2.1.31-2.el6           redhat-logos.noarch 0:60.0.14-12.el6.centos

Complete!

[root@03e99f8ba9a6 /]# service httpd start
Starting httpd: httpd: Could not reliably determine the server's fully qualified domain name, using 172.17.0.2 for ServerName
                                                           [  OK  ]
[Ctrl]+[P][Q]でコンテナから抜ける。コンテナは生きている。
[root@03e99f8ba9a6 /]# [root@docker ~]# docker ps
CONTAINER ID        IMAGE               COMMAND             CREATED             STATUS              PORTS                NAMES
03e99f8ba9a6        centos:6            "/bin/bash"         13 minutes ago      Up 13 minutes       0.0.0.0:80->80/tcp   web
踏み台サーバーからDocker仮想マシンのポート80につなぐと、コンテナのポート80に転送されレスポンスが返ってくる。
[root@step-server ~]# curl http://10.0.0.3
<!DOCTYPE html PUBLIC "-//W3C//DTD XHTML 1.1//EN" "http://www.w3.org/TR/xhtml11/DTD/xhtml11.dtd">
        <head>
                <title>Apache HTTP Server Test Page powered by CentOS</title>
~~~~~~
コンテナを破棄する。docker stopでステータスがExitedになる。
[root@docker ~]# docker stop web
web

[root@docker ~]# docker ps -a
CONTAINER ID        IMAGE               COMMAND             CREATED             STATUS                      PORTS               NAMES
03e99f8ba9a6        centos:6            "/bin/bash"         18 minutes ago      Exited (-1) 5 seconds ago                       web
踏み台サーバーからつながらない。
[root@step-server ~]# curl http://10.0.0.3
curl: (7) couldn't connect to host
docker rm すると「-a」付きの docker ps でも表示されなくなる。
[root@docker ~]# docker rm web
web

[root@docker ~]# docker ps -a
CONTAINER ID        IMAGE               COMMAND             CREATED             STATUS              PORTS               NAMES
[root@docker ~]#
この仮想マシンでdockerが動作することが確認できたので仮想マシンを停止しイメージにする。
[root@docker ~]# exit
logout
Connection to 10.0.0.3 closed.

[root@step-server ~]# nova stop docker

[root@step-server ~]# nova list --field name,status
+--------------------------------------+-------------+---------+
| ID                                   | Name        | Status  |
+--------------------------------------+-------------+---------+
| 92ab2230-e91a-4180-881e-4ecc981722cb | docker      | SHUTOFF |
| 65d3400d-3467-4563-9ff5-9c0e30c7157e | step-server | ACTIVE  |
+--------------------------------------+-------------+---------+

[root@step-server ~]# nova image-create docker docker-base
イメージが active になるのを待つ。
[root@step-server ~]# glance image-list --name docker-base
+--------------------------------------+-------------+-------------+------------------+------+--------+
| ID                                   | Name        | Disk Format | Container Format | Size | Status |
+--------------------------------------+-------------+-------------+------------------+------+--------+
| 935f9ed9-589f-4ad6-af06-b137576cdbea | docker-base | qcow2       | bare             |      | queued |
+--------------------------------------+-------------+-------------+------------------+------+--------+

[root@step-server ~]# glance image-list --name docker-base
+--------------------------------------+-------------+-------------+------------------+------------+--------+
| ID                                   | Name        | Disk Format | Container Format | Size       | Status |
+--------------------------------------+-------------+-------------+------------------+------------+--------+
| 935f9ed9-589f-4ad6-af06-b137576cdbea | docker-base | qcow2       | bare             | 5267718144 | saving |
+--------------------------------------+-------------+-------------+------------------+------------+--------+

[root@step-server ~]# glance image-list --name docker-base
+--------------------------------------+-------------+-------------+------------------+------------+--------+
| ID                                   | Name        | Disk Format | Container Format | Size       | Status |
+--------------------------------------+-------------+-------------+------------------+------------+--------+
| 935f9ed9-589f-4ad6-af06-b137576cdbea | docker-base | qcow2       | bare             | 5267718144 | active |
+--------------------------------------+-------------+-------------+------------------+------------+--------+
仮想インスタンスを起動しておく。
[root@step-server ~]# nova start docker
14.3 Dockerfileによるコンテナイメージの作成
作成したイメージをDocker Hubにアップロードするステップがあるので、SignupからDocker Hubのユーザーを作成した。
登録したメールアドレスにアカウントをActivateにするメールが届くので、クリックする。
支援ファイルをダウンロードする。
[root@docker ~]# git clone https://github.com/josug-book1-materials/dockerfiles
Initialized empty Git repository in /root/dockerfiles/.git/
remote: Counting objects: 56, done.
remote: Total 56 (delta 0), reused 0 (delta 0), pack-reused 56
Unpacking objects: 100% (56/56), done.
[root@docker ~]# cd dockerfiles/
| サーバー | Dockerfile | 起動スクリプト |
|---|---|---|
| dbs | build_dbs/Dockerfile | build_dbs/init.sh |
| app | build_app/Dockerfile | build_app/init.sh |
| web | build_web/Dockerfile | build_dbs/init.sh |
dbsに対して docker build を実行する。build_dbs/Dockerfileに書かれている内容が Step X で表示され実行されるのがわかる。
「username」の部分は実際にはDocker Hubのユーザー名を指定している。
[root@docker dockerfiles]# docker build -t username/dbs:ver1.0 build_dbs
Sending build context to Docker daemon 4.608 kB
Sending build context to Docker daemon
Step 0 : FROM centos:centos6
 ---> f6808a3e4d9e
Step 1 : MAINTAINER Etsuji Nakai
 ---> Running in d5d4df23af00
 ---> e944583839df
Removing intermediate container d5d4df23af00
Step 2 : RUN yum -y install mysql-server
 ---> Running in a14937215402
Loaded plugins: fastestmirror
Setting up Install Process
~~~~~~~
Complete!
 ---> 328b42d182fc
Removing intermediate container a14937215402
Step 3 : ADD my.cnf /etc/my.cnf
 ---> 8be8aa27f4b3
Removing intermediate container 3eefe8fab63d
Step 4 : RUN service mysqld start;     mysql -u root -e "create database sample_bbs default character set utf8;";     mysql -u root -e "grant all on sample_bbs.* to user@'%' identified by 'password'; flush privileges;";     mysql -u root -e "grant all on sample_bbs.* to user@localhost identified by 'password'; flush privileges;"
 ---> Running in 36125891bff5
Initializing MySQL database:  Installing MySQL system tables...
OK
Filling help tables...
OK
~~~~~~~
Starting mysqld:  [  OK  ]
 ---> d6af82db821c
Removing intermediate container 36125891bff5
Step 5 : ADD init.sh /usr/local/bin/init.sh
 ---> ab33a22ce681
Removing intermediate container 56801c0ebcff
Step 6 : RUN chmod u+x /usr/local/bin/init.sh
 ---> Running in ae7bfadec8ff
 ---> 66eb3612585e
Removing intermediate container ae7bfadec8ff
Step 7 : CMD /usr/local/bin/init.sh
 ---> Running in ffb0ef20fe3d
 ---> 44dc5392ebbc
Removing intermediate container ffb0ef20fe3d
Step 8 : EXPOSE 3306
 ---> Running in 3ac90488ecde
 ---> f234940036ed
Removing intermediate container 3ac90488ecde
Successfully built f234940036ed
同様に app を build。
[root@docker dockerfiles]# docker build -t username/app:ver1.0 build_app
Sending build context to Docker daemon 3.072 kB
Sending build context to Docker daemon
Step 0 : FROM centos:centos6
 ---> f6808a3e4d9e
Step 1 : MAINTAINER Etsuji Nakai
 ---> Using cache
 ---> e944583839df
Step 2 : RUN yum -y install epel-release;     yum -y install git gcc python-devel python-crypto python-pip mysql-devel
 ---> Running in c0c8e52cd014
Loaded plugins: fastestmirror
Setting up Install Process
~~~~~~~
Complete!
 ---> d4a4acc42571
Removing intermediate container c0c8e52cd014
Step 3 : RUN cd /root;     git clone https://github.com/josug-book1-materials/sample-app.git;     cd /root/sample-app;     git checkout v1.0;     pip install -r server-setup/requirements.txt
 ---> Running in b21f473f4da1
Initialized empty Git repository in /root/sample-app/.git/
~~~~~~~
Cleaning up...
 ---> 1b3c00142686
Removing intermediate container b21f473f4da1
Step 4 : ADD init.sh /usr/local/bin/init.sh
 ---> e7d433a88a32
Removing intermediate container 9edef6867f61
Step 5 : RUN chmod u+x /usr/local/bin/init.sh
 ---> Running in b993abbdc151
 ---> 8f9cb916d82e
Removing intermediate container b993abbdc151
Step 6 : CMD /usr/local/bin/init.sh
 ---> Running in 63c5065877da
 ---> 6f57c99b22dd
Removing intermediate container 63c5065877da
Step 7 : EXPOSE 5555
 ---> Running in 79143c83bdf4
 ---> 4141334940f2
Removing intermediate container 79143c83bdf4
Successfully built 4141334940f2
web も build。
[root@docker dockerfiles]# docker build -t username/web:ver1.0 build_web
Sending build context to Docker daemon 3.072 kB
Sending build context to Docker daemon
Step 0 : FROM centos:centos6
 ---> f6808a3e4d9e
Step 1 : MAINTAINER Etsuji Nakai
 ---> Using cache
 ---> e944583839df
Step 2 : RUN yum -y install epel-release;     yum -y install git gcc python-devel python-crypto python-pip mysql-devel
 ---> Using cache
 ---> d4a4acc42571
Step 3 : RUN cd /root;     git clone https://github.com/josug-book1-materials/sample-app.git;     cd /root/sample-app;     git checkout v1.0;     pip install -r server-setup/requirements.txt
 ---> Using cache
 ---> 1b3c00142686
Step 4 : ADD init.sh /usr/local/bin/init.sh
 ---> 95fd813470a1
Removing intermediate container 1adf19a14965
Step 5 : RUN chmod u+x /usr/local/bin/init.sh
 ---> Running in 9d6902397878
 ---> 8d8935b41f7e
Removing intermediate container 9d6902397878
Step 6 : CMD /usr/local/bin/init.sh
 ---> Running in 3e1cd1bcde75
 ---> 78c0486fffa7
Removing intermediate container 3e1cd1bcde75
Successfully built 78c0486fffa7
イメージがローカルに登録されている。
[root@docker dockerfiles]# docker images
REPOSITORY          TAG                 IMAGE ID            CREATED             VIRTUAL SIZE
username/web       ver1.0              78c0486fffa7        50 seconds ago      565.5 MB
username/app       ver1.0              4141334940f2        4 minutes ago       565.5 MB
username/dbs       ver1.0              f234940036ed        9 minutes ago       351.8 MB
centos              centos7.1.1503      b58de3b24eb7        45 hours ago        226 MB
~~~~~~~
イメージを docker に push。ユーザー名、パスワード、メールアドレスを入力する。
[root@docker ~]# docker push username/dbs
The push refers to a repository [username/dbs] (len: 1)
Sending image list

Please login prior to push:
Username: username
Password:
Email: username@example.com
Login Succeeded
The push refers to a repository [username/dbs] (len: 1)
Sending image list
Pushing repository username/dbs (1 tags)
511136ea3c5a: Image already pushed, skipping
5b12ef8fd570: Image already pushed, skipping
f6808a3e4d9e: Image already pushed, skipping
e944583839df: Image successfully pushed
328b42d182fc: Image successfully pushed
8be8aa27f4b3: Image successfully pushed
d6af82db821c: Image successfully pushed
ab33a22ce681: Image successfully pushed
66eb3612585e: Image successfully pushed
44dc5392ebbc: Image successfully pushed
f234940036ed: Image successfully pushed
Pushing tag for rev [f234940036ed] on {https://cdn-registry-1.docker.io/v1/repositories/username/dbs/tags/ver1.0}
app と web のイメージも push する。2回目以降は認証は求められない。
[root@docker ~]# docker push username/app
The push refers to a repository [username/app] (len: 1)
Sending image list
Pushing repository username/app (1 tags)
511136ea3c5a: Image already pushed, skipping
~~~~~~~
4141334940f2: Image successfully pushed
Pushing tag for rev [4141334940f2] on {https://cdn-registry-1.docker.io/v1/repositories/orz4qiita/app/tags/ver1.0}

[root@docker ~]# docker push username/web
The push refers to a repository [username/web] (len: 1)
Sending image list
Pushing repository username/web (1 tags)
511136ea3c5a: Image already pushed, skipping
~~~~~~~
78c0486fffa7: Image successfully pushed
Pushing tag for rev [78c0486fffa7] on {https://cdn-registry-1.docker.io/v1/repositories/orz4qiita/web/tags/ver1.0}
14.4 コンテナーイメージによるアプリケーションの配布
14.4.1 単一の仮想マシンインスタンスへの展開
ここでは、単一の仮想マシンインスタンスをnova bootし、そのuserdataでdbs/app/webのコンテナを起動する。実行する内容はこちら。
下記のようにuserdatra_docker-all.txt を作る。イメージ名に自分のユーザー名か、著者が用意したものを使う場合は「enalai00」を指定する。
appで「--link dbs:db」を指定している。build_dbs/Dockerfileで「EXPOSE 3306」でポート3306を公開することを宣言しているので、appコンテナではdbsコンテナのアドレスが環境変数 DB_PORT_3306_TCP_ADDRで取得でき、内部利用できる。
webの「--link app:rest」も同様。build_app/Dockerfileで「EXPOSE 5555」を指定しているので、appコンテナのアドレスが環境変数 REST_PORT_5555_TCP_ADDRで、webコンテナ側で取得できる。
[root@step-server ~]# vi userdata_docker-all.txt
[root@step-server ~]# cat userdata_docker-all.txt
# !/bin/bash
service docker start
docker run -itd --name dbs username/dbs:ver1.0
docker run -itd --name app --link dbs:db username/app:ver1.0
docker run -itd --name web --link app:rest -p 80:80 username/web:ver1.0
nova boot で docker-all を起動する。これまで違い、docker を導入済みの docker-base イメージから起動していることに注意。nova boot で状態がACTIVEになるのに多少、時間がかかった。
[root@step-server ~]# function get_uuid () { cat - | grep " id " | awk '{print $4}'; }
[root@step-server ~]# export MY_DMZ_NET=`neutron net-show dmz-net | get_uuid`
[root@step-server ~]# echo $MY_DMZ_NET
35e4baac-7230-4232-9644-856874dfe8af

[root@step-server ~]# nova boot \
>     --flavor standard.xsmall \
>     --image docker-base \
>     --key-name key-for-internal \
>     --user-data userdata_docker-all.txt \
>     --security-groups sg-all-from-console,sg-web-from-internet \
>     --availability-zone az1 \
>     --nic net-id=${MY_DMZ_NET} \
>     docker-all
+--------------------------------------+----------------------------------------------------+
| Property                             | Value                                              |
+--------------------------------------+----------------------------------------------------+
| OS-DCF:diskConfig                    | MANUAL                                             |
| OS-EXT-AZ:availability_zone          | nova                                               |
| OS-EXT-STS:power_state               | 0                                                  |
| OS-EXT-STS:task_state                | scheduling                                         |
| OS-EXT-STS:vm_state                  | building                                           |
| OS-SRV-USG:launched_at               | -                                                  |
| OS-SRV-USG:terminated_at             | -                                                  |
| accessIPv4                           |                                                    |
| accessIPv6                           |                                                    |
| adminPass                            | 6eo48P3XkedW                                       |
| config_drive                         |                                                    |
| created                              | 2015-04-03T04:17:12Z                               |
| flavor                               | standard.xsmall (100)                              |
| hostId                               |                                                    |
| id                                   | fab76afe-43b3-483e-a29f-faa5631248cf               |
| image                                | docker-base (935f9ed9-589f-4ad6-af06-b137576cdbea) |
| key_name                             | key-for-internal                                   |
| metadata                             | {}                                                 |
| name                                 | docker-all                                         |
| os-extended-volumes:volumes_attached | []                                                 |
| progress                             | 0                                                  |
| security_groups                      | sg-all-from-console, sg-web-from-internet          |
| status                               | BUILD                                              |
| tenant_id                            | 106e169743964758bcad1f06cc69c472                   |
| updated                              | 2015-04-03T04:17:13Z                               |
| user_id                              | 98dd78b670884b64b879568215777c53                   |
+--------------------------------------+----------------------------------------------------+
sshでログインし docker ps で状態を確認する。3つのコンテナが表示されるまで、多少時間がかかる。
[root@step-server ~]# nova list --field name,networks
+--------------------------------------+-------------+------------------------------------+
| ID                                   | Name        | Networks                           |
+--------------------------------------+-------------+------------------------------------+
| 92ab2230-e91a-4180-881e-4ecc981722cb | docker      | work-net=10.0.0.3                  |
| fab76afe-43b3-483e-a29f-faa5631248cf | docker-all  | dmz-net=192.168.0.31               |
| 65d3400d-3467-4563-9ff5-9c0e30c7157e | step-server | work-net=10.0.0.1, 192.168.100.131 |
+--------------------------------------+-------------+------------------------------------+

[root@step-server ~]# ssh -i key-for-internal.pem root@192.168.0.31

[root@docker-all ~]# docker ps
CONTAINER ID        IMAGE                  COMMAND                CREATED             STATUS              PORTS               NAMES
fc05cf947d96        username/dbs:ver1.0    "/usr/local/bin/init   56 seconds ago      Up 54 seconds       3306/tcp            dbs

[root@docker-all ~]# docker ps
CONTAINER ID        IMAGE                  COMMAND                CREATED             STATUS              PORTS                NAMES
c322096e629f        username/web:ver1.0    "/usr/local/bin/init   28 seconds ago      Up 26 seconds       0.0.0.0:80->80/tcp   web
f2006d629a91        username/app:ver1.0    "/usr/local/bin/init   47 seconds ago      Up 45 seconds       5555/tcp             app
fc05cf947d96        username/dbs:ver1.0    "/usr/local/bin/init   3 minutes ago       Up 3 minutes        3306/tcp             dbs
webに振られたIPを確認する。方法はこちらを参考にした。
[root@docker-all ~]# sudo docker inspect --format '{{ .NetworkSettings.IPAddress }}' web
172.17.0.4
仮想マシン上からw3mでwebコンテナに接続する。
[root@docker-all ~]# w3m http://172.17.0.4/
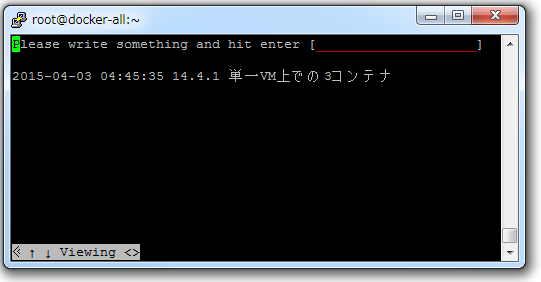
web→app→dbsの連携がとれ、アプリが正常に動作していることが確認できる。
14.4.2 複数の仮想マシンインスタンスへの展開
3つの仮想マシンを起動し、おのおのにコンテナをひとつずつ動かす。
14.4.1 では、単一ホスト内のコンテナであったため「--link dbs:db」「--link app:rest」でIPアドレスを渡すことができた。今回は別のホストのため、それができない。「-e」で環境変数にセットする。「-p」で利用するポートを仮想ホストにマッピングするので、仮想ホストのIPをセットすればよい。
コンテナの起動コマンドは下記のとおり。
docker run -itd --name dbs -p 3306:3306 username/dbs:ver1.0

docker run -itd --name app -e DB_PORT_3306_TCP_ADDR=<dbs IP> -p 5555:5555 username/app:ver1.0

docker run -itd --name web -e REST_PORT_5555_TCP_ADDR=<app IP> -p 80:80 username/web:ver1.0
連携にはansibleを使うので踏み台サーバーでユーザーansibleに切り替える。
[root@step-server ~]# su - ansible
[ansible@step-server ~]$ cd $HOME && source venv/bin/activate
(venv)[ansible@step-server ~]$ source openrc
「11.5.2 仮想マシンインスタンス構築の自動化」で利用したプレイブックの「image_name: "centos-base"」を「image_name: "docker-base"」に変更したプレイブックを用意する。
(venv)[ansible@step-server ~]$ sed 's/centos-base/docker-base/' chapter11/playbooks/book1/create_sample_vm.yml > create_docker_vm.yml
web用VMを起動。
(venv)[ansible@step-server ~]$ ansible-playbook -i ansible_hosts -e target=web create_docker_vm.yml

PLAY [localhost] **************************************************************

GATHERING FACTS ***************************************************************
ok: [localhost]

TASK: [ansible_python_interpreter setup] **************************************
ok: [localhost]

TASK: [get uuid for generate hostname] ****************************************
changed: [localhost]

TASK: [create {{ target }}-server on nova-compute with floating_ip] ***********
changed: [localhost]

TASK: [create {{ target }}-server on nova-compute without floating_ip] ********
skipping: [localhost]

PLAY RECAP ********************************************************************
localhost                  : ok=4    changed=2    unreachable=0    failed=0
app用VMを起動。
(venv)[ansible@step-server ~]$ ansible-playbook -i ansible_hosts -e target=app create_docker_vm.yml

PLAY [localhost] **************************************************************

GATHERING FACTS ***************************************************************
ok: [localhost]

TASK: [ansible_python_interpreter setup] **************************************
ok: [localhost]

TASK: [get uuid for generate hostname] ****************************************
changed: [localhost]

TASK: [create {{ target }}-server on nova-compute with floating_ip] ***********
skipping: [localhost]

TASK: [create {{ target }}-server on nova-compute without floating_ip] ********
changed: [localhost]

PLAY RECAP ********************************************************************
localhost                  : ok=4    changed=2    unreachable=0    failed=0
dbs用VMを起動。
(venv)[ansible@step-server ~]$ ansible-playbook -i ansible_hosts -e target=dbs create_docker_vm.yml

PLAY [localhost] **************************************************************

GATHERING FACTS ***************************************************************
ok: [localhost]

TASK: [ansible_python_interpreter setup] **************************************
ok: [localhost]

TASK: [get uuid for generate hostname] ****************************************
changed: [localhost]

TASK: [create {{ target }}-server on nova-compute with floating_ip] ***********
skipping: [localhost]

TASK: [create {{ target }}-server on nova-compute without floating_ip] ********
changed: [localhost]

PLAY RECAP ********************************************************************
localhost                  : ok=4    changed=2    unreachable=0    failed=0
起動してきた。
(venv)[ansible@step-server ~]$ nova list --field name,networks --name ^...-
+--------------------------------------+------------------------------------------+------------------------------------------------------------------+
| ID                                   | Name                                     | Networks                                                         |
+--------------------------------------+------------------------------------------+------------------------------------------------------------------+
| 636a0bf9-a41b-4b1a-b86f-e4999bdce7fa | app-fbb61303-b0b2-43f4-893f-10c3ea79792d | dmz-net=192.168.0.33; app-net=172.16.10.20; dbs-net=172.16.20.12 |
| 73efdad1-c0ad-440b-bfab-4a3d164fd895 | dbs-4a0d5541-3350-485e-9cbf-820d1770401a | dmz-net=192.168.0.34; dbs-net=172.16.20.13                       |
| 0bfde50e-d4ce-4a49-9c16-e1319082aeb1 | web-b79aedaf-244f-4fd2-9b88-7487da35b4b8 | dmz-net=192.168.0.32, 192.168.100.136; app-net=172.16.10.19      |
+--------------------------------------+------------------------------------------+------------------------------------------------------------------+
コンテナを起動するプレイブックはこちら
Docker Hubのユーザー名を引数に指定して実行する。まずはdbs。
(venv)[ansible@step-server ~]$ ansible-playbook -i sample_app_inventory.py -e target=dbs -e docker_user=username -u root do_docker_run.yml

PLAY [dbs] ********************************************************************

GATHERING FACTS ***************************************************************
The authenticity of host '192.168.0.35 (192.168.0.35)' can't be established.
RSA key fingerprint is b6:d3:04:8a:d3:65:13:00:23:43:b3:04:66:6e:aa:41.
Are you sure you want to continue connecting (yes/no)? yes
ok: [192.168.0.35]

TASK: [install required packages] *********************************************
ok: [192.168.0.35] => (item=python-pip)

TASK: [install python client for docker] **************************************
changed: [192.168.0.35] => (item=docker-py)

TASK: [docker run "{{ target }}"] *********************************************
changed: [192.168.0.35]

PLAY RECAP ********************************************************************
192.168.0.35               : ok=4    changed=2    unreachable=0    failed=0
次にapp。
(venv)[ansible@step-server ~]$ ansible-playbook -i sample_app_inventory.py -e target=app -e docker_user=username -u root do_docker_run.yml

PLAY [app] ********************************************************************

GATHERING FACTS ***************************************************************
The authenticity of host '192.168.0.33 (192.168.0.33)' can't be established.
RSA key fingerprint is b6:d3:04:8a:d3:65:13:00:23:43:b3:04:66:6e:aa:41.
Are you sure you want to continue connecting (yes/no)? yes
ok: [192.168.0.33]

TASK: [install required packages] *********************************************
ok: [192.168.0.33] => (item=python-pip)

TASK: [install python client for docker] **************************************
changed: [192.168.0.33] => (item=docker-py)

TASK: [docker run "{{ target }}"] *********************************************
changed: [192.168.0.33]

PLAY RECAP ********************************************************************
192.168.0.33               : ok=4    changed=2    unreachable=0    failed=0
最後にweb。
(venv)[ansible@step-server ~]$ ansible-playbook -i sample_app_inventory.py -e target=web -e docker_user=userdata -u root do_docker_run.yml

PLAY [web] ********************************************************************

GATHERING FACTS ***************************************************************
The authenticity of host '192.168.0.32 (192.168.0.32)' can't be established.
RSA key fingerprint is b6:d3:04:8a:d3:65:13:00:23:43:b3:04:66:6e:aa:41.
Are you sure you want to continue connecting (yes/no)? yes
ok: [192.168.0.32]

TASK: [install required packages] *********************************************
ok: [192.168.0.32] => (item=python-pip)

TASK: [install python client for docker] **************************************
changed: [192.168.0.32] => (item=docker-py)

TASK: [docker run "{{ target }}"] *********************************************
changed: [192.168.0.32]

PLAY RECAP ********************************************************************
192.168.0.32               : ok=4    changed=2    unreachable=0    failed=0
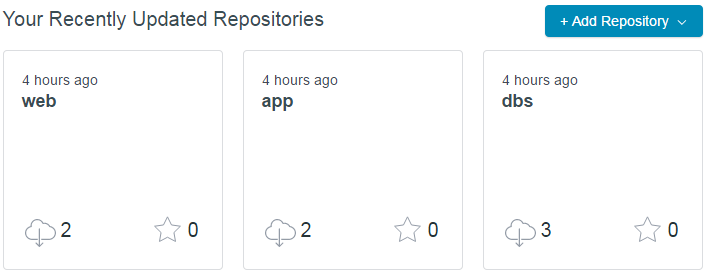
Docker Hubでイメージを確認するとダウンロード数がカウントアップするのが確認できる。dbsが3なのは一度やり直したせい。
第14章の完了。


