rancher-agentを構築しよう
関連記事
rancher-agentとなるサーバーにも同様にrancherOSをインストールしておく
rancher-agentをrun
- 以下はrancher-serverの管理画面で操作する
- 管理画面のADMINタブ -> SETTING
-
Host Registration URL -> something else
http://{rancher-serverのprivateIP}:8080
-

- INFRASTRUCTURE -> HOSTS -> Add Host
-
type
custom -
5 Copy, paste, and run the command below to register the host with Rancher:
言われたとうりコピーする それぞれrancher-agentに貼り付けてコマンドを実行する -
5 Click close below. The new host should pop up on the Hosts screen within a minute.
 INFRASTRUCTURE -> HOSTS
 しばらく眺めてたらhostの画面が現れる!
 editから名前を変更しておく"agent01""agent02"とか
-

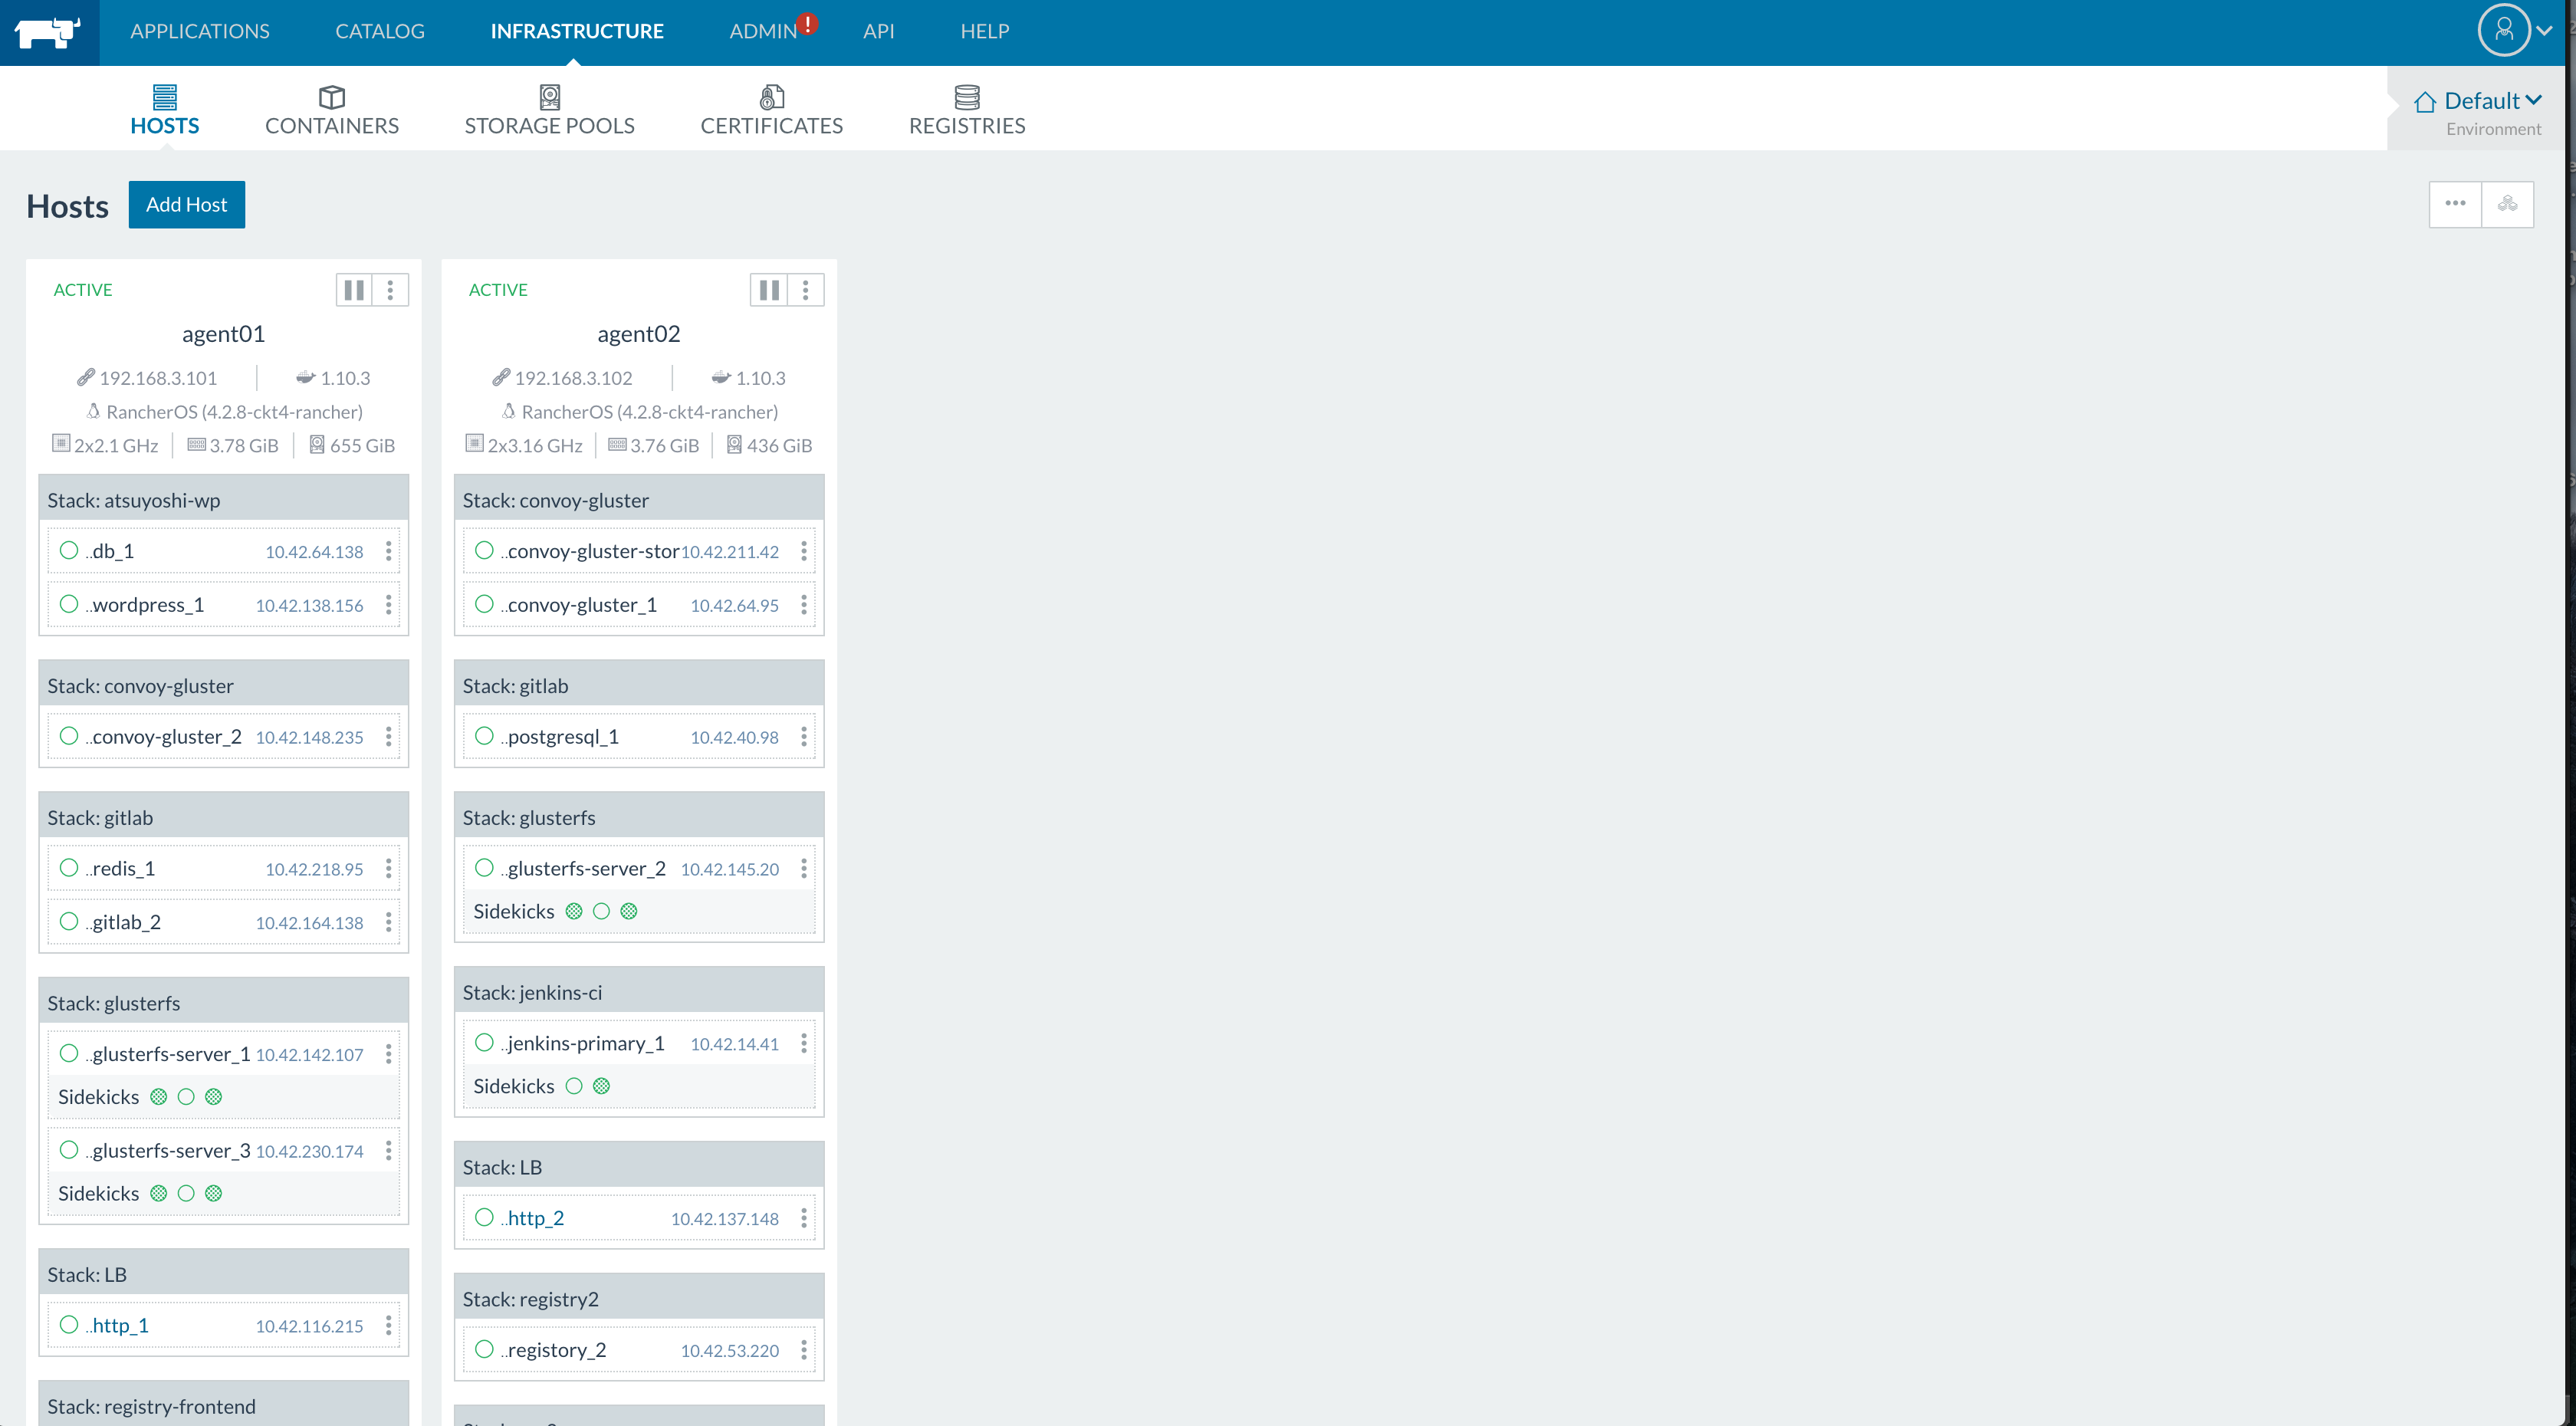
一通り完了
サービスが展開できる用意が整った
-
rancher/server
-
rancher/agent
-
haproxy
-
CATALOG でぽちぽちやると適当なサービスを運用することができる
試しにwordpressを動かしてみる


- Launchを押すとコンテナが作られて、wpを見れるようになる!!
今後の課題
- コンテナが消えるとデータも消える -> NFSをつくってmysqlのデータを永続化
- ポートが重なるとコンテナが上がらなくなる -> ロードバランサをつくってurlで分ける
- ローカルで開発したdocker imageを本番環境でデプロイ -> registryを使ってみよう