おしゃれインスタグラマーに憧れた結果、
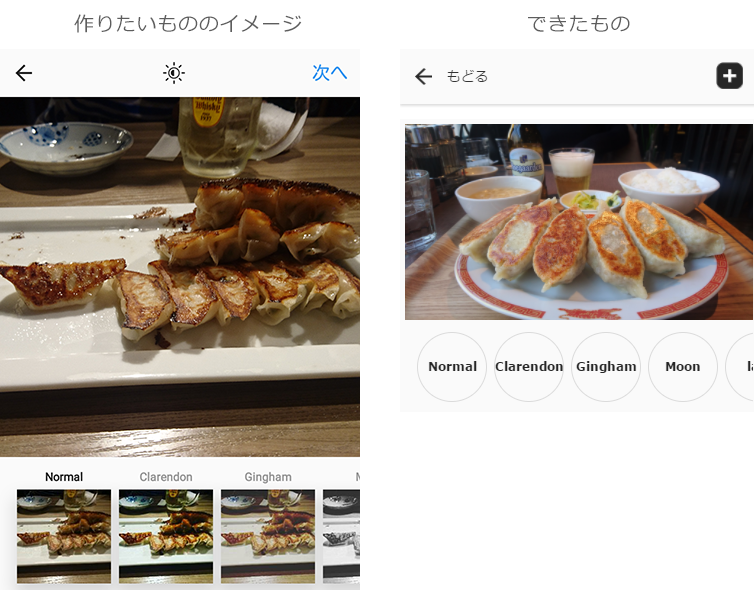
Instagramのフィルター編集みたいなものを作ってみたいなと思い、簡易的ですがHTML+CSS+jQueryで作成しました。
できあがりのイメージはこちら
下の丸い部分をクリックすると、そのフィルターが上の画像にかかるようになります。
今回は、そのフィルター部分について書こうと思います。
HTML
まずはベースとなるHTML。
写真を置いて、下のフィルターリストをクリックしたらそのフィルターを写真にCSSとして追加をします。
<div class="container">
  <div>
    <div class="photo js-photo">
      <img src="dst/img/photo2.jpg" class="photo-img js-photo-img">
    </div>
  </div>

  <div class="filter">
    <ul class="filter-name-list">
      <li class="normal">Normal</li>
      <li class="clarendon">Clarendon</li>
      <li class="gingham">Gingham</li>
      <li class="moon">Moon</li>
      <li class="lark">lark</li>
      <li class="reyes">Reyes</li>
      <li class="juno">Juno</li>
      <li class="slumber">Slumber</li>
      <li class="crema">Crema</li>
      <li class="ludwig">Ludwig</li>
      <li class="amaro">Amaro</li>
      <li class="hudson">Hudson</li>
      <li class="valencia">Valencia</li>
      <li class="x-proii">X-Pro II</li>
      <li class="nashville">Nashville</li>
    </ul>
  </div>
</div>
フィルター名はインスタのフィルター名に合わせました。
CSS
まずは写真部分のCSS
.photo {
  width: 100%;
  position: relative;

  &:before,
  &:after {
    content: '';
    display: block;
    width: 100%;
    height: 100%;
    position: absolute;
    top: 0;
    left: 0;
  }

  .photo-img {
    width: 100%;
  }
}
写真に疑似要素でフィルターをかぶせるので、先に疑似要素を追加して大きな透明なフィルタをかぶせます。
そして、フィルター用のCSSを追加します。
// フィルターリスト(丸いやつ)
.filter {
  overflow: auto;
  position: relative;

  .filter-name-list {
    display: flex;
    padding: 12px;
    overflow: auto;

    li {
      display: inline-block;
      border: $border;
      width: 70px;
      height: 70px;
      display: flex;
      justify-content: center;
      align-items: center;
      margin-right: 7px;
      font-weight: bold;
      cursor: pointer;
      border-radius: 50%;
      line-height: 1;
      flex: 0 0 auto;
      color: #262626;
      font-size: 12px;
    }
  }
}

// インスタ用フィルタ
.filter-x-proii {
  filter: saturate(84%) brightness(83%) contrast(187%) ;
  -webkit-filter: saturate(84%) hbrightness(83%) contrast(187%) ;

  &:before {
    background: rgba(125, 16, 16, .32);
    mix-blend-mode: screen;
  }

  &:after {
    background: radial-gradient(circle at 50% 50%, transparent 75%, rgba(0, 0, 0, .6) 100%);
  }
}

.filter-nashville {
  filter: saturate(99%) brightness(132%) contrast(81%) ;
  -webkit-filter: saturate(99%) brightness(132%) contrast(81%) ;

  &:before {
    background: rgba(255, 36, 149, .11);
    mix-blend-mode: normal;
  }
}
今回は「X-PROII」と「nashville」のフィルタを用意してみました。
この辺のフィルターのさじ加減は、ソースをいじりながら調整するのも時間がかかってしまうのでとても便利なサイトを利用させていただきました。
ありがとうございます!!!
CSSのfilter、mix-brend-modeを使いそれっぽいフィルターを作成しました。
(※アプリと見比べると全然違いますがそれっぽければいいのです…)
そして、jQueryでフィルターリストをクリック→写真に反映、を書きます。
Javascript
$(function() {
  // クリックしたフィルターを画像に適用
  $('.filter-name-list li').on('click', function() {
    var filterName = $(this).attr('class');
    var photo = $('.js-photo');
    photo.removeClass(function(index, className) {
      return (className.match(/\bfilter-\S+/g) || []).join(' ');
    });
    photo.addClass('filter-' + filterName);
  });
});
フィルターをクリックで、そのリストのclass名を取得、
filterがついているclass名を外して、代わりにfilter-のあとにリストのclass名を画像のdivに追加しています。
これで、ブラウザ上で調整をするだけのものですが、
インスタのようにリストでフィルターを選んで反映させるようなものができました!
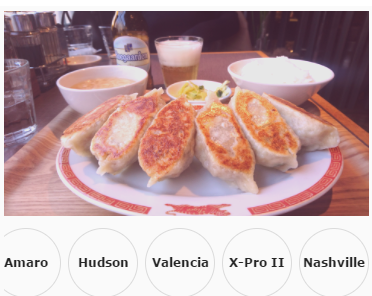
ちなみに上の餃子の写真に「nashville」を反映させたものがこちら
可愛いインスタっぽい写真になりました!
これでおしゃれインスタグラマーへの道が一歩近づきました。

