今日のゴール
- 「空腹状態」のパラメーターをキャラクターに実装する
- 空腹になったらローカル通知でアプリから呼び出す
- 空腹状態になったらそれ用のimageに差し替えてキャラを動かなくする

今回のキーワード
- User Notification
やったこと
デジモンと言えば育成、育成と言えばエサやり
- ということでキャラクターが空腹になったらアプリから呼び出す実装をしていくよ
Push通知
- Push通知とは何かについては割愛するよ いわゆるLINEが来た時とかに「ピコーン」ってiPhoneの上に表示されるアレだよ(雑)
- Push通知にはローカル通知とリモート通知があるよ
- ローカル通知
- アプリ内部で決められたタイミングで発生する通知
- リモート通知
- サーバーから任意のタイミングを指定して発生させることができる通知
- ローカル通知
- 今回はローカル通知を実装していくよ
タップすると即座に通知する
- まずはボタンをタップすると即座に通知を出すように実装するよ
- ユーザーに通知出していいか許諾を取るダイアログをAppDelegateに実装するよ
- UNUserNotificationCenterDelegateをAppDelegateに実装するよ
- Main.storyboardにタップしたら通知するようのButton(pushLocalNotification(_ sender: Any))を配置してViewControllerにIBOutletするよ
- 通知を送るための各種設定をpushLocalNotification()に書いていくよ
AppDelegate.swift
import UIKit
import UserNotifications

@UIApplicationMain
class AppDelegate: UIResponder, UIApplicationDelegate {

    var window: UIWindow?


    func application(_ application: UIApplication, didFinishLaunchingWithOptions launchOptions: [UIApplicationLaunchOptionsKey: Any]?) -> Bool {
        // Override point for customization after application launch.

        // MARK: Warning!!! 起動時の処理諸々ができたら消す
        sleep(3)

        // 通知許諾を取るダイアログを表示する
        UNUserNotificationCenter.current().requestAuthorization(options: [.badge, .sound, .alert], completionHandler: { (granted, error) in
            if error != nil {
                return
            }

            if granted {
                debugPrint("通知許可")
            } else {
                debugPrint("通知拒否")
            }
        })
        return true
    }
~~~省略~~~
extension AppDelegate: UNUserNotificationCenterDelegate {
    func userNotificationCenter(_ center: UNUserNotificationCenter, willPresent notification: UNNotification, withCompletionHandler completionHandler: @escaping (UNNotificationPresentationOptions) -> Void) {
        completionHandler([.alert, .sound, .badge])
    }
}
ViewController.swift
import UIKit
import AVFoundation
import UserNotifications

class ViewController: UIViewController {
~~~省略~~~
    @IBAction func pushLocalNotification(_ sender: Any) {
        let center = UNUserNotificationCenter.current()
        center.delegate = self

        // 通知内容の設定
        let content = UNMutableNotificationContent()
        content.title = "テスト!"
        content.body = "テストだよおおお"
        content.sound = UNNotificationSound.default()

        // ハッカトリガーの設定 1秒後に通知発生
        let trigger = UNTimeIntervalNotificationTrigger(timeInterval: 1.0, repeats: false)

        let request = UNNotificationRequest(identifier: "pushLocalNotification", content: content, trigger: trigger)

        UNUserNotificationCenter.current().add(request, withCompletionHandler: nil)
    }
おお動く動く!

腹減りパラメーターをキャラクターに実装する
- 空腹状態のパラメーターを設定、一定時間でお腹が減るようにするよ
- ホントはIntで値を設定した方がいいんだろうけど、ちと面倒くさかったので、Condition型のenumで「満腹」「普通」「空腹」の3つの状態を定義するよ
- キャラクターにgetHungry()メソッドを定義して、呼び出された時に満腹なら普通へ、普通なら空腹へ、空腹なら継続して空腹になるように自分のプロパティを操作するよ
- キャラのプロパティにCondition型のconditionを設定、プロパティ監視して空腹になったら通知を送るように設定するよ
- conditionプロパティは可変なのでvarで宣言するけど、(今のところ)キャラクラス以外から操作されたくないのでprivateにしておくよ
- キャラの状態を取得するためにgetCondition()と満腹にするgetFull()メソッドを実装するよ
- pushLocalNotification()のメソッドのIBOutletを一旦外して、feed(_ sender: Any)にリネーム、満腹状態に戻すメソッドに変更してIBOutletし直すよ
- ViewControllerにキャラの状態を更新するreloadCondition()を定義して、その中でgetHungry()を呼び出してキャラのconditionを更新するよ
Character.swift
final class Character {

    enum Condition: String {
        case full
        case normal
        case hungry

        func description() -> String{
            switch self {
            case .full:
                return "満腹"
            case .normal:
                return "普通"
            case .hungry:
                return "空腹"
            }
        }
    }
~~~省略~~~
    private var condition: Condition = .full {
        willSet(newValue) {
            if newValue == .hungry {
                // 通知送る処理
                let content = UNMutableNotificationContent()
                content.title = "!!注意!!"
                content.body = "腹が減ってるよ!!"
                content.sound = UNNotificationSound.default()

                let trigger = UNTimeIntervalNotificationTrigger(timeInterval: 1.0, repeats: false)

                let request = UNNotificationRequest(identifier: "gethungry", content: content, trigger: trigger)

                UNUserNotificationCenter.current().add(request, withCompletionHandler: nil)
            }
        }
    }
~~~省略~~~
    func getHungry() {
        switch condition {
        case .full:
            self.condition = .normal
        case .normal, .hungry:
            self.condition = .hungry
        }
    }

    func getCondition() -> String {
        return self.condition.description()
    }

    func getFull() {
        self.condition = .full
    }
ViewController.swift
~~~省略~~~
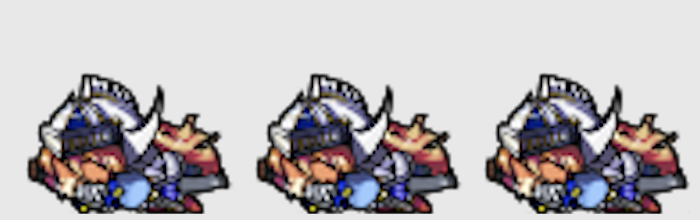
guard let valkyrie = Character(name: "【戦乙女】ヴァルキリー", charaImage: UIImage(named: "sozai.png")) else {
return
}
self.valkyrie = valkyrie
strLabel.text = "攻撃力: \(String(describing: valkyrie.status.str))"
defLabel.text = "防御力: \(String(describing: valkyrie.status.def))"
lucLabel.text = "天運: \(String(describing: valkyrie.status.luc))"
conditionLabel.text = "状態: " + valkyrie.getCondition()
// 3秒で腹が減る
let _ = Timer.scheduledTimer(timeInterval: 6.0, target: self, selector: #selector(reloadCondition), userInfo: nil, repeats: true)
}
func reloadCondition() {
valkyrie.getHungry()
conditionLabel.text = "状態: " + valkyrie.getCondition()
}
~~~省略~~~
@IBAction func feed(_ sender: Any) {
valkyrie.getFull()
conditionLabel.text = "状態: " + valkyrie.getCondition()
}
デバッグ用に2秒で腹減るようにしたからクッソ早いけど動いてるな!

バックグラウンド状態でも通知を出したい
- 基本放置型なのでバックグラウンド状態でも通知を送ってほしいなあ
- でもこのままだとバックグラウンド状態では通知が飛ばないよ・・・ なんでか分からなかったので調べるよ
- 検索ワード: 「Swift バックグラウンド 処理」
- どうやらバックグラウンドに移行するとタイマーはストップしてしまうらしいよ
- なのでバックグラウンド状態でも処理を続けるように、この記事通りAppDelegateに色々記述していくよ
AppDelegate.swift
    func applicationWillResignActive(_ application: UIApplication) {
        self.backgroundTaskID = application.beginBackgroundTask(){
            [weak self] in
            application.endBackgroundTask((self?.backgroundTaskID)!)
            self?.backgroundTaskID = UIBackgroundTaskInvalid
        }
    }
~~~省略~~~
    func applicationDidBecomeActive(_ application: UIApplication) {
        application.endBackgroundTask(self.backgroundTaskID)
    }
(QuickTimePlayerの撮影中に横から縦に戻るとクラッシュしてしまうのでgifにできないけどこれで動くはず・・・!)
空腹時にキャラを動かなくさせる
- 空腹なのにキャラが元気に動いてるのが違和感あるのでimageを差し替えるようにするよ
- 素材の中に倒れてるっぽいやつがあるのでこれを使うよ
- UIImage+Gifをいじって通常のgifを切り取るやつとdown時のgifを切り取るものに引数(byStandard)に応じて分岐させるようにしたよ(ハードコーディングすぎるしクソ使いづらいので要リファクタ)
 - キャラクラスはstandardImageとdownImage両方もつようにしてインスタンス生成時にプロパティにセットするよ
- ViewControllerのreloadCondition()メソッド内で、getHungry()が呼ばれた後にgetCondition()で状態をチェックして.hungryだったらimageViewのimageを差し替えるよ
- getConditon()がStringを返すようにしてたけど具合悪かったからConditionを返すようにしたよ
- タイマーで動くmove()メソッドは空腹時以外に処理が実行されるように修正するよ
- 空腹状態になったらローカル通知を出しつつtimerを止めて2回目以降に通知が飛ばないようにするよ
- feed()メソッドを実行した時は改めてタイマーをセットするようにするよ
- キャラクラスはstandardImageとdownImage両方もつようにしてインスタンス生成時にプロパティにセットするよ
- ViewControllerのreloadCondition()メソッド内で、getHungry()が呼ばれた後にgetCondition()で状態をチェックして.hungryだったらimageViewのimageを差し替えるよ
- getConditon()がStringを返すようにしてたけど具合悪かったからConditionを返すようにしたよ
- タイマーで動くmove()メソッドは空腹時以外に処理が実行されるように修正するよ
- 空腹状態になったらローカル通知を出しつつtimerを止めて2回目以降に通知が飛ばないようにするよ
- feed()メソッドを実行した時は改めてタイマーをセットするようにするよ
UIImage+Gif.swift
// MARK: 自身のimageからgif用の配列を生成するメソッド
    private func createCharacterImagesForGif(byStandard: Bool = true) -> [UIImage]? {
        let cropX = 64  // 切り抜くwidth
        let cropY = 64  // 切り抜くheight

        // 切り抜いた画像を保存しておく配列
        var images: [UIImage] = []

        // 3枚分for文を回す
        if byStandard {
            for i in 0..<3 {
                guard let image = self.cropping(to: CGRect(x: i * cropX, y: 0, width: cropX, height: cropY)) else {
                    // クロッピングに失敗したらnilをreturnする
                    return nil
                }

                // 切り抜けたUIImageを配列に追加
                images.append(image)
            }
        } else {
            // downImage切り抜き用
            for i in 6..<9 {
                guard let image = self.cropping(to: CGRect(x: i * cropX, y: 5 * cropY, width: cropX, height: cropY)) else {
                    // クロッピングに失敗したらnilをreturnする
                    return nil
                }

                // 切り抜けたUIImageを配列に追加
                images.append(image)
            }
        }


        // うまいこといけば3枚分のUIImageが入った配列がreturnされる
        return images
    }

    // MARK: UIImageの配列からgifを生成し、保存したURLを返すメソッド
    func createGifURL(byStandard: Bool = true) -> URL? {
        guard let images = self.createCharacterImagesForGif(byStandard: byStandard) else {
            return nil
        }

        let charaImages: [CGImage] = images.map{$0.cgImage!}

        guard let url = NSURL(fileURLWithPath: NSTemporaryDirectory()).appendingPathComponent("\(NSUUID().uuidString).gif") else {
            print("url化失敗")
            return nil
        }
        guard let destination = CGImageDestinationCreateWithURL(url as CFURL, kUTTypeGIF, charaImages.count, nil) else {
            print("CGImageDestinationの作成に失敗")
            return nil
        }

        let properties = [kCGImagePropertyGIFDictionary as String: [kCGImagePropertyGIFLoopCount as String: 0]]
        CGImageDestinationSetProperties(destination, properties as CFDictionary)

        let frameProperties = [kCGImagePropertyGIFDictionary as String: [kCGImagePropertyGIFDelayTime as String: 0.25]]
        for image in charaImages {
            CGImageDestinationAddImage(destination, image, frameProperties as CFDictionary)
        }

        if CGImageDestinationFinalize(destination) {
            print("GIF生成が成功")
            return url
        } else {
            print("GIF生成に失敗")
            return nil
        }
    }
Character.swift
import Foundation
import UIKit
import UserNotifications

final class Character {
~~~省略~~~
    let standardImage: UIImage // 生成したら基本変更しない方針なのでletで宣言
    let downImage: UIImage
~~~省略
    // 後々APIを追加した時に、レスポンスがnilだったりすることを考慮してFailable Initializerにする
    init?(name: String?, charaImage: UIImage?) {
        guard let name = name, let charaImage = charaImage, let gifURL = charaImage.createGifURL()?.absoluteString, let image = UIImage.gif(url: gifURL), let downGifURL = charaImage.createGifURL(byStandard: false)?.absoluteString, let downImage = UIImage.gif(url: downGifURL) else {
            print("Error: Faild to Initialize Character")
            return nil
        }

        self.name = name
        self.standardImage = image
        self.downImage = downImage
        self.status = (str: 100, def: 100, luc: 100)
    }

    func getCondition() -> Condition {
        return self.condition
    }

    func getFull() {
        self.condition = .full
    }
}
ViewController.swift
import UIKit
import AVFoundation
import UserNotifications

class ViewController: UIViewController {
~~諸々省略~~~
    private var valkyrie: Character!
    private var conditionTimer = Timer()

    override func viewDidLoad() {
        super.viewDidLoad()

        // キャラクターのインスタンスを生成してViewControllerのプロパティに設定
        guard let valkyrie = Character(name: "【戦乙女】ヴァルキリー", charaImage: UIImage(named: "sozai.png")) else {
            return
        }

        self.valkyrie = valkyrie

        // imageViewのimageにキャラのimageを設定
        imageView.image = valkyrie.standardImage
        conditionLabel.text =  "状態: " + valkyrie.getCondition().description()

        // 5秒で腹が減る
        conditionTimer = Timer.scheduledTimer(timeInterval: 5.0, target: self, selector: #selector(reloadCondition), userInfo: nil, repeats: true)
    }

    func reloadCondition() {
        valkyrie.getHungry()
        switch valkyrie.getCondition() {
        case .hungry:
            imageView.image = valkyrie.downImage
            conditionTimer.invalidate()
        default: break
        }
        conditionLabel.text =  "状態: " + valkyrie.getCondition().description()
    }

    func move(_ timer: Timer) {
        // 空腹時以外だったら
        if valkyrie.getCondition() != .hungry {
            // キャラ画像のframeを変数に格納
            var frame = imageView.frame

            // 移動量を定義して変数に格納
            let moveX: CGFloat = 50.0

            // 画面の左端(x座標が0)に到達したら
            if frame.origin.x < 0 {
                // 右を向いてることを表すためにフラグをfalseにする
                isLeft = false

                // もしキャラのx座標が右端(画面の最大x座標 - imageViewのサイズ分)に到達したら
            } else if frame.origin.x > view.frame.maxX - imageView.frame.width {
                // 左を向いていることを表すためにフラグをtrueにする
                isLeft = true
            }

            // 左を向いていれば左に動かすためにx軸の値をマイナス、逆ならプラスする
            isLeft ? (frame.origin.x -= moveX) : (frame.origin.x += moveX)

            // imageViewのframeに代入
            imageView.frame = frame
        }
    }
~~~省略~~~
    @IBAction func feed(_ sender: Any) {
        valkyrie.getFull()
        self.imageView.image = self.valkyrie.standardImage
        self.conditionLabel.text =  "状態: " + self.valkyrie.getCondition().description()

        // 満腹状態に戻るのでタイマーがどんな状態でも初期化する
        self.conditionTimer.invalidate()
        self.conditionTimer = Timer.scheduledTimer(timeInterval: 4.0 , target: self, selector: #selector(self.reloadCondition), userInfo: nil, repeats: true)
    }
}
おおお! なかなかそれっぽい感じじゃないですか!
結果
- アプリからの呼び出しが実装できた

- Timerが多くなって来たので本格的に詰むような予感しかしない
- TimerManagerのシングルトン作った方がいいか・・・?

- TimerManagerのシングルトン作った方がいいか・・・?
- RXSwiftとか覚えた方がいい気もしてきた・・・

- 今回の作業ブランチはこちら
次回
最後に
ご指摘・リファクタ大歓迎です![]()