この記事は
HoloLensで始めるCognitive Services(Translator Text API編)を元に音声読み上げ処理を組み込むための手順です。
まだTranslator Text API編を試していない場合は先にそちらの実施をお願いします。
さてさて、今回はCognitive ServicesのBing Speech APIを使用して、
日本語の読み上げを実行してみましょう!
なぜわざわざ読み上げにAzureが必要なのか?
HoloLensは2017年7月時点で日本語対応していないので、標準のTextToSpeechでは読み上げが不可能なのです。
逆に言えば英語はTextToSpeechの利用が可能ですので、日本語はBing Speech API、英語はTextToSpeechと使い分けして両方をいっぺんに学習しちゃいましょう!
Bing Speech APIとは
音声読み上げを行いたい文字列を送信すると、Azure側で音声ファイルに変換して返してくれる
Cognitive Servicesのサブスクリプションです。
詳しくは下記をご参照ください。
https://azure.microsoft.com/ja-jp/services/cognitive-services/speech/
環境
OS:Windows 10 CreatersUpdate
Unity:5.6.0f3
VisualStudio 2017
(そろそろ環境をアップデートしたいのですが、今回まではこのままで・・・)
完成イメージ
MRDesignLabに手を加えて元素記号の解説文をMicrosoft Translator Text APIで日本語化した結果に対してさらに読み上げ機能を追加。日本語はBingSpeechAPIを、英語はHoloToolkitのTextToSpeechを使用。#HoloLens pic.twitter.com/fdNiRlZDHi
— morio (@morio36) 2017年7月13日
流れ
0.事前準備
1.スクリプトを修正
2.UI部品を追加
3.動作確認
0.事前準備
TranslatorTextAPIの実施時にAzureのアカウントは作成済みのはずです。
今回はさらにBing Speech APIのサブスクリプションも必要となります。
下記の方の記事の「利用申し込み」を参考にサブスクリプション作成を行ってください。
テキスト→音声変換の「Text To Speech API」の使い方と、2017年3月現在のWatsonとの違い
1.スクリプトを修正
まず前回日本語文字列を表示するために作ったSingletonのクラスを下記のように変更します。
読み上げる対象文字列として日本語/英語の両方をメモリに保持しておくほか、
読み上げの処理自体もここで実装しています。
読み上げ処理を行わせたい文字列はSSMLというマークアップ言語形式に変換したうえでバイト配列の形でAzureのAPIに送ります。
その編集処理もこの中で行っています。
using HoloToolkit.Unity;
using System.Collections;
using System.Collections.Generic;
using System.Text;
using System.Xml.Linq;
using UnityEngine;
using UnityEngine.UI;

public class SingletonText : Singleton<SingletonText>
{
    public TextToSpeechManager tts; //英語読み上げ用TTS
    public AudioSource source;      //Azureからの返却ファイルを読み上げるためのソース

    private string ja;              //日本語文字列保持用変数
    private string en;              //英語文字列保持用変数

    private string bingTokenUrl = "https://api.cognitive.microsoft.com/sts/v1.0/issueToken"; //トークン取得用URL
    private string bingAPIUrl   = "https://speech.platform.bing.com/synthesize";             //API呼び出し用URL

    /*
     *日本語説明文をテキストエリアに表示。同時にローカル保持。
     */
    public void SetJaText(string s)
    {
        gameObject.GetComponent<Text>().text = s;
        ja = s;
    }

    /*
     * 英語説明文をローカル保持
     */
    public void SetEnText(string s)
    {
        en = s;
    }

    /*
     * 日本語ボタン押下時の発話処理
     */
    public void ClickButton_Ja()
    {

        var bingHeaders = new Dictionary<string, string>() {
            { "Ocp-Apim-Subscription-Key", "API_KEY" } //Bing Speech APIのAPIキーを入力
        };

        StartCoroutine(HttpPost(bingTokenUrl, bingHeaders, ja));
    }

    /*
     * HTTP POST リクエスト
     */
    IEnumerator HttpPost(string url, Dictionary<string, string> header, string japaneseString)
    {
        //Tokenの取得
        WWW www = new WWW(url, new byte[1], header); //POSTで投げたいのでダミーとして空のバイト配列を入れている
        yield return www;
        string bingToken = www.text;

        //SpeechAPIの呼び出し
        var headers = new Dictionary<string, string>() {
            { "Content-Type", "application/ssml+xml" },
            { "X-Microsoft-OutputFormat", "riff-16khz-16bit-mono-pcm" },
            { "Authorization", "Bearer "+ bingToken},
            { "X-Search-AppId", "07D3234E49CE426DAA29772419F436CA" },
            { "X-Search-ClientID", "1ECFAE91408841A480F00935DC390960" },
            { "User-Agent", "TTSClient" }
        };

        string ssml = GenerateSsml("ja-JP", "Female", "Microsoft Server Speech Text to Speech Voice (ja-JP, Ayumi, Apollo)", japaneseString);
        byte[] bytes = Encoding.UTF8.GetBytes(ssml);

        WWW wwwAPI = new WWW(bingAPIUrl, bytes, headers);
        yield return wwwAPI;

        source.clip = wwwAPI.GetAudioClip(true, true, AudioType.WAV);
        source.Play();
    }

    /*
     * SSML生成
     */
    private string GenerateSsml(string locale, string gender, string name, string text)
    {
        var ssmlDoc = new XDocument(
                          new XElement("speak",
                              new XAttribute("version", "1.0"),
                              new XAttribute(XNamespace.Xml + "lang", "ja-JP"),
                              new XElement("voice",
                                  new XAttribute(XNamespace.Xml + "lang", locale),
                                  new XAttribute(XNamespace.Xml + "gender", gender),
                                  new XAttribute("name", name),
                                  text)));
        return ssmlDoc.ToString();
    }

    /*
     * 英語ボタン押下時の発話処理
     */
    public void ClickButton_En()
    {
        tts.SpeakText(en); //英語の場合はこの一文だけ。あらかじめ保持しておいた文字列をSpeakTextに渡す。
    }
}
一番ややこしいのはAzureのAPI叩くところですね。
Headerでパラメータが色々指定できるのですが、いろんなパターンを試してみたところWAV形式でないとうまく値が返って来ませんでした
(私が選択した組み合わせに問題があるのかもしれません)。
X-Search-AppIdやX-Search-ClientIDも任意の16進文字列を生成してよいのですが、固定でもいいです。
特にこだわりがなければ上記の通りをコピペでよいかと思います。
部品を使用する側の処理も変更が必要です。
まず、任意の元素を選択した際に呼び出されるメソッドを修正し、日本語/英語の文字列を保持させるように変更します。
    System.Collections.IEnumerator ExecuteTranslate(string text)
    {
        string translateTokenUrl = "https://api.cognitive.microsoft.com/sts/v1.0/issueToken";

~~中略~~

        XmlDocument xmlDoc = new XmlDocument();
        xmlDoc.Load(new StringReader(getWWW.text));
        XmlNode root = xmlDoc.FirstChild;
        XmlNodeList talkList = xmlDoc.GetElementsByTagName("string");
        XmlNode talk0 = talkList[0];
        string jaString = talk0.InnerText;

        SingletonText.Instance.SetJaText(jaString); //変更部分。日本語説明文を保持
        SingletonText.Instance.SetEnText(text);     //追加部分。英語説明文を保持
    }
そして実際にボタンを押下した際に発話させるための処理も日本語/英語ともに実装します。
using HUX.Interaction;
using HUX.Receivers;
using UnityEngine;

public class TapMessageReceiverJa : InteractionReceiver
{
    protected override void OnTapped(GameObject obj, InteractionManager.InteractionEventArgs eventArgs)
    {
        SingletonText.Instance.ClickButton_Ja();
    }
}
using HUX.Interaction;
using HUX.Receivers;
using UnityEngine;

public class TapMessageReceiverEn : InteractionReceiver
{
    protected override void OnTapped(GameObject obj, InteractionManager.InteractionEventArgs eventArgs)
    {
        SingletonText.Instance.ClickButton_En();
    }
}
MRDesignLabの部品に関するタップ実装は下記を参考しました。
MRDesignLabを使いジェスチャー入力を取り扱う
HoloLensで始めるMRDesignLabs - ObjectCollection、各種ボタン、イベント制御を使う
スクリプトの実装は以上です。
2.UI部品を追加
発話のトリガーとなるボタンやオーディオソースを追加していきます。
まず下記のようにボタンを2つ、日本語用と英語用に配置してください。
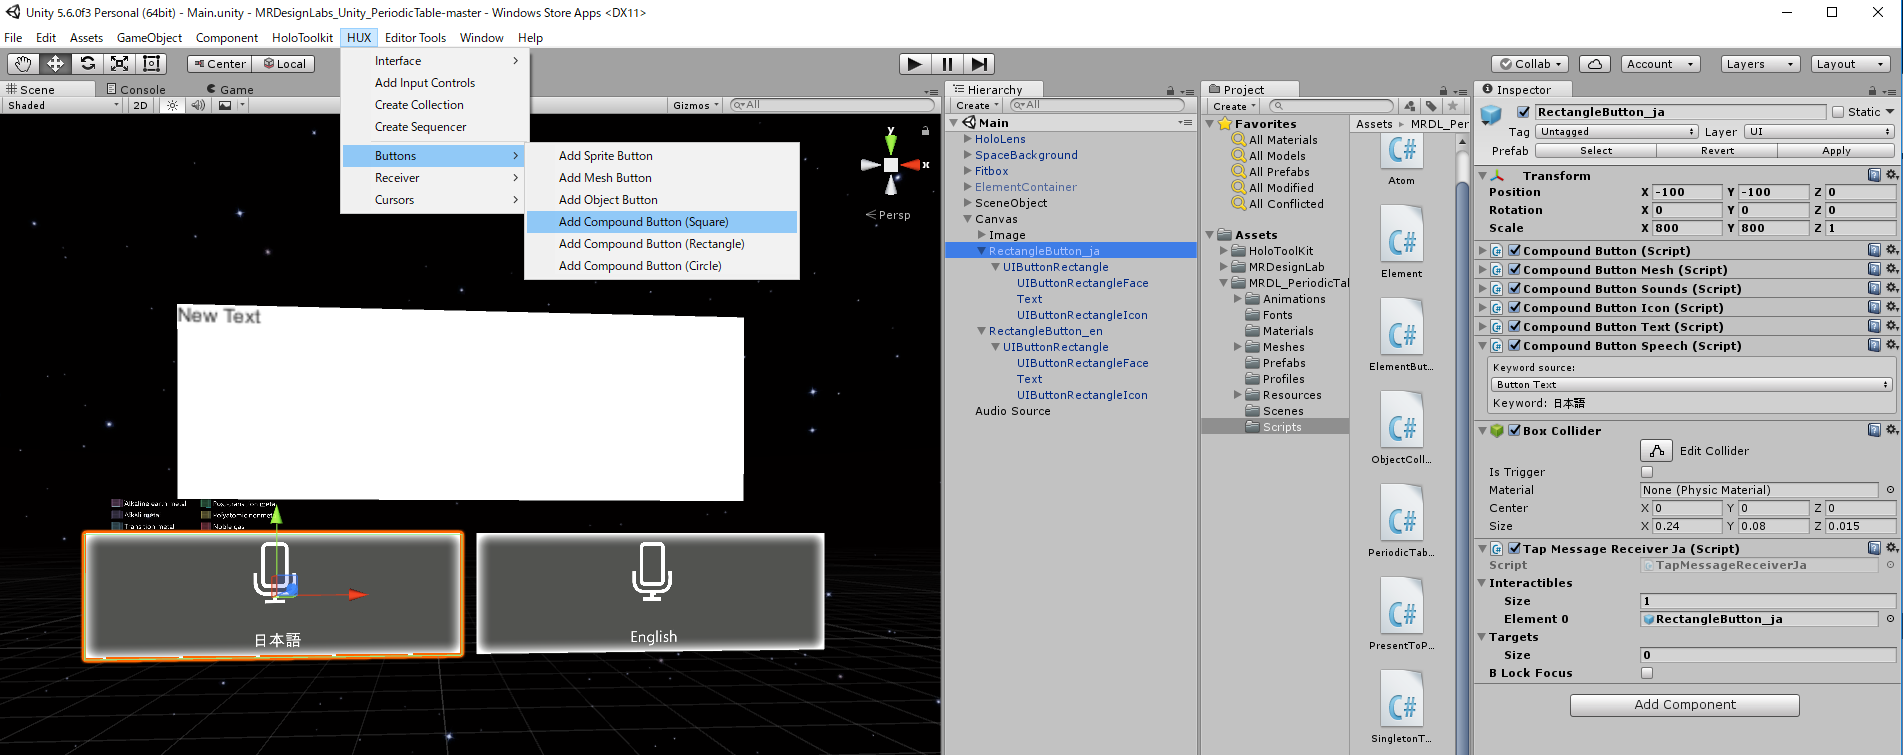
前回作ったCanvasの下に配置するのが簡単だと思います。
サイズを適度に調整し、インスペクタからアイコンを変更しましょう。私はマイクアイコンに変更しました。
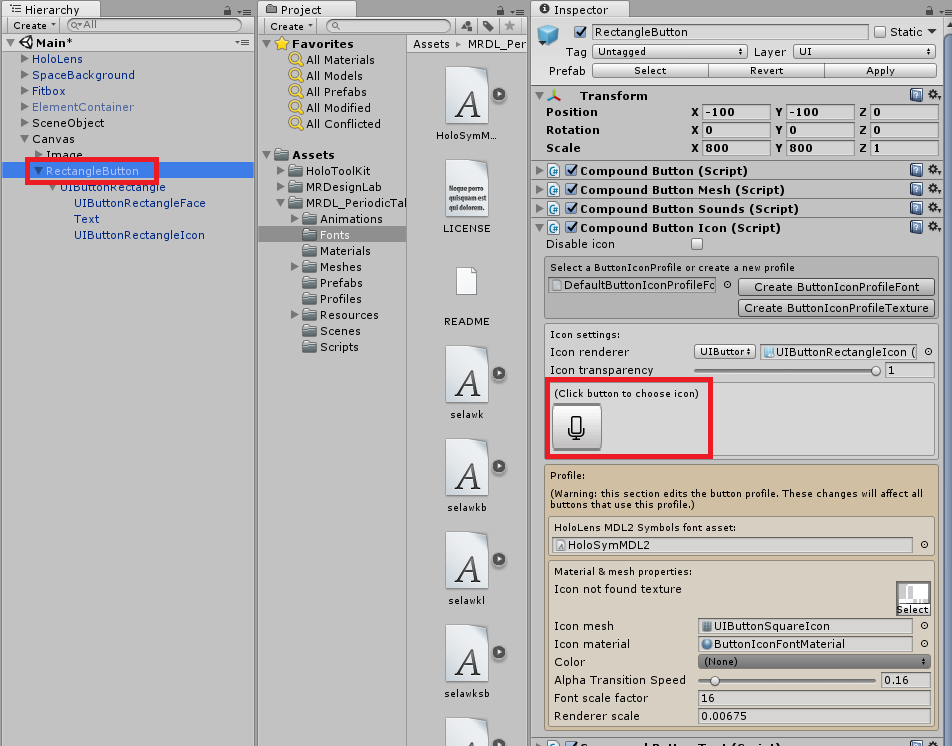
アイコンの位置やTextフォントサイズなども読みやすいように変更してください。
操作しているとたまにアイコンが消えてしまうこともありますが、Playボタン押すと復活しますので焦らずに進めてください。
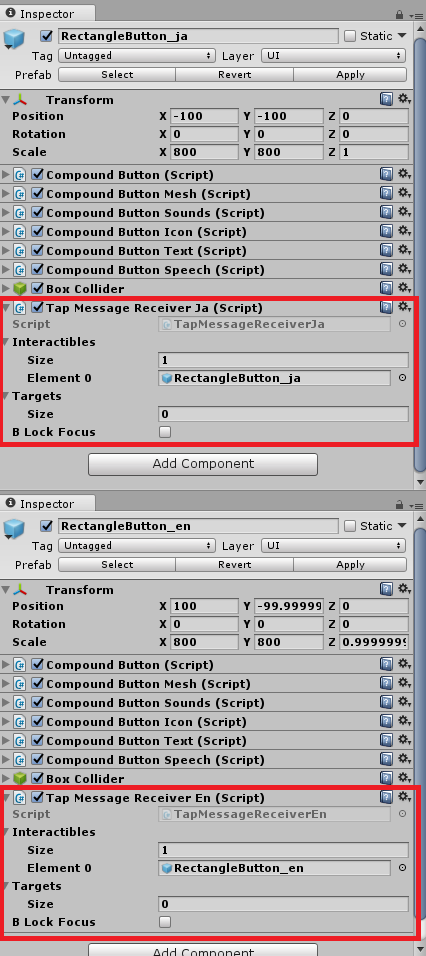
ボタンを配置したら、1で作成したスクリプトを日本語、英語それぞれアタッチし、Interactiblesのパラメータを変更してください。
Element 0には自分自身をドラッグすればよいです。
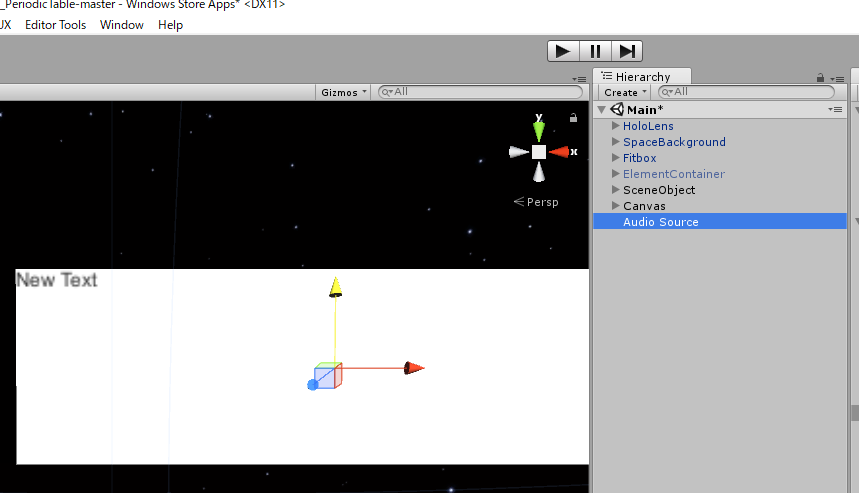
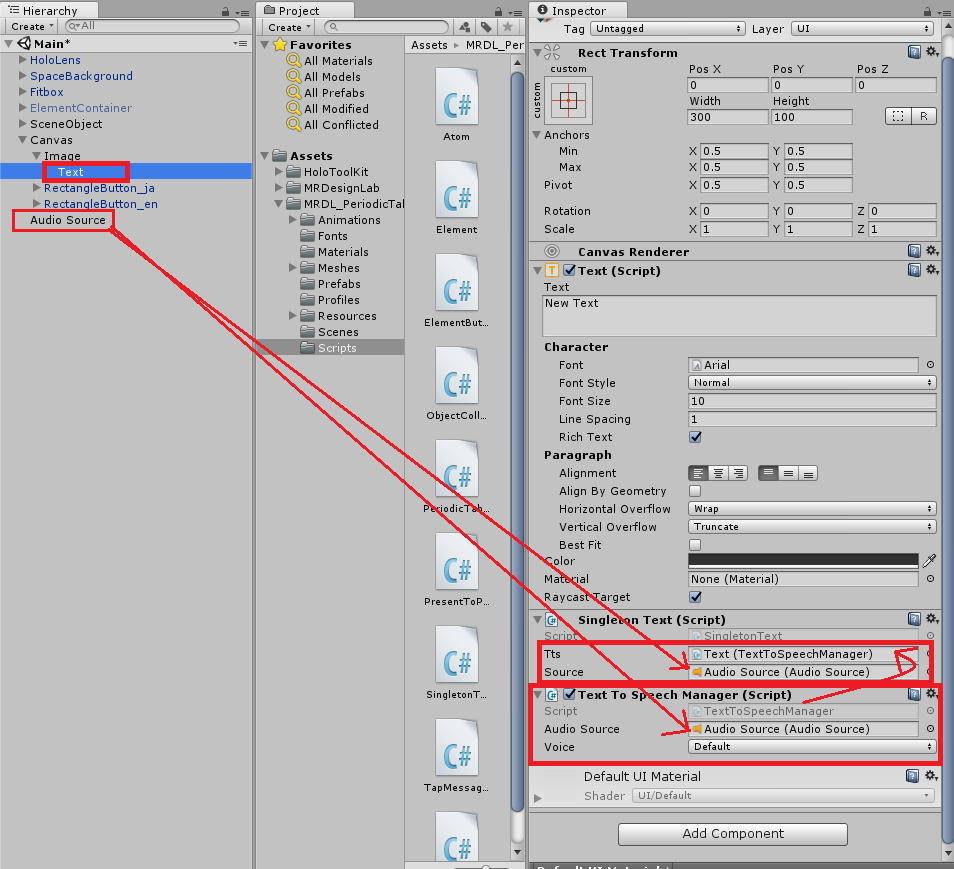
ヒエラルキーからAudio→AudioSourceを選択し、AudioSourceを追加してください。
Canvas→Image→Textのインスペクタを開き、Text To Speech ManagerをAddしてください。
Text To Speech ManagerのAudio Sourceに、先ほど追加したAudioSourceをアタッチします。
次にSingleton TextのSoruceにも同じくAudioSourceをアタッチし、Ttsには追加したコンポーネントであるText To Speech Managerをアタッチしてください。
3.動作確認
任意の元素を選択し、説明文を表示させてください。
その状態で発話用のボタンをタップすると、発話が始まります。
TextToSpeechはUnityエディタ上では動作しないようです(コンソールにInfo「Speech not supported in editor. 」が出ます)。
ソースコード
下記にアップしていますので、必要に応じてご参照ください。
https://github.com/haveagit/SpeechAPISample