準備
手前味噌で申し訳ないのですが、後々必要になるので以下のページでmacOSにJupyter Notebookをインストールしておいて下さい。
http://qiita.com/mix_dvd/items/d915752215db67919c06
JAVAの確認およびインストール
インストールされているか確認するため、以下のコマンドを実行。
$ java -version
インストールされていない場合は、以下のダイアログが表示されるので「詳しい情報...」というボタンをクリック
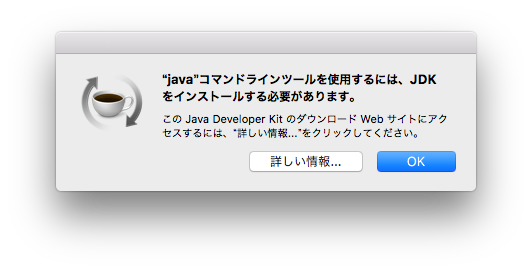
上記のWebサイトが表示されるので、JDKをダウンロードしインストール
インストール後、再度コマンドを実行してインストールされていることを確認
$ java -version
java version "1.8.0_101"
Java(TM) SE Runtime Environment (build 1.8.0_101-b13)
Java HotSpot(TM) 64-Bit Server VM (build 25.101-b13, mixed mode)
Elasticsearchのインストール
[公式サイト] https://www.elastic.co/jp/products/elasticsearch
プログラムのインストール
以下のコマンドを実行
$ curl -O https://download.elastic.co/elasticsearch/release/org/elasticsearch/distribution/zip/elasticsearch/2.3.4/elasticsearch-2.3.4.zip
$ unzip elasticsearch-2.3.4.zip
$ sudo mv elasticsearch-2.3.4 /usr/local/elasticsearch
バージョンの確認
$ /usr/local/elasticsearch/bin/elasticsearch --version
Version: 2.3.4, Build: e455fd0/2016-06-30T11:24:31Z, JVM: 1.8.0_101
プラグインのインストール
以下のコマンドを実行
$ cd /usr/local/elasticsearch
$ bin/plugin install analysis-kuromoji
起動
以下のコマンドを実行
$ /usr/local/elasticsearch/bin/elasticsearch
動作確認
別のターミナルを起動し、以下のコマンドを実行
$ curl localhost:9200
もしくは、Webブラウザで以下のURLにアクセス
以下のような応答があれば起動成功
{
  "name" : "Akasha",
  "cluster_name" : "elasticsearch",
  "version" : {
    "number" : "2.3.4",
    "build_hash" : "Xxxxxxxxxxxxxxxxxxxxxxxxxxxxxxxxxxxxxxxx",
    "build_timestamp" : "2016-06-30T11:24:31Z",
    "build_snapshot" : false,
    "lucene_version" : "5.5.0"
  },
  "tagline" : "You Know, for Search"
}
Python用ライブラリのインストール
以下のコマンドを実行
$ pip install elasticsearch
サンプルコードの実行
以下のコードをtest.pyとして保存
test.py
# coding: utf-8

# # Elasticsearch

# In[1]:

from elasticsearch import Elasticsearch
es = Elasticsearch("localhost:9200")
es


# # 変数の初期化

# In[2]:

esIndex = "bot"
esType = "talks"


# # インデックスの追加

# - curl -X POST http://localhost:9200/bot/talks -d '{"mode":"あいさつ", "words":"おはようございます"}'

# In[3]:

es.index(index=esIndex, doc_type=esType, body={"mode":"あいさつ", "words":"おはようございます"})


# In[4]:

es.index(index=esIndex, doc_type=esType, body={"mode":"あいさつ", "words":"こんにちは"})
es.index(index=esIndex, doc_type=esType, body={"mode":"あいさつ", "words":"こんばんは"})
es.index(index=esIndex, doc_type=esType, body={"mode":"あいさつ", "words":"さようなら"})
es.index(index=esIndex, doc_type=esType, body={"mode":"あいさつ", "words":"おやすみなさい"})
es.index(index=esIndex, doc_type=esType, body={"mode":"名言", "words":"死して屍拾うものなし"})


# # インデックスの修正

# - curl -X POST http://localhost:9200/bot/talks?id=AVYGQm6Q8mtRod8eIWiq -d '{"mode":"あいさつ","words":"お休みなさい"}'
#
# idが存在すれば更新、idが存在しなければ追加

# In[21]:

es.index(index=esIndex, doc_type=esType, id="AVYGQm6Q8mtRod8eIWiq", body={"mode":"あいさつ", "words":"また明日"})


# # データ取得

# - curl -X GET http://localhost:9200/bot/talks/_search?pretty -d '{"query":{"match_all":{}}}'

# In[29]:

res = es.search(index=esIndex, body={"query": {"match_all": {}}})
res


# In[23]:

len(res["hits"]["hits"])

words = []
modes = []

for i in range(len(res["hits"]["hits"])):
    row = res["hits"]["hits"][i]["_source"]
    print(row)
    words.append(row["words"])
    modes.append(row["mode"])


# # データ削除

# - curl -X DELETE http://localhost:9200/bot/

# In[8]:

# es.indices.delete(index="bot")


# # プラグインの利用

# - 形態素解析

# In[24]:

text = "今日はいい天気ですね"


# In[25]:

def analyze(es, text):

    params = {"analyzer":"kuromoji"}
    body = {"text":text}

    http_status, data = es.indices.client.transport.perform_request(
        'GET',
        '/' + esIndex + '/_analyze',
        params=params,
        body=body
    )

    return map(lambda x: x.get('token'), data.get('tokens')[0:])


# In[26]:

tokens = analyze(es, text)
print(' '.join(tokens))


# In[30]:

for word in words:
    print(' '.join(analyze(es, word)))
以下のコマンドを実行
$ python test.py
以下のとおり応答があれば成功!
{'mode': 'あいさつ', 'words': 'おはようございます'}
{'mode': 'あいさつ', 'words': 'こんばんは'}
{'mode': 'あいさつ', 'words': 'こんにちは'}
{'mode': 'あいさつ', 'words': 'さようなら'}
{'mode': 'あいさつ', 'words': 'おやすみなさい'}
{'mode': '名言', 'words': '死して屍拾うものなし'}
{'mode': 'あいさつ', 'words': 'また明日'}
今日 いい 天気
おはよう
こんばんは
こんにちは
さようなら
おやすみなさい
死す 屍 拾う
明日
さて、これから何するかな(^_^;)
追記
あ、Jupyter Notebook使わなかったですね(汗)