1日目 では、IBM BluemixにNode-REDを導入し、WebSocketでデータを受信して、Ambientというグラフ表示サービスにデータを連携するところまで進みました。
2日目では、受信したデータをNoSQL DB(Cloudant)にとりあえず保存するのと、Webサイトを作るところまで行きました。
3日目で、保存したデータを読める形にして、利用率を計算しました。
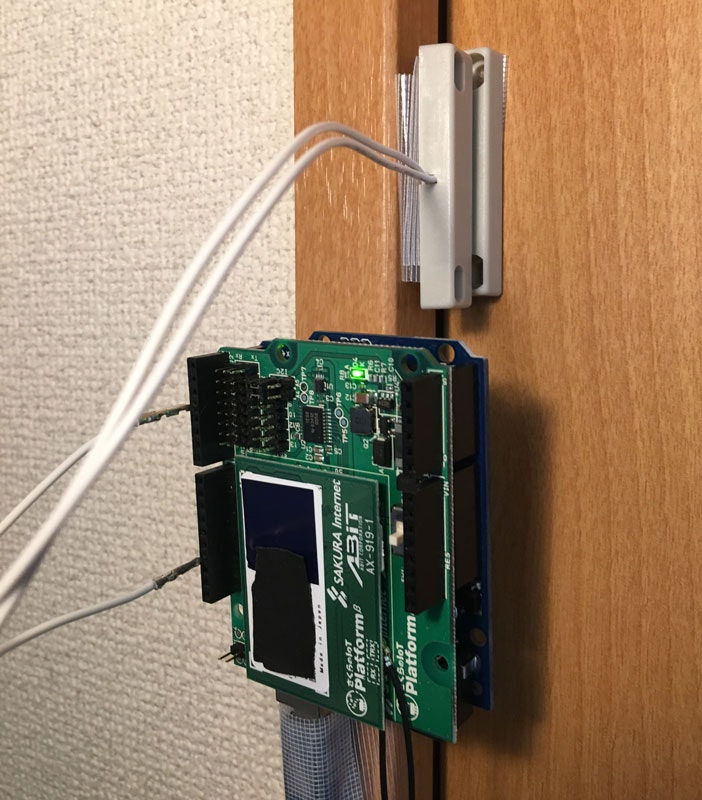
時間が前後してしまいましたが、さくらIoT Platformが無事届きましたので、Arduioを使って、実際に接続してみたいと思います。
結果から言うと、Node-RED部分は(ほぼ)想定通り動きました!!
目次
- Arduinoとの合体
- Arduinoのプログラム
- Node-REDとの接続
- 不要なkeepaliveをフィルターする
- ドアセンサの接続
Arduinoとの合体
ここは、さくらのIoT Platform βをArduinoと繋げてWebSocketサービスに連携するまでを参考にさせて頂きました。
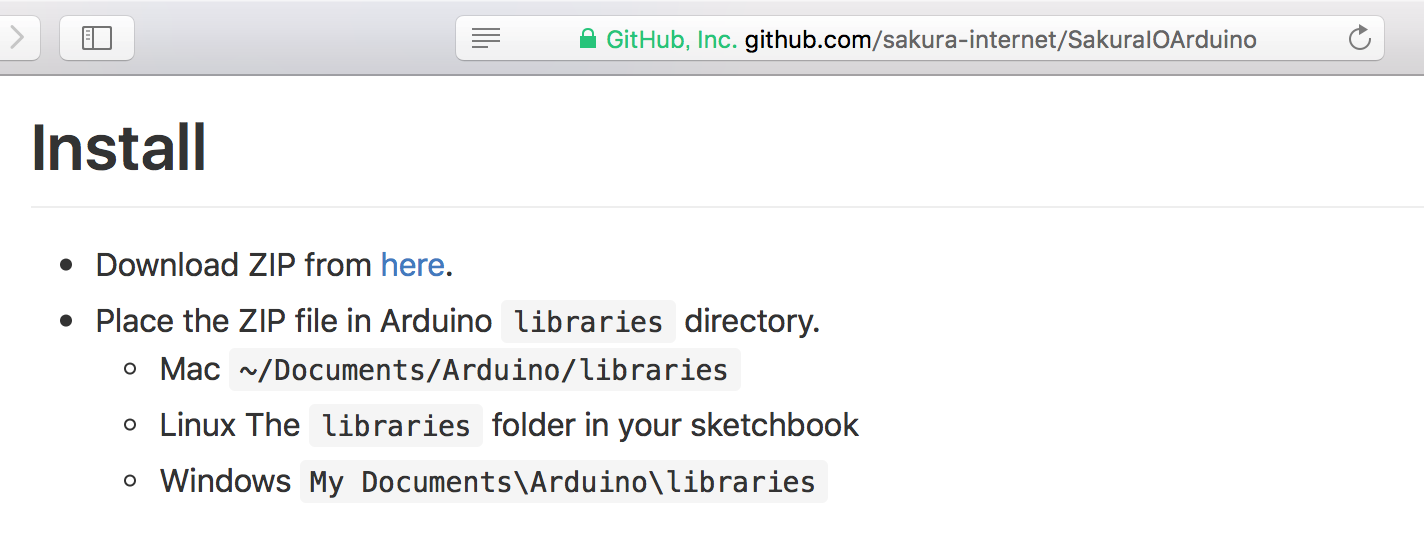
最後の手順にあるとおり、Arduinoのライブラリに、公式のサンプルプログラムをインストールしておかないと、コンパイルできません。
Arduinoのプログラム
公式のサンプルプログラムをほとんどそのまま使わせてもらいました。GitHubはこちら。
IoT Platformには、128のチャンネルがあり、そのチャンネルそれぞれに、8バイト(オクテット)のデータを送ることができます。
当社の会議室は、利用中以外はドアを開けておくルールになっています。
なので、Arduinoにドアセンサ(こんなの)を接続して、一つの部屋にひとつのチャンネルを割り当て、ドアが開いていればゼロ、ドアが閉まっていればイチを送るようにしました。
また、なるべくリアルタイムにデータを取得できるよう、5秒おきにループを回すことにしたのですが、毎回通信していたらそれなりに通信量がかさんでしまうので、状態が変わったときにだけデータを送ることにします。
# include <SakuraIO.h>

SakuraIO_I2C sakuraio;

// 接続するセンサの数
const int numSensors = 3;

// ドアセンサを接続するArduino上のピン
const int connectedPins[] = {2,3,4};

// 上記sensorPinに該当するチャンネル
const int dataChannels[] = {0,1,2};

// 上記sensorPinの前回の値 (0:ドア開放 1:ドア閉扉)
int prevStatus[numSensors];

void setup() {

  // さくらIoTのセットアップ
  Serial.begin(9600);
  Serial.print("Waiting to come online");
  for(;;){
    if( (sakuraio.getConnectionStatus() & 0x80) == 0x80 ) break;
    Serial.print(".");
    delay(1000);
  }
  Serial.println("");


  uint8_t request[33] = {};
  uint8_t response[33] = {};


  // ProductID
  uint16_t pid = sakuraio.getProductID();
  Serial.print("PID ");
  Serial.println(pid);

  // UniqueID
  sakuraio.getUniqueID((char *)response);
  Serial.print("UID ");
  Serial.println((char *)response);

  // Version
  sakuraio.getFirmwareVersion((char *)response);
  Serial.print("Ver ");
  Serial.println((char *)response);

  // Connection Status
  uint8_t connectionStatus = sakuraio.getConnectionStatus();
  Serial.print("Status ");
  Serial.println(connectionStatus);

  //getSignalQuarity
  uint8_t signalQuarity = sakuraio.getSignalQuarity();
  Serial.print("Quality ");
  Serial.println(signalQuarity);


  // センサーピンの設定
  // Pullup抵抗を接続するのが面倒なので、INPUTではなくINPUT_PULLUPを設定。
  // ただしOn/OffとHIGH/LOWが逆になる点に注意。

  for(int i =0; i < numSensors; i++){
    pinMode(connectedPins[i], INPUT_PULLUP);
  }

}


void loop() {

  // Unixtime
  uint32_t unixtime = (uint32_t)(sakuraio.getUnixtime()/1000UL);
  Serial.print("Unixtime ");
  Serial.println(unixtime);

  // Tx Queue
  uint8_t ret;

 int currentPinStatus;

for(int i =0; i < numSensors; i++){
    // 現時点のドアセンサの状態を取得
    // INPUT_PULLUPなので、HIGH=off(0), LOW=on(1)
    if( digitalRead(connectedPins[i])== HIGH) {
      currentPinStatus = 0;
    }else{
      currentPinStatus = 1;
    }

    // もし前回の値と異なっていたら、queueに登録
    if( prevStatus[i] != currentPinStatus) {
      prevStatus[i] = currentPinStatus;
      Serial.print("Enqueue (Pin");
      Serial.print(connectedPins[i]);
      Serial.print(") ");
      Serial.println(currentPinStatus);

      ret = sakuraio.enqueueTx((uint8_t)dataChannels[i], (int32_t)currentPinStatus);
      Serial.println(ret);
    }
  }

  uint8_t avail;
  uint8_t queued;
  sakuraio.getTxQueueLength(&avail, &queued);
  Serial.print("Tx Available=");
  Serial.print(avail);
  Serial.print(" Queued=");
  Serial.println(queued);

  // queue に溜まっていたら送信
  if(queued > 0){
    ret = sakuraio.send();
    Serial.print("Send ");
    Serial.println(ret);
  }

  delay(5000);
}
Node-REDとの接続
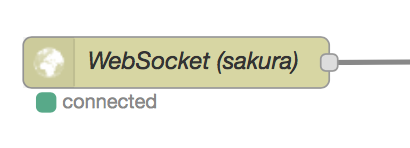
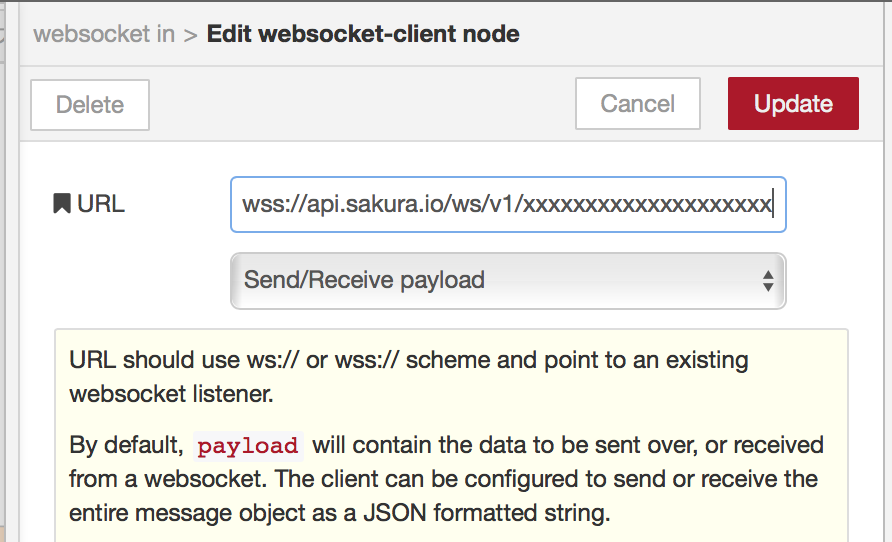
なんてこと無い、1日目に作ったWebSocket受信ノードのアドレスを変更するだけです。

不要な情報をフィルターする
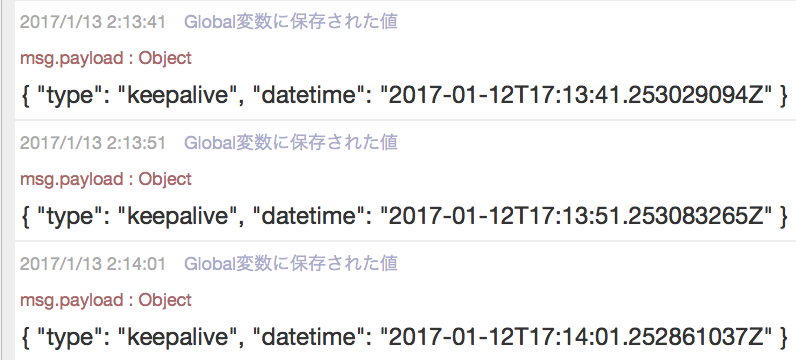
実際に接続してみると、数秒おきに、keepaliveが飛んでくるので、これを無視するように、フィルターを追加しました。

「更新情報のみ保存」の中身
if( msg.payload.type =="channels" ){
    return msg;
}else{
    msg.payload = null;
    return null;
}
モジュール全体
[{"id":"99a2e322.3dbee","type":"websocket in","z":"396465eb.1d8e22","name":"WebSocket (sakura)","server":"","client":"df973c4.18d10c","x":114,"y":2071,"wires":[["1dc0a90b.5a5a7f","79fb8120.0b87c"]]},{"id":"1dc0a90b.5a5a7f","type":"debug","z":"396465eb.1d8e22","name":"WebSocket受信データ","active":true,"console":"false","complete":"payload","x":169.03572409493586,"y":2142.2857789993286,"wires":[]},{"id":"52487252.24dfdc","type":"function","z":"396465eb.1d8e22","name":"Global変数の更新","func":" msg.payload.payload.channels.forEach(function(v) {\n context.global.data[v.channel] = v.value;\n\n});\n\nmsg.payload = JSON.stringify(context.global.data);\n\nreturn msg;","outputs":1,"noerr":0,"x":439.46428244454523,"y":2141.2142763137817,"wires":[["a45c41fa.5c5e5"]]},{"id":"a45c41fa.5c5e5","type":"debug","z":"396465eb.1d8e22","name":"Global変数に保存された値","active":true,"console":"false","complete":"payload","x":675.4642824445452,"y":2140.7142763137817,"wires":[]},{"id":"79fb8120.0b87c","type":"json","z":"396465eb.1d8e22","name":"","x":319.58928244454523,"y":2072.2142763137817,"wires":[["bff12351.e8cac8"]]},{"id":"3350a9c9.c1dafe","type":"cloudant out","z":"396465eb.1d8e22","name":"Cloudantへ保存","cloudant":"","database":"iot_data","service":"IOTテスト-cloudantNoSQLDB","payonly":true,"operation":"insert","x":712.2142824445452,"y":2072.7142763137817,"wires":[]},{"id":"bff12351.e8cac8","type":"function","z":"396465eb.1d8e22","name":"更新情報のみ保存","func":"if( msg.payload.type ==\"channels\" ){\n return msg;\n}else{\n msg.payload = null;\n return null;\n}","outputs":1,"noerr":0,"x":491.71428244454523,"y":2071.7142763137817,"wires":[["3350a9c9.c1dafe","52487252.24dfdc"]]},{"id":"a545b0a9.1ad358","type":"comment","z":"396465eb.1d8e22","name":"さくらIoT Platform から受信","info":"","x":147.57143729073664,"y":2021,"wires":[]},{"id":"df973c4.18d10c","type":"websocket-client","z":"","path":"wss://api.sakura.io/ws/v1/xxxxxxxxxxxxxxx","wholemsg":"false"}]
ドアセンサの接続
arduinoのソースコードで、2,3,4 ピンを使うように設定しています。
それらのピンと、GNDのピンを、それぞれドアセンサを接続します。
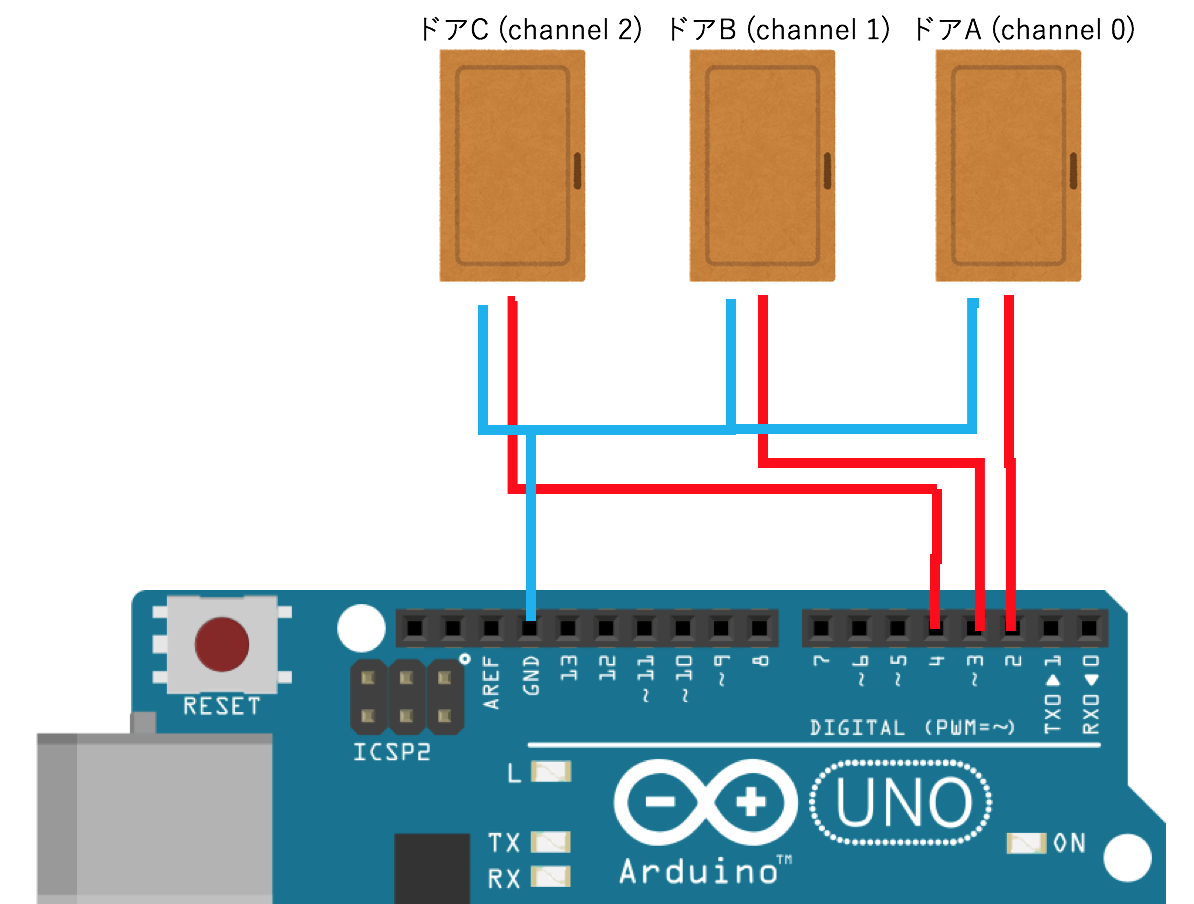
ドアセンサのリード線には、こちらの TJC8コネクタを半田付けしました。
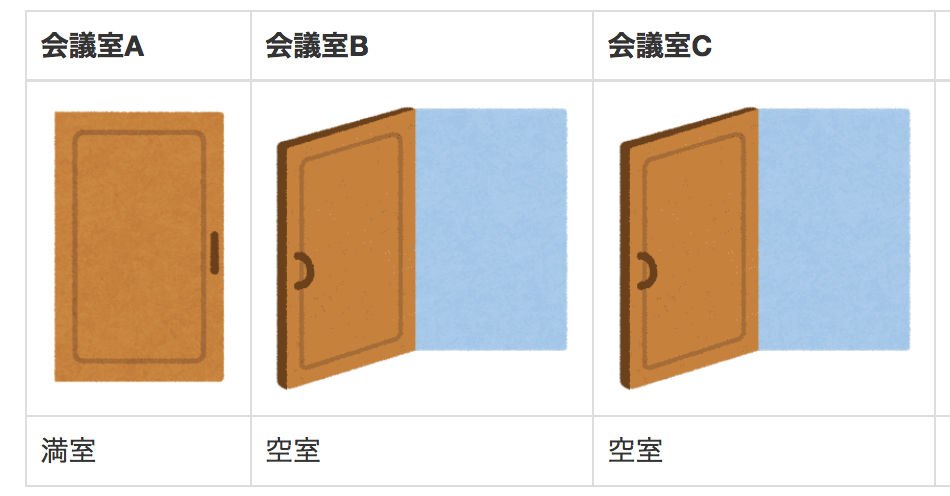
試しに、2ピンをGNDとショートさせると、こんな感じで、空き状況が分かるようになりました。
戻る
1日目 - IBM BluemixにNode-REDを導入し、WebSocketでデータを受信して、Ambientというグラフ表示サービスにデータを連携するところまで
2日目 - 受信したデータをNoSQL DB(Cloudant)にとりあえず保存するのと、Webサイトを作るところまで
3日目 - 保存したデータを読める形にして、利用率を計算するところまで
