完全に遅くなりましたが、iOS Adevent Calendar 2016の20日目の分です。
はじめに
標準のUIだけではどうしても間に合わない、WebっぽいUIをアプリの中に作る方法をまとめてみました。
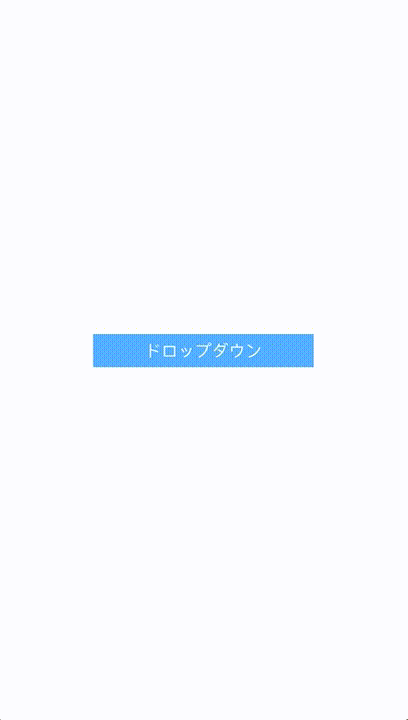
ドロップダウン
UIPresentationControllerでモーダルをカスタマイズするのがよさそう。
まずはUIPresentationControllerを継承して、ボタンを押した時にその下へViewが表示されるようにします。
import UIKit

class DropDownPresentationController: UIPresentationController {
    private lazy var overlayView: UIView = {
        let view = UIView()
        view.backgroundColor = UIColor.black.withAlphaComponent(0.5)
        let rec = UITapGestureRecognizer(target: self, action: #selector(DropDownPresentationController.overlayViewDidTap(sender:)))
        view.addGestureRecognizer(rec)
        return view
    }()

    private let maskLayer: CAShapeLayer = {
        let layer = CAShapeLayer()
        layer.fillColor = UIColor.black.withAlphaComponent(0.5).cgColor
        layer.fillRule = kCAFillRuleEvenOdd
        return layer
    }()

    var targetFrame = CGRect.zero

    override func presentationTransitionWillBegin() {
        super.presentationTransitionWillBegin()

        maskLayer.frame = overlayView.bounds
        overlayView.frame = containerView?.frame ?? .zero
        containerView?.insertSubview(overlayView, at: 0)

        maskLayer.path = {
            let maskPath = UIBezierPath(rect: overlayView.bounds)
            maskPath.append(UIBezierPath(rect: targetFrame))
            return maskPath.cgPath
        }()
        overlayView.layer.mask = maskLayer

        overlayView.alpha = 0
        presentedViewController.transitionCoordinator?.animate(alongsideTransition: { [weak self] (context) in
            self?.overlayView.alpha = 0.5
        }, completion: {(_) in })
    }

    override func dismissalTransitionWillBegin() {
        super.dismissalTransitionWillBegin()

        presentedViewController.transitionCoordinator?.animate(alongsideTransition: { [weak self] (context) in
            self?.overlayView.alpha = 0
        }, completion: { [weak self] (context) in
            self?.overlayView.removeFromSuperview()
        })
    }

    override func dismissalTransitionDidEnd(_ completed: Bool) {
        super.dismissalTransitionDidEnd(completed)
    }

    override func size(forChildContentContainer container: UIContentContainer, withParentContainerSize parentSize: CGSize) -> CGSize {
        return CGSize(width: targetFrame.width, height: 200)
    }

    override var frameOfPresentedViewInContainerView: CGRect {
        let containerSize = size(forChildContentContainer: presentedViewController, withParentContainerSize: containerView?.bounds.size ?? .zero)
        return CGRect(origin: CGPoint(x: targetFrame.minX, y: targetFrame.maxY), size: containerSize)
    }

    override func containerViewWillLayoutSubviews() {
        super.containerViewWillLayoutSubviews()

        overlayView.frame = containerView?.frame ?? .zero
    }

    func overlayViewDidTap(sender: UITapGestureRecognizer) {
        presentedViewController.dismiss(animated: true, completion: nil)
    }
}
さらに、上から下にViewが降りてくるようなカスタムトランジションを作成します。
import UIKit

class DropDownAnimator: NSObject, UIViewControllerAnimatedTransitioning {
    enum Direction {
        case present
        case dismiss
    }

    let direction: Direction

    init(direction: Direction) {
        self.direction = direction
    }

    func transitionDuration(using transitionContext: UIViewControllerContextTransitioning?) -> TimeInterval {
        return 0.5
    }

    func animateTransition(using transitionContext: UIViewControllerContextTransitioning) {
        switch direction {
        case .present:
            present(using: transitionContext)
        case .dismiss:
            dismiss(using: transitionContext)
        }
    }

    func present(using transitionContext: UIViewControllerContextTransitioning) {
        guard let toVC = transitionContext.viewController(forKey: .to) else {
            return
        }

        let finalFrame = transitionContext.finalFrame(for: toVC)
        toVC.view.frame = finalFrame
        let containerView = transitionContext.containerView
        containerView.addSubview(toVC.view)

        toVC.view.frame.size.height = 0
        UIView.animate(withDuration: transitionDuration(using: transitionContext), delay: 0, usingSpringWithDamping: 1, initialSpringVelocity: 0, options: .curveEaseInOut, animations: {
            toVC.view.frame.size.height = finalFrame.height
        }, completion: { _ in
            transitionContext.completeTransition(!transitionContext.transitionWasCancelled)
        })
    }

    func dismiss(using transitionContext: UIViewControllerContextTransitioning) {
        guard let fromVC = transitionContext.viewController(forKey: .from) else {
            return
        }

        UIView.animate(withDuration: transitionDuration(using: transitionContext), delay: 0, usingSpringWithDamping: 1, initialSpringVelocity: 0, options: .curveEaseInOut, animations: {
            fromVC.view.frame.size.height = 0
        }, completion: { _ in
            transitionContext.completeTransition(!transitionContext.transitionWasCancelled)
        })
    }
}
これらのオブジェクトを呼び出してやれば、それっぽいのができます。
class ViewController: UIViewController, UIViewControllerTransitioningDelegate {

    @IBOutlet weak var dropdownButton: UIButton!

    override func viewDidLoad() {
        super.viewDidLoad()
    }


    override func didReceiveMemoryWarning() {
        super.didReceiveMemoryWarning()
    }

    @IBAction func dropDownButtonDidTap(_ sender: UIButton) {
        let vc = UITableViewController()
        vc.transitioningDelegate = self
        vc.modalPresentationStyle = .custom
        vc.view.backgroundColor = .white
        present(vc, animated: true, completion: nil)
    }

    // MARK:- UIViewControllerTransitioningDelegate
    func presentationController(forPresented presented: UIViewController, presenting: UIViewController?, source: UIViewController) -> UIPresentationController? {
        let controller = DropDownPresentationController(presentedViewController: presented, presenting: presenting)
        controller.targetFrame = dropdownButton.frame
        return controller
    }

    func animationController(forPresented presented: UIViewController, presenting: UIViewController, source: UIViewController) -> UIViewControllerAnimatedTransitioning? {
        return DropDownAnimator(direction: .present)
    }

    func animationController(forDismissed dismissed: UIViewController) -> UIViewControllerAnimatedTransitioning? {
        return DropDownAnimator(direction: .dismiss)
    }
}
こんなUIになります。
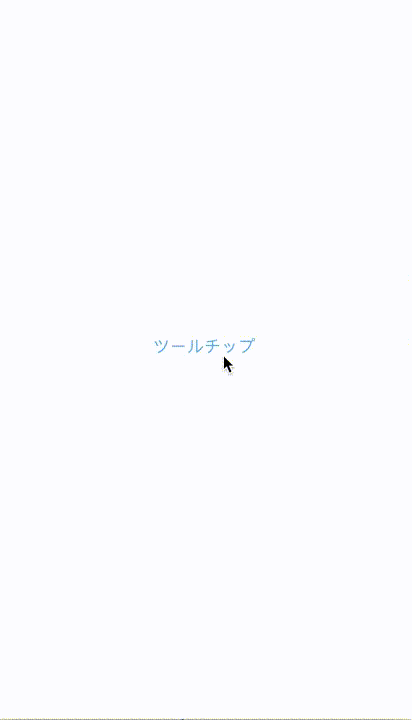
ツールチップ
標準の仕組みとして、UIViewControllerのpresentationStyleに.Popoverというのが付いている。iOS8以降であればiPhoneでも使えます。
もしカスタマイズされたポップオーバーを作りたければ、ドロップダウンと同じくUIPresentationControllerがよさそう。
まずはUIPresentationControllerを継承して、ボタンを押した時にその下へViewが表示されるようにします。
個々の部分でのドロップダウンとの違いは、presentedViewに対して、CGPathで吹き出しを描いて、maskLayerとして設定しています。
import UIKit

class TooltopPresentationController: UIPresentationController {
    var presentedViewFrame = CGRect.zero
    var pointerSize = CGSize(width: 10, height: 10)
    var cornerRadius: CGFloat = 10

    private lazy var overlayView: UIView = {
        let view = UIView()
        view.backgroundColor = UIColor.clear
        let rec = UITapGestureRecognizer(target: self, action: #selector(DropDownPresentationController.overlayViewDidTap(sender:)))
        view.addGestureRecognizer(rec)
        return view
    }()

    private var balloonMaskLayer: CALayer {
        let frame = frameOfPresentedViewInContainerView
        let bounds = frame.offsetBy(dx: -frame.minX, dy: -frame.minY)

        let balloon = CAShapeLayer()
        balloon.frame = bounds
        balloon.path = makeBallonPath(bounds: bounds, pointerSize: pointerSize, cornerRadius: cornerRadius)
        return balloon
    }

    override func presentationTransitionWillBegin() {
        super.presentationTransitionWillBegin()

        overlayView.frame = containerView?.frame ?? .zero
        containerView?.insertSubview(overlayView, at: 0)

        presentedView?.layer.mask = balloonMaskLayer
    }

    override func dismissalTransitionWillBegin() {
        super.dismissalTransitionWillBegin()
    }

    override func dismissalTransitionDidEnd(_ completed: Bool) {
        super.dismissalTransitionDidEnd(completed)
    }

    override func size(forChildContentContainer container: UIContentContainer, withParentContainerSize parentSize: CGSize) -> CGSize {
        return CGSize(width: presentedViewFrame.width, height: presentedViewFrame.height)
    }

    override var frameOfPresentedViewInContainerView: CGRect {
        let containerSize = size(forChildContentContainer: presentedViewController, withParentContainerSize: containerView?.bounds.size ?? .zero)
        return CGRect(origin: CGPoint(x: presentedViewFrame.minX, y: presentedViewFrame.minY), size: containerSize)
    }

    override func containerViewWillLayoutSubviews() {
        super.containerViewWillLayoutSubviews()

        overlayView.frame = containerView?.frame ?? .zero
    }

    func overlayViewDidTap(sender: UITapGestureRecognizer) {
        presentedViewController.dismiss(animated: true, completion: nil)
    }

    private func makeBallonPath(bounds: CGRect, pointerSize: CGSize, cornerRadius: CGFloat) -> CGPath {
        let path = CGMutablePath()
        path.move(
            to: CGPoint(x: bounds.size.width/2, y: bounds.maxY)
        )
        path.addLine(
            to: CGPoint(x: bounds.size.width/2 - pointerSize.width, y: bounds.maxY - pointerSize.height)
        )
        path.addArc(
            tangent1End: CGPoint(x: bounds.origin.x, y: bounds.maxY - pointerSize.height),
            tangent2End: CGPoint(x: bounds.origin.x, y: bounds.maxY - pointerSize.height - cornerRadius),
            radius: cornerRadius
        )
        path.addArc(
            tangent1End: CGPoint(x: bounds.minX, y: bounds.minY),
            tangent2End: CGPoint(x: bounds.minX + cornerRadius, y: bounds.minY),
            radius: cornerRadius
        )
        path.addArc(
            tangent1End: CGPoint(x: bounds.maxX, y: bounds.minY),
            tangent2End: CGPoint(x: bounds.maxX, y: bounds.minY + cornerRadius),
            radius: cornerRadius
        )
        path.addArc(
            tangent1End: CGPoint(x: bounds.maxX, y: bounds.maxY - pointerSize.height),
            tangent2End: CGPoint(x: bounds.maxX - cornerRadius, y: bounds.maxY - pointerSize.height),
            radius: cornerRadius
        )
        path.addLine(
            to: CGPoint(x: bounds.size.width/2 + pointerSize.width, y: bounds.maxY - pointerSize.height)
        )
        path.closeSubpath()
        return path
    }
}
そしてツールチップをpresent(_:animated:completion:)で表示させます。表示方法をcrossDisolveにして。先程作成したTooltopPresentationControllerのオブジェクトを返してやれば大丈夫です。
class ViewController: UIViewController, UIViewControllerTransitioningDelegate {

    @IBOutlet weak var tooltopButton: UIButton!

    override func viewDidLoad() {
        super.viewDidLoad()
    }

    override func didReceiveMemoryWarning() {
        super.didReceiveMemoryWarning()
    }

    @IBAction func tooptipButtonDidTap(_ sender: UIButton) {
        let vc = UIViewController()
        vc.view.backgroundColor = .black

        vc.transitioningDelegate = self
        vc.modalPresentationStyle = .custom
        vc.modalTransitionStyle = .crossDissolve
        present(vc, animated: true, completion: nil)
    }

    func presentationController(forPresented presented: UIViewController, presenting: UIViewController?, source: UIViewController) -> UIPresentationController? {
        let controller = TooltopPresentationController(presentedViewController: presented, presenting: presenting)
        let additionalHeight: CGFloat = -10
        controller.presentedViewFrame = dropdownButton.frame
            .insetBy(dx: 0, dy: additionalHeight)
            .offsetBy(dx: 0, dy: -dropdownButton.frame.height + additionalHeight)
        return controller
    }
}
するとこんな感じで表示できます。
ツールチップの表示位置に関してとりあえずごにょごにょやっていますが、汎用的な仕組みを作る場合はもうちょい工夫が必要でしょう。
カルーセル
これはUIScrollViewをそのまま使えばできますね。Autolayoutのみで作る方法を以下の記事で書きました。
Auto Layoutのみを使ったページングUIの実装パターン
アコーディオン
UITableViewのセクションへセルを追加すればそれっぽくなります。
コードはあとで
タブ
横スクロールのCollectionViewとUIPageViewControllerを組み合わせるのが一番楽な気がします。これに関しては以下の記事へまとめました。
UICollectionViewControllerとUIPageViewControllerでSmartNewsっぽいあのUIをお手軽に実現する
ドロワー
発祥はfacebookアプリだったと思うのでどちらかと言うとアプリのUIですね。最近のiOSアプリではGoogle製のものを除いたらほぼ絶滅危惧種状態でWebページのほうがよく見る気がするので扱ってみました。こいつもUIPresentationControllerを使うのが良さそう。
これまでと同じようにUIPresentationControllerを継承したクラスを作る。ただし追加機能として、ドロワー表示状態で右にスワイプした時にドロワーを閉じるインタラクティブトランジションも追加したいため、PanGestureに対するDelegateを追加しました。
import UIKit

protocol DrawerPresentationControllerDelegate: class {
    func presentationController(controller: DrawerPresentationController, containerViewDidPan sender: UIPanGestureRecognizer)
}

class DrawerPresentationController: UIPresentationController {
    private lazy var overlayView: UIView = {
        let view = UIView()
        view.backgroundColor = UIColor.black.withAlphaComponent(0.5)
        let tapRec = UITapGestureRecognizer(target: self, action: #selector(DropDownPresentationController.overlayViewDidTap(sender:)))
        view.addGestureRecognizer(tapRec)
        return view
    }()
    weak var gestureDelegate: DrawerPresentationControllerDelegate?

    override func presentationTransitionWillBegin() {
        super.presentationTransitionWillBegin()

        overlayView.frame = containerView?.frame ?? .zero
        containerView?.insertSubview(overlayView, at: 0)

        let panGesture = UIPanGestureRecognizer(target: self, action: #selector(DrawerPresentationController.containerViewDidPan(sender:)))
        containerView?.addGestureRecognizer(panGesture)

        overlayView.alpha = 0
        presentedViewController.transitionCoordinator?.animate(alongsideTransition: { [weak self] (context) in
            self?.overlayView.alpha = 0.5
            }, completion: { (_) in
        })
    }

    override func dismissalTransitionWillBegin() {
        super.dismissalTransitionWillBegin()

        presentedViewController.transitionCoordinator?.animate(alongsideTransition: { [weak self] (context) in
            self?.overlayView.alpha = 0
            }, completion: { (_) in
        })
    }

    override func dismissalTransitionDidEnd(_ completed: Bool) {
        super.dismissalTransitionDidEnd(completed)
    }


    override func size(forChildContentContainer container: UIContentContainer, withParentContainerSize parentSize: CGSize) -> CGSize {
        return CGSize(width: parentSize.width / 2, height: parentSize.height)
    }

    override var frameOfPresentedViewInContainerView: CGRect {
        let containerViewBound = containerView?.bounds ?? .zero
        let containerSize = size(forChildContentContainer: presentedViewController, withParentContainerSize: containerViewBound.size)
        let origin = CGPoint(x: containerViewBound.maxX - containerSize.width, y: containerViewBound.minY)
        return CGRect(origin: origin, size: containerSize)
    }

    override func containerViewWillLayoutSubviews() {
        super.containerViewWillLayoutSubviews()

        overlayView.frame = containerView?.frame ?? .zero
    }

    func overlayViewDidTap(sender: UITapGestureRecognizer) {
        presentedViewController.dismiss(animated: true, completion: nil)
    }

    func containerViewDidPan(sender: UIPanGestureRecognizer) {
        gestureDelegate?.presentationController(controller: self, containerViewDidPan: sender)
    }

}
続いて、またしても同じようにアニメーションのクラスを作成します。ここでは横から出し入れされるようにしたいため、そのようにアニメーションを記述します。注意点としては、インタラクティブトランジションで利用するアニメーションは指の動きに対して線形的であるようにします。
import UIKit

class DrawerAnimator: NSObject, UIViewControllerAnimatedTransitioning {
    enum Direction {
        case present
        case dismiss
    }

    let direction: Direction

    init(direction: Direction) {
        self.direction = direction
    }

    func transitionDuration(using transitionContext: UIViewControllerContextTransitioning?) -> TimeInterval {
        return 0.4
    }

    func animateTransition(using transitionContext: UIViewControllerContextTransitioning) {
        switch direction {
        case .present:
            present(using: transitionContext)
        case .dismiss:
            dismiss(using: transitionContext)
        }
    }

    func present(using transitionContext: UIViewControllerContextTransitioning) {
        guard let toVC = transitionContext.viewController(forKey: .to) else {
            return
        }

        let finalFrame = transitionContext.finalFrame(for: toVC)
        toVC.view.frame = finalFrame
        let containerView = transitionContext.containerView
        containerView.addSubview(toVC.view)

        toVC.view.frame.origin.x = containerView.bounds.maxX
        UIView.animate(withDuration: transitionDuration(using: transitionContext), delay: 0, usingSpringWithDamping: 1, initialSpringVelocity: 0, options: .curveEaseInOut, animations: {
            toVC.view.frame.origin.x = finalFrame.minX
        }, completion: { _ in
            transitionContext.completeTransition(!transitionContext.transitionWasCancelled)
        })
    }

    func dismiss(using transitionContext: UIViewControllerContextTransitioning) {
        guard let fromVC = transitionContext.viewController(forKey: .from) else {
            return
        }

        let containerView = transitionContext.containerView

        if transitionContext.isInteractive {
            UIView.animate(withDuration: transitionDuration(using: transitionContext), animations: {
                fromVC.view.frame.origin.x = containerView.bounds.maxX
            }, completion: { _ in
                transitionContext.completeTransition(!transitionContext.transitionWasCancelled)
            })
        } else {
            UIView.animate(withDuration: transitionDuration(using: transitionContext), delay: 0, usingSpringWithDamping: 1, initialSpringVelocity: 0, options: .curveLinear, animations: {
                fromVC.view.frame.origin.x = containerView.bounds.maxX
            }, completion: { _ in
                transitionContext.completeTransition(!transitionContext.transitionWasCancelled)
            })
        }


    }
}
そんでもって、ドロワーをpresent(_:animated:completion:)で表示させます。DrawerPresentationControllerのデリゲートとして作成した、DrawerPresentationControllerDelegateを実装します。インタラクティブトランジションを行いたいため、UIPercentDrivenInteractiveTransitionのオブジェクトをそこでアップデートしていきます。
import UIKit

class ViewController: UIViewController, UIViewControllerTransitioningDelegate, DrawerPresentationControllerDelegate {

    @IBOutlet weak var drawerButton: UIButton!

    var interactiveTransition: UIPercentDrivenInteractiveTransition?

    override func viewDidLoad() {
        super.viewDidLoad()
    }


    override func didReceiveMemoryWarning() {
        super.didReceiveMemoryWarning()
    }

    @IBAction func drawerButtonDidTap(_ sender: UIButton) {
        let vc = UITableViewController()
        vc.transitioningDelegate = self
        vc.modalPresentationStyle = .custom
        vc.view.backgroundColor = .white
        present(vc, animated: true, completion: nil)
    }

    func presentationController(forPresented presented: UIViewController, presenting: UIViewController?, source: UIViewController) -> UIPresentationController? {
        let controller = DrawerPresentationController(presentedViewController: presented, presenting: presenting)
        controller.gestureDelegate = self
        return controller
    }

    func animationController(forPresented presented: UIViewController, presenting: UIViewController, source: UIViewController) -> UIViewControllerAnimatedTransitioning? {
        return DrawerAnimator(direction: .present)
    }

    func animationController(forDismissed dismissed: UIViewController) -> UIViewControllerAnimatedTransitioning? {
        return DrawerAnimator(direction: .dismiss)
    }

    func interactionControllerForDismissal(using animator: UIViewControllerAnimatedTransitioning) -> UIViewControllerInteractiveTransitioning? {
        return interactiveTransition
    }

    func presentationController(vc: DrawerPresentationController, containerViewDidPan sender: UIPanGestureRecognizer) {
        let translation = sender.translation(in: sender.view)
        let prgress: CGFloat = vc.presentedView.flatMap { translation.x / $0.frame.width } ?? 0
        switch sender.state {
        case .began:
            interactiveTransition = UIPercentDrivenInteractiveTransition()
            dismiss(animated: true, completion: nil)
        case .cancelled:
            interactiveTransition?.cancel()
        case .changed:
            interactiveTransition?.update(prgress)
        case .ended:
            sender.velocity(in: sender.view).x > 0 ? interactiveTransition?.finish() : interactiveTransition?.cancel()
            interactiveTransition = nil
        case .failed:
            interactiveTransition?.cancel()
            interactiveTransition = nil
        case .possible:
            break
        }
    }
}
この結果以下のようなUIになります。
(おまけ)ピッカー
アプリ内のUIコンポーネントですが、mobile safariでドロップダウンの代わりに使われるのがピッカーです。これの組み込み方は様々ですが、mobile safariのようにキーボード上へ出したければ昔書いたこちらの記事のようにすればできます。
結論
(できればアプリはアプリらしく)