Thymeleaf とは
- 読み方は「タイムリーフ」
- テンプレートエンジンの1つ
- Spring Boot で使用が推奨されている
- 純粋な HTML としてテンプレートを記述することができる
動作環境
Spring Boot 上で Spring MVC のビューテンプレートエンジンとして動かすことを前提で調べる。
Hello World
buildscript {
    repositories {
        mavenCentral()
    }
    dependencies {
        classpath 'org.springframework.boot:spring-boot-gradle-plugin:1.5.6.RELEASE'
    }
}

apply plugin: 'java'
apply plugin: 'org.springframework.boot'

sourceCompatibility = '1.8'
targetCompatibility = '1.8'

repositories {
    mavenCentral()
}

dependencies {
    compile 'org.springframework.boot:spring-boot-devtools'
    compile 'org.springframework.boot:spring-boot-starter-web'
    compile 'org.springframework.boot:spring-boot-starter-thymeleaf'
}

ext['thymeleaf.version'] = '3.0.7.RELEASE'
ext['thymeleaf-layout-dialect.version'] = '2.2.2'

jar.baseName = 'thymeleaf'
-
spring-boot-devtoolsは、コード変更をすぐに反映できるようにするツール?で、 Thymeleaf の利用に直接は関係ないが、便利なので入れている - 2017年8月現在、 Spring Boot で Thymeleaf を有効に(依存関係に
spring-boot-starter-thymeleafを追加)すると ver 2.x 系が採用される - しかし、 Thymeleaf は現在 ver 3.x 系になっている
- Spring Boot で利用する Thymeleaf を 3.x にするには
'thymeleaf.version'と'thymeleaf-layout-dialect.version'を拡張プロパティ(ext)に追加して指定する - バージョン番号は、
'thymeleaf.version'はorg.thymeleaf:thymeleaf-spring4のバージョンを -
'thymeleaf-layout-dialect.version'はnz.net.ultraq.thymeleaf:thymeleaf-layout-dialectのバージョンをそれぞれ指定する
|-build.gradle
`-src/main/
  |-java/sample/thymeleaf/
  |  |-Main.java
  |  `-web/
  |    `-HelloController.java
  |
  `-resources/
    |-application.properties
    `templates/
       `-hello.html
spring.thymeleaf.mode=HTML
- デフォルトだと HTML5 モードで動作する
- Thymeleaf の ver 3.x からは HTML モードの利用が推奨されるため、 HTML5 モードだと警告メッセージがコンソールに出力される
- この設定を入れておけば、 HTML モードで動作するので警告が出なくなる
package sample;

import org.springframework.boot.SpringApplication;
import org.springframework.boot.autoconfigure.SpringBootApplication;

@SpringBootApplication
public class Main {

    public static void main(String[] args) {
        SpringApplication.run(Main.class, args);
    }
}
package sample.thymeleaf.web;
import org.springframework.stereotype.Controller;
import org.springframework.ui.Model;
import org.springframework.web.bind.annotation.GetMapping;
@Controller
public class HelloController {
@GetMapping("/hello")
public String hello(Model model) {
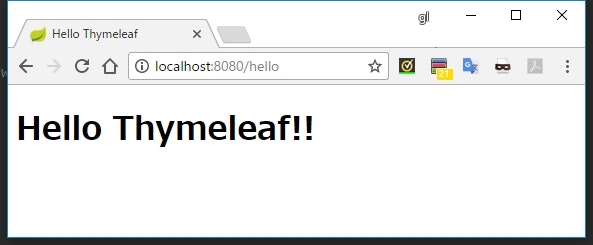
model.addAttribute("message", "Hello Thymeleaf!!");
return "hello";
}
}
- Spring Boot のデフォルト設定だと、クラスパス以下の
/resources/templates/【Controller の戻り値】.htmlでテンプレートファイルが探索される - 上の実装の場合は
src/main/resources/templates/hello.htmlがテンプレートファイルとして利用されることになる
<!doctype html>
<html xmlns:th="http://www.thymeleaf.org">
    <head>
        <meta charset="UTF-8" />
        <title>Hello Thymeleaf</title>
    </head>
    <body>
        <h1 th:text="${message}"></h1>
    </body>
</html>
- テンプレートファイルは純粋な HTML として記述できる
- Thymeleaf 用の属性は
xmlns:th="http://www.thymeleaf.org"で名前空間を宣言して利用できる
実行結果
テキストの埋め込み
package sample.thymeleaf.web;

import org.springframework.stereotype.Controller;
import org.springframework.web.bind.annotation.GetMapping;

@Controller
public class HelloController {

    @GetMapping("/hello")
    public String hello() {
        return "hello";
    }
}
<!doctype html>
<html xmlns:th="http://www.thymeleaf.org">
<head>
<meta charset="UTF-8" />
<title>Hello Thymeleaf</title>
</head>
<body>
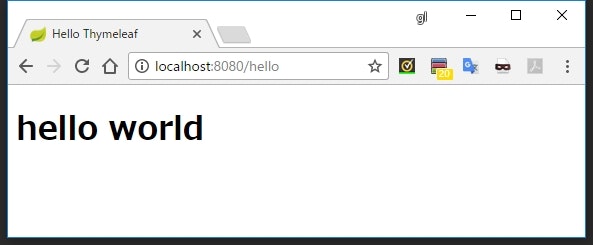
<h1 th:text="'hello world'"></h1>
</body>
</html>
実行結果
説明
<h1 th:text="'hello world'"></h1>
-
th:text="【出力する値】"とすることで、そのタグのテキスト要素を出力できる -
【出力する値】には Thymeleaf 独自の式言語を使用できる- 基本的に他の式言語(SpEL や EL式 とか)と同じ感じ
インライン処理
<!doctype html>
<html>
<head>
<meta charset="UTF-8" />
<title>Hello Thymeleaf</title>
</head>
<body>
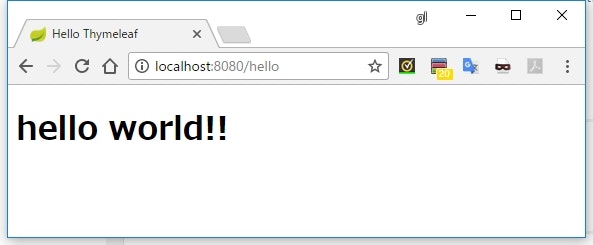
<h1>[['hello world!!']]</h1>
</body>
</html>
実行結果
説明
-
[[【出力する値】]]で、th:textを使わずに直接テンプレート上に値を出力することができる
変数の出力
package sample.thymeleaf.web;
import org.springframework.stereotype.Controller;
import org.springframework.ui.Model;
import org.springframework.web.bind.annotation.GetMapping;
@Controller
public class HelloController {
@GetMapping("/hello")
public String hello(Model model) {
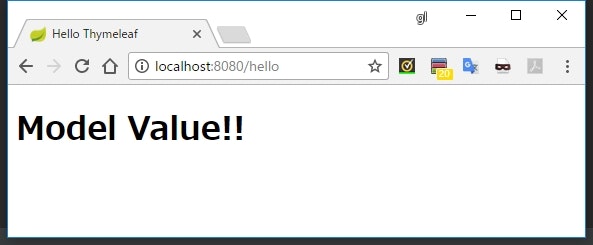
model.addAttribute("modelValue", "Model Value!!");
return "hello";
}
}
<!doctype html>
<html>
    <head>
        <meta charset="UTF-8" />
        <title>Hello Thymeleaf</title>
    </head>
    <body>
        <h1>[[${modelValue}]]</h1>
    </body>
</html>
実行結果
説明
<h1>[[${modelValue}]]</h1>
- 実行時のコンテキストに保存されている値をテンプレートに埋め込むには
${【変数名】}という式を利用する
    public String hello(Model model) {
        model.addAttribute("modelValue", "Model Value!!");
- コンテキストへの値の保存は、 Spring MVC のコントローラ引数で
Modelクラスを受け取り、addAttribute()メソッドで行う
式の構文
リテラル
<!-- 文字列 -->
<span th:text="'some text'"></span>
<!-- 数値 -->
<span th:text="123"></span>
<!-- 真偽値 -->
<span th:text="true"></span>
<!-- null -->
<span th:text="null"></span>
文字列連結
<span th:text="'some text' + '!!'"></span>
-
+で文字列の連結が可能
リテラル置換
<span th:text="|Hello ${message}|"></span>
-
|で括った文字列リテラルの中で${}を使えば、文字列リテラルの中に変数を埋め込むことができる
算術演算子
<span th:text="(30 * 20 + 10 / 5 - 1) % 3"></span>
-
*,/,+, '-', '%' が使用できる - 意味は Java のと同じ感じ
論理演算子
<span th:text="true
                and false
                or true
                and not true
                or !false"></span>
-
andまたはorが使用できる -
notまたは!で否定できる
比較と等価
<span th:text="1 < 10"></span>
<span th:text="1 > 10"></span>
<span th:text="1 <= 10"></span>
<span th:text="1 >= 10"></span>
<span th:text="1 == 10"></span>
<span th:text="1 != 10"></span>
-
<,>,<=,>=が使用可能 - それぞれ Java の演算子と同じ
-
==,!=はequals()を使った比較に置き換えられる(文字列の比較も可)
条件演算子
1: <span th:text="true ? 'a'"></span><br>
2: <span th:text="false ? 'b'"></span><br>
3: <span th:text="true  ? 'c': 'C'"></span><br>
4: <span th:text="true ?: 'd'"></span><br>
5: <span th:text="false ?: 'e'"></span><br>
6: <span th:text="null ?: 'f'"></span><br>
出力結果

【条件】 ? 【値】
- 【条件】 が
trueの場合に【値】が評価される -
falseの場合は空になる
【条件】 ? 【値1】 : 【値2】
- 【条件】が
trueの場合は【値1】が、falseの場合は【値2】が評価される
【オブジェクト】 ?: 【値】
- 【オブジェクト】が
nullの場合に【値】が評価される -
null以外の場合は【オブジェクト】がそのまま評価される
SpEL 式
${...} の中は SpEL (Spring Expression Language)という式言語によって評価される。
この SpEL を使うと、オブジェクトに簡潔にアクセスできる。
標準の式言語は OGNL
素の Thymeleaf のリファレンスを見ると、式言語は OGNL が使われていると説明が書いてある。
しかし、 Spring と統合した場合は SpEL が代わりに使用されるようになる。
2 The SpringStandard Dialect
Use Spring Expression Language (Spring EL or SpEL) as a variable expression language, instead of OGNL.
Consequently, all ${...} and *{...} expressions will be evaluated by Spring’s Expression Language engine.(翻訳)
Spring Expression Language (Spring EL または SpEL) を変数の式言語として OGNL の代わりに使用します。
従って、全ての${...}と*{...}の式は Spring の式言語エンジンによって評価されます。
フィールド・プロパティ・メソッドの参照
package sample.thymeleaf.web;

import org.springframework.stereotype.Controller;
import org.springframework.ui.Model;
import org.springframework.web.bind.annotation.GetMapping;

@Controller
public class HelloController {

    @GetMapping("/hello")
    public String hello(Model model) {
        model.addAttribute("hoge", new Hoge());
        return "hello";
    }

    public static class Hoge {
        public int publicField = 1;

        public int publicMethod() {return 2;}

        public int getPublicValue() {return 3;}
    }
}
<!doctype html>
<html xmlns:th="http://www.thymeleaf.org">
    <head>
        <meta charset="UTF-8" />
        <title>Hello Thymeleaf</title>
    </head>
    <body>
        <div th:text="${hoge.publicField}"></div>
        <div th:text="${hoge['publicField']}"></div>
        <div th:text="${hoge.publicMethod()}"></div>
        <div th:text="${hoge.publicValue}"></div>
        <div th:text="${hoge['publicValue']}"></div>
    </body>
</html>
実行結果
説明
-
publicなフィールドやメソッドなら直接参照が可能 -
getXxx()というメソッドなら、プロパティとしてobjectName.xxxでアクセスできる(メソッドがpublicである必要がある) - フィールドとプロパティなら
objectName['名前']のように角括弧で参照することも可能
Map の参照
package sample.thymeleaf.web;

import org.springframework.stereotype.Controller;
import org.springframework.ui.Model;
import org.springframework.web.bind.annotation.GetMapping;

import java.util.HashMap;

@Controller
public class HelloController {

    @GetMapping("/hello")
    public String hello(Model model) {
        HashMap<String, String> map = new HashMap<>();
        map.put("message", "Hello World!!");

        model.addAttribute("map", map);
        return "hello";
    }
}
<!doctype html>
<html xmlns:th="http://www.thymeleaf.org">
    <head>
        <meta charset="UTF-8" />
        <title>Hello Thymeleaf</title>
    </head>
    <body>
        <div th:text="${map.message}"></div>
        <div th:text="${map['message']}"></div>
    </body>
</html>
実行結果
説明
-
Mapの場合、map.キーで値を参照できる - また
map['キー']のように角括弧で参照することもできる
List の参照
package sample.thymeleaf.web;

import org.springframework.stereotype.Controller;
import org.springframework.ui.Model;
import org.springframework.web.bind.annotation.GetMapping;

import java.util.Arrays;

@Controller
public class HelloController {

    @GetMapping("/hello")
    public String hello(Model model) {
        model.addAttribute("list", Arrays.asList(1, 2, 3));
        return "hello";
    }
}
<!doctype html>
<html xmlns:th="http://www.thymeleaf.org">
    <head>
        <meta charset="UTF-8" />
        <title>Hello Thymeleaf</title>
    </head>
    <body>
        <div th:text="${list[0]}"></div>
        <div th:text="${list[1]}"></div>
        <div th:text="${list[2]}"></div>
    </body>
</html>
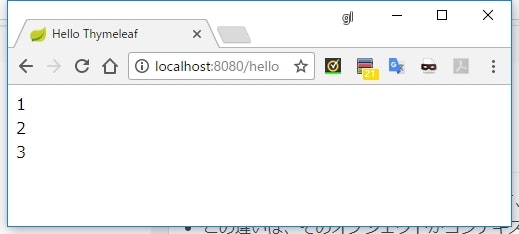
実行結果
説明
-
Listや配列の要素にアクセスするには、list[インデックス]とする
属性に値を設定する
<!doctype html>
<html xmlns:th="http://www.thymeleaf.org">
    <head>
        <meta charset="UTF-8" />
        <title>Hello Thymeleaf</title>
    </head>
    <body>
        <span th:class="'hello' + 'world'">hoge</span>
    </body>
</html>
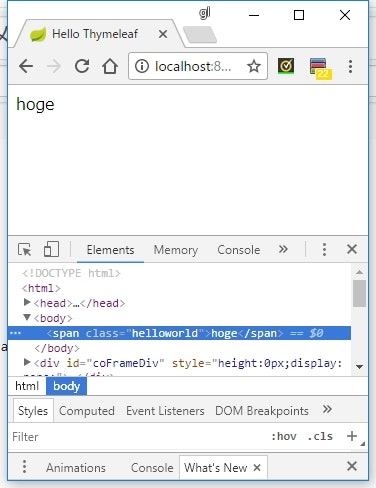
実行結果
説明
-
th:属性名という形で属性を記述することで、式の処理結果を属性にセットすることができる - v3.x から?は任意の属性に対してこの方法が使えるっぽい
リンクURL
server.contextPath=/thymeleaf
- 動作確認のために Spring Boot をコンテキストパスつきで起動するよう設定
<!doctype html>
<html xmlns:th="http://www.thymeleaf.org">
    <head>
        <meta charset="UTF-8" />
        <title>Hello Thymeleaf</title>
    </head>
    <body>
        <ul>
            <li>
                @{foo/bar} = [[@{foo/bar}]]
            </li>
            <li>
                @{/foo/bar} = [[@{/foo/bar}]]
            </li>
            <li>
                @{~/foo/bar} = [[@{~/foo/bar}]]
            </li>
            <li>
                @{http://localhost:8080/foo/bar} = [[@{http://localhost:8080/foo/bar}]]
            </li>
            <li>
                @{//localhost:8080/foo/bar} = [[@{//localhost:8080/foo/bar}]]
            </li>
        </ul>
    </body>
</html>
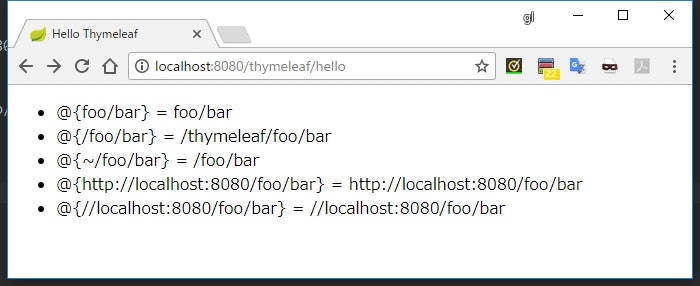
実行結果
説明
-
@{...}という式を使うと、コンテキストパスなどを上手く補完した形式でパスを構築できる
| 種類 | 説明 |
|---|---|
foo/bar |
通常の相対パス |
/foo/bar |
コンテキストパスからの相対パス |
~/foo/bar |
サーバーのルートからの相対パス(/foo が他のコンテキストパスになる) |
http://xxx/xxx |
絶対パス |
//xxx/xxx |
プロトコル相対パス |
通常は <a> タグの href 属性などに指定するので、
<a th:href="@{/foo/bar}">/foo/bar</a>
のように設定することになる。
クエリパラメータを設定する
package sample.thymeleaf.web;

import org.springframework.stereotype.Controller;
import org.springframework.ui.Model;
import org.springframework.web.bind.annotation.GetMapping;

@Controller
public class HelloController {

    @GetMapping("/hello")
    public String hello(Model model) {
        model.addAttribute("paramValue", "PARAM VALUE");
        return "hello";
    }
}
<!doctype html>
<html xmlns:th="http://www.thymeleaf.org">
    <head>
        <meta charset="UTF-8" />
        <title>Hello Thymeleaf</title>
    </head>
    <body>
        [[@{/foo/bar(hoge='HOGE', paramValue=${paramValue})}]]
    </body>
</html>
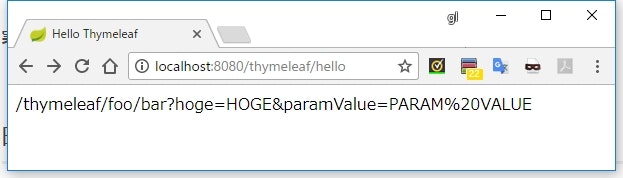
実行結果
説明
- パスにクエリパラメータを設定するには、パスの末尾に丸括弧(
())で括ったキーバリューの組み合わせを記述する - 複数指定する場合は、カンマ区切りで列挙する
- URL エンコーディングは自動的に行われる
パスに変数を埋め込む
<!doctype html>
<html>
    <head>
        <meta charset="UTF-8" />
        <title>Hello Thymeleaf</title>
    </head>
    <body>
        [[@{/foo/{pathValue}/bar(pathValue=123)}]]
    </body>
</html>
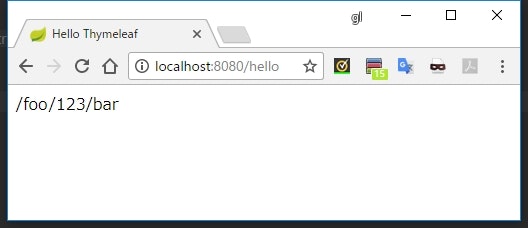
実行結果
説明
- 末尾で
()を使って宣言した変数をパスの中で{}で括った形で利用することができる - この場合、そのパラメータはクエリパラメータにはセットされず、パスの一部としてだけ利用される
暗黙的に参照できるオブジェクト
コントローラの Model でセットした値以外にも、デフォルトでアクセスできるオブジェクトが存在する。
<span th:text="${#httpServletRequest}"></span>
<span th:text="${#httpSession}"></span>
<span th:text="${param}"></span>
<span th:text="${session}"></span>
<span th:text="${application}"></span>
-
#httpServletRequestはHttpServletRequestオブジェクトそのもの -
#httpSessionは、HttpSessionオブジェクトそのものを参照する -
paramはリクエストパラメータを保持したオブジェクト -
sessionはHttpSessionに保存された属性情報 -
applicationはServletContextに保存された属性情報 -
param,session,applicationはMapのように参照することができる-
param['parameterName']など
-
# の有る無しの違い
-
httpServletRequestは#が頭についていて、sessionやparamはついていない - この違いは、そのオブジェクトがコンテキスト上のどこに保存されているかによる
-
#がついていない場合、その値は#varsという暗黙の変数から検索される
オブジェクトの選択
package sample.thymeleaf.web;

import org.springframework.stereotype.Controller;
import org.springframework.ui.Model;
import org.springframework.web.bind.annotation.GetMapping;

@Controller
public class HelloController {

    @GetMapping("/hello")
    public String hello(Model model) {
        model.addAttribute("hoge", new Hoge());
        return "hello";
    }

    public static class Hoge {
        public String name = "hogeee";
        public String value = "HOGEEE";
    }
}
<!doctype html>
<html xmlns:th="http://www.thymeleaf.org">
    <head>
        <meta charset="UTF-8" />
        <title>Hello Thymeleaf</title>
    </head>
    <body>
        <div th:object="${hoge}">
            <div>name = [[*{name}]]</div>
            <div>value = [[*{value}]]</div>
        </div>
    </body>
</html>
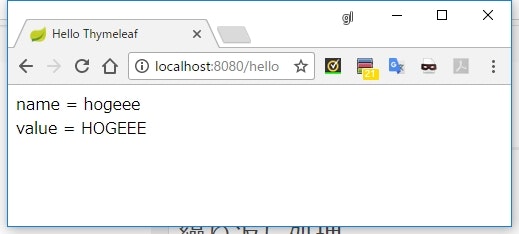
実行結果
説明
        <div th:object="${hoge}">
            <div>name = [[*{name}]]</div>
            <div>value = [[*{value}]]</div>
        </div>
-
th:objectでオブジェクトを指定すると、そのタグの子要素の中では*{}という形式でそのオブジェクトのフィールドやプロパティを直接参照できるようになる
ローカル変数の宣言
<!doctype html>
<html xmlns:th="http://www.thymeleaf.org">
<head>
<meta charset="UTF-8" />
<title>Hello Thymeleaf</title>
</head>
<body>
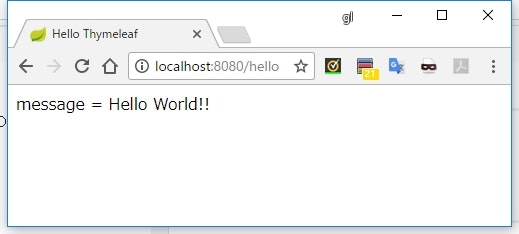
<div th:with="message = 'Hello World!!'">
message = [[${message}]]
</div>
</body>
</html>
実行結果
説明
        <div th:with="message = 'Hello World!!'">
            message = [[${message}]]
        </div>
-
th:withの中で宣言した変数は、そのタグの子要素の中だけで有効な変数になり、${}式の中で参照できるようになる
条件による表示・非表示の切り替え
package sample.thymeleaf.web;
import org.springframework.stereotype.Controller;
import org.springframework.ui.Model;
import org.springframework.web.bind.annotation.GetMapping;
@Controller
public class HelloController {
@GetMapping("/hello")
public String hello(Model model) {
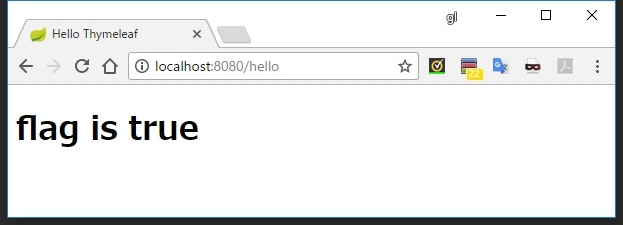
model.addAttribute("flag", true);
return "hello";
}
}
<!doctype html>
<html xmlns:th="http://www.thymeleaf.org">
    <head>
        <meta charset="UTF-8" />
        <title>Hello Thymeleaf</title>
    </head>
    <body>
        <h1 th:if="${flag}">flag is true</h1>
        <h1 th:if="${!flag}">flag is false</h1>
    </body>
</html>
実行結果
説明
-
th:if="【条件】"を使うと、【条件】が真と評価される値のときだけ表示されるようになる
真・偽と評価される値
package sample.thymeleaf.web;

import org.springframework.stereotype.Controller;
import org.springframework.ui.Model;
import org.springframework.web.bind.annotation.GetMapping;

@Controller
public class HelloController {

    @GetMapping("/hello")
    public String hello(Model model) {
        model.addAttribute("booleanTrue", true);
        model.addAttribute("booleanFalse", false);
        model.addAttribute("numericZero", 0);
        model.addAttribute("numericOne", 1);
        model.addAttribute("charZero", '0');
        model.addAttribute("stringEmpty", "");
        model.addAttribute("stringZero", "0");
        model.addAttribute("stringOff", "off");
        model.addAttribute("stringNo", "no");
        model.addAttribute("stringFalse", "false");
        model.addAttribute("anyObject", new Object());
        model.addAttribute("nullValue", null);

        return "hello";
    }
}
<!doctype html>
<html xmlns:th="http://www.thymeleaf.org">
    <head>
        <meta charset="UTF-8" />
        <title>Hello Thymeleaf</title>
    </head>
    <body>
        <ul>
            <li th:if="${booleanTrue}">booleanTrue</li>
            <li th:if="${booleanFalse}">booleanFalse</li>
            <li th:if="${numericZero}">0</li>
            <li th:if="${numericOne}">numericOne</li>
            <li th:if="${charZero}">charZero</li>
            <li th:if="${stringEmpty}">stringEmpty</li>
            <li th:if="${stringZero}">stringZero</li>
            <li th:if="${stringOff}">stringOff</li>
            <li th:if="${stringNo}">stringNo</li>
            <li th:if="${stringFalse}">stringFalse</li>
            <li th:if="${anyObject}">anyObject</li>
            <li th:if="${nullValue}">nullValue</li>
        </ul>
    </body>
</html>
実行結果
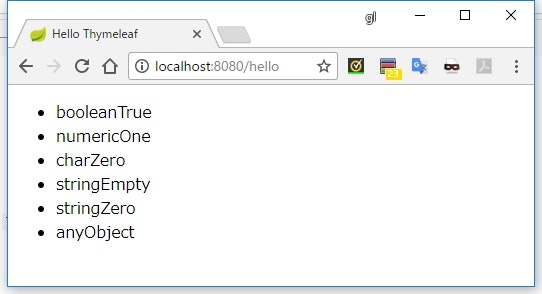
偽と評価される値
-
booleanのfalse - 数値の
0 null- 文字列の
"false","off","no"
真と評価される値
- 「偽と評価される値」以外全て
- 例
-
booleanのtrue - 数位値の
1 - 文字列の
"0" - 空文字
-
nullでない任意のオブジェクト
-
リファレンスを読むと、「文字列の "0" 以外の値は true と評価される」と書かれている。
つまり、「文字列の "0" は false」と評価されるような気がするが、実際に試すと true と評価される。
バグ?
繰り返し処理
package sample.thymeleaf.web;
import org.springframework.stereotype.Controller;
import org.springframework.ui.Model;
import org.springframework.web.bind.annotation.GetMapping;
import java.util.Arrays;
@Controller
public class HelloController {
@GetMapping("/hello")
public String hello(Model model) {
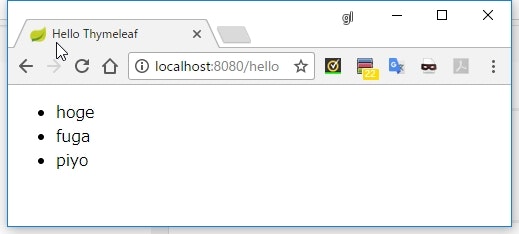
model.addAttribute("list", Arrays.asList("hoge", "fuga", "piyo"));
return "hello";
}
}
<!doctype html>
<html xmlns:th="http://www.thymeleaf.org">
    <head>
        <meta charset="UTF-8" />
        <title>Hello Thymeleaf</title>
    </head>
    <body>
        <ul>
            <li th:each="element : ${list}">[[${element}]]</li>
        </ul>
    </body>
</html>
実行結果
説明
-
th:each="【各要素を格納する変数名】 : ${【繰り返し処理するオブジェクト】}"で、タグを繰り返し出力することができる - 【各要素を格納する変数名】は、繰り返しの出力の中でのみ有効な変数になる
-
Iterableを実装したクラスであれば、th:eachで繰り返し処理することができる
Map の繰り返し
package sample.thymeleaf.web;

import org.springframework.stereotype.Controller;
import org.springframework.ui.Model;
import org.springframework.web.bind.annotation.GetMapping;

import java.util.HashMap;

@Controller
public class HelloController {

    @GetMapping("/hello")
    public String hello(Model model) {
        HashMap<String, String> map = new HashMap<>();
        map.put("hoge", "HOGE");
        map.put("fuga", "FUGA");
        map.put("piyo", "PIYO");

        model.addAttribute("map", map);

        return "hello";
    }
}
<!doctype html>
<html xmlns:th="http://www.thymeleaf.org">
    <head>
        <meta charset="UTF-8" />
        <title>Hello Thymeleaf</title>
    </head>
    <body>
        <ul>
            <li th:each="entry : ${map}">
                key=[[${entry.key}]], value=[[${entry.value}]]
            </li>
        </ul>
    </body>
</html>
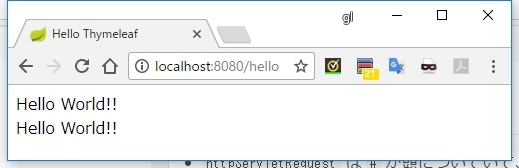
実行結果
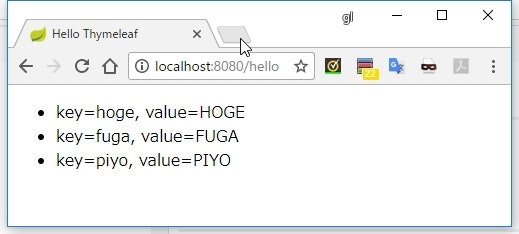
説明
-
Mapを繰り返し処理した場合、Map.Entryが各要素として繰り返し処理される
List, Map 以外を繰り返し処理した場合
<!doctype html>
<html xmlns:th="http://www.thymeleaf.org">
    <head>
        <meta charset="UTF-8" />
        <title>Hello Thymeleaf</title>
    </head>
    <body>
        <ul>
            <li th:each="element : 'text'">[[${element}]]</li>
        </ul>
    </body>
</html>
実行結果
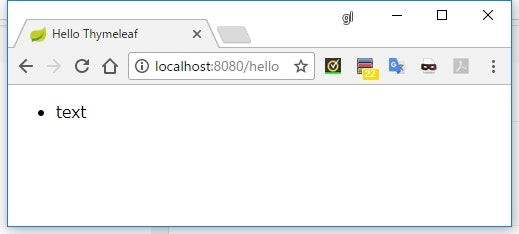
説明
-
Iterableを実装していない、かつMap以外のオブジェクトをth:eachで繰り返し処理した場合、その値を唯一持つListとして扱われる
繰り返しのステータスの参照
package sample.thymeleaf.web;

import org.springframework.stereotype.Controller;
import org.springframework.ui.Model;
import org.springframework.web.bind.annotation.GetMapping;

import java.util.Arrays;

@Controller
public class HelloController {

    @GetMapping("/hello")
    public String hello(Model model) {
        model.addAttribute("list", Arrays.asList("hoge", "fuga", "piyo"));
        return "hello";
    }
}
<!doctype html>
<html xmlns:th="http://www.thymeleaf.org">
    <head>
        <meta charset="UTF-8" />
        <title>Hello Thymeleaf</title>
    </head>
    <body>
        <ul>
            <li th:each="element, status : ${list}">
                index = [[${status.index}]],
                count = [[${status.count}]],
                size = [[${status.size}]],
                current = [[${status.current}]],
                even = [[${status.even}]],
                odd = [[${status.odd}]],
                first = [[${status.first}]],
                last = [[${status.last}]]
            </li>
        </ul>
    </body>
</html>
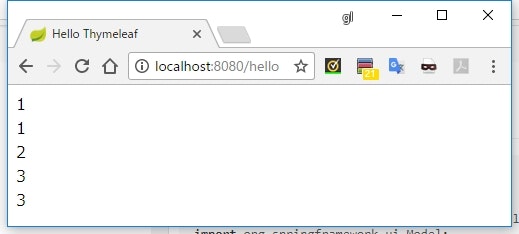
実行結果
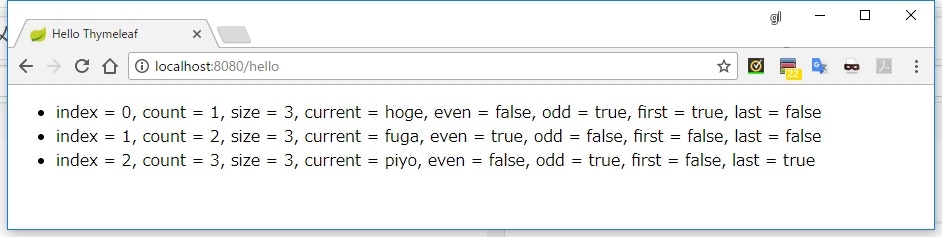
説明
-
th:each="【各要素】, 【ステータス変数】 : 【繰り返す対象】"のように、各要素変数の宣言に続けて, 変数名とすることで、各ループの状態を保持した変数を使えるようになる- ステータス変数の宣言を省略した場合は、
【各要素】Statという名前の変数でステータス変数が準備される -
th:each="element : ${list}"とした場合はelementStatでステータス変数を参照できる
- ステータス変数の宣言を省略した場合は、
- ステータスには、現在のループの状態に関する情報が格納されている
- ステータスに保存されている情報は以下の通り
| 変数名 | 意味 |
|---|---|
index |
現在のループインデックス(0 はじまり) |
count |
現在のループカウント(1 はじまり) |
size |
繰り返し対象オブジェクトのサイズ |
current |
現在の繰り返し要素 |
even |
現在の要素が偶数かどうか(真偽値) |
odd |
現在の要素が奇数かどうか(真偽値) |
first |
現在の要素が先頭かどうか(真偽値) |
last |
現在の要素が末尾かどうか(真偽値) |
th:block
package sample.thymeleaf.web;

import org.springframework.stereotype.Controller;
import org.springframework.ui.Model;
import org.springframework.web.bind.annotation.GetMapping;

import java.util.Arrays;

@Controller
public class HelloController {

    @GetMapping("/hello")
    public String hello(Model model) {
        model.addAttribute("list", Arrays.asList("hoge", "fuga", "piyo"));

        return "hello";
    }
}
<!doctype html>
<html xmlns:th="http://www.thymeleaf.org">
    <head>
        <meta charset="UTF-8" />
        <title>Hello Thymeleaf</title>
    </head>
    <body>
        <th:block th:each="element : ${list}">
            <h2>[[${element}]]</h2>
        </th:block>
    </body>
</html>
実行結果
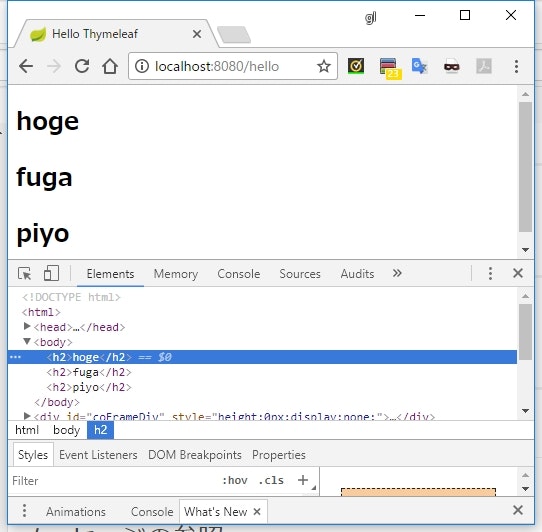
説明
        <th:block th:each="element : ${list}">
            <h2>[[${element}]]</h2>
        </th:block>
-
<th:block>タグは、レンダリング後からは完全に消去される - Thymeleaf の処理(
th:ifとか)は書けるので、処理は書くためだけに<div>タグを増やすといったことが不要になる
フラグメントを埋め込む
他のテンプレートを埋め込む
`-src/main/
  |-java/sample/thymeleaf/
  | `-FragmentController.java
  |
  `-resources/templates/fragment/
    |-fragment.html
    `-embedded.html
package sample.thymeleaf.web;

import org.springframework.stereotype.Controller;
import org.springframework.web.bind.annotation.GetMapping;

@Controller
public class FragmentController {


    @GetMapping("/fragment")
    public String fragment() {
        return "fragment/fragment";
    }
}
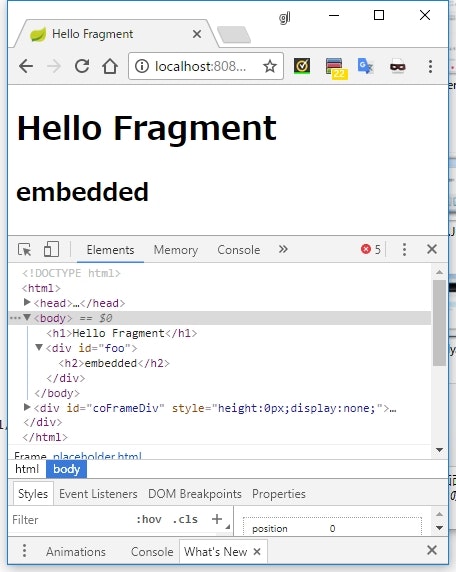
<h2>embedded</h2>
<!doctype html>
<html xmlns:th="http://www.thymeleaf.org">
    <head>
        <meta charset="UTF-8" />
        <title>Hello Fragment</title>
    </head>
    <body>
        <h1>Hello Fragment</h1>
        <div id="foo"
             th:insert="fragment/embedded"></div>
    </body>
</html>
実行結果
説明
`-src/main/
  `-resources/templates/fragment/
    |-fragment.html
    `-embedded.html
        <div id="foo"
             th:insert="fragment/embedded"></div>
- 他のテンプレートを埋め込むには
th:insertを使用する- v2.x の頃は
th:includeがあったが、 v3.x では非推奨となっている
- v2.x の頃は
- 値には、埋め込むテンプレートを指定する
- ここで指定する値は、コントローラクラスの戻り値からテンプレートファイルを解決するときと同じロジックが適用されるので、それに合わせる
-
th:insertの値では式を利用することもできる(th:insert="fragment/${name}")
埋め込むフラグメントを指定する
<!doctype html>
<html xmlns:th="http://www.thymeleaf.org">
<body>
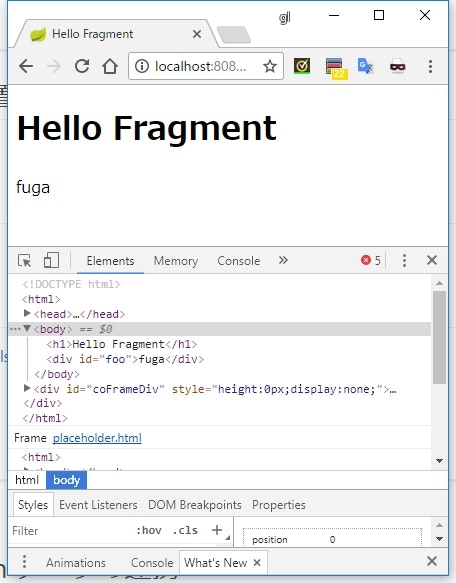
<span th:fragment="hoge">hoge</span>
<span th:fragment="fuga">fuga</span>
</body>
</html>
<!doctype html>
<html xmlns:th="http://www.thymeleaf.org">
    <head>
        <meta charset="UTF-8" />
        <title>Hello Fragment</title>
    </head>
    <body>
        <h1>Hello Fragment</h1>
        <div id="foo"
             th:insert="fragment/embedded :: fuga"></div>
    </body>
</html>
実行結果
説明
        <span th:fragment="hoge">hoge</span>
        <span th:fragment="fuga">fuga</span>
- 埋め込む側に
th:fragment属性でフラグメントの名前を指定する
        <div id="foo"
             th:insert="fragment/embedded :: fuga"></div>
-
th:insertで、【テンプレート名】 :: 【埋め込むフラグメント名】と指定することで、指定したテンプレートの指定したフラグメントだけを埋め込むことができる
th:replace で完全に置き換える
<!doctype html>
<html xmlns:th="http://www.thymeleaf.org">
<body>
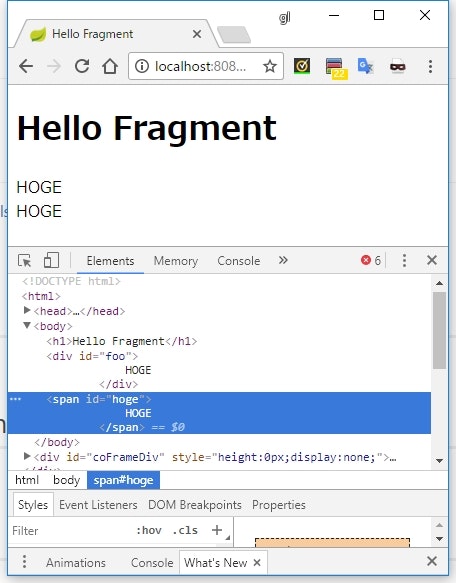
<span id="hoge" th:fragment="hoge">
HOGE
</span>
</body>
</html>
<!doctype html>
<html xmlns:th="http://www.thymeleaf.org">
    <head>
        <meta charset="UTF-8" />
        <title>Hello Fragment</title>
    </head>
    <body>
        <h1>Hello Fragment</h1>
        <div id="foo"
             th:insert="fragment/embedded :: hoge"></div>
        <div id="bar"
             th:replace="fragment/embedded :: hoge"></div>
    </body>
</html>
実行結果
説明
-
th:insertの場合、埋め込み元(fragment.html)側のタグの中に、埋め込み対象(embedded.html)のタグの中身(th:fragmentを付与したタグの子要素)が埋め込まれる -
th:replaceの場合、埋め込み元(fragment.html)側のタグが、埋め込み対象(embedded.html)のタグそのもの(th:fragmentを付与したタグそのもの)で置き換えられる
フラグメントにパラメータを渡す
<!doctype html>
<html xmlns:th="http://www.thymeleaf.org">
<body>
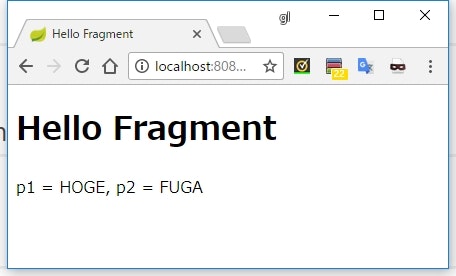
<span th:fragment="hoge(p1, p2)">
p1 = [[${p1}]], p2 = [[${p2}]]
</span>
</body>
</html>
<!doctype html>
<html xmlns:th="http://www.thymeleaf.org">
    <head>
        <meta charset="UTF-8" />
        <title>Hello Fragment</title>
    </head>
    <body>
        <h1>Hello Fragment</h1>
        <div th:insert="fragment/embedded :: hoge('HOGE', 'FUGA')"></div>
    </body>
</html>
実行結果
説明
        <span th:fragment="hoge(p1, p2)">
            p1 = [[${p1}]], p2 = [[${p2}]]
        </span>
- フラグメント名の宣言の後ろで、メソッド引数のような形式でフラグメントが受け取るパラメータを宣言できる
<div th:insert="fragment/embedded :: hoge('HOGE', 'FUGA')"></div>
- 埋め込む側は、フラグメント名の後ろにメソッド呼び出しのように引数を渡すことができる
- 引数は名前指定でも可能で、
hoge(p1='HOGE', p2='FUGA')のようにもできる
Thymeleaf Layout Dialect
フラグメントは個々のページに共通部品を埋め込む形だった。
今度は逆に、共通レイアウト(ヘッダーやフッター)に対して自ページを埋め込む。
この処理自体は標準機能だけでは実現できず、 thymeleaf-layout-dialect という拡張機能を入れる必要がある。
ext['thymeleaf.version'] = '3.0.7.RELEASE'
ext['thymeleaf-layout-dialect.version'] = '2.2.2'
この 'thymeleaf-layout-dialect.version' がソレ。
`-src/main/
  |-java/sample/thymeleaf/web/
  |  `-LayoutController.java
  |
  `-resources/templates/layout/
     |-layout.html
     `-content.html
package sample.thymeleaf.web;

import org.springframework.stereotype.Controller;
import org.springframework.web.bind.annotation.GetMapping;

@Controller
public class LayoutController {

    @GetMapping("/layout")
    public String method() {
        return "layout/content";
    }
}
<!doctype html>
<html xmlns:layout="http://www.ultraq.net.nz/thymeleaf/layout">
    <head>
        <meta charset="UTF-8" />
        <title>Layout File</title>
    </head>
    <body>
        <h1>Common Layout</h1>
        <section layout:fragment="content">
        </section>
    </body>
</html>
<!doctype html>
<html xmlns:layout="http://www.ultraq.net.nz/thymeleaf/layout"
      layout:decorate="~{layout/layout}">
    <body>
        <section layout:fragment="content">
            Content
        </section>
    </body>
</html>
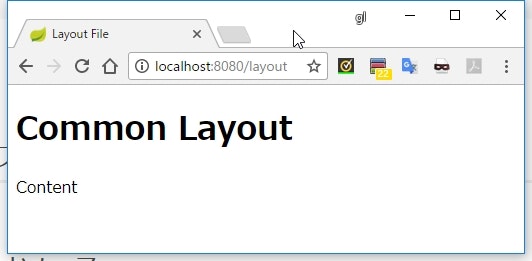
実行結果
説明
    @GetMapping("/layout")
    public String method() {
        return "layout/content";
    }
- テンプレートとして指定するのは
content.htmlの方にする
<!doctype html>
<html xmlns:layout="http://www.ultraq.net.nz/thymeleaf/layout">
    <head>
        <meta charset="UTF-8" />
        <title>Layout File</title>
    </head>
    <body>
        <h1>Common Layout</h1>
        <section layout:fragment="content">
        </section>
    </body>
</html>
- 名前空間として
xmlns:layout="http://www.ultraq.net.nz/thymeleaf/layout"を宣言 -
layout:fragmentで各ページの情報を埋め込む場所を定義する
<!doctype html>
<html xmlns:layout="http://www.ultraq.net.nz/thymeleaf/layout"
      layout:decorate="~{layout/layout}">
    <body>
        <section layout:fragment="content">
            Content
        </section>
    </body>
</html>
-
layout:decorateでレイアウトを定義したテンプレートを指定する - 値には v3.x で追加されたフラグメント式(fragment expression)を利用する
- フラグメント式は
~{}という形式で記述し、テンプレートの位置を指定する- フラグメント式の書式は、
th:insertで指定したものとだいたい一緒 - 詳細は 公式ドキュメントを
- フラグメント式の書式は、
- ちなみにフラグメント式の
~{}を使わなくても一応動くが、警告メッセージがコンソールに出力される- メッセージによると、将来は使えなくなるらしい
title の構築
<!doctype html>
<html xmlns:layout="http://www.ultraq.net.nz/thymeleaf/layout">
    <head>
        <meta charset="UTF-8" />
        <title layout:title-pattern="$LAYOUT_TITLE - $CONTENT_TITLE">Layout</title>
    </head>
    <body>
        <h1>Common Layout</h1>
        <section layout:fragment="content">
        </section>
    </body>
</html>
<!doctype html>
<html xmlns:layout="http://www.ultraq.net.nz/thymeleaf/layout"
      layout:decorate="~{layout/layout}">
    <head>
        <title>Content</title>
    </head>
    <body>
        <section layout:fragment="content">
            Content
        </section>
    </body>
</html>
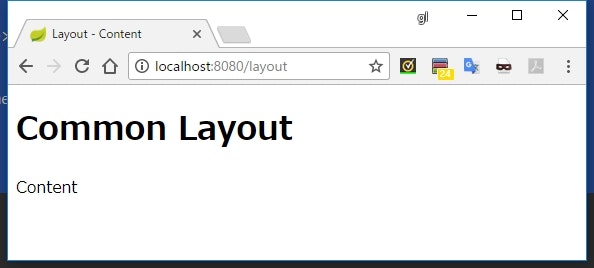
実行結果
説明
<title layout:title-pattern="$LAYOUT_TITLE - $CONTENT_TITLE">Layout</title>
-
<title>の内容を、レイアウトファイルのものとコンテンツファイルのものとの組み合わせにすることができる - レイアウトファイル側の
<title>にlayout:title-pattern属性を設定し、値の中で組み合わせ後の<title>の形を定義する -
$LAYOUT_TITLEはレイアウトファイルの<title>を参照し、$CONTENT_TITLEはコンテンツファイル側の<title>を参照する
    <head>
        <title>Content</title>
    </head>
- コンテンツファイル側は、普通に
<title>を宣言するだけ
<title>Layout - Content</title>
- レイアウトファイルの
<title>とコンテンツファイルの<title>が組み合わされた値になっている
コメント
<!doctype html>
<html xmlns:th="http://www.thymeleaf.org">
    <head>
        <meta charset="UTF-8" />
        <title>Hello Thymeleaf</title>
    </head>
    <body>
        <!-- standard html comment -->
        <!--/* -->
            <h1 th:text="'parser level comment'"></h1>
        <!-- */-->
        <!--/*/
            <h1 th:text="'prototype comment'"></h1>
        /*/-->
    </body>
</html>
実行結果

説明
- Thymeleaf のコメントは3種類存在する
通常の HTML コメント
<!-- standard html comment -->
- これは、普通の HTML コメントになる
- レンダリング後もそのまま出力され、 HTML 上もただのコメントとして扱われる
パーサーレベルのコメント
        <!--/* -->
            <h1 th:text="'parser level comment'"></h1>
        <!-- */-->
-
<!--/*から始まり*/-->までの間が対象となる - このコメントは、レンダリング時に完全に除去され、 HTML 上には存在しなくなる
-
<!--/*-->と<!--*/-->で括ることもできるので、ブラウザで開いたときは表示されるが、サーバー上で動かすと無くなる、といったことが実現できる
プロトタイプのみのコメント
        <!--/*/
            <h1 th:text="'prototype comment'"></h1>
        /*/-->
-
<!--/*/から/*/-->までが対象となる - ブラウザで直接開いた場合は単純な HTML のコメントとして扱われるが、 Thymeleaf のレンダリングは対象になる
- プロトタイプとしてはコメントとして扱うが、実際にサーバー上で動かすときは Thymeleaf に処理させたい、といったときに使う
メッセージリソース
`-src/main/
  |-java/sample/thymeleaf/
  |  |-web/
  |  |  `-HelloController.java
  |  `-Main.java
  |
  `-resources/
     |-messages/
     |  `-Messages_ja.properties
     `-templates/
        `-hello.html
package sample.thymeleaf;

import org.springframework.boot.SpringApplication;
import org.springframework.boot.autoconfigure.SpringBootApplication;
import org.springframework.context.MessageSource;
import org.springframework.context.annotation.Bean;
import org.springframework.context.support.ResourceBundleMessageSource;

@SpringBootApplication
public class Main {

    public static void main(String[] args) {
        SpringApplication.run(Main.class, args);
    }

    @Bean
    public MessageSource messageSource() {
        ResourceBundleMessageSource messageSource = new ResourceBundleMessageSource();
        messageSource.setBasename("messages/Messages");
        messageSource.setDefaultEncoding("UTF-8");
        return messageSource;
    }
}
foo.message=おはよう世界
bar.message=さよなら世界
<!doctype html>
<html xmlns:th="http://www.thymeleaf.org">
    <head>
        <meta charset="UTF-8" />
        <title>Hello Thymeleaf</title>
    </head>
    <body>
        <h1 th:text="#{foo.message}"></h1>
        <h1 th:text="#{bar.message}"></h1>
    </body>
</html>
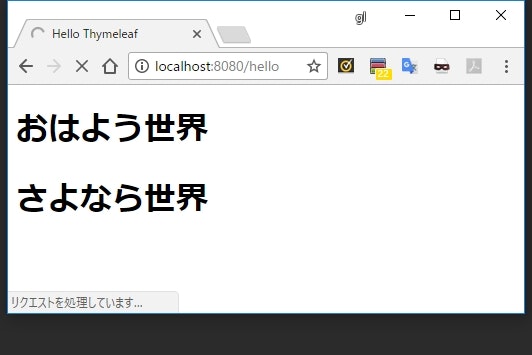
実行結果
説明
import org.springframework.context.support.ResourceBundleMessageSource;

...

    @Bean
    public ResourceBundleMessageSource messageSource() {
        ResourceBundleMessageSource messageSource = new ResourceBundleMessageSource();
        messageSource.setBasename("messages/Messages");
        messageSource.setDefaultEncoding("UTF-8");
        return messageSource;
    }
- Spring が扱うリソースバンドルファイルを指定している
- エンコーディングを
UTF-8にしているので、日本語をそのままメッセージファイルに書ける
        <h1 th:text="#{foo.message}"></h1>
        <h1 th:text="#{bar.message}"></h1>
- メッセージを Thymeleaf のテンプレートから参照するには
#{}という式を利用する - 中に表示したいメッセージのキーを指定する
メッセージにパラメータを埋め込む
foo.message=おはよう{0}
<!doctype html>
<html xmlns:th="http://www.thymeleaf.org">
    <head>
        <meta charset="UTF-8" />
        <title>Hello Thymeleaf</title>
    </head>
    <body>
        <h1 th:text="#{foo.message('せかい')}"></h1>
        <h1 th:text="#{foo.message('世界')}"></h1>
    </body>
</html>
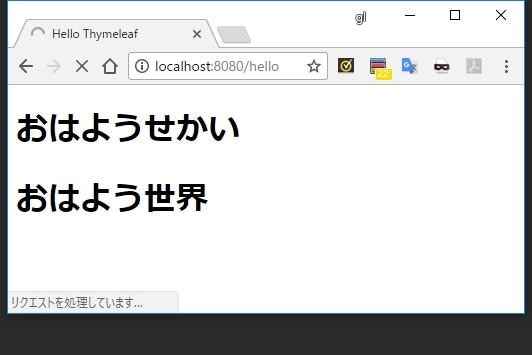
実行結果
説明
        <h1 th:text="#{foo.message('せかい')}"></h1>
        <h1 th:text="#{foo.message('世界')}"></h1>
- メッセージにプレースホルダがある場合は、
#{キー名(パラメータ...)}というふうにメソッド引数のような感じでパラメータを渡すことができる
Springビーン
package sample.thymeleaf;

import org.springframework.stereotype.Component;

@Component
public class MySpringBean {

    public String hello() {
        return "Hello MySpringBean!!";
    }
}
<!doctype html>
<html xmlns:th="http://www.thymeleaf.org">
<head>
<meta charset="UTF-8" />
<title>Hello Thymeleaf</title>
</head>
<body>
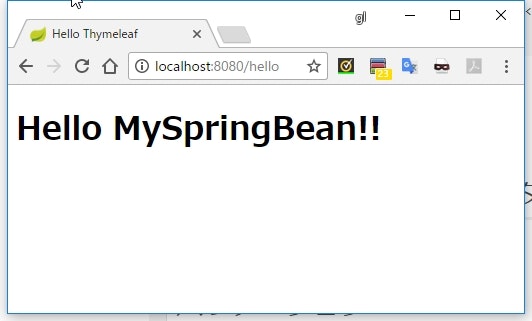
<h1 th:text="${@mySpringBean.hello()}"></h1>
</body>
</html>
実行結果
説明
-
${}は SpEL 式として評価されるので、 Spring の Bean の参照も可能になっている - Spring の Bean を参照するには、
@ビーン名とする
Spring MVC との Form データの連携
package sample.thymeleaf.web;

public class MyForm {
    private String value;

    public String getValue() {
        return value;
    }

    public void setValue(String value) {
        this.value = value;
    }
}
- Form クラスはデフォルトだとプロパティアクセスになるので、 Getter, Setter が必須
package sample.thymeleaf.web;

import org.springframework.stereotype.Controller;
import org.springframework.ui.Model;
import org.springframework.web.bind.annotation.GetMapping;
import org.springframework.web.bind.annotation.PostMapping;
import org.springframework.web.bind.annotation.RequestMapping;

@Controller
@RequestMapping("/form")
public class FormController {

    @GetMapping
    public String init(Model model) {
        model.addAttribute(new MyForm());
        return "form";
    }

    @PostMapping
    public String submit(MyForm form) {
        System.out.println("form.value=" + form.getValue());
        return "form";
    }
}
- 初期表示時に
Model.addAttribute()でMyFormのオブジェクトを登録
<!doctype html>
<html xmlns:th="http://www.thymeleaf.org">
    <head>
        <meta charset="UTF-8" />
        <title>Form Sample</title>
    </head>
    <body>
        <form th:action="@{/form}" method="post" th:object="${myForm}">
            <input type="text" th:field="*{value}" />
            <input type="submit" value="Submit" />
        </form>
    </body>
</html>
実行結果
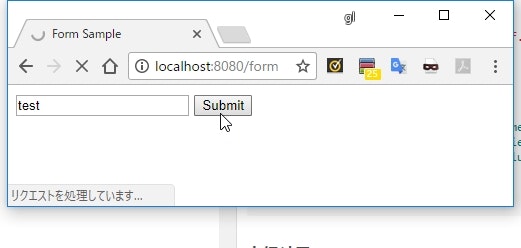
適当に文字を入力して Submit ボタンをクリック。
form.value=test
説明
        <form th:action="@{/form}" method="post" th:object="${myForm}">
            <input type="text" th:field="*{value}" />
            <input type="submit" value="Submit" />
        </form>
- Java 側の Form オブジェクト(
MyForm)と HTML の<form>タグを紐づけるにはth:objectタグでコントローラで登録した Form オブジェクトを指定する- (
th:object使わなくてもなんか動いたけど、ドキュメントには必須と書かれていた...)
- (
- 各入力項目と Form のプロパティとのマッピングには
th:field属性を使用する
チェックボックスのラベル
package sample.thymeleaf.web;

public class MyForm {
    private boolean checked;

    public boolean isChecked() {
        return checked;
    }

    public void setChecked(boolean checked) {
        this.checked = checked;
    }
}
<!doctype html>
<html xmlns:th="http://www.thymeleaf.org">
    <head>
        <meta charset="UTF-8" />
        <title>Form Sample</title>
    </head>
    <body>
        <form th:action="@{/form}" method="post" th:object="${myForm}">
            <label th:for="${#ids.next('checked')}">checked</label>
            <input type="checkbox" th:field="*{checked}" />

            <input type="submit" value="Submit" />
        </form>
    </body>
</html>
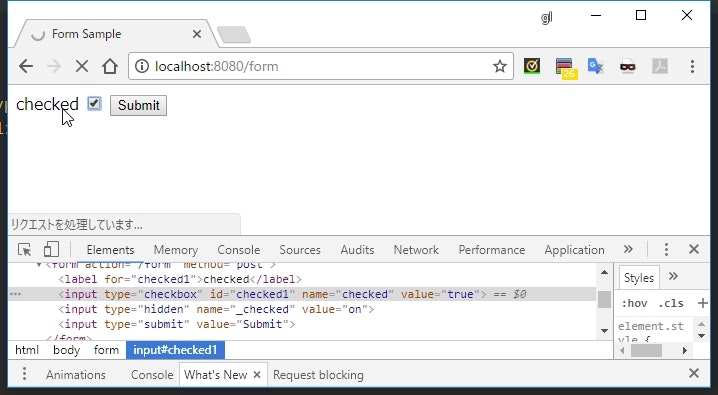
実行結果
説明
-
th:fieldを使うと、id属性は Thymeleaf によって自動的に付与される - 特にループしながら複数のチェックボックスを作成している場合は
forを指定するのが難しくなる - これをサポートするため、
th:forで${#ids.next('【紐づけたいプロパティの名前】')}と指定することで、for属性値に対象のプロパティのid属性値が設定される - チェックボックス項目が
<label>の前にある場合は${#ids.prev()}を使う
ラジオボタン
package sample.thymeleaf.web;

import java.util.LinkedHashMap;
import java.util.Map;

public class MyForm {
    private String selectedValue = "piyo";

    public Map<String, String> radioButtons() {
        Map<String, String> radioButtons = new LinkedHashMap<>();
        radioButtons.put("hoge", "HOGE");
        radioButtons.put("fuga", "FUGA");
        radioButtons.put("piyo", "PIYO");

        return radioButtons;
    }

    public String getSelectedValue() {
        return selectedValue;
    }

    public void setSelectedValue(String selectedValue) {
        this.selectedValue = selectedValue;
    }
}
package sample.thymeleaf.web;

import org.springframework.stereotype.Controller;
import org.springframework.ui.Model;
import org.springframework.web.bind.annotation.GetMapping;
import org.springframework.web.bind.annotation.PostMapping;
import org.springframework.web.bind.annotation.RequestMapping;

@Controller
@RequestMapping("/form")
public class FormController {

    @GetMapping
    public String init(Model model) {
        model.addAttribute(new MyForm());
        return "form";
    }

    @PostMapping
    public String submit(MyForm form) {
        System.out.println("form.selectedValue=" + form.getSelectedValue());
        return "form";
    }
}
<!doctype html>
<html xmlns:th="http://www.thymeleaf.org">
    <head>
        <meta charset="UTF-8" />
        <title>Form Sample</title>
    </head>
    <body>
        <form th:action="@{/form}" method="post" th:object="${myForm}">
            <div th:each="radioButton : *{radioButtons()}">
                <label th:for="${#ids.next('selectedValue')}" th:text="${radioButton.value}"></label>
                <input type="radio" th:field="*{selectedValue}" th:value="${radioButton.key}" />
            </div>

            <input type="submit" value="Submit" />
        </form>
    </body>
</html>
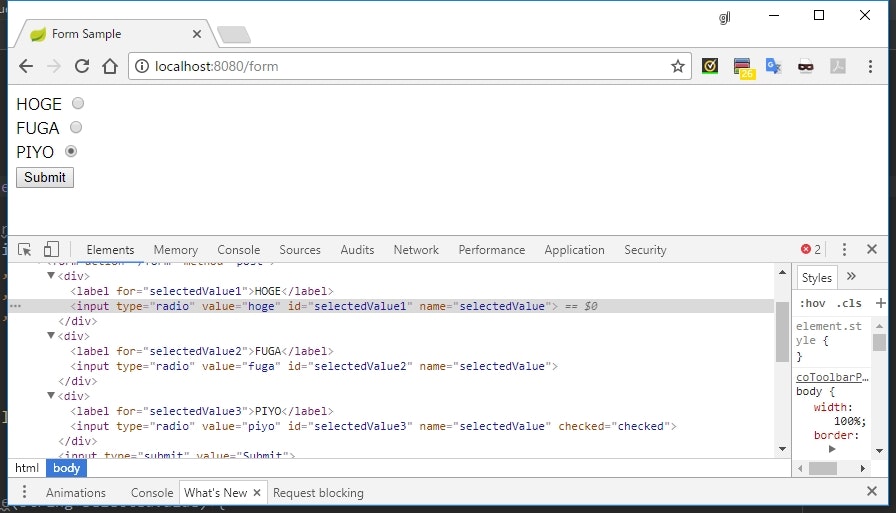
実行結果
説明
    private String selectedValue = "piyo";

    public Map<String, String> radioButtons() {
        Map<String, String> radioButtons = new LinkedHashMap<>();
        radioButtons.put("hoge", "HOGE");
        radioButtons.put("fuga", "FUGA");
        radioButtons.put("piyo", "PIYO");

        return radioButtons;
    }
            <div th:each="radioButton : *{radioButtons()}">
                <label th:for="${#ids.next('selectedValue')}" th:text="${radioButton.value}"></label>
                <input type="radio" th:field="*{selectedValue}" th:value="${radioButton.key}" />
            </div>
- ラジオボタンと Form をマッピングするには、次の2つを用意する
- ラジオボタンを構築するための情報(
raidoButtons())- 今回はサクっと作るために
LinkedHashMapを使ったが、実際はラベルと値を格納する専用の入れ物クラスを用意してListとかに詰めると思う
- 今回はサクっと作るために
- 選択された値を格納するプロパティ(
selectedValue)
- ラジオボタンを構築するための情報(
-
radioButtons()の結果をth:eachで回しながらラジオボタンを構築していく - ラジオボタンを Form とマッピングするときは、
th:fieldだけでなくth:valueも指定が必須となる- その項目が選択されたときの値が必要なので
- 初期値を選択したい場合は、対応するプロパティに選択値を設定しておく(
selectedValue = "piyo")- 値を設定しなかったら、全ての項目が未選択の状態になる
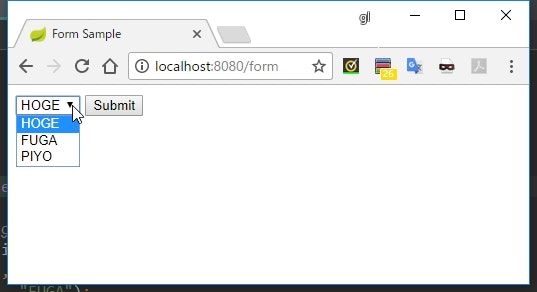
ドロップダウンリスト
package sample.thymeleaf.web;

import java.util.LinkedHashMap;
import java.util.Map;

public class MyForm {
    private String selectedValue;

    public Map<String, String> options() {
        Map<String, String> radioButtons = new LinkedHashMap<>();
        radioButtons.put("hoge", "HOGE");
        radioButtons.put("fuga", "FUGA");
        radioButtons.put("piyo", "PIYO");

        return radioButtons;
    }

    public String getSelectedValue() {
        return selectedValue;
    }

    public void setSelectedValue(String selectedValue) {
        this.selectedValue = selectedValue;
    }
}
package sample.thymeleaf.web;

import org.springframework.stereotype.Controller;
import org.springframework.ui.Model;
import org.springframework.web.bind.annotation.GetMapping;
import org.springframework.web.bind.annotation.PostMapping;
import org.springframework.web.bind.annotation.RequestMapping;

@Controller
@RequestMapping("/form")
public class FormController {

    @GetMapping
    public String init(Model model) {
        model.addAttribute(new MyForm());
        return "form";
    }

    @PostMapping
    public String submit(MyForm form) {
        System.out.println("form.selectedValue=" + form.getSelectedValue());
        return "form";
    }
}
<!doctype html>
<html xmlns:th="http://www.thymeleaf.org">
    <head>
        <meta charset="UTF-8" />
        <title>Form Sample</title>
    </head>
    <body>
        <form th:action="@{/form}" method="post" th:object="${myForm}">
            <select th:field="*{selectedValue}">
                <option th:each="option : *{options()}"
                        th:value="${option.key}"
                        th:text="${option.value}">
                </option>
            </select>

            <input type="submit" value="Submit" />
        </form>
    </body>
</html>
実行結果
説明
- ドロップダウンリストを動的に生成するには、
<option>をth:eachでループさせればいい -
th:fieldは<select>タグのほうに記述する -
<option>にはth:valueの指定が必須になる
動的フィールド
行を動的に追加・削除できるような入力項目の作り方
package sample.thymeleaf.web;

import java.util.ArrayList;
import java.util.List;

public class MyForm {
    private List<Row> rows = new ArrayList<>();

    public void appendRow() {
        this.rows.add(new Row());
    }

    public void removeRow(int index) {
        this.rows.remove(index);
    }

    public List<Row> getRows() {
        return rows;
    }

    public void setRows(List<Row> rows) {
        this.rows = rows;
    }

    public static class Row {
        private String value;

        public String getValue() {
            return value;
        }

        public void setValue(String value) {
            this.value = value;
        }
    }
}
package sample.thymeleaf.web;

import org.springframework.stereotype.Controller;
import org.springframework.ui.Model;
import org.springframework.web.bind.annotation.GetMapping;
import org.springframework.web.bind.annotation.PostMapping;
import org.springframework.web.bind.annotation.RequestMapping;
import org.springframework.web.bind.annotation.RequestParam;

import java.util.List;

@Controller
@RequestMapping("/form")
public class FormController {

    @GetMapping
    public String init(Model model) {
        model.addAttribute(new MyForm());
        return "form";
    }

    @PostMapping(params="appendRow")
    public String appendRow(MyForm form) {
        form.appendRow();
        this.printRows(form);
        return "form";
    }

    @PostMapping(params="removeIndex")
    public String submit(MyForm form, @RequestParam int removeIndex) {
        form.removeRow(removeIndex);
        this.printRows(form);
        return "form";
    }

    private void printRows(MyForm form) {
        List<MyForm.Row> rows = form.getRows();
        for (int i = 0; i < rows.size(); i++) {
            MyForm.Row row = rows.get(i);
            System.out.println("i=" + i + ", row.value=" + row.getValue());
        }
    }
}
<!doctype html>
<html xmlns:th="http://www.thymeleaf.org">
    <head>
        <meta charset="UTF-8" />
        <title>Form Sample</title>
    </head>
    <body>
        <form th:action="@{/form}" method="post" th:object="${myForm}">
            <table border="1">
                <tr>
                    <th>No</th>
                    <th>User input</th>
                    <th>Remove Row</th>
                </tr>
                <tr th:each="row, loop : *{rows}">
                    <th th:text="${loop.count}"></th>
                    <th>
                        <input type="text" th:field="*{rows[__${loop.index}__].value}" />
                    </th>
                    <th>
                        <button type="submit" name="removeIndex" th:value="${loop.index}">
                            Remove
                        </button>
                    </th>
                </tr>
            </table>

            <input type="submit" name="appendRow" value="Append Row" />
        </form>
    </body>
</html>
実行結果
説明
<tr th:each="row, loop : *{rows}">
    <th th:text="${loop.count}"></th>
    <th>
        <input type="text" th:field="*{rows[__${loop.index}__].value}" />
    </th>
    <th>
        <button type="submit" name="removeIndex" th:value="${loop.index}">
            Remove
        </button>
    </th>
</tr>
- 動的に増減するフィールドを紐づける場合は、
th:fieldの指定をすこし工夫する必要がある- 単純に
${row.value}とするとエラーになる
- 単純に
-
rowsをインデックス指定で各要素にアクセスする必要がある - さらに、インデックスの指定はプリプロセッシングの仕組みを利用する
- プリプロセッシングとは通常の式よりも先に評価させることができる仕組みで、
__で括ることで記述する-
__${loop.index}__の部分
-
- これにより、
*{rows[__${loop.index}__].value}は*{rows[0].value}と評価されてから*{}の中がさらに評価されるようになる - 単純に
*{rows[loop.index].value}としても動きそうだが、残念ながら動かない - これは、 SpEL 式がリストのインデックスを指定する括弧の中で式を指定できない仕様になっていることに起因する
    @PostMapping(params="appendRow")
    public String appendRow(MyForm form) {
        form.appendRow();
        this.printRows(form);
        return "form";
    }

    @PostMapping(params="removeIndex")
    public String submit(MyForm form, @RequestParam int removeIndex) {
        form.removeRow(removeIndex);
        this.printRows(form);
        return "form";
    }
-
Append Rowボタンがクリックされたのか、Removeボタンがクリックされたのかの識別は、ボタンにname属性を指定し、そのパラメータの有る無しでコントローラのメソッド呼び出しを切り替えるようにしている - マッピング用のアノテーション(
@PostMapping,@GetMappingなど)のparamsで、「そのパラメータがあれば実行」というのを制御できる
バリデーション
Spring MVC は Bean Validation を使った入力チェックの仕組みを用意している。
Thymeleaf は、このエラー結果を確認したり、エラーメッセージを表示するための仕組みを用意している。
package sample.thymeleaf.web;

import javax.validation.constraints.Min;
import javax.validation.constraints.Size;

public class MyForm {
    @Size(min=3)
    private String text;
    @Min(100)
    private Integer number;

    public String getText() {
        return text;
    }

    public void setText(String text) {
        this.text = text;
    }

    public Integer getNumber() {
        return number;
    }

    public void setNumber(Integer number) {
        this.number = number;
    }
}
package sample.thymeleaf.web;

import org.springframework.stereotype.Controller;
import org.springframework.ui.Model;
import org.springframework.validation.BindingResult;
import org.springframework.validation.annotation.Validated;
import org.springframework.web.bind.annotation.GetMapping;
import org.springframework.web.bind.annotation.PostMapping;
import org.springframework.web.bind.annotation.RequestMapping;

@Controller
@RequestMapping("/form")
public class FormController {

    @GetMapping
    public String init(Model model) {
        model.addAttribute(new MyForm());
        return "form";
    }

    @PostMapping
    public String submit(@Validated MyForm form, BindingResult result) {
        System.out.println("********************************************************");
        System.out.println("form = " + form);
        System.out.println("result = " + result);
        System.out.println("********************************************************");
        return "form";
    }
}
<!doctype html>
<html xmlns:th="http://www.thymeleaf.org">
    <head>
        <meta charset="UTF-8" />
        <title>Form Sample</title>
    </head>
    <body>
        <form th:action="@{/form}" method="post" th:object="${myForm}">
            <div>
                <input type="text" th:field="*{text}" />
                <ul th:each="error : ${#fields.errors('text')}">
                    <li th:text="${error}"></li>
                </ul>
            </div>
            <div>
                <input type="text" th:field="*{number}" />
                <ul th:each="error : ${#fields.errors('number')}">
                    <li th:text="${error}"></li>
                </ul>
            </div>

            <input type="submit" value="Submit" />
        </form>
    </body>
</html>
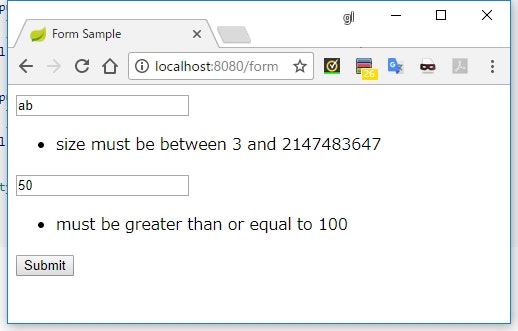
実行結果
説明
import javax.validation.constraints.Min;
import javax.validation.constraints.Size;

...

    @Size(min=3)
    private String text;
    @Min(100)
    private Integer number;
- Form のフィールドを Bean Validation のアノテーションで注釈し、チェック内容を定義
- Bean Validation の使い方についてはこちらを参照
import org.springframework.validation.annotation.Validated;

...

    @PostMapping
    public String submit(@Validated MyForm form, BindingResult result) {
- コントローラメソッドの引数で、フォームオブジェクトを
@Validatedでアノテートすることで、入力チェックが有効になる
  <div>
      <input type="text" th:field="*{text}" />
      <ul th:each="error : ${#fields.errors('text')}">
          <li th:text="${error}"></li>
      </ul>
  </div>
  <div>
      <input type="text" th:field="*{number}" />
      <ul th:each="error : ${#fields.errors('number')}">
          <li th:text="${error}"></li>
      </ul>
  </div>
- 各プロパティで発生したエラーメッセージは
${#fields.errors('【プロパティ名】')}でアクセスできる - 結果はリストになっているので、ループで回せば各エラーメッセージを取得できる
項目がエラーかどうか確認する
<!doctype html>
<html xmlns:th="http://www.thymeleaf.org">
    <head>
        <meta charset="UTF-8" />
        <title>Form Sample</title>
    </head>
    <body>
        <form th:action="@{/form}" method="post" th:object="${myForm}">
            <div>
                <input type="text" th:field="*{text}" />
                <span th:if="${#fields.hasErrors('text')}">エラーです!</span>
            </div>
            <div>
                <input type="text" th:field="*{number}" />
                <span th:if="${#fields.hasErrors('number')}">エラーです!</span>
            </div>

            <input type="submit" value="Submit" />
        </form>
    </body>
</html>
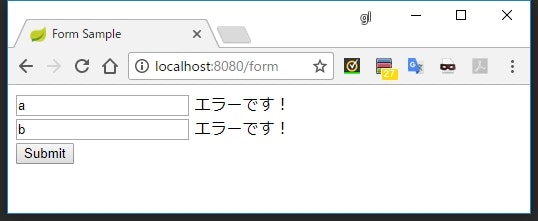
実行結果
説明
-
${#fields.hasErrors('【プロパティ名】')}で、そのプロパティにエラーがあるかどうかを確認できる
エラーがある場合のスタイルを指定する
<!doctype html>
<html xmlns:th="http://www.thymeleaf.org">
<head>
<meta charset="UTF-8" />
<title>Form Sample</title>
</head>
<body>
<form th:action="@{/form}" method="post" th:object="${myForm}">
<div>
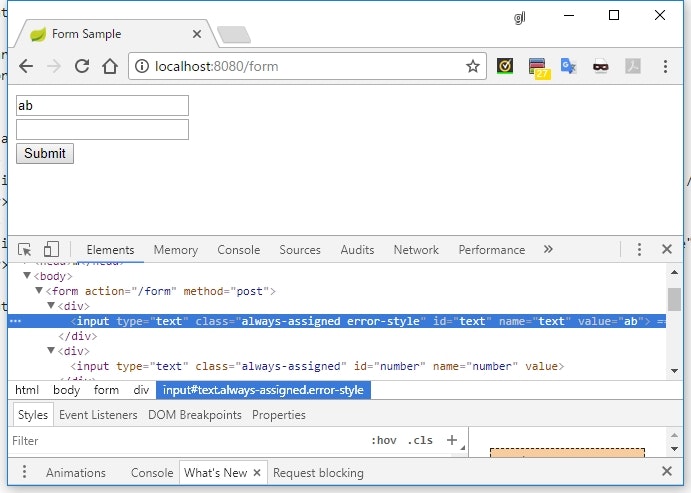
<input type="text" th:field="*{text}" class="always-assigned" th:errorclass="error-style" />
</div>
<div>
<input type="text" th:field="*{number}" class="always-assigned" th:errorclass="error-style" />
</div>
<input type="submit" value="Submit" />
</form>
</body>
</html>
実行結果
説明
-
th:errorclass属性を指定すると、そのプロパティにエラーになったときだけ指定された class 属性が追加される - エラー時のスタイルを適用したい場合は、
${#fields.hasErrors('text') ? 'error-style'}のようにするよりかは、シンプルで分かりやすくなる
エラーが1つでもあるかどうか確認する
<!doctype html>
<html xmlns:th="http://www.thymeleaf.org">
<head>
<meta charset="UTF-8" />
<title>Form Sample</title>
</head>
<body>
<form th:action="@{/form}" method="post" th:object="${myForm}">
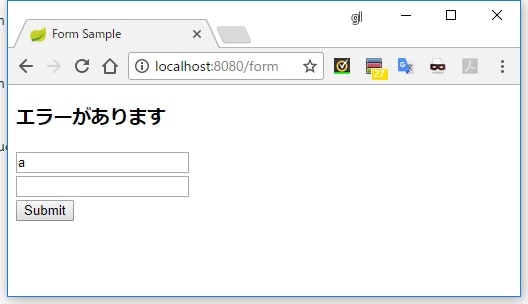
<h3 th:if="${#fields.hasAnyErrors()}">エラーがあります</h3>
<div>
<input type="text" th:field="*{text}" />
</div>
<div>
<input type="text" th:field="*{number}" />
</div>
<input type="submit" value="Submit" />
</form>
</body>
</html>
実行結果
説明
<h3 th:if="${#fields.hasAnyErrors()}">エラーがあります</h3>
-
#fields.hasAnyErrors()で、エラーが1つでも存在するかどうかを確認できる -
#fields.hasErrors('*')または#fields.hasErrors('all')としても同じ結果を得られる
全てのエラーメッセージを取得する
<!doctype html>
<html xmlns:th="http://www.thymeleaf.org">
<head>
<meta charset="UTF-8" />
<title>Form Sample</title>
</head>
<body>
<form th:action="@{/form}" method="post" th:object="${myForm}">
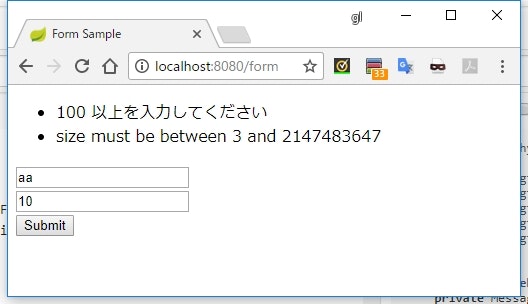
<ul>
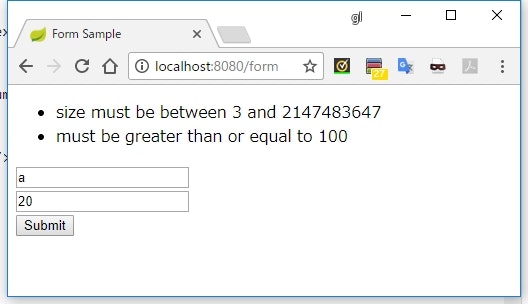
<li th:each="error: ${#fields.allErrors()}">
[[${error}]]
</li>
</ul>
<div>
<input type="text" th:field="*{text}" />
</div>
<div>
<input type="text" th:field="*{number}" />
</div>
<input type="submit" value="Submit" />
</form>
</body>
</html>
実行結果
説明
-
#fields.allErrors()で全てのエラーメッセージを取得できる - これは
#fields.errors('*')または#fields.errors('all')とした場合も同じ動きになる
グローバルエラー
特定のプロパティに紐づいていないエラーをグローバルエラーと呼ぶ(たぶん)。
相関チェックを行う独自バリデーションを作成して、グローバルエラーを発生させる。
package sample.thymeleaf.validation;

import javax.validation.Constraint;
import javax.validation.Payload;
import java.lang.annotation.ElementType;
import java.lang.annotation.Retention;
import java.lang.annotation.RetentionPolicy;
import java.lang.annotation.Target;

@Constraint(validatedBy = MyValidator.class)
@Retention(RetentionPolicy.RUNTIME)
@Target(ElementType.TYPE)
public @interface MyValidation {
    String message() default "エラーです!";

    Class<?>[] groups() default {};

    Class<? extends Payload>[] payload() default {};
}
package sample.thymeleaf.validation;


import sample.thymeleaf.web.MyForm;

import javax.validation.ConstraintValidator;
import javax.validation.ConstraintValidatorContext;

public class MyValidator implements ConstraintValidator<MyValidation, MyForm> {
    @Override
    public void initialize(MyValidation constraintAnnotation) {
        System.out.println("MyValidator initialize");
    }

    @Override
    public boolean isValid(MyForm value, ConstraintValidatorContext context) {
        System.out.println("MyValidator isValid");
        if (value == null) {
            return true;
        }

        Integer number = value.getNumber();
        if (number == null) {
            return true;
        }

        String text = value.getText();

        if (number == 500) {
            return "500".equals(text);
        }

        return true;
    }
}
-
numberが500だったら、textも"500"であることをチェックするバリデータ - 独自バリデータの作成方法についてはこちらを参照
package sample.thymeleaf.web;

import sample.thymeleaf.validation.MyValidation;

import javax.validation.constraints.Min;
import javax.validation.constraints.Size;

@MyValidation
public class MyForm {
    @Size(min=3)
    private String text;
    @Min(100)
    private Integer number;

    ...
}
-
MyFormを@MyValidationでアノテート
<!doctype html>
<html xmlns:th="http://www.thymeleaf.org">
<head>
<meta charset="UTF-8" />
<title>Form Sample</title>
</head>
<body>
<form th:action="@{/form}" method="post" th:object="${myForm}">
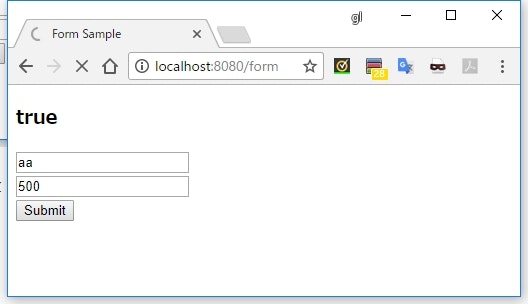
<h3>[[${#fields.hasGlobalErrors()}]]</h3>
<div>
<input type="text" th:field="*{text}" />
</div>
<div>
<input type="text" th:field="*{number}" />
</div>
<input type="submit" value="Submit" />
</form>
</body>
</html>
実行結果
number を 500 以外にしてエラーにする
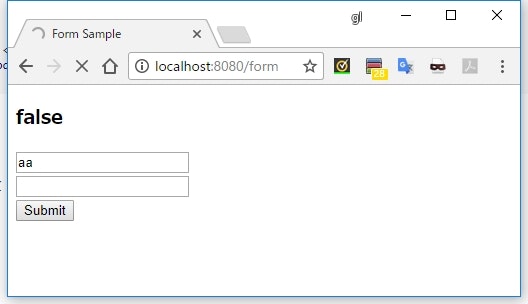
number を 500 にしてエラーにする
説明
<h3>[[${#fields.hasGlobalErrors()}]]</h3>
-
#fields.hasGlobalErrors()でグローバルエラーがあるかどうかを確認できる - これは
#fields.hasErrors('global')でも同じ結果になる
グローバルエラーのメッセージを取得する
<!doctype html>
<html xmlns:th="http://www.thymeleaf.org">
    <head>
        <meta charset="UTF-8" />
        <title>Form Sample</title>
    </head>
    <body>
        <form th:action="@{/form}" method="post" th:object="${myForm}">
            <h3>[[${#fields.globalErrors()}]]</h3>

            <div>
                <input type="text" th:field="*{text}" />
            </div>
            <div>
                <input type="text" th:field="*{number}" />
            </div>

            <input type="submit" value="Submit" />
        </form>
    </body>
</html>
実行結果
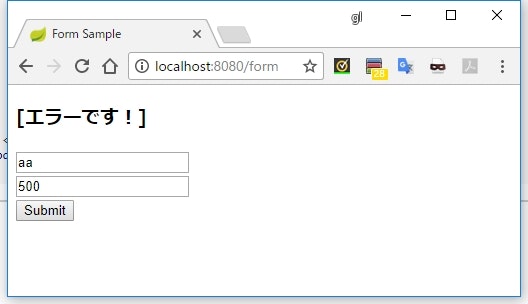
説明
-
#fields.globalErrors()でグローバルエラーのメッセージを全て取得できる - これは
#fields.errors('global')とした場合も同じ結果になる
エラーメッセージの変更
package sample.thymeleaf;

import org.springframework.boot.SpringApplication;
import org.springframework.boot.autoconfigure.SpringBootApplication;
import org.springframework.context.MessageSource;
import org.springframework.context.annotation.Bean;
import org.springframework.context.support.ResourceBundleMessageSource;

@SpringBootApplication
public class Main {

    public static void main(String[] args) {
        SpringApplication.run(Main.class, args);
    }

    @Bean
    public MessageSource messageSource() {
        ResourceBundleMessageSource messageSource = new ResourceBundleMessageSource();
        messageSource.addBasenames("messages/Messages", "messages/validation-messages");
        messageSource.setDefaultEncoding("UTF-8");
        return messageSource;
    }
}
package sample.thymeleaf;

import org.springframework.context.MessageSource;
import org.springframework.context.annotation.Configuration;
import org.springframework.validation.Validator;
import org.springframework.validation.beanvalidation.LocalValidatorFactoryBean;
import org.springframework.web.servlet.config.annotation.WebMvcConfigurerAdapter;

@Configuration
public class MyWebConfig extends WebMvcConfigurerAdapter {
    private MessageSource messageSource;

    public MyWebConfig(MessageSource messageSource) {
        this.messageSource = messageSource;
    }

    @Override
    public Validator getValidator() {
        LocalValidatorFactoryBean validator = new LocalValidatorFactoryBean();
        validator.setValidationMessageSource(messageSource);
        return validator;
    }
}
javax.validation.constraints.Min.message = {value} 以上で入力してください
実行結果
説明
- Bean Validation の仕様上、クラスパス直下に
ValidationMessagesをベース名とするプロパティファイルを配置すれば、デフォルトのメッセージを上書きすることができる - ただし、プロパティファイルを native2ascii でエンコーディングしないといけなかったりでちょっと不便
- Spring の
MessageSourceの仕組みを利用すれば、 UTF-8 でメッセージを書けるので便利
    @Bean
    public ResourceBundleMessageSource messageSource() {
        ResourceBundleMessageSource messageSource = new ResourceBundleMessageSource();
        messageSource.addBasenames("messages/Messages", "messages/validation-messages");
        messageSource.setDefaultEncoding("UTF-8");
        return messageSource;
    }
-
addBasenames()で Bean Validation 用のメッセージファイルを追加
javax.validation.constraints.Min.message = {value} 以上で入力してください
- キーが何なのかは、デフォルトのメッセージファイルを調べればいい
- 依存関係の中に Hibernate Validator が入っているので、その jar の中にある
ValidationMessages.propertiesを見ればデフォルトメッセージの一覧が確認できる
javax.validation.constraints.AssertFalse.message = must be false
javax.validation.constraints.AssertTrue.message  = must be true
javax.validation.constraints.DecimalMax.message  = must be less than ${inclusive == true ? 'or equal to ' : ''}{value}
javax.validation.constraints.DecimalMin.message  = must be greater than ${inclusive == true ? 'or equal to ' : ''}{value}
javax.validation.constraints.Digits.message      = numeric value out of bounds (<{integer} digits>.<{fraction} digits> expected)
javax.validation.constraints.Future.message      = must be in the future
javax.validation.constraints.Max.message         = must be less than or equal to {value}
javax.validation.constraints.Min.message         = must be greater than or equal to {value}
javax.validation.constraints.NotNull.message     = may not be null
javax.validation.constraints.Null.message        = must be null
javax.validation.constraints.Past.message        = must be in the past
javax.validation.constraints.Pattern.message     = must match "{regexp}"
javax.validation.constraints.Size.message        = size must be between {min} and {max}

org.hibernate.validator.constraints.CreditCardNumber.message        = invalid credit card number
org.hibernate.validator.constraints.EAN.message                   = invalid {type} barcode
org.hibernate.validator.constraints.Email.message                   = not a well-formed email address
org.hibernate.validator.constraints.Length.message                  = length must be between {min} and {max}
org.hibernate.validator.constraints.LuhnCheck.message               = The check digit for ${validatedValue} is invalid, Luhn Modulo 10 checksum failed
org.hibernate.validator.constraints.Mod10Check.message              = The check digit for ${validatedValue} is invalid, Modulo 10 checksum failed
org.hibernate.validator.constraints.Mod11Check.message              = The check digit for ${validatedValue} is invalid, Modulo 11 checksum failed
org.hibernate.validator.constraints.ModCheck.message                = The check digit for ${validatedValue} is invalid, ${modType} checksum failed
org.hibernate.validator.constraints.NotBlank.message                = may not be empty
org.hibernate.validator.constraints.NotEmpty.message                = may not be empty
org.hibernate.validator.constraints.ParametersScriptAssert.message  = script expression "{script}" didn't evaluate to true
org.hibernate.validator.constraints.Range.message                   = must be between {min} and {max}
org.hibernate.validator.constraints.SafeHtml.message                = may have unsafe html content
org.hibernate.validator.constraints.ScriptAssert.message            = script expression "{script}" didn't evaluate to true
org.hibernate.validator.constraints.URL.message                     = must be a valid URL

org.hibernate.validator.constraints.br.CNPJ.message                 = invalid Brazilian corporate taxpayer registry number (CNPJ)
org.hibernate.validator.constraints.br.CPF.message                  = invalid Brazilian individual taxpayer registry number (CPF)
org.hibernate.validator.constraints.br.TituloEleitoral.message      = invalid Brazilian Voter ID card number