[注]こちらの記事はAWS IoTが出始めた頃(2015年末)にトライしたものですので、2017年3月時点ではだいぶ見た目も機能も変わってしまっているようです。
ナウでヤングな方は、@moritalous さんによる「AWS IoTのデータをKibanaに表示する」をやってみた。2017/3版 をチェック!
AWS IoTでデータのPubSubや保存が極端に簡単になりましたが、データのビジュアライゼーション機能はありません。ということで、今回はElasticsearchにデータを投入してKibanaに表示させてみましょう。
全体像は以下。
植物のプランターにセンサを取り付けるのを想定して、温度や光度情報をKibanaに表示します。
Elasticsearchインスタンスを立ち上げる
まずは、立ち上がりが遅いElasticsearchを先に立ち上げておきましょう。
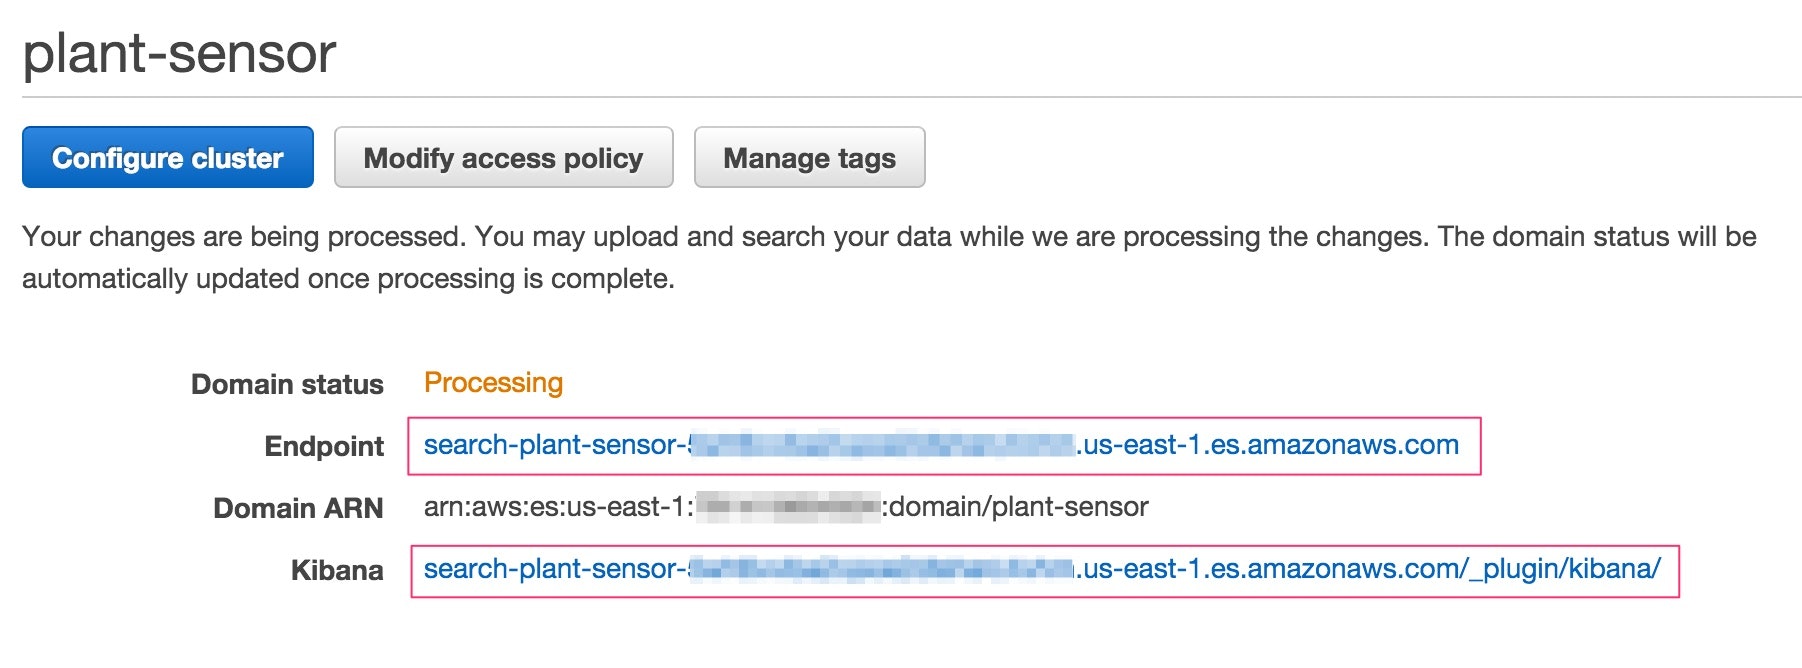
Domain nameを plant-sensor、Instance typeはt2.micro.elasticsearch、Instance countは 1、Strage typeは EBS に設定します。
Kibana のURLをクリックするとKibana4の画面が表示されます。EndpointのURLはLambdaで使います。
Kinesis Streamを作成
AWS IoTの情報を流す先のKinesis zstreamを先に作っておきます。
Stream Nameを plant-sensors、Number of Shardsを 1 で作成します。
AWS IoTでThingやRuleを作成
まずはplant-sensor という名前のThingを作成。そして plant-sensor のDetail画面にて Connect a device ボタンを押して、CertificateとPolicyを作成します。この時、SDK選択画面が出てくるので NodeJS を選択しましょう。証明書は後で使うのでダウンロードしておきましょう。
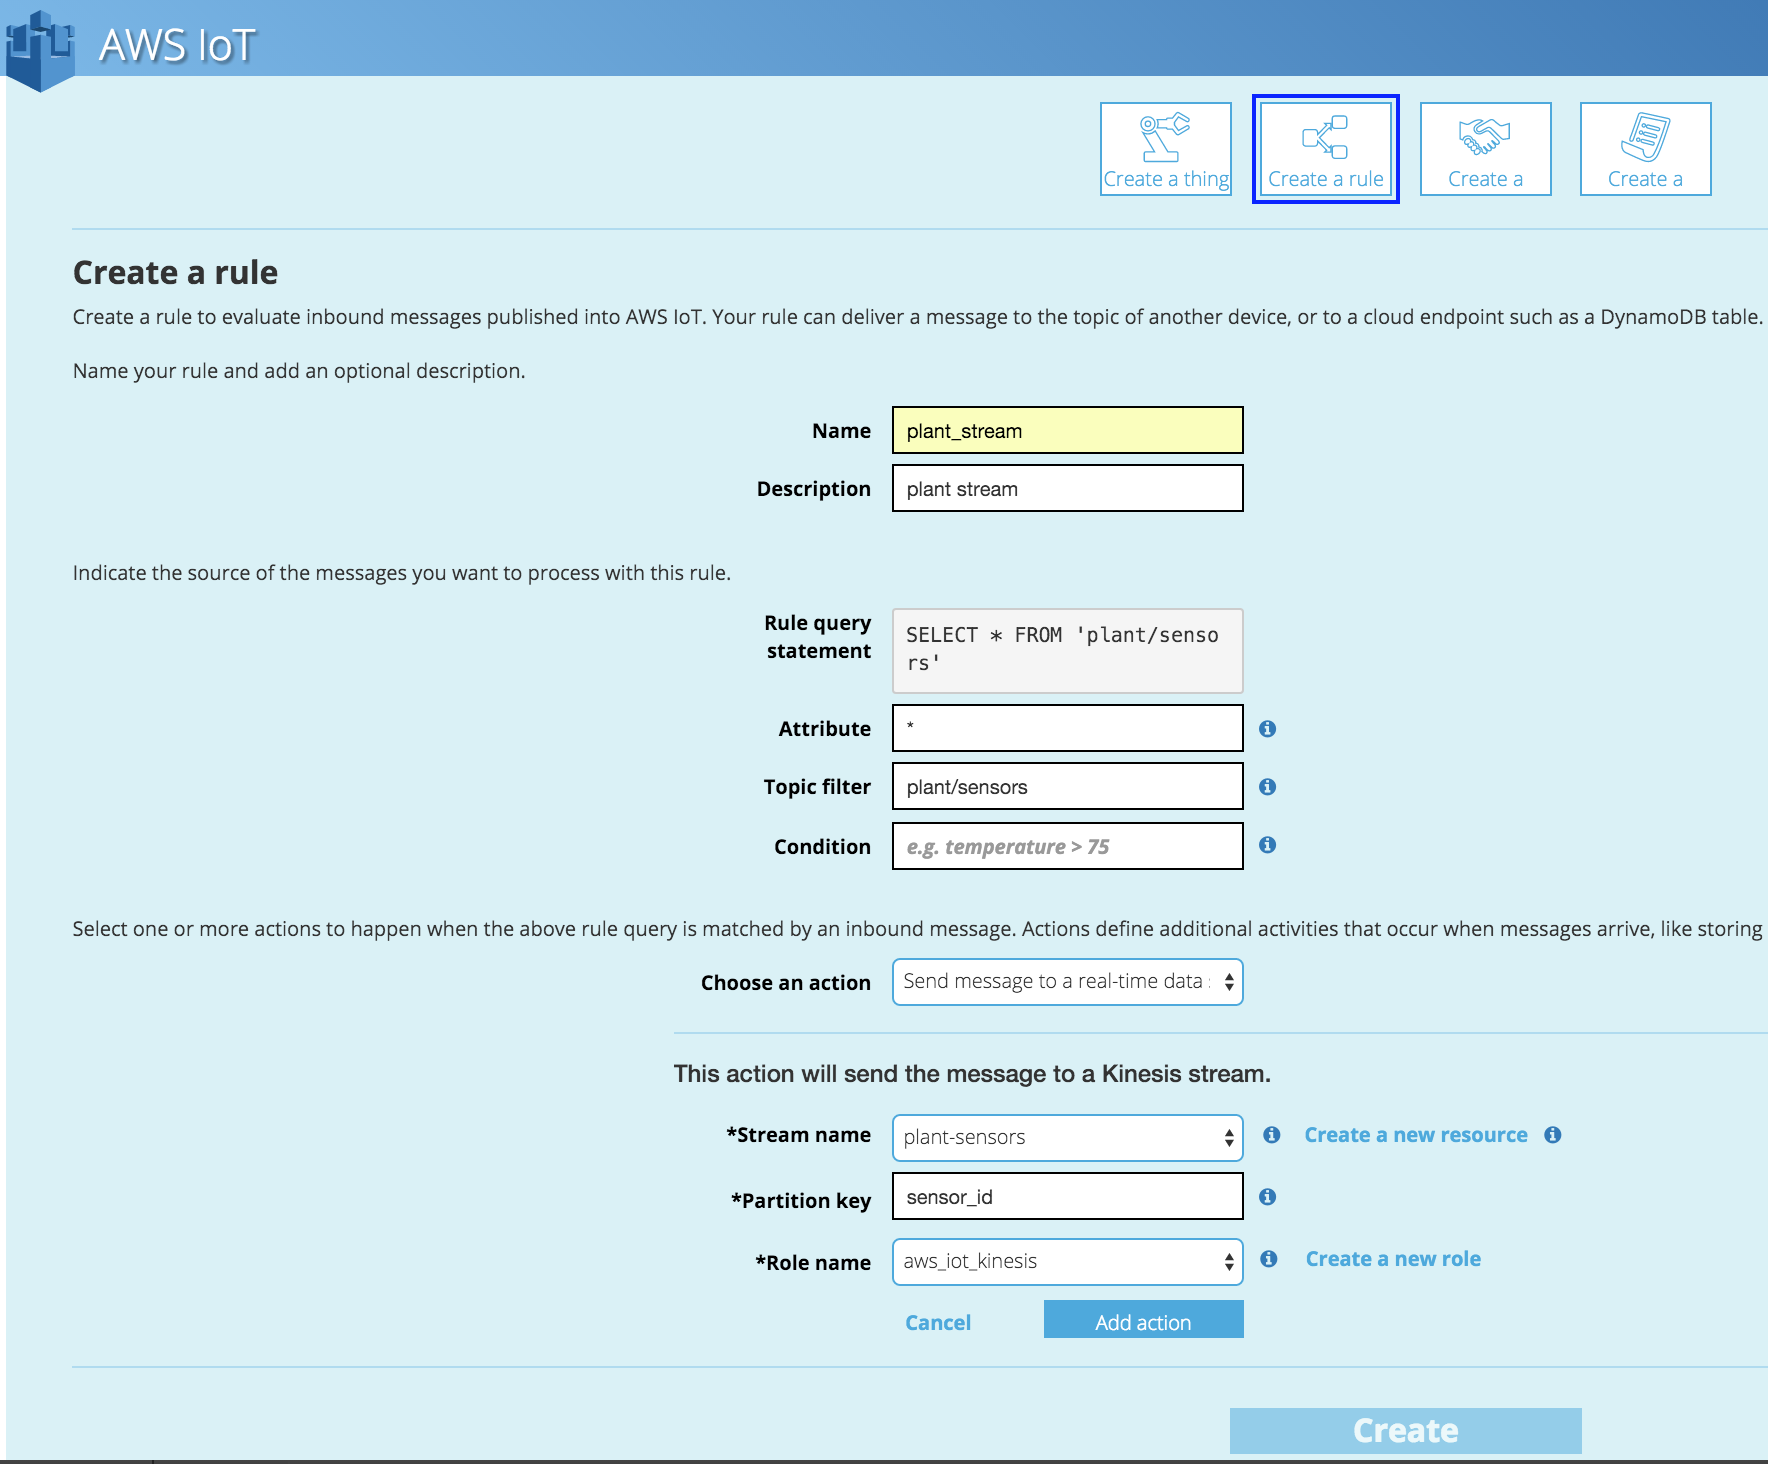
最後にRuleを作成します。今回は plant/sensors というトピック名でデータを飛ばそうと思うので、Topic filterに plant/sensors を設定します。アクションは Send message to a real-time data stream (Kinesis) を選択し、先ほど作った plant-sensors というKinesis Streamを選択します。今回はShards数は1つなのでPartition Keyは適当なものを設定しても大丈夫です。そして Add action ボタンを押して Create を押せばRule作成完了です。
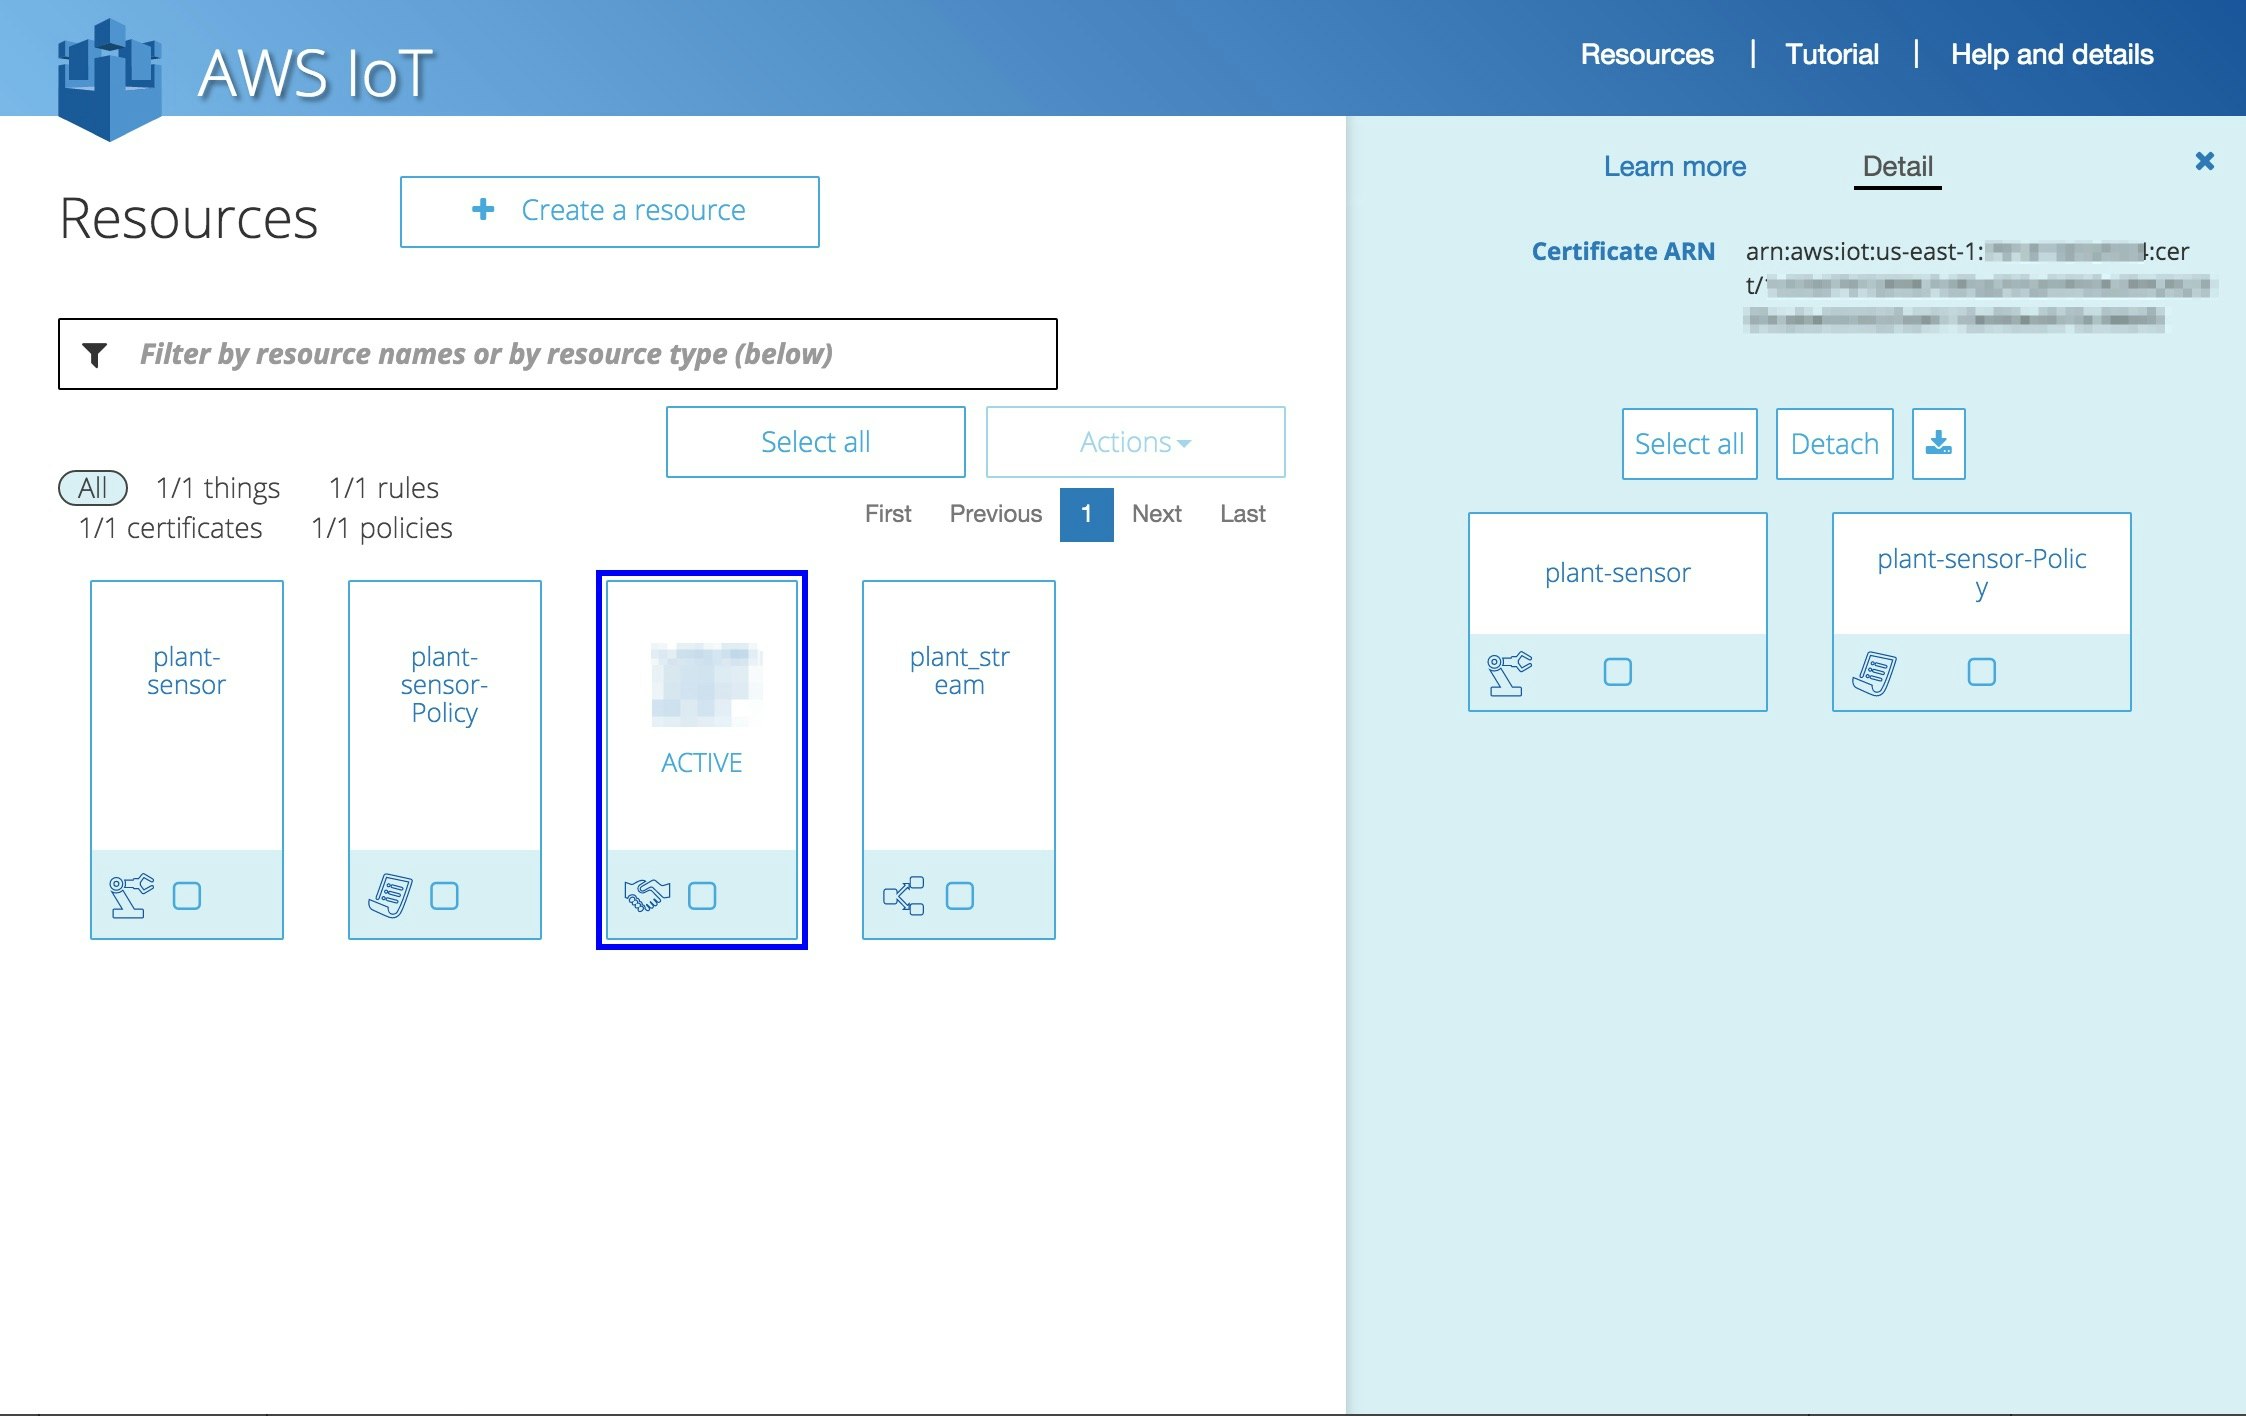
これでIoT側の準備は万端。Thing, Certificate, Policy, Ruleの4つの項目が作られているはずです。
仮想的なIoTデバイスを作成
手元にセンサがないので、とりあえず温度や湿度っぽいデータを生成するプログラムを作ってみましょう。
先ほどダウンロードした証明書は certs ディレクトリに入れておきます。 root-CA.crt はこちらからダウンロードします。
'use strict'

var awsIot = require( 'aws-iot-device-sdk');

var device = awsIot.device({
  keyPath: './certs/1c03d79728-private.pem.key',
  certPath: './certs/1c03d79728-certificate.pem.crt',
  caPath: './certs/root-CA.crt',
  clientId: 'planta-sensor',
  region: 'us-east-1'
});

var getRandomData = function(value){
  return Math.floor(value + Math.random()*value/10 - value/10/2);
}

var sendSensorData = function(){
  var data = JSON.stringify({
    timestamp: new Date(),
    humidity: getRandomData(45),
    temperature: getRandomData(20),
    lux: getRandomData(32000),
    moisture: getRandomData(301)
  });
  console.log(data);
  device.publish('plant/sensors', data);
}

device
  .on('connect', function(){
    console.log('connect');

    setInterval(function(){
      sendSensorData();
    }, 1000);
  });
早速実行してみましょう。
$ npm init
$ npm install --save aws-iot-device-sdk
$ node plant-sensor.js
connect
{"timestamp":"2015-12-31T03:08:21.059Z","humidity":42,"temperature":20,"lux":33037,"moisture":295}
{"timestamp":"2015-12-31T03:08:22.070Z","humidity":46,"temperature":19,"lux":33443,"moisture":290}
{"timestamp":"2015-12-31T03:08:23.071Z","humidity":43,"temperature":20,"lux":30566,"moisture":297}
{"timestamp":"2015-12-31T03:08:24.072Z","humidity":45,"temperature":19,"lux":33140,"moisture":308}
・・・・
CloudWatchのIoT MetricとKinesisのMonitoringを見てみると、ちゃんとデータが来ているのを確認できます。
LambdaでKinesis StreamのイベントをElasticsearchに流す
awslabs/amazon-elasticsearch-lambda-samplesのコードを参考にしながら、Kinesis StreamのイベントのレコードをElasticsearchに投入するLambdaコードを作成します。
var path = require('path');
var AWS = require('aws-sdk');

var esDomain = {
    region: 'us-east-1',
    endpoint: 'search-plant-sensor-****************.us-east-1.es.amazonaws.com',
    index: 'plant-sensor',
    doctype: 'sensor'
};
var endpoint = new AWS.Endpoint(esDomain.endpoint);
var creds = new AWS.EnvironmentCredentials('AWS');

exports.handler = function(event, context) {
    //console.log('Received event:', JSON.stringify(event, null, 2));
    event.Records.forEach(function(record) {
        // Kinesis data is base64 encoded so decode here
        var payload = new Buffer(record.kinesis.data, 'base64').toString('ascii');
        postToES(payload, context);
        console.log('Decoded payload:', payload);
    });
    context.succeed('Successfully processed ' + event.Records.length + ' records.');
};

function postToES(doc, context) {
    var req = new AWS.HttpRequest(endpoint);

    req.method = 'POST';
    req.path = path.join('/', esDomain.index, esDomain.doctype);
    req.region = esDomain.region;
    req.headers['presigned-expires'] = false;
    req.headers['Host'] = endpoint.host;
    req.body = doc;

    var signer = new AWS.Signers.V4(req , 'es');  // es: service code
    signer.addAuthorization(creds, new Date());

    var send = new AWS.NodeHttpClient();
    send.handleRequest(req, null, function(httpResp) {
        var respBody = '';
        httpResp.on('data', function (chunk) {
            respBody += chunk;
        });
        httpResp.on('end', function (chunk) {
            console.log('Response: ' + respBody);
            context.succeed('Lambda added document ' + doc);
        });
    }, function(err) {
        console.log('Error: ' + err);
        context.fail('Lambda failed with error ' + err);
    });
}
注意点としては、LambdaのRoleはKinesisとElasticsearchにアクセスできるようにしましょう。
CloudWatchで実行ログを確認してみて、ちゃんと動作してそうだったらOKです。
Kibanaでダッシュボードを作成する
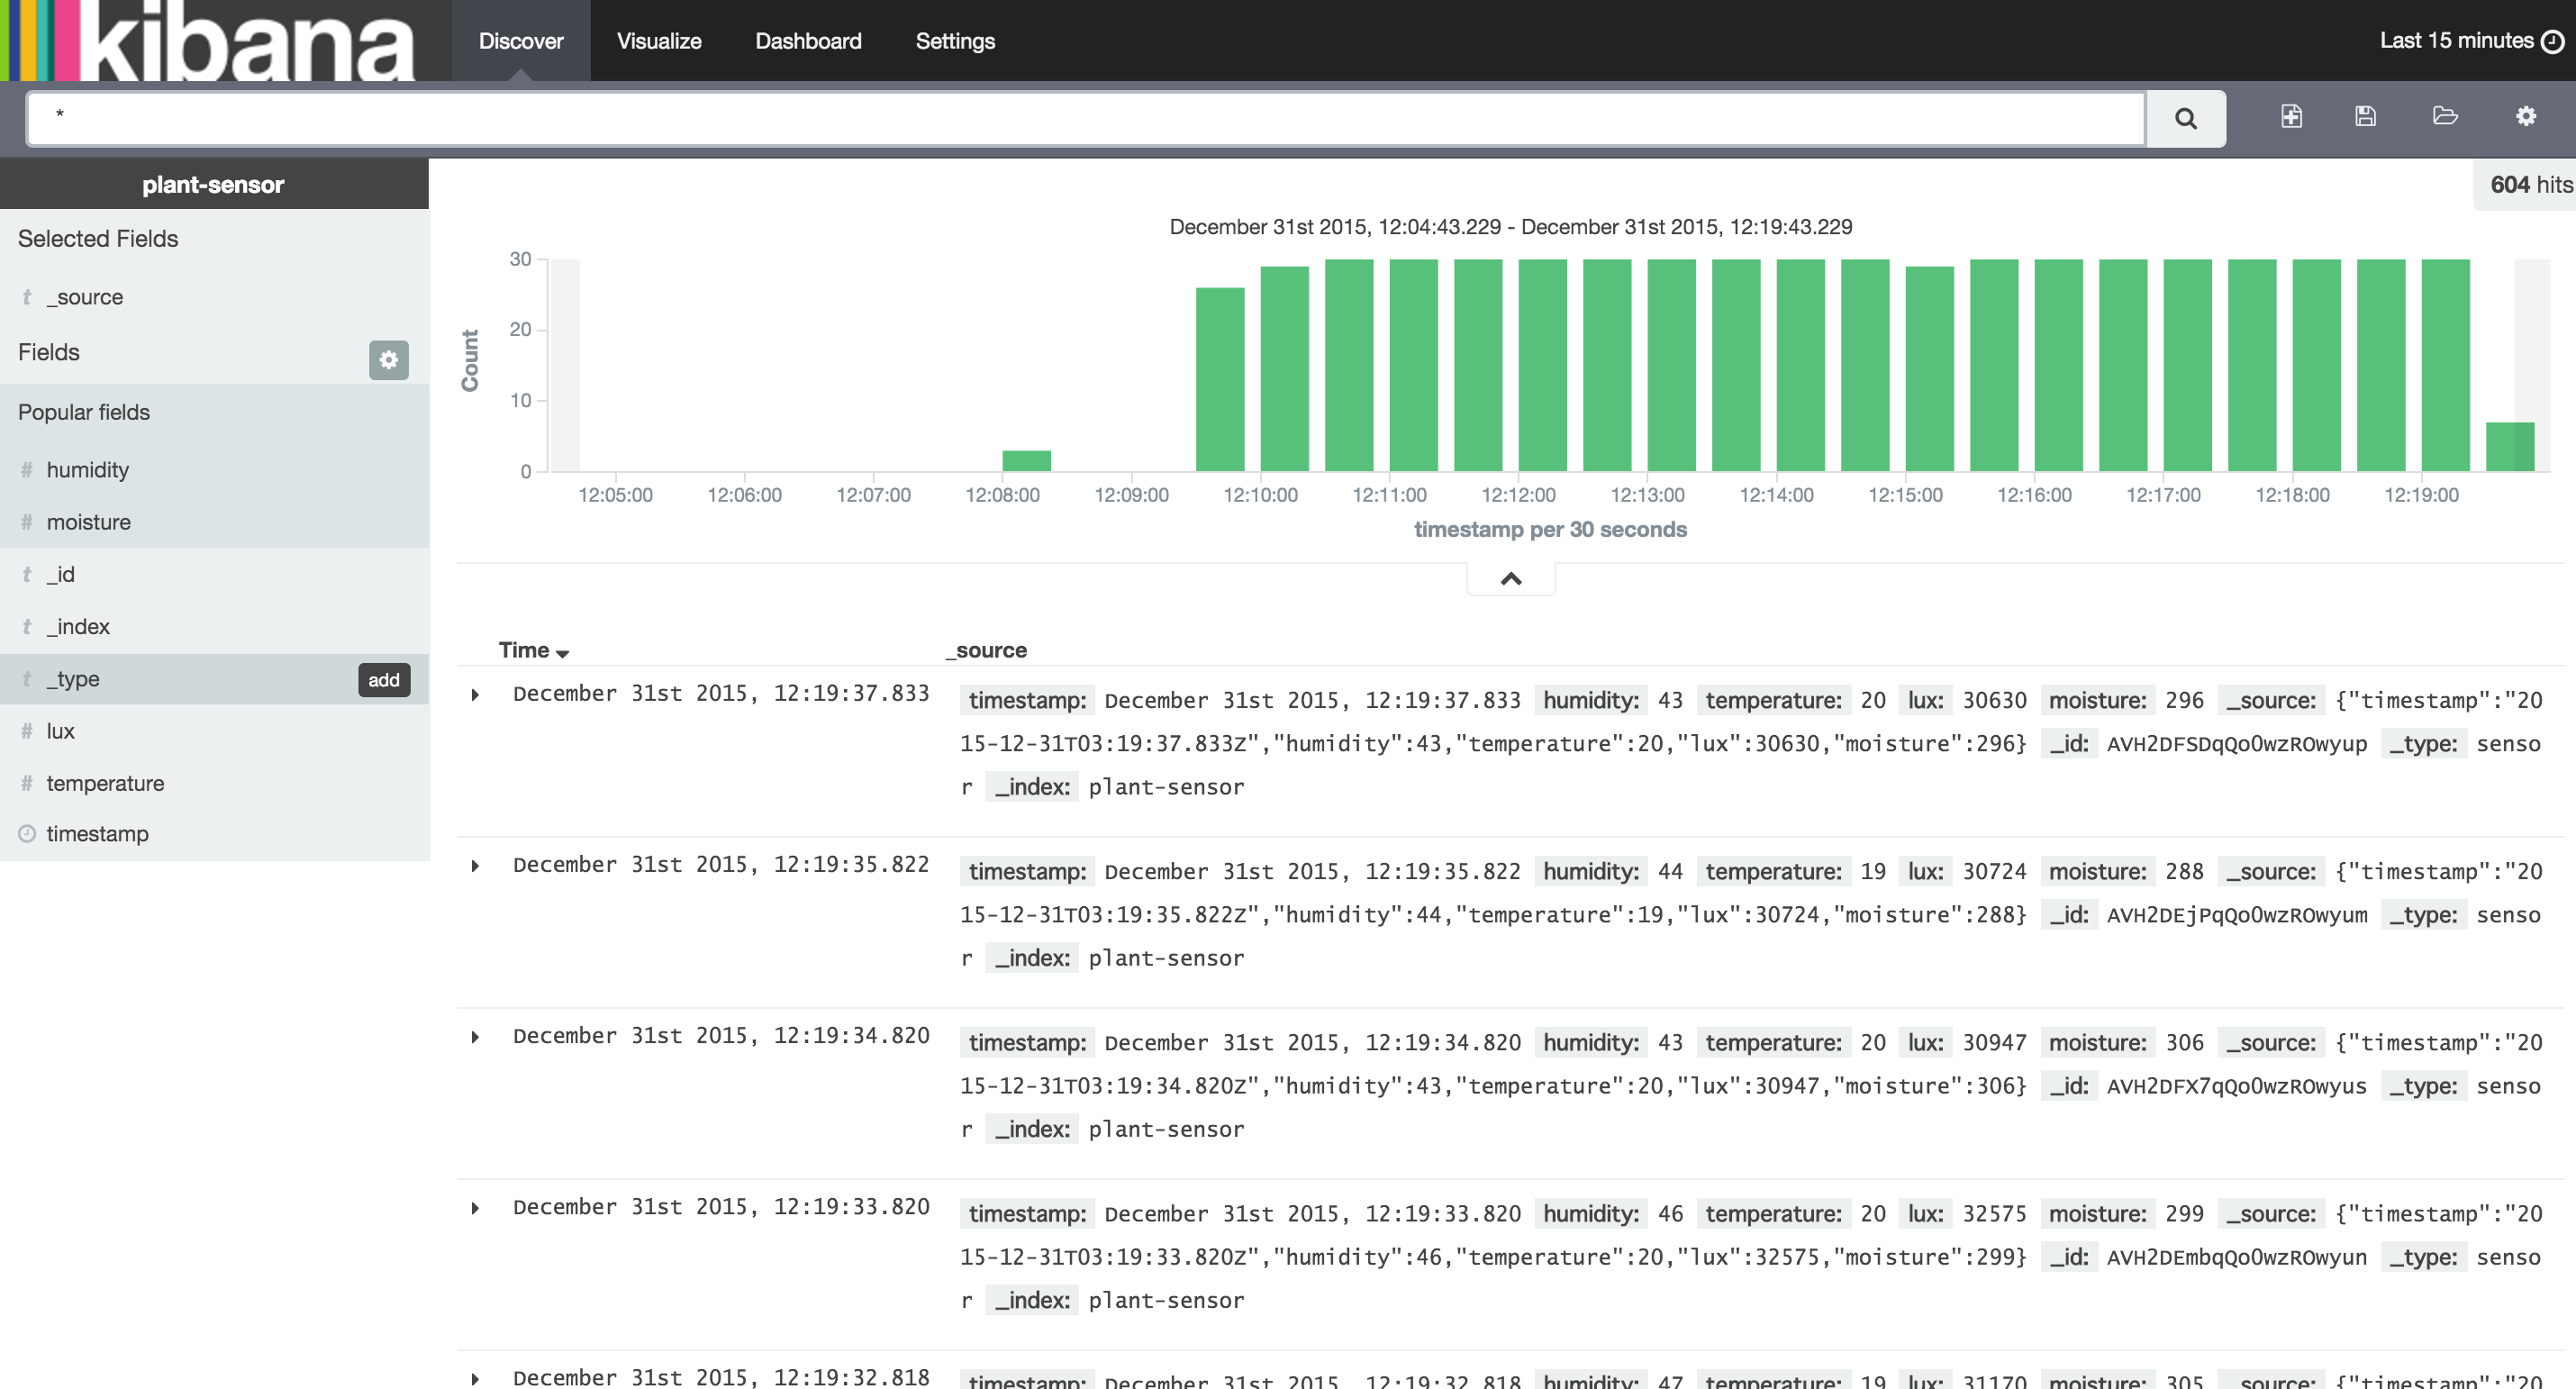
Discoverタブを見てみると、ちゃんとデータが来ているのを確認できます。
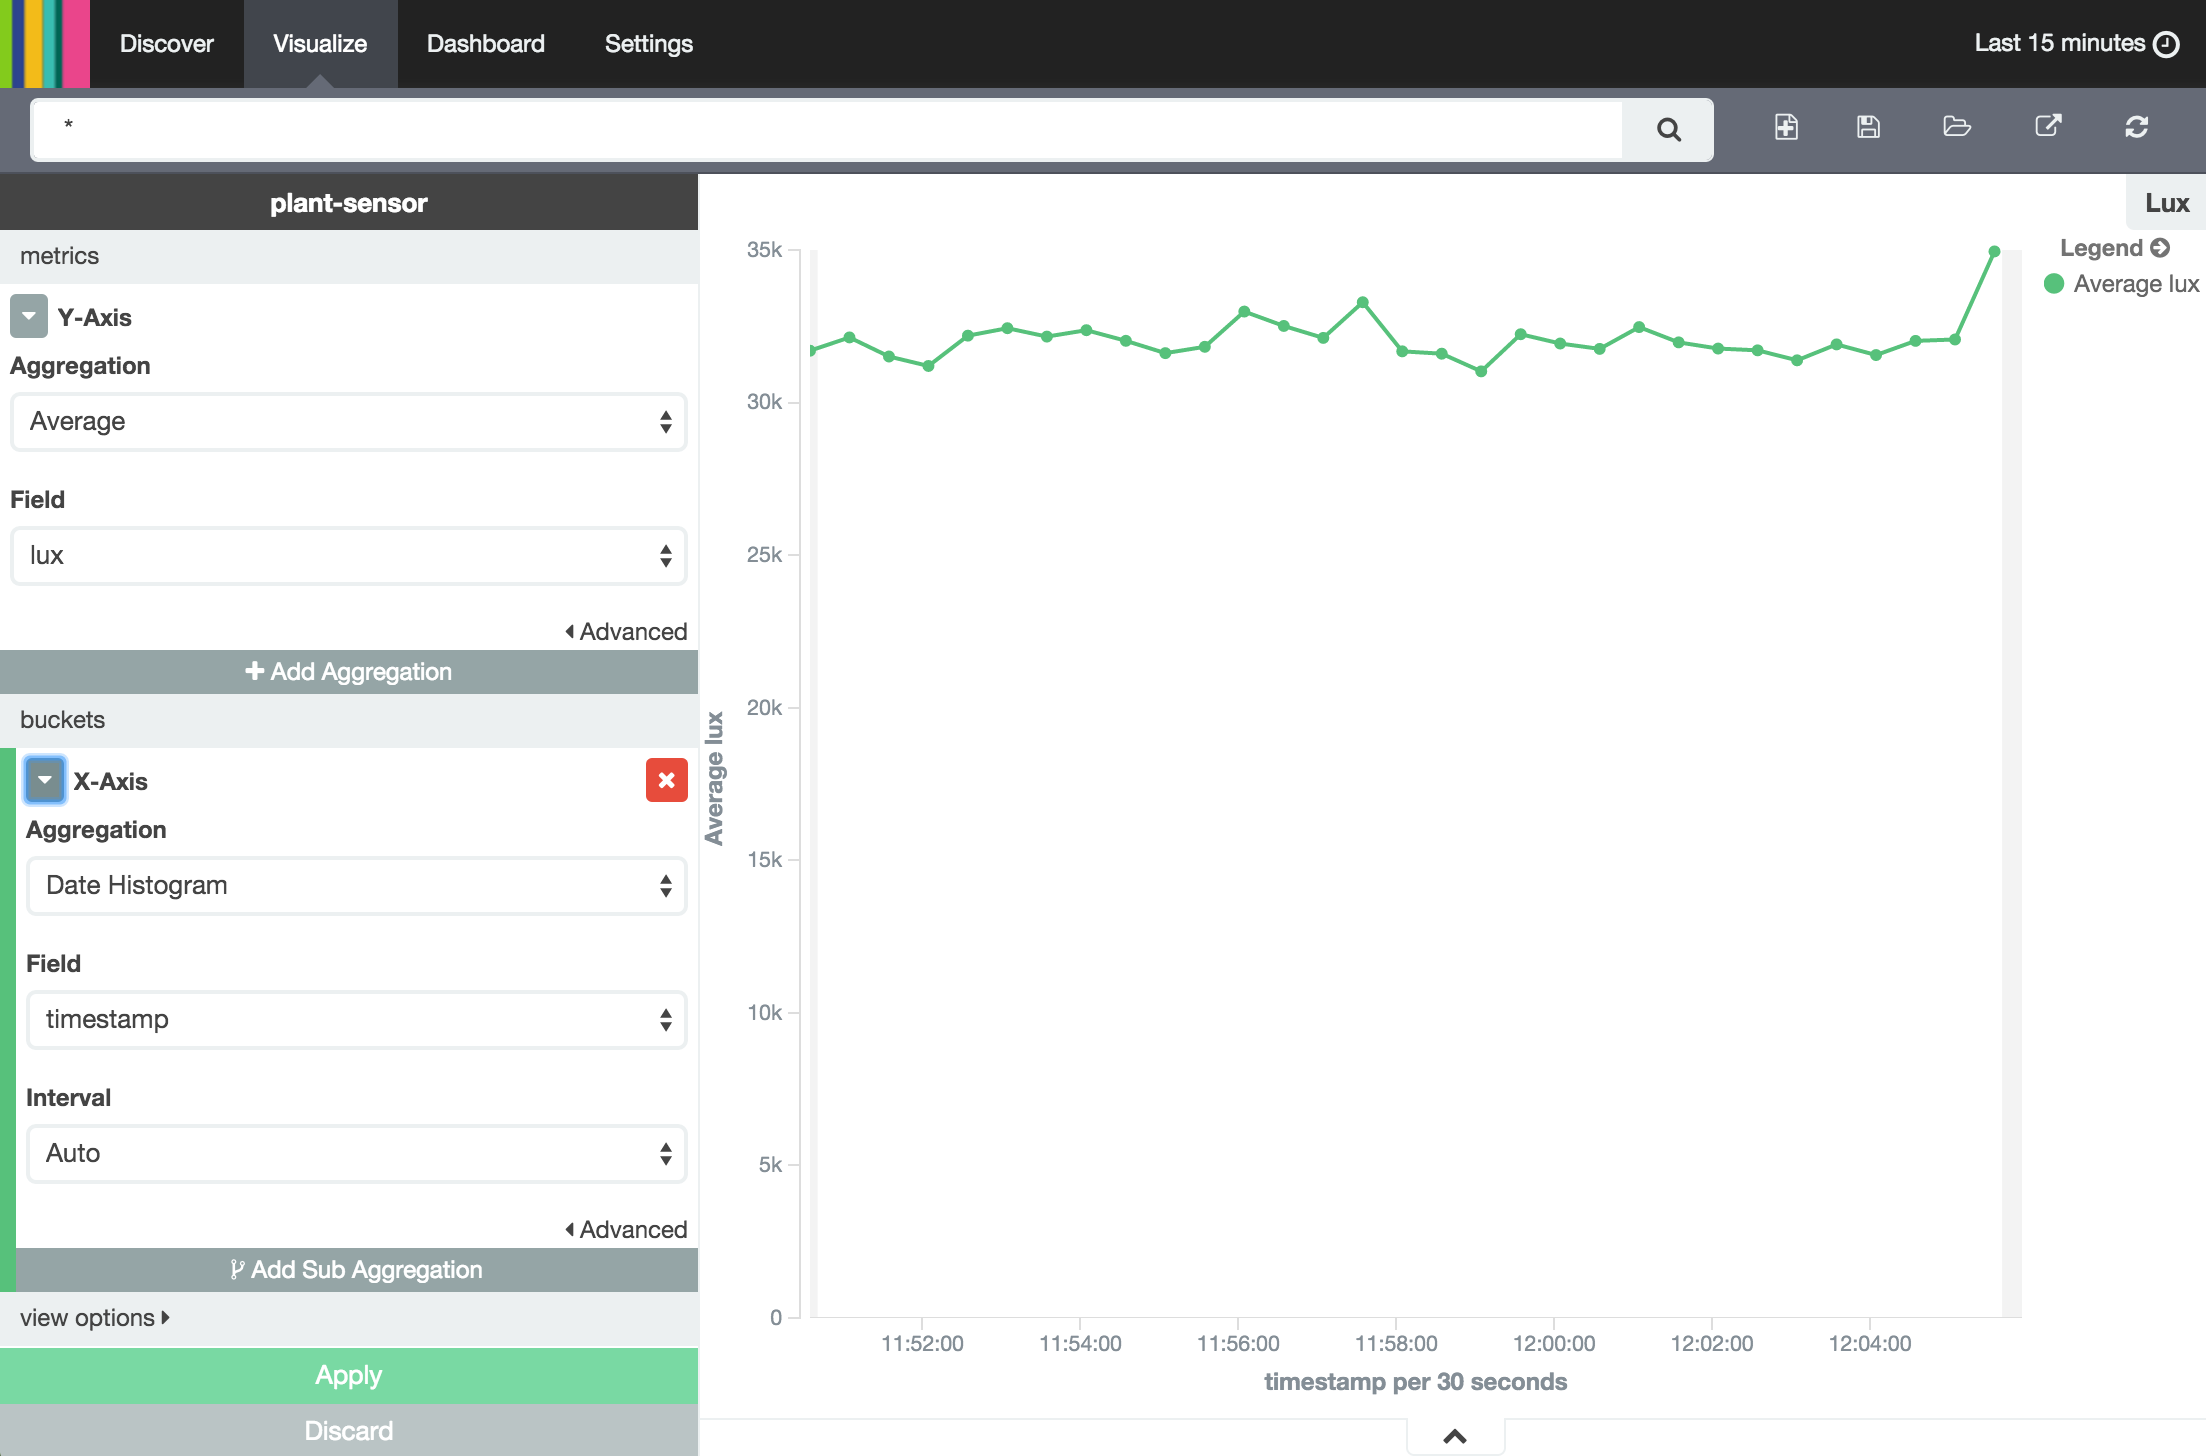
では、チャートを作ってみましょう。Visualizeタブで、以下の様な感じでグラフを作成します。
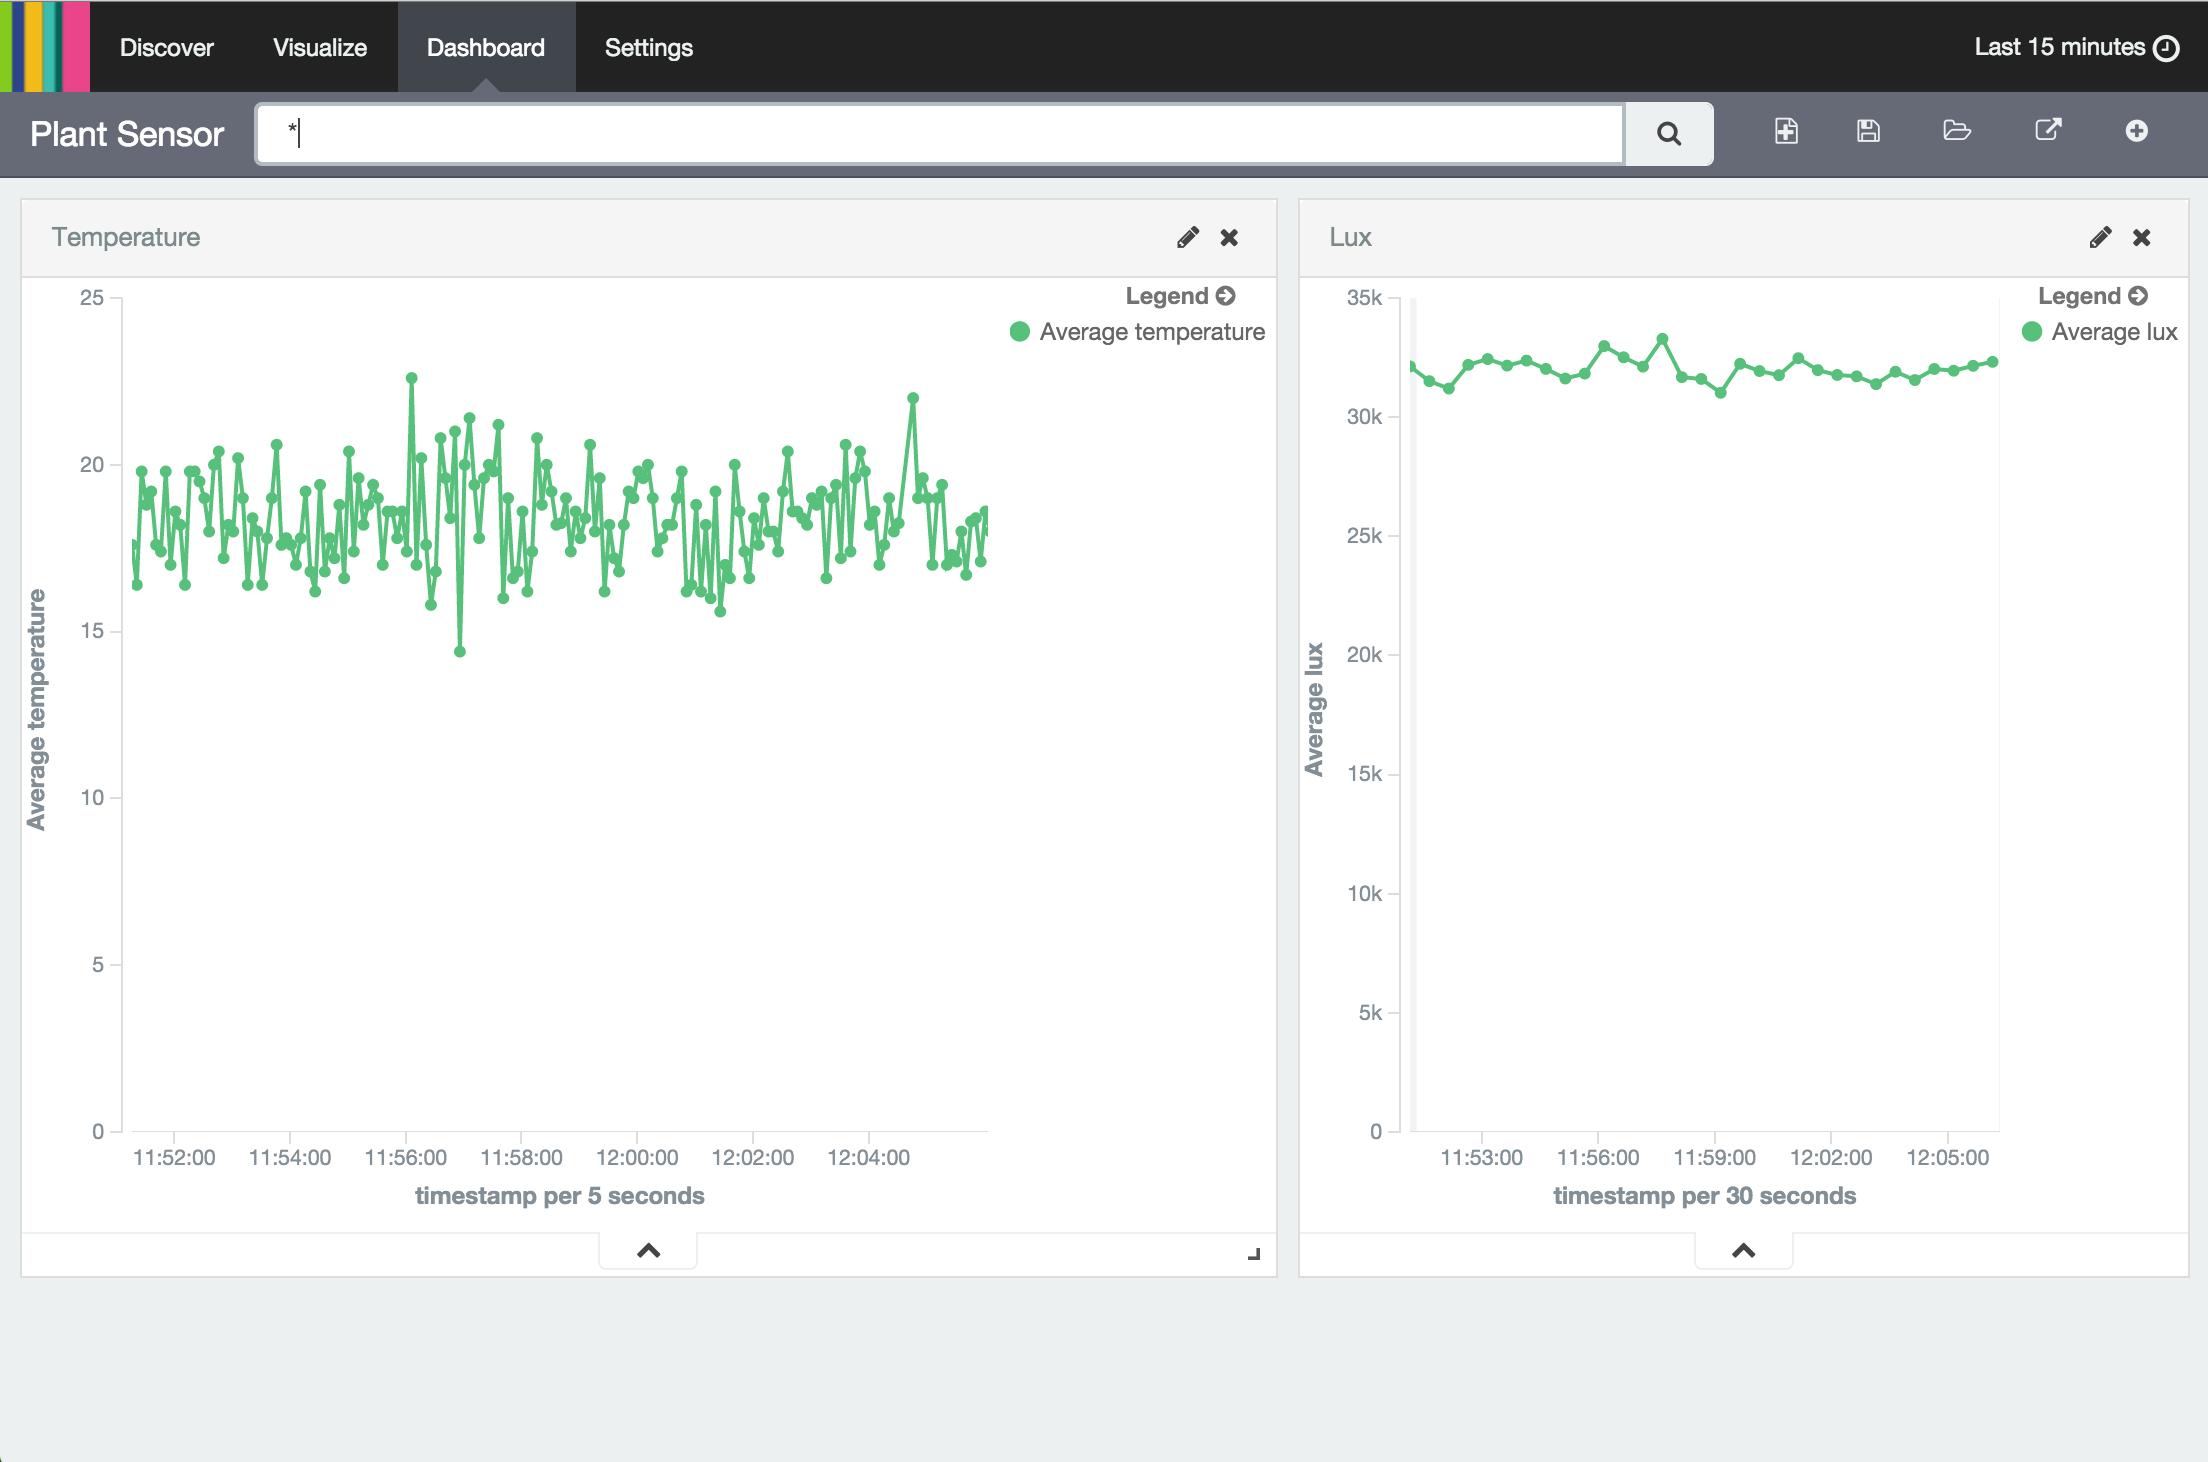
最後にダッシュボードを作成します。Dashboardタブを選択して、Add visualization で先ほど作成したチャートをポンポンと選択していくだけです!
構成要素は多いですが、意外と簡単に作れるものですね!

