角丸で枠線なUIButtonを作る場合、画像をBackgroudImageかImageを設定することになるのだが、たかが角丸な枠線のボタンのために画像を作るのは手間がかかる。
または、コード内で
button.layer.cornerRadius = 2.0;
button.layer.borderWidth = [UIColor BlackColor];
button.borderWidth = 1.0;
と指定してもいいのだが、毎回やるのは手間がかかるし、Storyboard上での見た目と違ってくる。
そこで、角丸で枠線のボタンが簡単に作れるUIButtonのサブクラスを作る。
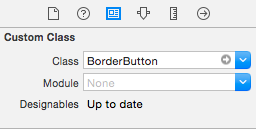
このように@interfaceの前にIB_DESIGNABLE、@propertyにIBInspectable を指定すれば Storyboard上でも思った通りに表示される。
# import <UIKit/UIKit.h>

IB_DESIGNABLE
@interface BorderButton : UIButton

@property (nonatomic) IBInspectable CGFloat cornerRadius;
@property (nonatomic) IBInspectable UIColor *borderColor;
@property (nonatomic) IBInspectable CGFloat borderWidth;

@end
# import "BorderButton.h"

@implementation BorderButton

- (void)drawRect:(CGRect)rect
{
    self.layer.cornerRadius = self.cornerRadius;
    self.layer.borderColor = self.borderColor.CGColor;
    self.layer.borderWidth = self.borderWidth;

    [super drawRect:rect];
}

@end
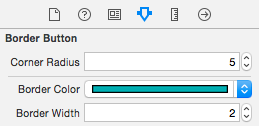
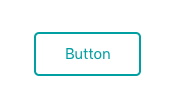
追加したパラメーターが表示されるようになるので、これを指定すると

こちらを参考にしました
http://qiita.com/Kta-M/items/ae22fd0c78cb15faee0b
https://developer.apple.com/library/ios/recipes/xcode_help-IB_objects_media/Chapters/CreatingaLiveViewofaCustomObject.html

