始めに
Embulkを使ってCloudtrailログをelasticsearchに放り込むのが便利だったのでので、やり方をまとめておきます。
準備
-
elasticsearchとkibanaをインストールしておく。手順は下記リンクなどを参考に。
-
elasticsearch上にマッピングを作成。kibanaで分析する場合は各フィールド適宜not_analyzed を指定する。今回は以下ののmappingを使用。
{
    "mappings": {
        "log": {
            "properties": {
                "eventName": {
                    "type": "string",
                    "index": "not_analyzed"
                },
                "eventSource": {
                    "type": "string",
                    "index": "not_analyzed"
                },
                "awsRegion": {
                    "type": "string",
                    "index": "not_analyzed"
                },
                "sourceIPAddress": {
                    "type": "string",
                    "index": "not_analyzed"
                },
                "errorCode": {
                    "type": "string",
                    "index": "not_analyzed"
                },
                "requestID": {
                    "type": "string",
                    "index": "not_analyzed"
                },
                "eventID": {
                    "type": "string",
                    "index": "not_analyzed"
                },
                "userType": {
                    "type": "string",
                    "index": "not_analyzed"
                },
                "userArn": {
                    "type": "string",
                    "index": "not_analyzed"
                },
                "userName": {
                    "type": "string",
                    "index": "not_analyzed"
                },
                "accesskeyid": {
                    "type": "string",
                    "index": "not_analyzed"
                },
                "userAgent": {
                    "type": "string",
                    "index": "not_analyzed"
                },
                "eventTime": {
                    "type": "date",
                    "format": "dateOptionalTime"
                },
                "errorMessage": {
                    "type": "string",
                    "index": "not_analyzed"
                }
            }
        }
    }
}
えんばるくる(Embulkの実行)
Embulkをインストールする。
$ curl –create-dirs. –o ~/.embulk/bin/embulk –L http://dl.embulk.org/embulk-latest.jar
$ chmod +x ~/.embulk/bin/embulk
$ echo 'export PATH="$HOME/.embulk/bin:$PATH"' >> ~/.bashrc
$ source ~/.bashrc
S3 input、json parser、elasticsearch output のプラグインをインストールする。
$ embulk gem install embulk-input-s3
$ embulk gem install embulk-output-elasticsearch
$ embulk gem install embulk-parser-json
設定ファイルを書く。
in:
  type: s3
  bucket: <bucket name>
  path_prefix: <path to cloudtrail log>
  endpoint: <s3 region endpoint>
  access_key_id: <access key>
  secret_access_key: <secret key>
  decoders:
  - {type: gzip}
  parser:
    type: json
    root: $.Records
    schema:
      - {name: eventName, type: string}
      - {name: eventSource, type: string}
      - {name: awsRegion, type: string}
      - {name: sourceIPAddress, type: string}
      - {name: eventTime, type: string}
      - {name: requestID, type: string}
      - {name: eventID, type: string}
      - {name: userType, path: userIdentity.type, type: string}
      - {name: userArn, path: userIdentity.arn, type: string}
      - {name: userName, path: userIdentity.userName, type: string}
      - {name: accesskeyid, path: userIdentity.accessKeyId, type: string}
      - {name: userAgent, type: string}
      - {name: errorCode, type: string}
      - {name: errorMessage, type: string}
out:
  type: elasticsearch
  cluster_name: <clustername>
  nodes:
    - {host: "localhost", port: 9300}
  index: cloudtrail
  index_type: log
previewコマンドでinput側のdry-runができる。
$ embulk preview config.yml
問題なさそうであればデータロードの実行。
$embulk run config.yml -o config.yml
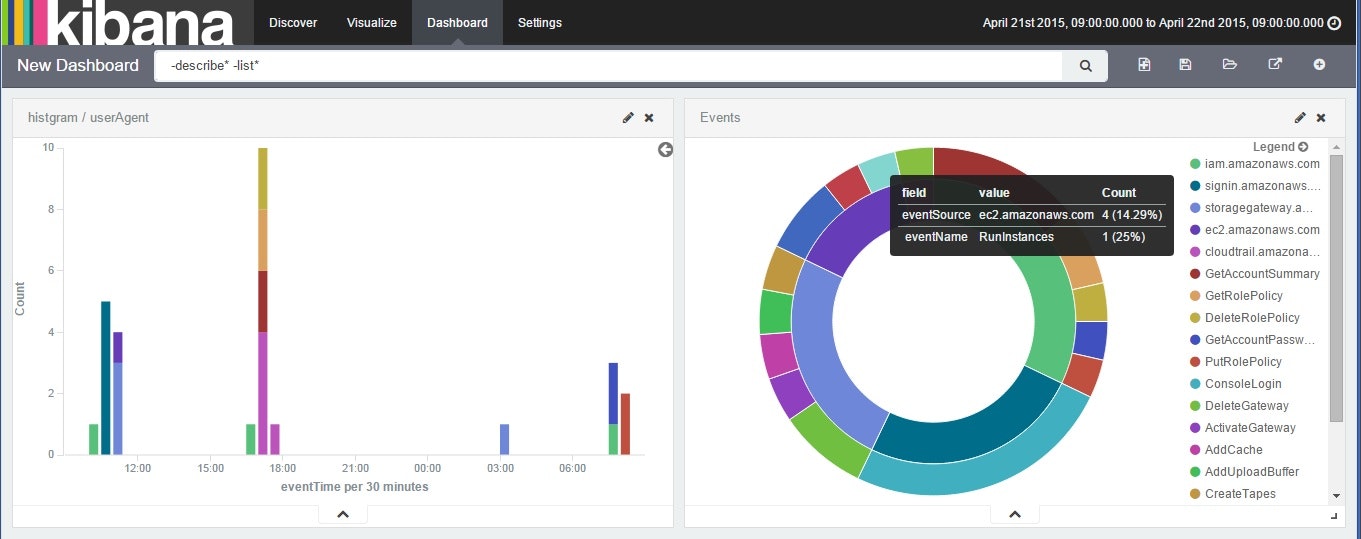
ロードが終わったら、kibanaで眺める。
注意事項
kibana上ではローカルタイムゾーンでの時刻表示となるようです https://github.com/elastic/kibana/issues/1600
UTCとずれて表示されるのご注意ください。
雑感
- Embulk、初めて触ったけどとんでもなく簡単だし便利。設定ファイル書き換えればELBやCloudFrontログを解析することもすぐにできそう。
- Redshiftのoutputプラグインもあるので、Redshiftで分析することもたぶん可能。Pluginが増えると使い方がどんどん広がる。
参考リンク等
Embulk公式
https://github.com/embulk/embulk
http://treasure-data.hateblo.jp/entry/2015/02/02/133635 #紹介記事
http://www.embulk.org/plugins/ #plug-inのリスト。
今回使ったEmbulk plug-in
https://github.com/embulk/embulk-input-s3
https://github.com/takumakanari/embulk-parser-json
https://github.com/muga/embulk-output-elasticsearch
定期的にログをkibanaで分析したい場合はLambdaもお勧めです
Lambdaを使ってCloudtrailログをElasticsearchに投下する
