前置き
手元にRaspberryPiがあって、Spotifyのアカウントが取れたので。
spotify-clientのインストール?
Spotify for Linux を参照してみると、debianパッケージが公開されているらしい
$ sudo apt-key adv --keyserver hkp://keyserver.ubuntu.com:80 --recv-keys BBEBDCB318AD50EC6865090613B00F1FD2C19886
Executing: /tmp/tmp.XGHd70qrvM/gpg.1.sh --keyserver
hkp://keyserver.ubuntu.com:80
--recv-keys
BBEBDCB318AD50EC6865090613B00F1FD2C19886
gpg: requesting key D2C19886 from hkp server keyserver.ubuntu.com
gpg: key D2C19886: public key "Spotify Public Repository Signing Key <operations@spotify.com>" imported
gpg: Total number processed: 1
gpg:               imported: 1  (RSA: 1)
$ echo deb http://repository.spotify.com stable non-free | sudo tee /etc/apt/sources.list.d/spotify.list
deb http://repository.spotify.com stable non-free
$ apt-get update
Reading package lists... Done
.....
N: Skipping acquire of configured file 'non-free/binary-armhf/Packages' as repository 'http://repository.spotify.com stable InRelease' doesn't support architecture 'armhf'
試してみると、どうやらRaspberryPiをサポートしていないらしい。まぁ、自分でビルドすりゃいいんだろうけど、いろいろと検索してみたら、Mopidyというのがあるらしいのでそちらをインストールしてみる。
Mopidyのインストール
Debian/Ubuntu: Install from apt.mopidy.comを参照して、aptのリストに追加後インストール。
$ wget -q -O - https://apt.mopidy.com/mopidy.gpg | sudo apt-key add -
$ sudo wget -q -O /etc/apt/sources.list.d/mopidy.list https://apt.mopidy.com/wheezy.list
$ sudo apt-get update
$ sudo apt-get install mopidy
$ sudo apt-get install mopidy-spotify
Spotifyのユーザー&アカウントの設定
どうやらプレミアムのアカウントが必要らしいので、30日間無料にとりあえずサインアップ。
Spotifyにログインしてデバイスのパスワード設定からパスワード設定のためのURLを送ってもらう。
パスワード設定ページでエラーが出るが、設定できているみたいなので configファイルに設定を記述する。
[spotify]
enabled = true
username = {USERNAME}
password = {PASSWORD}
bitrate = 320
timeout = 10
cache_dir = $XDG_CACHE_DIR/mopidy/spotify
raspberry pi から音が出ない?
config
configファイルに以下を追加してreboot。
dtparam=audio=on
aplay でリストに出てくる事を確認。
$ aplay -l
**** List of PLAYBACK Hardware Devices ****
card 0: ALSA [bcm2835 ALSA], device 0: bcm2835 ALSA [bcm2835 ALSA]
  Subdevices: 8/8
  Subdevice #0: subdevice #0
  Subdevice #1: subdevice #1
  Subdevice #2: subdevice #2
  Subdevice #3: subdevice #3
  Subdevice #4: subdevice #4
  Subdevice #5: subdevice #5
  Subdevice #6: subdevice #6
  Subdevice #7: subdevice #7
card 0: ALSA [bcm2835 ALSA], device 1: bcm2835 ALSA [bcm2835 IEC958/HDMI]
  Subdevices: 1/1
  Subdevice #0: subdevice #0
音が出ることの確認
以下のコマンドを実行して音が期待通りに出ることを確認。
$ speaker-test -t sine -f 600
$ aplay /usr/share/sounds/alsa/Front_Center.wav
出力先の設定
アナログ(イヤホンジャック)側への出力
$ amixer cset numid=3 1
HDMI側への出力
$ amixer cset numid=3 2
WebClientのセットアップ
WebClientを port:6680 で起動させることにする。
ポートを開ける
ufwでポートを開ける設定をしておく。
$ sudo ufw allow 6680
$ sudo ufw enable
pipでWebClientをインストール
$ pip install Mopidy-Moped
そのままやると /usr/local/lib/python2.7/dist-packages/mopidy_moped/ 以下に保存されるので、configファイルにコレを設定しておく。
[http]
enabled = true
hostname = 192.168.11.11
port = 6680
static_dir = /usr/local/lib/python2.7/dist-packages/mopidy_moped/static/
設定後再起動
$ sudo service mopidy restart
アクセスする
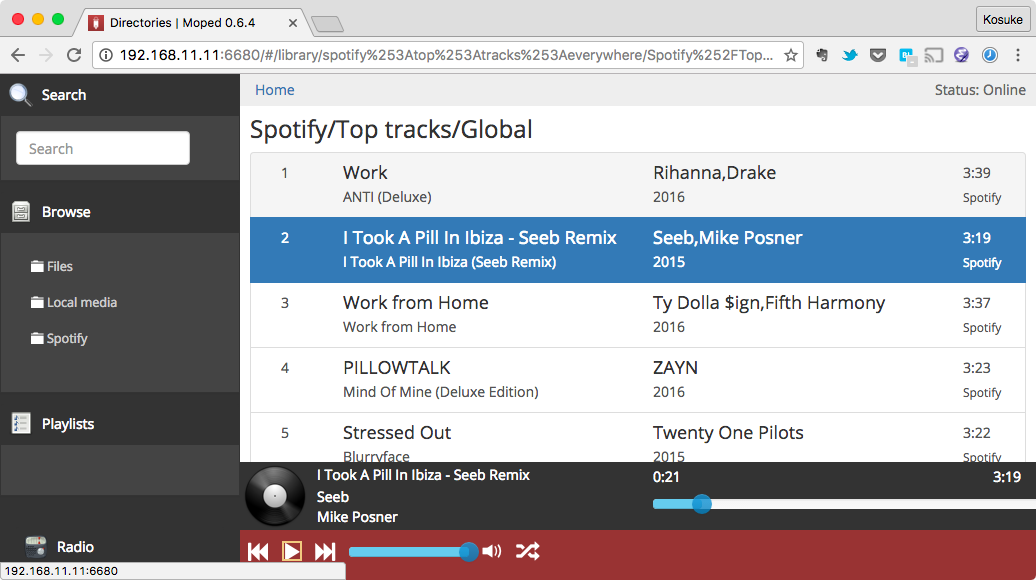
http://localhost:6680 に手元のMacからアクセスして、RaspberryPiに接続したスピーカーから音が流れる事が確認できました。
