概要
とりとめのない雑多な覚書
jQuery
Node.jsを入れてプロンプト画面で実行する
ブラウザを使わずにjQueryを試すための環境構築
### Ubuntu16.04, node v8.1.1, jquery@3.2.1, jsdom@11.0.0
$ git clone https://github.com/creationix/nvm.git ~/.nvm
$ source ~/.nvm/nvm.sh
### 最新のnodeをインストール
$ nvm install `nvm ls-remote | tail -1`
$ node -v
================================================
v8.1.1
================================================
$ mkdir jquery_sample
$ cd jquery_sample
### $ npm init
$ cat <<- 'EOS' > package.json
{
  "name": "jquery_sample",
  "version": "1.0.0",
  "description": "",
  "main": "index.js",
  "scripts": {
    "test": "echo \"Error: no test specified\" && exit 1"
  },
  "author": "",
  "license": "ISC"
}
EOS
$ npm install jquery jsdom --save
$ cat <<- 'EOS' > fruits.js
const jsdom = require("jsdom");
const { JSDOM } = jsdom;
const { window } = new JSDOM(`<!DOCTYPE html>`);
const $ = require('jquery')(window);

$(function() {

    var arr = [ "apple", "orange", "grape" ];
    $.each(arr, function(i, val) {
        console.log(i+':'+val);
    });
});
EOS
$ node fruits.js
================================================
0:apple
1:orange
2:grape
================================================
htmlを読み取って値を取り出す
$ cat <<- 'EOS' > index.html
<html>
  <body>
    <div id="hoge">
      <h1>h1 text</h1>
    </div>
  </body>
</html>
EOS

$ cat <<- 'EOS' > app.js
const jsdom = require("jsdom");
const { JSDOM } = jsdom;
const { window } = new JSDOM(`<!DOCTYPE html>`);
const $ = require('jquery')(window);
const fs = require('fs');

fs.readFile(__dirname + '/index.html', function (err, data) {
  if (err) throw err;

  var body = data.toString();
  console.log(body);
  console.log($(body).find('h1').text());
});
EOS

$ node app.js
================================================
<html>
  <body>
    <div id="hoge">
      <h1>h1 text</h1>
    </div>
  </body>
</html>

h1 text
================================================
デバッグ
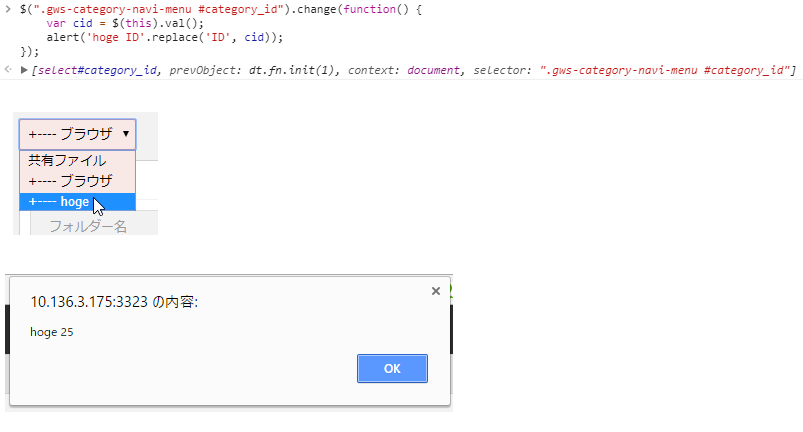
  $(".gws-category-navi-menu #category_id").change(function() {
    var cid = $(this).val();
    if (cid) location.href = '<%= gws_share_category_files_path(category: 'ID') %>'.replace('ID', cid);
    else location.href = '<%= gws_share_files_path %>';
  });
のようなコードでcidの中身を確認したい時は、Chromeのコンソールで
$(".gws-category-navi-menu #category_id").change(function() {
    var cid = $(this).val();
    alert(cid);
});
を入れて遷移するとダイアログに値が出る。
Mastodon
### 雑なメモ
$ bundle exec install --path vendor/bundle
$ bundle exec rake npm:install
- PostgreSQLにパスワード認証で接続できない
-
pg_hba.confをpeerをmd5に変更する
-
PostgreSQL
インストール
### デフォルトのリポジトリが使われないように修正
$ sudo vi /etc/yum.repos.d/CentOS-Base.repo
================================================
[base]
...
exclude=postgresql* ### ディレクティブの最後に追加する
[updates]
...
exclude=postgresql* ### ディレクティブの最後に追加する
================================================

### PostgreSQL9.6のリポジトリ設定
$ sudo yum install https://download.postgresql.org/pub/repos/yum/9.6/redhat/rhel-7-x86_64/pgdg-centos96-9.6-3.noarch.rpm

### PostgreSQL9.6のインストール
$ sudo yum install postgresql96-server postgresql96-devel

### PATHの設定
$ sudo vi /etc/profile.d/postgresql.sh
================================================
export PATH=$PATH:/usr/pgsql-9.6/bin
================================================
$ source /etc/profile.d/postgresql.sh

### セットアップ
### $ sudo postgresql-setup initdb
### ================================================
### Initializing database ... OK
### ================================================
$ sudo su - postgres
$ initdb --encoding=UTF8 --no-locale
================================================
The files belonging to this database system will be owned by user "postgres".
This user must also own the server process.

The database cluster will be initialized with locale "C".
The default text search configuration will be set to "english".

Data page checksums are disabled.

fixing permissions on existing directory /var/lib/pgsql/9.6/data ... ok
creating subdirectories ... ok
selecting default max_connections ... 100
selecting default shared_buffers ... 128MB
selecting dynamic shared memory implementation ... posix
creating configuration files ... ok
running bootstrap script ... ok
performing post-bootstrap initialization ... locale: Cannot set LC_MESSAGES to default locale: No such file or directory
ok
syncing data to disk ... ok

WARNING: enabling "trust" authentication for local connections
You can change this by editing pg_hba.conf or using the option -A, or
--auth-local and --auth-host, the next time you run initdb.

Success. You can now start the database server using:

    pg_ctl -D /var/lib/pgsql/9.6/data -l logfile start
================================================
$ exit

### 【開発用途設定】ローカルホストからアクセスを受け付ける
$ sudo vi /var/lib/pgsql/9.6/data/postgresql.conf
================================================
### ローカルホストのみアクセスを受け付ける
listen_addresses = 'localhost'

### ログを[日時 ユーザー DB ~] 形式にする
### 9.2のとき
### log_line_prefix = '%t %u %d '
log_line_prefix = '< %m > '
================================================

### PostgreSQLの起動
$ sudo systemctl start postgresql-9.6.service
$ sudo systemctl enable postgresql-9.6.service

### adminのパスワード変更
$ sudo su - postgres
$ psql -c "alter user postgres with password 'pass'"
================================================
ALTER ROLE
================================================

### DBユーザ「mastodon」作成
$ createuser mastodon

### データベース作成 (オーナーは上記ユーザー)
$ createdb mastodon_development -O mastodon
$ createdb mastodon_test -O mastodon
$ createdb mastodon_production -O mastodon

### 確認
$ psql -l
================================================
                                               データベース一覧
         名前         |  所有者  | エンコーディング |  照合順序   | Ctype(変換演算子) |      アクセス権
----------------------+----------+------------------+-------------+-------------------+-----------------------
 mastodon_development | mastodon | UTF8             | ja_JP.UTF-8 | ja_JP.UTF-8       |
 mastodon_production  | mastodon | UTF8             | ja_JP.UTF-8 | ja_JP.UTF-8       |
 mastodon_test        | mastodon | UTF8             | ja_JP.UTF-8 | ja_JP.UTF-8       |
 postgres             | postgres | UTF8             | ja_JP.UTF-8 | ja_JP.UTF-8       |
 template0            | postgres | UTF8             | ja_JP.UTF-8 | ja_JP.UTF-8       | =c/postgres          +
                      |          |                  |             |                   | postgres=CTc/postgres
 template1            | postgres | UTF8             | ja_JP.UTF-8 | ja_JP.UTF-8       | =c/postgres          +
                      |          |                  |             |                   | postgres=CTc/postgres
(6 行)
================================================

### DBに接続(mastodon_development)
$ psql mastodon_development
================================================
psql (9.2.18)
"help" でヘルプを表示します.
================================================

### パスワード設定
mastodon_development=# alter user mastodon with password 'pass';
================================================
ALTER ROLE
================================================

### DBを切り替えてパスワード変更
mastodon_development=# \c mastodon_production
================================================
データベース "mastodon_production" にユーザ"postgres"として接続しました。
================================================
mastodon_production=# alter user mastodon with password 'pass';
================================================
ALTER ROLE
================================================

※ この後mastodon_testも同様

### ログアウト
mastodon_test=# \q

### 認証方式を変更
### これを設定してないとローカルの接続でパスワード認証に失敗する
### リモートからも接続できるようにする
$ sudo vi /var/lib/pgsql/9.6/data/pg_hba.conf
================================================
# local   all             all                                     peer
local   all             all                                     md5
...
host    all             all             172.17.0.0/16            md5
================================================
$ sudo systemctl restart postgresql-9.6.service

### 接続テスト
$ psql mastodon_production -U mastodon
================================================
ユーザ mastodon のパスワード:
psql (9.2.18)
"help" でヘルプを表示します.

mastodon_production=>
================================================
テーブルの作成とレコードの追加
### DBに接続
$ psql jsd -d jsd_development

### テーブル一覧の表示
jsd_development=> \dt;
================================================
### まだテーブル無し
No relations found.
================================================

### テーブルの作成
jsd_development=> create table people (id SERIAL, name text, age integer, address text);
================================================
NOTICE:  CREATE TABLE will create implicit sequence "people_id_seq" for serial column "people.id"
CREATE TABLE
================================================

### テーブル一覧の表示
jsd_development=> \dt;
================================================
        List of relations
 Schema |  Name  | Type  | Owner
--------+--------+-------+-------
 public | people | table | jsd
(1 row)
================================================

### テーブルの構造の表示
jsd_development=> \d people
================================================
                          Table "public.people"
 Column  |  Type   |                      Modifiers
---------+---------+-----------------------------------------------------
 id      | integer | not null default nextval('people_id_seq'::regclass)
 name    | text    |
 age     | integer |
 address | text    |
================================================

### レコードの登録
### 文字列をダブルクオートで囲むとエラーになる
jsd_development=> INSERT INTO people (name, age, address) VALUES ('Taro', 21, 'Tokyo');
================================================
INSERT 0 1
================================================

### テーブル内のデータ一覧
jsd_development=> SELECT * FROM people;
================================================
 id | name | age | address
----+------+-----+---------
  1 | Taro |  21 | Tokyo
(1 row)
================================================
ユーザ設定
### パスワードの設定
postgres=# alter role ftakao2007 with password 'pass';
================================================
ALTER ROLE
================================================

### 権限の確認
postgres=# \du
================================================
                             List of roles
 Role name |                   Attributes                   | Member of
-----------+------------------------------------------------+-----------
 ftakao2007|                                                | {}
 postgres  | Superuser, Create role, Create DB, Replication | {}
================================================

### DBを作成する権限の付与
postgres=# ALTER ROLE ftakao2007 WITH CREATEROLE CREATEDB;
================================================
ALTER ROLE
================================================

### 権限の確認
postgres=# \du
================================================
                             List of roles
 Role name |                   Attributes                   | Member of
-----------+------------------------------------------------+-----------
 ftakao2007| Create role, Create DB                         | {}
 postgres  | Superuser, Create role, Create DB, Replication | {}
================================================
Windows
仮想デスクトップ
### 新しいデスクトップを作成
[Windows ロゴキー] + [Ctrl] + [D]

### デスクトップを切り替える
[Windows ロゴキー] + [Ctrl] + [←]/[→]

### 使わない仮想デスクトップを閉じる
[Windows ロゴキー] + [Ctrl] + [F4]
動画のキャプチャ
-
Windows10のデスクトップキャプチャ機能 「Game DVR」の使い方と設定方法
- 「録画したいウィンドウをアクティブにした状態でWindowsキー+Gキー」を押す
- 例えば「C:\Users(ユーザ名)\Videos\Captures」 に保存される
ルーティング追加
管理者権限で実行
### 起動のたびに設定が必要
route add 192.168.50.0 mask 255.255.255.0 172.17.100.1

### 永続的設定
route -p add 192.168.50.0 mask 255.255.255.0 172.17.100.1

### 設定の削除
route delete 192.168.50.0 mask 255.255.255.0 172.17.100.1

### batファイル (route_add.bat)
### 右クリックで 「管理者として実行」
================================================
@echo off
cd /d %~dp0
route add 192.168.50.0 mask 255.255.255.0 172.17.100.1
================================================
インストール
Ansible
Serverspec
Selenium
CentOS7で動作確認
### cargoのインストール
$ sudo yum install cargo

### geckodriverのインストール
$ cd /usr/local/src
$ sudo git clone https://github.com/mozilla/geckodriver.git
$ cd geckodriver
$ sudo cargo build --release

### rubyがあるディレクトリに移動してリンクの作成
$ cd $(dirname `which ruby`)
$ sudo ln -s /usr/local/src/geckodriver/target/release/geckodriver

### seleniumのインストール
$ cd ~
$ mkdir selenium
$ cd selenium
$ bundle init
$ vi Gemfile
================================================
# frozen_string_literal: true
# A sample Gemfile
source "https://rubygems.org"

gem "selenium-webdriver"
================================================

$ bundle install --path vendor/bundle
$ mkdir app
$ vi app/googleTest.rb
================================================
require "selenium-webdriver"

# Firefoxを使う
driver = Selenium::WebDriver.for :firefox

# Chromeを使う
# driver = Selenium::WebDriver.for :chrome

# Googleにアクセス
driver.navigate.to "http://google.com"

# `q`というnameを持つ要素を取得
element = driver.find_element(:name, 'q')

# `Hello WebDriver!`という文字を、上記で取得したinput要素に入力
element.send_keys "Hello WebDriver!"

# submitを実行する(つまり検索する)
element.submit

# 表示されたページのタイトルをコンソールに出力
puts driver.title

# 若干停止
sleep 10

# テストを終了する(ブラウザを終了させる)
driver.quit
================================================

$ bundle exec ruby app/googleTest.rb
Chromium
CentOS7で動作確認
$ sudo vi /etc/yum.repos.d/andykimpe.repo
================================================
[home_andykimpe]
name=andykimpe beta zpanel (CentOS_7)
type=rpm-md
baseurl=http://download.opensuse.org/repositories/home:/andykimpe/CentOS_7/
gpgcheck=1
gpgkey=http://download.opensuse.org/repositories/home:/andykimpe/CentOS_7/repodata/repomd.xml.key
enabled=1
================================================

$ sudo yum install chromium.x86_64
MySQL Workbench
CentOS7で動作確認
$ sudo yum install epel-release
$ sudo yum install python-paramiko proj tinyxml http://dev.mysql.com/get/Downloads/MySQLGUITools/mysql-workbench-community-6.3.7-1.el7.x86_64.rpm
コマンドでVIPを付与、削除する
CentOS7
### 現在の状態の確認
$ ip a | grep inet
================================================
    inet 127.0.0.1/8 scope host lo
    inet 100.127.108.191/24 brd 100.127.108.255 scope global ens192
================================================

### VIPを一時的に付与
$ sudo ip addr add 100.127.108.190/32 dev ens192
$ sudo arping -f -q -c 5 -w 5 -I ens192 -U 100.127.108.190
$ ip a | grep inet
================================================
    inet 127.0.0.1/8 scope host lo
    inet 100.127.108.191/24 brd 100.127.108.255 scope global ens192
    inet 100.127.108.190/32 scope global ens192
================================================

### VIPを削除
$ sudo ip addr del 100.127.108.190/32 dev ens192
$ ip a | grep inet
================================================
    inet 127.0.0.1/8 scope host lo
    inet 100.127.108.191/24 brd 100.127.108.255 scope global ens192
================================================
- 恒久的に付与する (nmtui-edit)
### 設定の確認
### 「192.168.33.99/32」がVIP
$ nmcli con show ens160
================================================
...
ipv4.addresses:                         192.168.33.11/24, 192.168.33.99/32
...
================================================

### VIP削除
$ sudo nmcli con mod ens160 ipv4.addresses "192.168.33.11/24"
$ sudo systemctl restart network.service
$ nmcli con show ens160
================================================
...
ipv4.addresses:                         192.168.33.11/24
...
================================================
※ ipv4.addressesの設定を帰ればVIPの付与もできる
CentOS6
### VIPを付与
$ sudo ifconfig eth0:1 172.17.0.150 netmask 255.255.0.0
$ sudo arping -f -q -c 5 -w 5 -I eth0 -U 172.17.0.150

### VIPを削除
$ sudo ifconfig eth0:1 down
動作検証
### /etc/sysconfig/network-scripts/ifcfg-eth0:1 でVIPを設定している場合
□ VIPを上げる
$ sudo ifconfig eth0:1 10.1.38.240 netmask 255.255.255.0
$ sudo arping -f -q -c 5 -w 5 -I eth0 -U 10.1.38.240
================================================
(正常に上がる)
================================================

$ sudo ifup eth0:1
================================================
(正常に上がる)
================================================

□ VIPを落とす
$ sudo ifconfig eth0:1 down
================================================
(正常に落ちる)
================================================

$ sudo ifdown eth0:1
================================================
(正常に落ちる)
================================================

### /etc/sysconfig/network-scripts/ifcfg-eth0:1 等のファイルが無い場合
□ VIPを上げる
$ sudo ifconfig eth0:1 10.1.38.240 netmask 255.255.255.0
$ sudo arping -f -q -c 5 -w 5 -I eth0 -U 10.1.38.240
================================================
(正常に上がる)
================================================

$ sudo ifup eth0:1
================================================
(ifupは/etc/sysconfig/network-scripts/ifcfg-eth0:1などに従って処理が実行されるため操作できない)
================================================


□ VIPを落とす
$ sudo ifconfig eth0:1 down
================================================
(正常に落ちる)
================================================

$ sudo ifdown eth0:1
================================================
(以下のように表示されて落とすことができない)
使い方: ifdown <デバイス名>
================================================
/etc/sysconfig/network-scripts/ifcfg-eth0:1 が無い時はifup,ifdownは使えない
mount
CIFS
### /root/credential
================================================
username=joruri
password=pass
domain=JORURI
================================================

[centos6]
# /sbin/mount.cifs //192.168.33.11/backup/192.168.33.31 /data/backup/192.168.33.31 -o credentials=/root/credential,rw,cifsacl,iocharset=utf8,uid=1000,gid=1000

[centos7]
# /usr/bin/mount -t cifs //192.168.33.11/backup/192.168.33.31 /data/backup/192.168.33.31 -o credentials=/root/credential,rw,cifsacl,iocharset=utf8,uid=1000,gid=1000,sec=ntlm
ssh
- 【非推奨】パスワードを対話的に入力せずsshする
- 踏み台からはログアウトされた状態になる
- 踏み台 : 192.168.33.11
- ログイン先 : 192.168.33.12
- 踏み台からはログアウトされた状態になる
### 192.168.33.11で実行
$ vi passwd.sh
================================================
# !/bin/sh
echo $pass
================================================

$ vi ssh_nopass.sh
================================================
# !/bin/sh
export SSH_ASKPASS=./passwd.sh
export DISPLAY=dummy:0
exec setsid "$@"
================================================

$ chmod 775 passwd.sh ssh_nopass.sh
$ export pass='pass'
$ ./ssh_nopass.sh ssh 192.168.33.12 'touch hoge'

### 確認
$ ssh 192.168.33.12
$ ls hoge
================================================
hoge
================================================
ssh鍵の作成と設置
既存の鍵を上書きしないように気を付ける。
[接続元]
### 既存の鍵があるか確認
$ ls ~/.ssh
================================================
config  known_hosts
================================================

### 鍵の作成
$ ssh-keygen -t rsa -C "(メールアドレス等)"
================================================
Generating public/private rsa key pair.
Enter file in which to save the key (/home/prefuser/.ssh/id_rsa):
Enter passphrase (empty for no passphrase):
Enter same passphrase again:
Your identification has been saved in /home/ftakao2007/.ssh/id_rsa.
Your public key has been saved in /home/ftakao2007/.ssh/id_rsa.pub.
The key fingerprint is:
00:11:22:34:84:73:47:f4:1d:e4:6d:5b:56:14:22:99 ftakao2007@gmail.com
The key's randomart image is:
+--[ RSA 2048]----+
|     o+oo  .o.+E+|
|    o.  .. o =. .|
|     o.   . o o o|
|     o o     . + |
|    . o S     .  |
|B      o         |
|      .          |
+-----------------+
================================================

### 以下の内容をコピー
$ cat ~/.ssh/id_rsa.pub
================================================
ssh-rsa AAAAB3NzaC1yc2EAA(中略)Twm2EtHyiXJA7Q== ftakao2007@gmail.com
================================================

[接続先]
### authorized_keysの確認
$ ls ~/.ssh/authorized_keys
================================================
ls: cannot access /home/ftakao2007/.ssh/authorized_keys: そのようなファイルやディレクトリはありません
================================================

### 無ければ作成
$ touch ~/.ssh/authorized_keys
$ chmod 600 ~/.ssh/authorized_keys

### 先ほどコピーした内容を一番下に追加
$ echo "(コピーした内容)" >> ~/.ssh/authorized_keys
keepalived
keepalivec.confの設定
- interface名注意
- CentOS6の流れで
eth0とか設定しがち
- CentOS6の流れで
-
keepalivedのstateとpriority、nopreemptの関係
-
nopreemptを設定しないとpriorityの高いノードが追加されるとそちらにVIPが移ってしまう - STATEはどちらもBACKUPにしてpriorityでMasterを決めるようにすると良さげ
-
-
KeepAlivedのススメ2
-
garp_master_delayの設定は必要に応じて。そこまでシビアではないサービスを想定して1を入れた
-
### Master
$ cat /etc/keepalived/keepalived.conf
================================================
vrrp_instance VIP_MySQL {
    state BACKUP
    nopreempt
    interface ens192
    virtual_router_id 51
    garp_master_delay 1
    priority 100
    advert_int 1
    authentication {
        auth_type PASS
        auth_pass 1111
    }
    virtual_ipaddress {
        100.127.108.190
    }
}
================================================

### Slave
$ cat /etc/keepalived/keepalived.conf
================================================
vrrp_instance VIP_MySQL {
    state BACKUP
    nopreempt
    interface ens192
    virtual_router_id 51
    garp_master_delay 1
    priority 101
    advert_int 1
    authentication {
        auth_type PASS
        auth_pass 1111
    }
    virtual_ipaddress {
        100.127.108.190
    }
}
================================================
-
keepalived講習会
- notify_masterやnotify_backupの説明
検証
keepalivedが異常終了したとき
-
keepalivedが異常終了したらvipを手動で消す必要がある
- keepalivedが異常終了した場合は手でVIPを落として再起動
-
sudo ip addr del 100.127.108.190/32 dev ens192; sudo systemctl restart keepalived.service- BACKUP側にVIPが付与された状態になる
-
- keepalivedが異常終了した場合は手でVIPを落として再起動
### keepalivedを異常終了させる
$ ps aux | grep keep | grep -v grep
================================================
root      3178  0.0  0.0 111704  1312 ?        Ss   17:32   0:00 /usr/sbin/keepalived -D
root      3179  0.0  0.0 113828  2748 ?        S    17:32   0:00 /usr/sbin/keepalived -D
root      3180  0.0  0.0 113828  2188 ?        S    17:32   0:00 /usr/sbin/keepalived -D
================================================

$ sudo kill -9 3178 3179 3180
$ ps aux | grep keep | grep -v grep
================================================
================================================

### Master側VIPはついたまま
$ ip a | grep inet
================================================
    inet 127.0.0.1/8 scope host lo
    inet 100.127.108.191/24 brd 100.127.108.255 scope global ens192
    inet 100.127.108.190/32 scope global ens192
================================================

### Backup側にもVIPが付与されてしまっている
$ ip a | grep inet
================================================
    inet 127.0.0.1/8 scope host lo
    inet 100.127.108.192/24 brd 100.127.108.255 scope global ens192
    inet 100.127.108.190/32 scope global ens192
================================================

### 別サーバからsshでアクセスするとBackup側にログインする
### 複数回やってもすべてBackup側に接続された
$ ssh 100.127.108.190
$ ip a | grep inet
================================================
    inet 127.0.0.1/8 scope host lo
    inet 100.127.108.192/24 brd 100.127.108.255 scope global ens192
    inet 100.127.108.190/32 scope global ens192
================================================

### Backup側のkeepalivedを落としてVIPにsshするとMaster側の残留しているVIPで接続できた
$ ssh 100.127.108.190
$ ip a | grep inet
================================================
    inet 127.0.0.1/8 scope host lo
    inet 100.127.108.192/24 brd 100.127.108.255 scope global ens192
    inet 100.127.108.190/32 scope global ens192
================================================

### この状態でBackup側のkeepalivedを立ち上げるとBackup側にVIPが付与される
### 残留しているVIPでMaster側に接続していたものはBackup側にVIPが付与されたら接続が切断された
================================================
Write failed: Broken pipe
================================================
- 検証結果
- keepalivedが異常終了するとVIPが残留する
- Masterのkeepalivedは落ちているのでBACKUP側にもVIPが付与される (Master,BACKUP両方に同じVIPが付与されている状態)
- ただし、ssh接続はkeepalivedが起動している方(ここではBACKUP側)に接続される
- BACKUP側のkeepalivedを落としてMasterの残留しているVIPのみになった場合はMaster側に接続される
- ここでBACKUP側のkeepalivedを起動してVIPがMaster,BACKUP両方に存在する状態となったとき、残留したVIPに接続していたコネクションは勝手に切断された
- まとめ
- Master側の残留したVIPとBACKUP側のkeepalivedにより付与されたVIPでは、BACKUP側のVIPに接続が行くような仕組みとなっていそう
keepalivedで付与されているVIPを手で強引に消したとき
### Master側のVIPを手で消す
$ ip a | grep inet
================================================
    inet 127.0.0.1/8 scope host lo
    inet 100.127.108.191/24 brd 100.127.108.255 scope global ens192
    inet 100.127.108.190/32 scope global ens192
================================================
$ sudo ip addr del 100.127.108.190/32 dev ens192

### Master,BACKUPどちらもVIPが付与されていない状態になる
$ ip a | grep inet
================================================
    inet 127.0.0.1/8 scope host lo
    inet 100.127.108.191/24 brd 100.127.108.255 scope global ens192
================================================

$ ip a | grep inet
================================================
    inet 127.0.0.1/8 scope host lo
    inet 100.127.108.192/24 brd 100.127.108.255 scope global ens192
================================================

### BACKUP側のkeepalivedを再起動しても変化なし(どちらにもVIPが付与されていない状態)
### Master側のkeepalivedを再起動するとBackup側にVIPが付与される
- 検証結果
- VIPを手動で強引に消した場合、消した側(ここではMaster)のkeepalivedを再起動すると片側(ここではBackup)にVIPが付与される
- 逆に片側(ここではBackup)のkeepalivedを再起動させてもVIPはどちらにも付与されない
- VIPを手動で強引に消した場合、消した側(ここではMaster)のkeepalivedを再起動すると片側(ここではBackup)にVIPが付与される
ncftp
### ftpサーバに接続
$ ncftp -u vagrant 10.136.3.181
================================================
NcFTP 3.2.5 (Feb 02, 2011) by Mike Gleason (http://www.NcFTP.com/contact/).
Connecting to 10.136.3.181...
(vsFTPd 3.0.2)
Logging in...
Password requested by 10.136.3.181 for user "vagrant".

    Please specify the password.

Password: ****   ### パスワード入力

Login successful.
Logged in to 10.136.3.181.
================================================

### パッシブモードが使えるか確認
ncftp /home/vagrant/ftp > set
================================================
anon-password                  NcFTP@
auto-ascii                     |.txt|.asc|.html|.htm|.css|.xml|.ini|.pl|.hqx|.cfg|.c|.h|.cpp|.hpp|.bat|.m3u|.pls|
auto-resume                    yes
autosave-bookmark-changes      no
confirm-close                  no
connect-timeout                20
control-timeout                135
logsize                        10240
pager                          more
passive                        optional    ### ここがonになっていれば使える
progress-meter                 2 (statbar)
redial-delay                   20
save-passwords                 ask
show-status-in-xterm-titlebar  no
so-bufsize                     0 (use system default)
xfer-timeout                   3600
yes-i-know-about-NcFTPd        no
================================================

### 設定の変更と確認
ncftp /home/vagrant/ftp > set passive on
ncftp /home/vagrant/ftp > set
================================================
anon-password                  NcFTP@
auto-ascii                     |.txt|.asc|.html|.htm|.css|.xml|.ini|.pl|.hqx|.cfg|.c|.h|.cpp|.hpp|.bat|.m3u|.pls|
auto-resume                    yes
autosave-bookmark-changes      no
confirm-close                  no
connect-timeout                20
control-timeout                135
logsize                        10240
pager                          more
passive                        on
progress-meter                 2 (statbar)
redial-delay                   20
save-passwords                 ask
show-status-in-xterm-titlebar  no
so-bufsize                     0 (use system default)
xfer-timeout                   3600
yes-i-know-about-NcFTPd        no
================================================

### ファイルを取得
ncftp /home/vagrant/ftp > get hoge.csv
================================================
hoge.csv:                                   94.00 B    6.52 kB/s
================================================
swapon
### swapの容量と、どのデバイスに割り当てられているか確認
$ swapon -s
================================================
Filename                                Type            Size    Used    Priority
/dev/sda3                               partition       10485756        0       -1
================================================
chronyc
### chronyの動作状況を確認する
$ chronyc sources
================================================
210 Number of sources = 1
MS Name/IP address         Stratum Poll Reach LastRx Last sample
===============================================================================
^* ntp-b3.nict.go.jp             1   6    37    10  +1332ns[ +919us] +/-   11ms
================================================
rsync
- sync_target_dirの末尾には「/」を設定するが、backup_dirの末尾には「/」はつけない
- cronに仕込む場合はsshの鍵認証の設定をする
nfsserver="192.168.33.11"
sync_target_dir="/home/ftakao2007/jupyter/"
backup_dir="/data/backup/home/ftakao2007/jupyter"
$ ionice -c 2 -n 7 nice -n 19 rsync -avm --exclude='.svn/' --partial --progress --delete --bwlimit=1024 -e ssh ${nfsserver}:${sync_target_dir} ${backup_dir}
- オプション
- rsyncより前
- 負荷を下げるおまじない
- -avm
- a : なるべくコピー元のファイルと同一条件でコピーする
- v : 詳細を出力する
- m : 空ディレクトリはコピーしない
- 2系では使えない?
- 通常yumで入れれば3以上が入ってるはず。
- --exclude
- 同期対象外のファイルを指定
- --partial
- 大きなファイルを転送中に失敗したとき、再実行するとその失敗したところから再開できる
- --progress
- 進捗のどうですか
- --delete
- 転送元に無いファイルが転送先にあれば削除する
- --bwlimit=1024
- 転送速度を制限する(1024KB/sec)
- -e ssh
- ssh経由で接続
- rsyncより前
top
### topの結果を標準出力に出す
$ top -b -n 1

### 60秒間隔で30回topコマンドを実行した結果をファイルに出力する
$ top -b -d 60 -n 30 > top_result.txt

### Apacheプロセス出力例
$ top -b -n 1| head | grep PID; top -b -n 1 | grep apache
================================================
  PID USER      PR  NI  VIRT  RES  SHR S %CPU %MEM    TIME+  COMMAND
 6080 apache    20   0  179m 4380 2036 S  0.0  0.1   0:00.48 httpd
 6085 apache    20   0  179m 4376 2036 S  0.0  0.1   0:00.45 httpd
 6086 apache    20   0  179m 4400 2052 S  0.0  0.1   0:00.50 httpd
 6097 apache    20   0  179m 4376 2028 S  0.0  0.1   0:00.51 httpd
 6105 apache    20   0  179m 4368 2028 S  0.0  0.1   0:00.45 httpd
 6107 apache    20   0  179m 4392 2036 S  0.0  0.1   0:00.50 httpd
 6108 apache    20   0  179m 4380 2044 S  0.0  0.1   0:00.44 httpd
 6110 apache    20   0  179m 4368 2028 S  0.0  0.1   0:00.45 httpd
 6111 apache    20   0  179m 4384 2044 S  0.0  0.1   0:00.46 httpd
20306 apache    20   0  179m 4424 2052 S  0.0  0.1   0:01.30 httpd
20308 apache    20   0  179m 4384 2028 S  0.0  0.1   0:01.20 httpd
20309 apache    20   0  179m 4408 2052 S  0.0  0.1   0:01.18 httpd
20311 apache    20   0  179m 4400 2052 S  0.0  0.1   0:01.21 httpd
20312 apache    20   0  179m 4416 2056 S  0.0  0.1   0:01.21 httpd
25353 apache    20   0  179m 4408 2052 S  0.0  0.1   0:01.15 httpd
26902 apache    20   0  179m 4348 1996 S  0.0  0.1   0:01.06 httpd
28237 apache    20   0  179m 4384 2028 S  0.0  0.1   0:00.89 httpd
28749 apache    20   0  179m 4384 2044 S  0.0  0.1   0:00.86 httpd
28884 apache    20   0  179m 4380 2036 S  0.0  0.1   0:00.88 httpd
28906 apache    20   0  179m 4396 2036 S  0.0  0.1   0:00.98 httpd
================================================
sar
### 特定の日(その月、もしくは前月の20日)のメモリ使用量確認
$ sar -r -f /var/log/sa/sa20
================================================
Linux 2.6.32-573.18.1.el6.x86_64 (webserv01)  2017年01月20日  _x86_64_        (2 CPU)

00時00分01秒 kbmemfree kbmemused  %memused kbbuffers  kbcached  kbcommit   %commit
00時10分01秒   1919220   2004812     51.09    157420   1098364    336124      4.43
================================================
awk
### サンプル
$mysql -umysql -p'hoge' -e "select * from fuga_db.haga_table"
================================================
id      parent_id       created_at      updated_at      version data_type       code    sort_no name    name_en group_s_name    kana    email   match   official_position       assigned_job
5382    0       2016-12-05 19:35:27     2016-12-05 19:35:27     1480934122      group   システム部      10      システム部      NULL    NULL    NULL    NULL    NULL    NULL    NULL
5383    5382    2016-12-05 19:35:28     2016-12-05 19:35:28     1480934122      group   リテール        20      リテール        NULL    NULL    NULL    NULL    NULL    NULL    NULL
5388    5382    2016-12-05 19:35:29     2016-12-05 19:35:29     1480934122      group   system1    30      system1    NULL    NULL    NULL    NULL    NULL    NULL    NULL
5418    5382    2016-12-05 19:35:30     2016-12-05 19:35:30     1480934122      group   system2    40      system2    NULL    NULL    NULL    NULL    NULL    NULL    NULL
5436    0       2016-12-05 19:35:32     2016-12-05 19:35:32     1480934122      group   営業部  50      営業部  NULL    NULL    NULL    NULL    NULL    NULL    NULL
================================================

### 2列目が0のものだけ取り出す
$mysql -umysql -p'hoge' -e "select * from fuga_db.haga_table" | awk '$2=="0"{print $0}'
================================================
5382    0       2016-12-05 19:35:27     2016-12-05 19:35:27     1480934122      group   システム部      10      システム部      NULL    NULL    NULL    NULL    NULL    NULL    NULL
5436    0       2016-12-05 19:35:32     2016-12-05 19:35:32     1480934122      group   営業部  50      営業部  NULL    NULL    NULL    NULL    NULL    NULL    NULL
================================================
sort
### 4列目でsort
$ cat a.log | sort -k4,4

### 4列目でsortした後に5列目でsort
$ cat a.log | sort -k4,4 -k5,5

### 4列目でsortした後に5列目を数値(n)で逆順(r)にsort
$ cat a.log | sort -k4,4 -k5,5nr
curl
### telnetが使えない環境でportの接続確認
$ curl --noproxy 192.168.33.11 -v telnet://192.168.33.11:22
================================================
* About to connect() to 192.168.33.11 port 22 (#0)
*   Trying 192.168.33.11... connected
* Connected to 192.168.33.11 (192.168.33.11) port 22 (#0)
SSH-2.0-OpenSSH_5.3

Protocol mismatch.
* Closing connection #0
================================================
smtpを指定して送信
### centos5
$ vi ~/.mailrc
================================================
set smtp=smtp://192.168.33.11:25
================================================
$ echo hoge | mail tanaka@to_address.co.jp -s "from web_server01" -- -f suzuki@from_address.co.jp

### centos6以降
$ echo hoge  | mail -s "from web_server01" -S "smtp=smtp://192.168.33.11:25" -r suzuki@from_address.co.jp tanaka@to_address.co.jp

### centos6以降smtp認証有り
$ echo hoge  | mail -s "from web_server01" -S "smtp=smtp://192.168.33.11:25 smtp-auth=login smtp-auth-user=joruri smtp-auth-password=pass" -r suzuki@from_address.co.jp tanaka@to_address.co.jp
base64
# エンコード
$ printf "hoge" | base64
aG9nZQ==

# デコード
$ printf "aG9nZQ==" | base64 -d
hoge
PAM (今は下書きのみ)
Consul
- Consulサーバクラスタ構成手順の歴史 #consul
- consul [インストール〜設定〜クライアント(ジョイン、パージ)]
- Consulについてまとめてみた(基本編)
- サービス・ディスカバリのためのConsul入門
起動する
### 192.168.33.180で実行
### 「-bootstrap-expect=2」は初回起動時のみ実行
### 頭にnohupをつけるとログアウトしても動き続ける
$ sudo /usr/local/sbin/consul agent -server -bootstrap-expect=2 -node=consul-server -data-dir=/tmp/consul -bind=192.168.33.180 &
================================================
==> WARNING: Bootstrap mode enabled! Do not enable unless necessary
==> Starting Consul agent...
==> Starting Consul agent RPC...
==> Consul agent running!
         Node name: 'consul-server'
        Datacenter: 'dc1'
            Server: true (bootstrap: true)
       Client Addr: 127.0.0.1 (HTTP: 8500, HTTPS: -1, DNS: 8600, RPC: 8400)
      Cluster Addr: 192.168.33.180 (LAN: 8301, WAN: 8302)
    Gossip encrypt: false, RPC-TLS: false, TLS-Incoming: false
             Atlas: <disabled>
================================================

### 確認
$ sudo consul members
================================================
    2016/07/12 15:09:42 [INFO] agent.rpc: Accepted client: 127.0.0.1:49140
Node           Address            Status  Type    Build  Protocol  DC
consul-server  192.168.33.180:8301  alive   server  0.6.4  2         dc1
================================================


### 192.168.33.188で実行
$ sudo consul agent -data-dir=/tmp/consul -node=consul-client1 -bind=192.168.33.188 -join=192.168.33.180 &
================================================
==> Starting Consul agent...
==> Starting Consul agent RPC...
==> Joining cluster...
    Join completed. Synced with 1 initial agents
==> Consul agent running!
         Node name: 'consul-client1'
        Datacenter: 'dc1'
            Server: false (bootstrap: false)
       Client Addr: 127.0.0.1 (HTTP: 8500, HTTPS: -1, DNS: 8600, RPC: 8400)
      Cluster Addr: 192.168.33.188 (LAN: 8301, WAN: 8302)
    Gossip encrypt: false, RPC-TLS: false, TLS-Incoming: false
             Atlas: <disabled>
================================================

### 確認
$ sudo consul members
================================================
    2016/07/12 15:12:51 [INFO] agent.rpc: Accepted client: 127.0.0.1:49166
Node            Address            Status  Type    Build  Protocol  DC
consul-client1  192.168.33.188:8301  alive   client  0.6.4  2         dc1
consul-server   192.168.33.180:8301  alive   server  0.6.4  2         dc1
================================================
sed
空白行削除
$ grep -v '^\s*#' /etc/nsswitch.conf | sed -e '/^$/d'
================================================
passwd:     files sss ldap
shadow:     files sss ldap
group:      files sss ldap
hosts:      files dns myhostname
bootparams: nisplus [NOTFOUND=return] files
ethers:     files
netmasks:   files
networks:   files
protocols:  files
rpc:        files
services:   files sss
netgroup:   files sss
publickey:  nisplus
automount:  files
aliases:    files nisplus
================================================
etc
### 編集対象ファイル
$ cat ldap.yml
================================================
development
  host: 127.0.0.1
  port: 389
  base: dc=sample,dc=example,dc=com

test
  host: 127.0.0.1
  port: 389
  base: dc=sample,dc=example,dc=com

production
  host: 192.168.33.11
  port: 389
  base: dc=sample,dc=example,dc=com
================================================

###  「host:」にヒットした行を消す
$  cat ldap.yml | sed -e "/host:/d"
================================================
development
  port: 389
  base: dc=sample,dc=example,dc=com

test
  port: 389
  base: dc=sample,dc=example,dc=com

production
  port: 389
  base: dc=sample,dc=example,dc=com
================================================

### さらに「port:」の上に「host: 192.168.33.12」を追加する
$ cat ldap.yml | sed -e "/host:/d" -e "/port: /i \  host: 192.168.33.12"
================================================
development
  host: 192.168.33.12
  port: 389
  base: dc=sample,dc=example,dc=com

test
  host: 192.168.33.12
  port: 389
  base: dc=sample,dc=example,dc=com

production
  host: 192.168.33.12
  port: 389
  base: dc=sample,dc=example,dc=com
================================================

### 環境変数${LDAP_SERVER}」を利用する
### ${LDAP_SERVER} は環境変数で値は192.168.33.13
$ cat ldap.yml | sed -e "/host:/d" -e "/port: /i \  host: ${LDAP_SERVER}"
================================================
development
  host: 192.168.33.13
  port: 389
  base: dc=sample,dc=example,dc=com

test
  host: 192.168.33.13
  port: 389
  base: dc=sample,dc=example,dc=com

production
  host: 192.168.33.13
  port: 389
  base: dc=sample,dc=example,dc=com
================================================

-> production以下のhostのみ置換する方法をいずれ考える。
特定のディレクトリ以下の複数のファイルに含まれる特定の文字列を一気に置換する
- LDAPサーバ172.17.0.4を172.17.0.5に変更する例
### 対象の確認
# grep '172.17.0.4' /etc/* -r
================================================
/etc/nslcd.conf:uri ldap://172.17.0.4:389/
/etc/openldap/ldap.conf:URI ldap://172.17.0.4/
/etc/pam_ldap.conf:uri ldap://172.17.0.4/
/etc/postfix/ldap-aliases.cf:server_host = 172.17.0.4:389
/etc/postfix/ldap-uid_maps.cf:server_host = 172.17.0.4:389
================================================

### 置換される結果を確認
# grep -l '172.17.0.4' /etc/* -r | xargs sed -e 's/172.17.0.4/172.17.0.5/g' | grep 172.17.0.5
================================================
uri ldap://172.17.0.5:389/
URI ldap://172.17.0.5/
uri ldap://172.17.0.5/
server_host = 172.17.0.5:389
server_host = 172.17.0.5:389
================================================

### 置換する
# grep -l '172.17.0.4' /etc/* -r | xargs sed -i -e 's/172.17.0.4/172.17.0.5/g'

### 結果の確認
# grep '172.17.0.5' /etc/* -r
================================================
/etc/nslcd.conf:uri ldap://172.17.0.5:389/
/etc/openldap/ldap.conf:URI ldap://172.17.0.5/
/etc/pam_ldap.conf:uri ldap://172.17.0.5/
/etc/postfix/ldap-aliases.cf:server_host = 172.17.0.5:389
/etc/postfix/ldap-uid_maps.cf:server_host = 172.17.0.5:389
================================================
SQLite
参考はredmineの公式dockerイメージ
### DBに接続する
### 例では拡張子はhoge.sqlite3のようになっていることが多い
# sqlite3 sqlite/redmine.db

### データベース一覧の表示
sqlite> .databases
====================================================
seq  name             file
---  ---------------  ----------------------------------------------------------
0    main             /usr/src/redmine/sqlite/redmine.db
1    temp
====================================================

### テーブルの確認
sqlite> .table
====================================================
attachments                          members
auth_sources                         messages
boards                               news
changes                              open_id_authentication_associations
changeset_parents                    open_id_authentication_nonces
changesets                           projects
changesets_issues                    projects_trackers
comments                             queries
custom_field_enumerations            queries_roles
custom_fields                        repositories
custom_fields_projects               roles
custom_fields_roles                  roles_managed_roles
custom_fields_trackers               schema_migrations
custom_values                        settings
documents                            time_entries
email_addresses                      tokens
enabled_modules                      trackers
enumerations                         user_preferences
groups_users                         users
import_items                         versions
imports                              watchers
issue_categories                     wiki_content_versions
issue_relations                      wiki_contents
issue_statuses                       wiki_pages
issues                               wiki_redirects
journal_details                      wikis
journals                             workflows
member_roles
====================================================

### テーブルの定義の確認
sqlite> .schema users
====================================================
CREATE TABLE "users" ("id" INTEGER PRIMARY KEY AUTOINCREMENT NOT NULL, "login" varchar DEFAULT '' NOT NULL, "hashed_password" varchar(40) DEFAULT '' NOT NULL, "firstname" varchar(30) DEFAULT '' NOT NULL, "lastname" varchar(255) DEFAULT '' NOT NULL, "admin" boolean DEFAULT 'f' NOT NULL, "status" integer DEFAULT 1 NOT NULL, "last_login_on" datetime, "language" varchar(5) DEFAULT '', "auth_source_id" integer, "created_on" datetime, "updated_on" datetime, "type" varchar, "identity_url" varchar, "mail_notification" varchar DEFAULT '' NOT NULL, "salt" varchar(64), "must_change_passwd" boolean DEFAULT 'f' NOT NULL, "passwd_changed_on" datetime);
CREATE INDEX "index_users_on_id_and_type" ON "users" ("id", "type");
CREATE INDEX "index_users_on_auth_source_id" ON "users" ("auth_source_id");
CREATE INDEX "index_users_on_type" ON "users" ("type");
====================================================

### ログアウト
sqlite> .exit
DBに接続していない状態からsqliteコマンド実行
# sqlite3 redmine.db  ".table"
====================================================
(テーブルの情報が表示される)
====================================================
MySQLをSQLiteに変換
MongoDB
mysql:mongodb
データベース:データベース
テーブル:コレクション
レコード:ドキュメント
基本
### DB接続
$ mongo

### DB一覧
> show dbs

### DB選択
> use db_name

### コレクション一覧
> show collections

### コレクション内のドキュメント一覧
> db.col_name.find()

### 見やすくする
> db.col_name.find().pretty()

### 特定のプロパティを取得
> db.col_name.find({_id:ObjectId("55efe106d460800dc7000002")}).pretty()
================================================
{
        "_id" : ObjectId("55efe106d460800dc7000002"),
        "body" : "ほげほげ",
        "category_id" : null,
        "comment_size" : 1,
        "conf_sequence" : 123,
        "contents" : [
...
        "sequence" : 4567,
        "title" : "ふがふが,
        "updated_at" : ISODate("2015-09-17T02:46:13Z")
}
================================================

### データの更新
> db.sns_links.update({"_id": ObjectId("55efe106d460800dc7000002")}, {$set:{"body": "はがはが"}})
================================================
{
        "_id" : ObjectId("55efe106d460800dc7000002"),
        "body" : "はがはが",
        "category_id" : null,
        "comment_size" : 1,
        "conf_sequence" : 123,
        "contents" : [
...
        "sequence" : 4567,
        "title" : "ふがふが,
        "updated_at" : ISODate("2015-09-17T02:46:13Z")
}
================================================


### managersのサイズが0のものを検索
> db.getCollection('sns_projects').find({"managers": {$size:0}})

### managersのサイズが0のものを検索した後、membersでsort
> db.getCollection('sns_projects').find({"managers": {$size:0}}).sort({'members':1})
dump,restore
### dump
$ mongodump --out /tmp/mongodump

### restore
$ mongorestore /tmp/mongodump

### DBを指定
$ mongorestore --db [database_name] /tmp/mongodump/[database_name]
※ 可能であればmongodbを停止してディレクトリまるごとバックアップの方が良さそう。
http://gihyo.jp/dev/serial/01/mongodb/0011
リンク
Pervasive PSQL
逆引き
コマンドでVIPを起動、停止
### 起動
$ sudo ifconfig eth0:1 172.17.0.150 netmask 255.255.0.0
$ sudo arping -f -q -c 5 -w 5 -I eth0 -U 172.17.0.150

### 停止
$ sudo ifconfig eth0:1 down
ファイルを分割する
### 90MB単位でファイルを分割する
$ split -b 90m hoge.tar.gz hoge.tar.gz
$ ls -l hoge.tar.gz.*
============================================================
-rw-r--r--@  1 ftakao2007  staff   351M 10 25 04:02 hoge.tar.gz
-rw-r--r--   1 ftakao2007  staff    90M 10 25 04:21 hoge.tar.gz.ab
-rw-r--r--   1 ftakao2007  staff    90M 10 25 04:21 hoge.tar.gz.aa
-rw-r--r--   1 ftakao2007  staff    81M 10 25 04:21 hoge.tar.gz.ad
-rw-r--r--   1 ftakao2007  staff    90M 10 25 04:21 hoge.tar.gz.ac
============================================================
ファイルを結合する
### hoge.tar.gz.*を結合する
$ cat hoge.tar.gz.* > hoge.tar.gz
ipv6をoffにする
$ sudo vi /etc/modprobe.d/disable-ipv6.conf
============================================================
install ipv6 /bin/true
============================================================

### 一番下に追加
$ sudo vi /etc/sysctl.conf
============================================================
# ipv6 disabled
net.ipv6.conf.all.disable_ipv6 = 1
net.ipv6.conf.default.disable_ipv6 = 1
============================================================
$ sudo sysctl -p

$ sudo service ip6tables stop
$ sudo chkconfig ip6tables off
SHA-1の確認
$ openssl sha1 2015-05-05-raspbian-wheezy.zip
===========================
SHA1(2015-05-05-raspbian-wheezy.zip)= cb799af077930ff7cbcfaa251b4c6e25b11483de
===========================
yum
グループリストの確認
$ sudo LANG=C yum grouplist
Network
ipvsadm
$ ipvsadm -Ln | fgrep -A4 '(ipアドレスやホスト名)'
arping
### eth0のARPキャッシュを強制的に更新
$ sudo arping -f -c 5 -w 5 -I eth0 -U 172.17.0.150
================================================
ARPING 172.17.0.150 from 172.17.0.150 eth0
Sent 5 probes (5 broadcast(s))
Received 0 response(s)
================================================
-q オプションをつけるとメッセージは表示されない
MySQL
TIMESTAMPを日付に変換する
binlogのTIMESTAMPを日付に変換する
================================================
SET TIMESTAMP=1499838911/*!*/;
================================================
↓
$ date -d @1499838911
================================================
2017年  7月 12日 水曜日 14:55:11 JST
================================================
出力結果を捨てる
クエリの速度を計測したいが大量に検索結果が出力されて鬱陶しい時
mysql> pager > /dev/null
================================================
1 row in set (0.00 sec)
================================================
変数の確認
$ mysqladmin -u root -p variables

or

mysql> SHOW VARIABLES;
linuxプロンプト上からクエリ実行
$ mysql -uhoge -pfuga -e '(クエリ)'
テーブルの構造を確認
mysql> show columns from numberid_recognizers;
================================================
+---------------+------------------+------+-----+---------+----------------+
| Field         | Type             | Null | Key | Default | Extra          |
+---------------+------------------+------+-----+---------+----------------+
| id            | int(10) unsigned | NO   | PRI | NULL    | auto_increment |
| parent_id     | int(11) unsigned | YES  |     | NULL    |                |
| user_id       | int(11) unsigned | YES  |     | NULL    |                |
| recognized_at | text             | YES  |     | NULL    |                |
| mode          | int(11)          | YES  |     | NULL    |                |
+---------------+------------------+------+-----+---------+----------------+
================================================
select count(*) from (テーブル);
テーブルの行数をカウントできる
mysql> select count(*) from hosts;
+----------+
| count(*) |
+----------+
|      529 |
+----------+
1 row in set (0.00 sec)
dbを指定して show tables
mysql> show tables from (db_name);

### select col1,col2,... from (db_name).(table_name);
mysql> select User,Password,Host from mysql.user;
置換してupdate
### maildbデータベースのusersテーブルにおいてid=1のemailカラムの文字列example.co.jpをexample.comに置換する
mysql> UPDATE maildb.users SET email=REPLACE(email, 'example.co.jp', 'example.com') WHERE id=1;
select * from (テーブル) order by (列) desc limit N;
- order by : 指定した列で並び替え
- desc : 降順
- 何も指定しなければ昇順
- limit N : N行表示
mysql> select * from hosts order by updated_at desc limit 1;
+-----+---------+-----------+---------------------+---------------------+
| id  | name    | is_active | created_at          | updated_at          |
+-----+---------+-----------+---------------------+---------------------+
| 907 | abc1001 |         1 | 2014-11-26 10:38:41 | 2014-11-26 10:38:41 |
+-----+---------+-----------+---------------------+---------------------+
1 row in set (0.00 sec)


### コマンドラインから
$ mysql -utaro -p -e "select created_at,updated_at,name,email from db_name.table_name order by created_at limit 10"
ユーザの権限確認
mysql> use mysql
mysql> select user, host from user;
+-------+--------------------------+
| user  | host                     |
+-------+--------------------------+
| taro  | 10.136.0.0/255.255.128.0 |
| root  | 127.0.0.1                |
|       | localhost                |
| root  | localhost                |
| taro  | localhost                |
|       | localhost.localdomain    |
| root  | localhost.localdomain    |
+-------+--------------------------+

mysql> show grants for 'taro'@'localhost';
+-----------------------------------------------------------------------------------------------------------------------+
| Grants for taro@localhost                                                                                            |
+-----------------------------------------------------------------------------------------------------------------------+
| GRANT ALL PRIVILEGES ON *.* TO 'taro'@'localhost' IDENTIFIED BY PASSWORD '*61(...)A9' |
+-----------------------------------------------------------------------------------------------------------------------+
1 row in set (0.00 sec)
ユーザの作成
mysql> grant all on *.* to test_user@'%' IDENTIFIED BY 'pass';
mysql> grant replication slave on *.* to repl@'%' IDENTIFIED BY 'pass';
パスワード変更
mysql> SET PASSWORD FOR test_user@'%'=PASSWORD('pass');
ユーザの削除
mysql> drop user 'test_user'@'%';
rootパスワードリセット(MySQL5.6)
rootでログインできなくなった時。
※ この作業は自己責任で行ってください
### safeモードでmysql起動
$ sudo mysqld_safe --skip-grant-tables &

### rootでログイン
$ mysql -u root

### パスワードリセット
mysql> use mysql;
mysql> update user set password=PASSWORD("pass") where User='root';
mysql> flush privileges;
mysql> quit

### 起動しているmysql_safeをkill (もっとちゃんとした止め方あると思う)
$ ps aux | grep mysql
$ kill -9 (上で表示されたmysql関連のPID)

### mysql起動
$ sudo systemctl start mysqld.service

### ログイン確認
$ mysql -uroot -p
show tablesで特定の文字が含まれているもののみ表示
mysql> show tables like '%sched%';
+-----------------------------------------+
| Tables_in_production_jorurigw (%sched%) |
+-----------------------------------------+
| gw_schedule_event_masters               |
| gw_schedule_events                      |
| gw_schedule_options                     |
| gw_schedule_prop_temporaries            |
| gw_schedule_props                       |
| gw_schedule_public_roles                |
| gw_schedule_repeats                     |
| gw_schedule_todos                       |
| gw_schedule_users                       |
| gw_schedules                            |
| gwsub_sb01_training_schedule_conditions |
| gwsub_sb01_training_schedule_members    |
| gwsub_sb01_training_schedule_props      |
| gwsub_sb01_training_schedules           |
+-----------------------------------------+
14 rows in set (0.00 sec)
テーブル同士を結合して特定の条件に合ったもののみ表示
※ ユーザ情報のテーブルとログイン情報のテーブルを結合して特定の時間帯に誰がログインしたかの情報を取得する
### created_atはログインした時間、user_idはユーザID
mysql> select * from sys_user_logins;
+----+---------+---------------------+---------------------+
| id | user_id | created_at          | updated_at          |
+----+---------+---------------------+---------------------+
|  1 |       1 | 2016-07-17 15:39:20 | 2016-07-17 15:39:20 |
|  2 |       1 | 2016-07-19 06:34:36 | 2016-07-19 06:34:36 |
|  3 |      11 | 2016-07-19 06:36:37 | 2016-07-19 06:36:37 |
|  4 |      11 | 2016-07-20 10:55:55 | 2016-07-20 10:55:55 |
|  5 |       1 | 2016-07-28 19:15:15 | 2016-07-28 19:15:15 |
|  6 |      12 | 2016-07-28 19:16:07 | 2016-07-28 19:16:07 |
|  7 |      12 | 2016-07-28 19:16:40 | 2016-07-28 19:16:40 |
|  8 |      12 | 2016-07-28 19:18:30 | 2016-07-28 19:18:30 |
|  9 |      12 | 2016-07-28 19:22:44 | 2016-07-28 19:22:44 |
+----+---------+---------------------+---------------------+
9 rows in set (0.00 sec)

### idはユーザID
mysql> select * from sys_users;
+----+--------------+---------------------------+
| id | account      | name                      |
+----+--------------+---------------------------+
|  1 | admin        | システム管理者            |
|  2 | user1        | 徳島 太郎                |
|  3 | user2        | 徳島 花子                |
|  4 | user3        | 吉野 三郎                |
|  5 | user4        | 佐藤 直一                |
|  6 | user5        | 鈴木 裕介                |
|  7 | user6        | 高橋 和寿                |
|  8 | user7        | 田中 彩子                |
|  9 | user8        | 渡辺 真由子              |
| 10 | user9        | 伊藤 勝                  |
| 11 | joruri       | joruri                    |
| 12 | joruri_ldap  | テストアカウント          |
| 13 | joruri_ldap2 | テストアカウント2         |
+----+--------------+---------------------------+
13 rows in set (0.00 sec)

※「sys_user_logins」テーブルの「user_id」カラムと「sys_users」テーブルの「id」カラムを使って結合する


### 結合したものを全部表示
mysql> select * from sys_user_logins inner join sys_users on sys_user_logins.user_id = sys_users.id;
+----+---------+---------------------+---------------------+-----+-------------+--------------------------+
| id | user_id | created_at          | updated_at          | id  | account     | name                     |
+----+---------+---------------------+---------------------+-----+-------------+--------------------------+
|  1 |       1 | 2016-07-17 15:39:20 | 2016-07-17 15:39:20 |  1  | admin       | システム管理者           |
|  2 |       1 | 2016-07-19 06:34:36 | 2016-07-19 06:34:36 |  1  | admin       | システム管理者           |
|  3 |      11 | 2016-07-19 06:36:37 | 2016-07-19 06:36:37 | 11  | joruri      | joruri                   |
|  4 |      11 | 2016-07-20 10:55:55 | 2016-07-20 10:55:55 | 11  | joruri      | joruri                   |
|  5 |       1 | 2016-07-28 19:15:15 | 2016-07-28 19:15:15 |  1  | admin       | システム管理者           |
|  6 |      12 | 2016-07-28 19:16:07 | 2016-07-28 19:16:07 | 12  | joruri_ldap | テストアカウント         |
|  7 |      12 | 2016-07-28 19:16:40 | 2016-07-28 19:16:40 | 12  | joruri_ldap | テストアカウント         |
|  8 |      12 | 2016-07-28 19:18:30 | 2016-07-28 19:18:30 | 12  | joruri_ldap | テストアカウント         |
|  9 |      12 | 2016-07-28 19:22:44 | 2016-07-28 19:22:44 | 12  | joruri_ldap | テストアカウント         |
+----+---------+---------------------+---------------------+-----+-------------+--------------------------+
9 rows in set (0.00 sec)


### ログイン時間とユーザID、ユーザ名を表示
mysql> select sys_user_logins.created_at,sys_user_logins.user_id,sys_users.name from sys_user_logins inner join sys_users on sys_user_logins.user_id = sys_users.id;
+---------------------+---------+--------------------------+
| created_at          | user_id | name                     |
+---------------------+---------+--------------------------+
| 2016-07-17 15:39:20 |       1 | システム管理者           |
| 2016-07-19 06:34:36 |       1 | システム管理者           |
| 2016-07-19 06:36:37 |      11 | joruri                   |
| 2016-07-20 10:55:55 |      11 | joruri                   |
| 2016-07-28 19:15:15 |       1 | システム管理者           |
| 2016-07-28 19:16:07 |      12 | テストアカウント         |
| 2016-07-28 19:16:40 |      12 | テストアカウント         |
| 2016-07-28 19:18:30 |      12 | テストアカウント         |
| 2016-07-28 19:22:44 |      12 | テストアカウント         |
+---------------------+---------+--------------------------+
9 rows in set (0.00 sec)

### 7/28の19時にログインしたユーザのみ表示
mysql> select sys_user_logins.created_at,sys_user_logins.user_id,sys_users.name from sys_user_logins inner join sys_users on sys_user_logins.user_id = sys_users.id where sys_user_logins.created_at like '%2016-07-28 19%';
+---------------------+---------+--------------------------+
| created_at          | user_id | name                     |
+---------------------+---------+--------------------------+
| 2016-07-28 19:15:15 |       1 | システム管理者           |
| 2016-07-28 19:16:07 |      12 | テストアカウント         |
| 2016-07-28 19:16:40 |      12 | テストアカウント         |
| 2016-07-28 19:18:30 |      12 | テストアカウント         |
| 2016-07-28 19:22:44 |      12 | テストアカウント         |
+---------------------+---------+--------------------------+
5 rows in set, 1 warning (0.00 sec)
DBエンジンの確認
mysql> use information_schema;
mysql> select table_name, engine from tables where table_schema = "DB名";
ソケット
-
プロセス間通信を行うための通信のエンドポイント
- 2つエンドポイント間の通信経路が正しく確立するとプロセスは通信可能状態になる
- プロセス間でデータの送信や受信が可能な状態になる
-
参考
ダンプとリストア
### すべてをdump
### 「enents」はall-databasesの時に必要。個別DB単位の場合は不要。
$ mysqldump -uroot -p --all-databases --events --lock-all-tables > /tmp/dbdump.db

### restore
$ mysql -uroot -p < /tmp/dbdump.db

### すべてを圧縮してdump
$ mysqldump -uroot -p --all-databases --events --lock-all-tables | gzip > /tmp/dbdump.sql.gz

### restore
$ zcat /tmp/dbdump.sql.gz | mysql -uroot -p

### pvコマンドを使ってrestoreの進捗表示
$ sudo yum install pv
$ zcat /tmp/dbdump.sql.gz | pv | mysql -uroot
================================================
 340MB 0:00:31 [13.2MB/s] [                  <=>                 ]
================================================

以下それぞれの圧縮コマンドは省略

### データベースを指定
$ mysqldump -uroot -p データベース名 > dump.sql

### restore
$ mysql -uroot -p  データベース名 < /tmp/dbdump.db


### 特定のテーブルをdump
mysqldump -uroot -p データベース名 テーブル名 > テーブル名.sql

### restore
$ mysql -uroot -p  データベース名 < テーブル名.sql

### 圧縮してdump
正規化
vim
操作
-
基本
-
Tabページ
-
画面分割
-
Unite.vim
コマンド覚え書き
-
複数行の先頭をコメントアウト
- Ctrl + v, Shift + i, #, ESC
-
置換で改行を入力
- :s/ /^M- /g (カレント業の空白を改行して「- 」を頭につける)
- ^MはCtrl+v,Ctrl+mと入力する。
- :s/ /^M- /g (カレント業の空白を改行して「- 」を頭につける)
-
矩形選択した範囲を置換
- 矩形選択した範囲のupdaterという文字列をownerに置換
- :'<,'>s/%Vupdater%V/owner/g
※ \%V で囲まれた部分が置換される
プラグイン
※ 「vi」ではなく「vim」で開かないと使えないものもある
- Shougo/neocomplcache
- 入力補完機能を提供する Vim のプラグイン
- Shougo/neosnippet
- 定型構文を素早く挿入できる機能
- 新しいものはShougo/neosnippet-snippetsを入れるとデフォルトのスニペットが使える
- The-NERD-tree
- vimを開きながらディレクトリをツリー表示することができる
- ファイルにvimを開きながらアクセスできる
-
vim-plugin NERDTree で開発効率をアップする!
- 操作など
- rails.vim
- Railsのモデル・ビュー・コントローラ間を簡単に行き来できる
-
Vimで快適なRailsライフを
- 操作など
-
Vimで快適なRailsライフを
- Railsのモデル・ビュー・コントローラ間を簡単に行き来できる
- dbext.vim
- DBをvimから確認できる
リンク
- vimrc設定
- ショートカットなど
Teratermマクロ
sshパスワード自動ログイン
### ssh_connect_password.ttl
============================================================
;; 外部ファイルの読み込み開始
fileopen FH 'ssh_connect_password.txt' 0

;; 接続先ホスト/ユーザ名/パスワード設定
filereadln FH HOSTADDR
filereadln FH USERNAME
filereadln FH PASSWORD

;; 外部ファイルの読み込み完了
fileclose FH
;==============================================
;; コマンド組立て
COMMAND = HOSTADDR
strconcat COMMAND ':22 /ssh /2 /auth=password /user='
strconcat COMMAND USERNAME
strconcat COMMAND ' /passwd='
strconcat COMMAND PASSWORD

;; 接続
connect COMMAND

;; マクロ終了
end
============================================================

## ssh_connect_password.txt
1行目がホスト、2行目がアカウント、3行目がパスワード
============================================================
192.168.33.11
vagrant
vagrant
============================================================
ssh鍵自動ログイン
### ssh_connect_sshkey.ttl
============================================================
;; 外部ファイルの読み込み開始
fileopen FH 'ssh_connect_sshkey.txt' 0

;; 接続先ホスト/ユーザ名/SSH鍵設定
filereadln FH HOSTADDR
filereadln FH USERNAME
filereadln FH KEYFILE

;; 外部ファイルの読み込み完了
fileclose FH

;; コマンド組立て
COMMAND = HOSTADDR
strconcat COMMAND ':22 /ssh /2 /auth=publickey /user='
strconcat COMMAND USERNAME
strconcat COMMAND ' /keyfile='
strconcat COMMAND KEYFILE

;; 接続
connect COMMAND

;; マクロ終了
end
============================================================

### ssh_connect_sshkey.txt
1行目がホスト、2行目がアカウント、3行目が鍵ファイル
============================================================
192.168.33.11
vagrant
E:\vagrant\CentOS6.7\.vagrant\machines\node1\virtualbox\private_key
============================================================
git
Forkからプルリクエストまで
githubでForkをポチポチ押して自分のリポジトリに持ってくるまでは省略
Frok元から差分を取り込む
ある程度時間がたってFork元が進んだ時にその差分を取り込む
### フォーク元のリポジトリを登録する
$ git remote add upstream https://github.com/shirasagi/shirasagi.git

### fetchする
$ git fetch upstream
================================================
remote: Counting objects: 320, done.
remote: Total 320 (delta 256), reused 256 (delta 256), pack-reused 64
Receiving objects: 100% (320/320), 48.60 KiB | 0 bytes/s, done.
Resolving deltas: 100% (259/259), completed with 195 local objects.
From https://github.com/shirasagi/shirasagi
 * [new branch]      check-links -> upstream/check-links
 * [new branch]      fixes/unable-share-with-twitter -> upstream/fixes/unable-share-with-twitter
 * [new branch]      master     -> upstream/master
 * [new branch]      mobile-filter -> upstream/mobile-filter
 * [new branch]      multilingual -> upstream/multilingual
 * [new branch]      new-design -> upstream/new-design
 * [new branch]      sns-poster -> upstream/sns-poster
 * [new branch]      stable     -> upstream/stable
 * [new branch]      v0.9.1     -> upstream/v0.9.1
 * [new branch]      v0.9.2     -> upstream/v0.9.2
 * [new branch]      v0.9.3     -> upstream/v0.9.3
 * [new branch]      v0.9.4     -> upstream/v0.9.4
 * [new branch]      v0.9.5     -> upstream/v0.9.5
 * [new branch]      webapi     -> upstream/webapi
================================================
### 全てfetchする場合は--all
### $ git fetch --all

### 以下はmergeしたポイントをcommitのログとして残したい場合は以下を飛ばす
### 通常のmergeは以下
$ git merge upstream/master
### 通常のmergeはここで終わり。

### fork元のブランチのローカルブランチを作成する
### fork元のブランチ : upstream/master
### 作成するローカルブランチ : fork_master
$ git checkout -b fork_master upstream/master
================================================
Branch fork_master set up to track remote branch master from upstream.
Switched to a new branch 'fork_master'
================================================

### ブランチを確認する
$ git branch -a
================================================
* fork_master ※ これの差分を
  master ※ これに取り込む
  remotes/origin/HEAD -> origin/master
  remotes/origin/check-links
  remotes/origin/fixes/unable-share-with-twitter
  remotes/origin/hotfix-install
  remotes/origin/master
  remotes/origin/mobile-filter
  remotes/origin/multilingual
  remotes/origin/new-design
  remotes/origin/sns-poster
  remotes/origin/stable
  remotes/origin/v0.9.1
  remotes/origin/v0.9.2
  remotes/origin/v0.9.3
  remotes/origin/v0.9.4
  remotes/origin/v0.9.5
  remotes/origin/webapi
  remotes/upstream/check-links
  remotes/upstream/fixes/unable-share-with-twitter
  remotes/upstream/master
  remotes/upstream/mobile-filter
  remotes/upstream/multilingual
  remotes/upstream/new-design
  remotes/upstream/sns-poster
  remotes/upstream/stable
  remotes/upstream/v0.9.1
  remotes/upstream/v0.9.2
  remotes/upstream/v0.9.3
  remotes/upstream/v0.9.4
  remotes/upstream/v0.9.5
  remotes/upstream/webapi
================================================

### マージされるブランチを最新にする
$ git checkout master
================================================
Switched to branch 'master'
================================================

$ git pull
================================================
Already up-to-date.
================================================

### fork元のブランチを自分のブランチにマージする
$ git merge --no-ff fork_master
ブランチを統合する
gws-testブランチにdev/gws-todoとdev/monitorを統合する
### dev/gwsのチェックアウトと統合テスト用ブランチの作成
$ git checkout -b dev/gws origin/dev/gws
$ git branch dev/gws-test

## 統合する分ランチをチェックアウト
$ git checkout -b dev/gws-todo origin/dev/gws-todo
$ git checkout -b dev/monitor origin/dev/monitor

## マージ先ブランチへ移動
$ git checkout dev/gws-test

## マージする
$ git merge --no-ff dev/gws-todo
$ git merge --no-ff dev/monitor
自分が開発する用のブランチを作成する
### developブランチの作成
$ git checkout -b develop origin/mathtodon

### 確認
$ git branch
================================================
* develop
  fork_master_mathtodon
  mathtodon
================================================

### developブランチから開発用ブランチの作成
$ git branch feature-latex-display
$ git checkout feature-latex-display

### 確認
$ git branch
================================================
  develop
* feature-latex-display
  fork_master_mathtodon
  mathtodon
================================================
設定の確認
$ git config -l
================================================
...
core.filemode=false
core.repositoryformatversion=0
core.filemode=false
core.bare=false
core.logallrefupdates=true
...
================================================
コミットした人や作者を変更
### 対象を確認。一番上のhogeをftakao2007に変更したい
$ git log -2 --pretty=full
================================================
commit 28c6d3f7a925774b6c205a6268ac5ac8160ee5da
Author: hoge <hoge@example.com>
Commit: hoge <hoge@example.com>

    機能B追加

commit c93c7f8415a55c2f211c5ad076632cd68c306cd7
Author: ftakao2007 <ftakao2007@example.com>
Commit: ftakao2007 <ftakao2007@example.com>

    機能A修正
================================================

### nameとemailを設定。必要に応じてglobalで設定
$ git config --local user.name ftakao2007
$ git config --local user.email ftakao2007@example.com

### AuthorとCommitの修正
$ git commit --amend --author="ftakao2007 <ftakao2007@example.com>"
================================================
(コメントアウトの行にあるCommitのところを書き換える)
================================================

### rebaseする
$ git rebase --continue

### 変更されたことを確認
$ git log -2 --pretty=full
================================================
commit 28c6d3f7a925774b6c205a6268ac5ac8160ee5da
Author: ftakao2007 <ftakao2007@example.com>
Commit: ftakao2007 <ftakao2007@example.com>

    機能B追加

commit c93c7f8415a55c2f211c5ad076632cd68c306cd7
Author: ftakao2007 <ftakao2007@example.com>
Commit: ftakao2007 <ftakao2007@example.com>

    機能A修正
================================================

### pushする。すでにpushしている場合は-fをつける
$ git push -f origin <ブランチ>
developブランチとコンフリクトがある場合のrebase方法
git fetch --all
git checkout develop
git pull origin develop
git checkout (作業しているブランチ)
git rebase develop
upstreamからrebaseする場合
https://github.com/hoge/hoge.git の fuga-branch を https://github.com/hoge2/hoge.git に持ってくる
git remote add upstream https://github.com/hoge/hoge.git
git remote -v
================================================
origin  https://github.com/hoge2/hoge.git (fetch)
origin  https://github.com/hoge2/hoge.git (push)
upstream        https://github.com/hoge/hoge.git (fetch)
upstream        https://github.com/hoge/hoge.git (push)
================================================
git fetch upstream
git checkout -b fuga-branch origin/fuga-branch
git rebase upstream/fuga-branch
vi (修正対象ファイル)
git add (修正対象ファイル)
git rebase --continue
git pull
vi (修正対象ファイル)
git add (修正対象ファイル)
git commit
git push origin fuga-branch
originの変更
リモートからブランチを持ってきて、そのブランチから新たなブランチを作成
### リモートのtokushimaブランチをチェックアウト
$ git checkout -b tokushima origin/tokushima

### tokushimaブランチから新たに修正用ブランチを作成
$ git checkout -b 'hotfix/modify_test'

(コードを修正)

### 修正したコードを修正用ブランチにpush
$ git add (修正したファイル)
$ git commit -m "(修正内容のコメント)"
$ git push origin 'hotfix/modify_test'
コミットの修正
### ログの確認
$ git log

### 3つ前のコミットを修正する (3つ前に+1して4を指定)
$ git rebase -i HEAD~4

(ファイルも修正したい場合はここで修正する)

### コメントを修正
$ git commit --amend

### コミットの修正
$ git rebase --continue

### push
$ git pull origin (リモートブランチ)
$ git push -u origin (リモートブランチ)
リモートのコミットをログを残しつつ戻す(今のバージョンのgitではできない?)
### チェックアウト
$ git clone https://(対象URL)

### ディレクトリ移動
$ cd (リポジトリ)

### 対象ブランチをチェックアウト (masterの場合は不要)
$ git checkout -b (対象ブランチ) origin/(対象ブランチ)

### コミットログの確認
$ git log --oneline --graph
====================================================
*   d6b9490 Merge pull request issue:12 from hoge/hotfix/fuga   ### <- これをなかったことにしたい
|\
| * 43e5ea2 fix fuga
|/
*   855e00d Merge pull request issue:11 from hoge/hotfix/haga
====================================================

### revertする。以下の表示が出るのでviの操作で保存(ZZ)
$ git revert -m 1 d6b9490
====================================================
Revert "Merge pull request issue:12 from hoge/hotfix/fuga"

This reverts commit d6b94902fbf94f7237b47f8f142075ad9875257e, reversing
changes made to 855e00de6fdcd264cf3a274e280f1f8c7e3deb2e.

# Please enter the commit message for your changes. Lines starting
# with '#' will be ignored, and an empty message aborts the commit.
#
...
====================================================

### コミットログの確認
$ git log --oneline --graph
====================================================
* 4aeb50a Revert "Merge pull request issue:12 from hoge/hotfix/fuga"  ### <- Revertのコミットができる
*   d6b9490 Merge pull request issue:12 from hoge/hotfix/fuga   ### <- これをなかったことにしたい
|\
| * 43e5ea2 fix fuga
|/
*   855e00d Merge pull request issue:11 from hoge/hotfix/haga
====================================================

### pushする
$ git push origin (対象ブランチ)
リモートブランチを削除する
### hogeブランチを削除
$ git branch -d hoge
$ git push origin :hoge
リモートのコミットを削除する
### チェックアウト
$ git clone https://(対象URL)

### ディレクトリ移動
$ cd (リポジトリ)

### 対象ブランチをチェックアウト (masterの場合は不要)
$ git checkout -b (対象ブランチ) origin/(対象ブランチ)

### コミットログの確認
$ git log --oneline --graph
====================================================
*   d6b9490 Merge pull request issue:12 from hoge/hotfix/fuga   ### <- これをなかったことにしたい
|\
| * 43e5ea2 fix fuga
|/
*   855e00d Merge pull request issue:11 from hoge/hotfix/haga
====================================================

### revertする。以下の表示が出るのでviの操作で保存(ZZ)
$ git rebase -i HEAD~~
====================================================
(修正前)
pick d6b9490 Merge pull request issue:12 from hoge/hotfix/fuga

# Rebase d6b9490..2c1ad6c onto d6b9490 (1 command(s))
#

(修正後)
drop d6b9490 Merge pull request issue:12 from hoge/hotfix/fuga

# Rebase d6b9490..2c1ad6c onto d6b9490 (1 command(s))
#
====================================================

### コミットログの確認
$ git log --oneline --graph
====================================================
*   855e00d Merge pull request issue:11 from hoge/hotfix/haga
...
====================================================

### pushする
$ git push origin (対象ブランチ)
LVMのディスク拡張
ESXiのCentOS6.7のディスク拡張
- 20GB -> 85GBに拡張する
- ディスク自体の拡張はvSphere ClientでGUIで終わらせておく
### 現在のサイズの確認
# fdisk -l
====================================================
ディスク /dev/sda: 91.3 GB, 91268055040 バイト   ### <- デバイス上は91.3GBに増えている
ヘッド 255, セクタ 63, シリンダ 11096
Units = シリンダ数 of 16065 * 512 = 8225280 バイト
セクタサイズ (論理 / 物理): 512 バイト / 512 バイト
I/O size (minimum/optimal): 512 bytes / 512 bytes
ディスク識別子: 0x000efcb2

デバイス ブート      始点        終点     ブロック   Id  システム
/dev/sda1   *           1          64      512000   83  Linux
パーティション 1 は、シリンダ境界で終わっていません。
/dev/sda2              64        2611    20458496   8e  Linux LVM

ディスク /dev/mapper/VolGroup-lv_root: 18.8 GB, 18798870528 バイト  ### <- ここを85GBに拡張したい
ヘッド 255, セクタ 63, シリンダ 2285
Units = シリンダ数 of 16065 * 512 = 8225280 バイト
セクタサイズ (論理 / 物理): 512 バイト / 512 バイト
I/O size (minimum/optimal): 512 bytes / 512 bytes
ディスク識別子: 0x00000000
...
====================================================

### パーティションの作成
# fdisk /dev/sda
====================================================
警告: DOS互換モードは廃止予定です。このモード (コマンド 'c') を止めることを
      強く推奨します。 and change display units to
         sectors (command 'u').

コマンド (m でヘルプ): n  ### <- 入力
コマンドアクション
   e   拡張
   p   基本パーティション (1-4)
p    ### <- 入力
パーティション番号 (1-4): 3  ### <- 入力
最初 シリンダ (2611-11096, 初期値 2611):  ### <- デフォルトのままEnter
初期値 2611 を使います
Last シリンダ, +シリンダ数 or +size{K,M,G} (2611-11096, 初期値 11096):  ### <- デフォルトのままEnter
初期値 11096 を使います

コマンド (m でヘルプ): p

ディスク /dev/sda: 91.3 GB, 91268055040 バイト
ヘッド 255, セクタ 63, シリンダ 11096
Units = シリンダ数 of 16065 * 512 = 8225280 バイト
セクタサイズ (論理 / 物理): 512 バイト / 512 バイト
I/O size (minimum/optimal): 512 bytes / 512 bytes
ディスク識別子: 0x000efcb2

デバイス ブート      始点        終点     ブロック   Id  システム
/dev/sda1   *           1          64      512000   83  Linux
パーティション 1 は、シリンダ境界で終わっていません。
/dev/sda2              64        2611    20458496   8e  Linux LVM
/dev/sda3            2611       11096    68157100   83  Linux      ### <- パーティションが作成された

コマンド (m でヘルプ): t  ### <- 入力
パーティション番号 (1-4): 3  ### <- 入力
16進数コード (L コマンドでコードリスト表示): L  ### <- 入力

 0  空             24  NEC DOS         81  Minix / 古い  bf  Solaris
 1  FAT12           39  Plan 9          82  Linux スワッ c1  DRDOS/sec (FAT-
 2  XENIX root      3c  PartitionMagic  83  Linux           c4  DRDOS/sec (FAT-
 3  XENIX usr       40  Venix 80286     84  OS/2 隠し C:  c6  DRDOS/sec (FAT-
 4  FAT16 <32M      41  PPC PReP Boot   85  Linux 拡張領 c7  Syrinx
 5  拡張領域    42  SFS             86  NTFS ボリュ  da  非 FS デー
 6  FAT16           4d  QNX4.x          87  NTFS ボリュ  db  CP/M / CTOS / .
 7  HPFS/NTFS       4e  QNX4.x 2nd part 88  Linux プレー de  Dell ユーテ
 8  AIX             4f  QNX4.x 3rd part 8e  Linux LVM       df  BootIt
 9  AIX ブート   50  OnTrack DM      93  Amoeba          e1  DOS access
 a  OS/2 ブート  51  OnTrack DM6 Aux 94  Amoeba BBT      e3  DOS R/O
 b  W95 FAT32       52  CP/M            9f  BSD/OS          e4  SpeedStor
 c  W95 FAT32 (LBA) 53  OnTrack DM6 Aux a0  IBM Thinkpad    eb  BeOS fs
 e  W95 FAT16 (LBA) 54  OnTrackDM6      a5  FreeBSD         ee  GPT
 f  W95 拡張領   55  EZ-Drive        a6  OpenBSD         ef  EFI (FAT-12/16/
10  OPUS            56  Golden Bow      a7  NeXTSTEP        f0  Linux/PA-RISC
11  隠し FAT12    5c  Priam Edisk     a8  Darwin UFS      f1  SpeedStor
12  Compaq 診断   61  SpeedStor       a9  NetBSD          f4  SpeedStor
14  隠し FAT16 <3 63  GNU HURD また ab  Darwin ブー   f2  DOS セカン
16  隠し FAT16    64  Novell Netware  af  HFS / HFS+      fb  VMware VMFS
17  隠し HPFS/NTF 65  Novell Netware  b7  BSDI fs         fc  VMware VMKCORE
18  AST SmartSleep  70  DiskSecure Mult b8  BSDI スワッ  fd  Linux raid 自
1b  隠し W95 FAT3 75  PC/IX           bb  隠し Boot Wiz fe  LANstep
1c  隠し W95 FAT3 80  古い Minix    be  Solaris ブー  ff  BBT
1e  隠し W95 FAT1
16進数コード (L コマンドでコードリスト表示): 8e  ### <- 入力
領域のシステムタイプを 3 から 8e (Linux LVM) に変更しました

コマンド (m でヘルプ): p  ### <- 入力

ディスク /dev/sda: 91.3 GB, 91268055040 バイト
ヘッド 255, セクタ 63, シリンダ 11096
Units = シリンダ数 of 16065 * 512 = 8225280 バイト
セクタサイズ (論理 / 物理): 512 バイト / 512 バイト
I/O size (minimum/optimal): 512 bytes / 512 bytes
ディスク識別子: 0x000efcb2

デバイス ブート      始点        終点     ブロック   Id  システム
/dev/sda1   *           1          64      512000   83  Linux
パーティション 1 は、シリンダ境界で終わっていません。
/dev/sda2              64        2611    20458496   8e  Linux LVM
/dev/sda3            2611       11096    68157100   8e  Linux LVM  ### <- Linux LVMになっていることを確認

コマンド (m でヘルプ): w  ### <- 入力
パーティションテーブルは変更されました!

ioctl() を呼び出してパーティションテーブルを再読込みします。

警告: パーティションテーブルの再読込みがエラー 16 で失敗しました: デバイスもしくはリソースがビジー状態です。
カーネルはまだ古いテーブルを使っています。新しいテーブルは
次回リブート時か、partprobe(8)またはkpartx(8)を実行した後に
使えるようになるでしょう
ディスクを同期しています。
====================================================

### 再起動
# reboot

### rootでログインする

### Physical volumeの作成
# pvcreate /dev/sda3

### Physical volumeの確認
# pvdisplay
====================================================
  --- Physical volume ---
  PV Name               /dev/sda2
  VG Name               VolGroup
  PV Size               19.51 GiB / not usable 3.00 MiB
  Allocatable           yes (but full)
  PE Size               4.00 MiB
  Total PE              4994
  Free PE               0
  Allocated PE          4994
  PV UUID               NR78oH-gC0W-hjxp-ghr0-afuW-hJI8-F16B6Q

  --- Physical volume ---
  PV Name               /dev/sda3   ### <- これが作成された
  VG Name
  PV Size               65.00 GiB
  Allocatable           NO
  PE Size               0
  Total PE              0
  Free PE               0
  Allocated PE          0
  PV UUID               reKHjL-i8J7-MfXD-J8RY-UAnx-qTma-lb1bAf
====================================================

### Volume Groupの拡張
# vgextend VolGroup /dev/sda3

### Volume Groupの確認
# vgdisplay
====================================================
  --- Volume group ---
  VG Name               VolGroup
  System ID
  Format                lvm2
  Metadata Areas        2
  Metadata Sequence No  4
  VG Access             read/write
  VG Status             resizable
  MAX LV                0
  Cur LV                2
  Open LV               2
  Max PV                0
  Cur PV                2
  Act PV                2
  VG Size               84.50 GiB
  PE Size               4.00 MiB
  Total PE              21633
  Alloc PE / Size       4994 / 19.51 GiB
  Free  PE / Size       16639 / 65.00 GiB   ### <- Free PEが拡張分追加されている
  VG UUID               Hcf20P-8Y5p-ordM-xYsS-gCCo-MvaK-m9KMYn
====================================================

### Logical volumeを拡張する。空きをすべて割り当てる
# lvextend -l +100%FREE /dev/VolGroup/lv_root

### Logical volumeの確認
# lvdisplay
====================================================
  --- Logical volume ---
  LV Path                /dev/VolGroup/lv_root
  LV Name                lv_root
  VG Name                VolGroup
  LV UUID                Pg5LMc-uZSv-IneL-x0He-clBB-anWB-d9AU3L
  LV Write Access        read/write
  LV Creation host, time localhost.localdomain, 2015-11-24 11:14:33 +0900
  LV Status              available
  # open                 1
  LV Size                82.50 GiB   ### <- LVが拡張されている
  Current LE             21121
  Segments               2
  Allocation             inherit
  Read ahead sectors     auto
  - currently set to     256
  Block device           253:0
...
====================================================

### ディスクサイズの拡張
# resize2fs /dev/VolGroup/lv_root

### CentOS7(xfs)の場合
# xfs_growfs /dev/VolGroup/lv_root

### ディスクが拡張されたことを確認する
# df -h
====================================================
Filesystem            Size  Used Avail Use% Mounted on
/dev/mapper/VolGroup-lv_root
                       82G  1.5G   76G   2% /   ### <- 拡張された
tmpfs                 7.3G     0  7.3G   0% /dev/shm
/dev/sda1             477M   73M  380M  16% /boot
====================================================
- 別のやり方
- ディスクの追加では無く元のディスクを拡張する
  - 仮想Diskの容量拡大
    - vsphereの設定の編集にて 20 => 50 GB(など)
  - OS起動
  - fdisk /dev/sda
  - pにてパーティション確認(2つある)
  - 既存のパーティションを一旦削除(d -> 2)
  - そのままn=>p=>2でパーティションを再作成(容量拡張)(エンターで進める)
  - ラベルを8eに変更(t -> 2 -> 8e)
  - 保存して再起動(w)(reboot)
  - fdisk -l にて拡張されている事を確認
  - dh -h -> まだパーティションは拡張されていない
  - pvresize /dev/sda2
  - lvextend -l +100%free /dev/mapper/centos-root
  - xfs_growfs /
  - df -h →パーティション(root)が拡張されている事を確認)
redmine
- 初期設定
- admin/adminでログイン
- 個人設定
- メールアドレス : admin用アドレス
- 言語 : (auto)
- 設定 タイムゾーン : (GMT+09:00) TokyoとかOsakaとかSapporoとか
- (いったん保存)
- パスワード変更
- (パスワードを設定)
- 管理
- デフォルト設定をロード (日本語)
- ユーザー
- 新しいユーザからユーザ作成
- f7%ir0 r0無しとか。
- 新しいユーザからユーザ作成
- 設定
- 表示
- デフォルトの言語 : 日本語
- 認証
- 認証が必要をチェック
- 表示
- Git連携
- RedmineとGitHubを連携
- gitbucket連携の場合の読み替え
Jmeter
負荷試験ツール
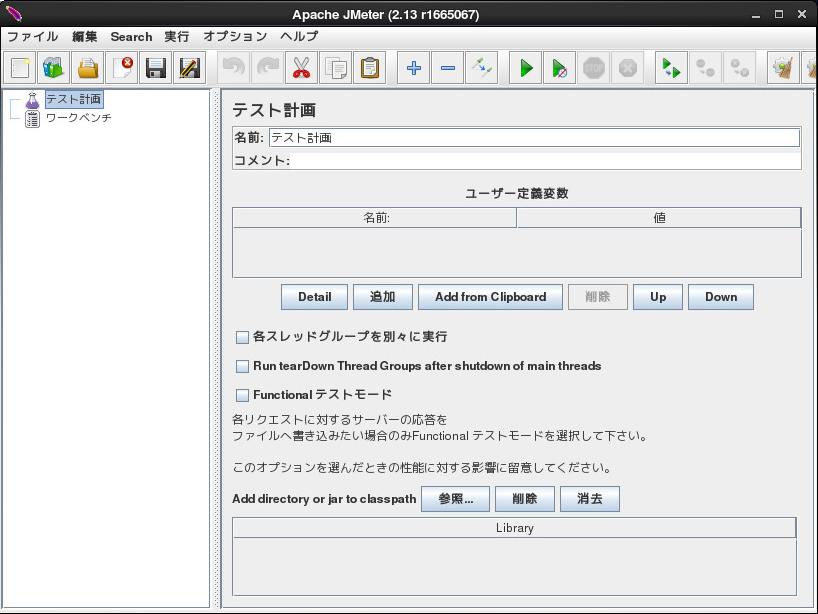
簡単なテスト
「テスト計画」にスレッドグループを作成
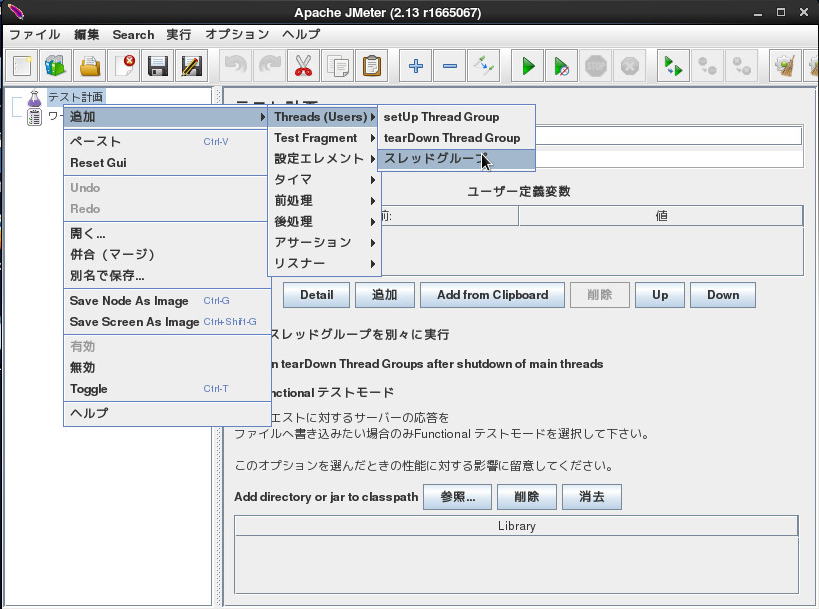
- スレッドグループの設定
- スレッド数 : 一回のテストケースで生成されるスレッドの数
- Ramp-Up期間(秒) : 何秒間でそれら全スレッドを生成するかを決定。0にするとすべてを同時に実行
- ループ回数 : ループする回数
- テストの総回数 : 「スレッド数」×「ループ回数」
- 1秒あたりのテスト回数 : 「テストの総回数」÷「Ramp-Up期間(秒)」
- 例 スレッド数 : 10、 Ramp-Up期間(秒) : 10、 ループ回数 : 5
- -> テストの総回数 : 50、 1秒あたりのテスト回数 : 5
- 例 スレッド数 : 10、 Ramp-Up期間(秒) : 10、 ループ回数 : 5
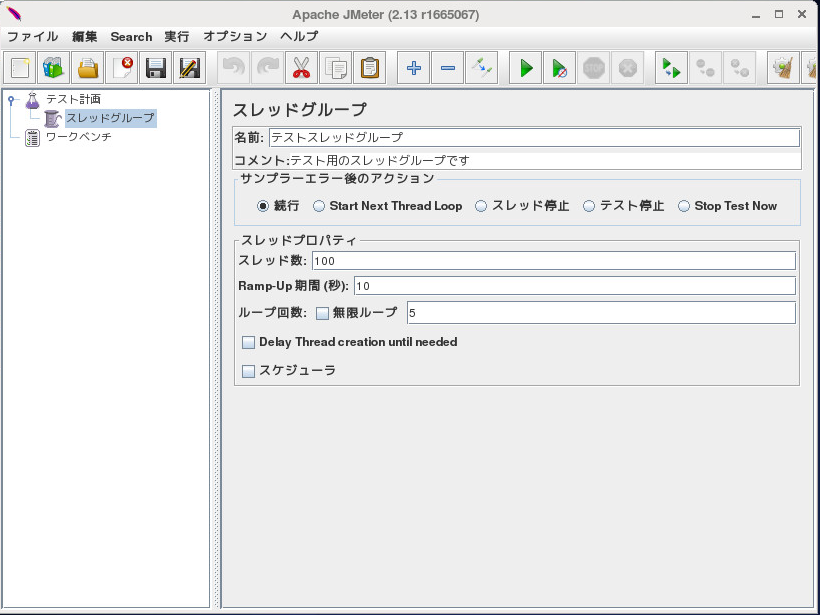
テストの作成

IPアドレスとポート番号を指定
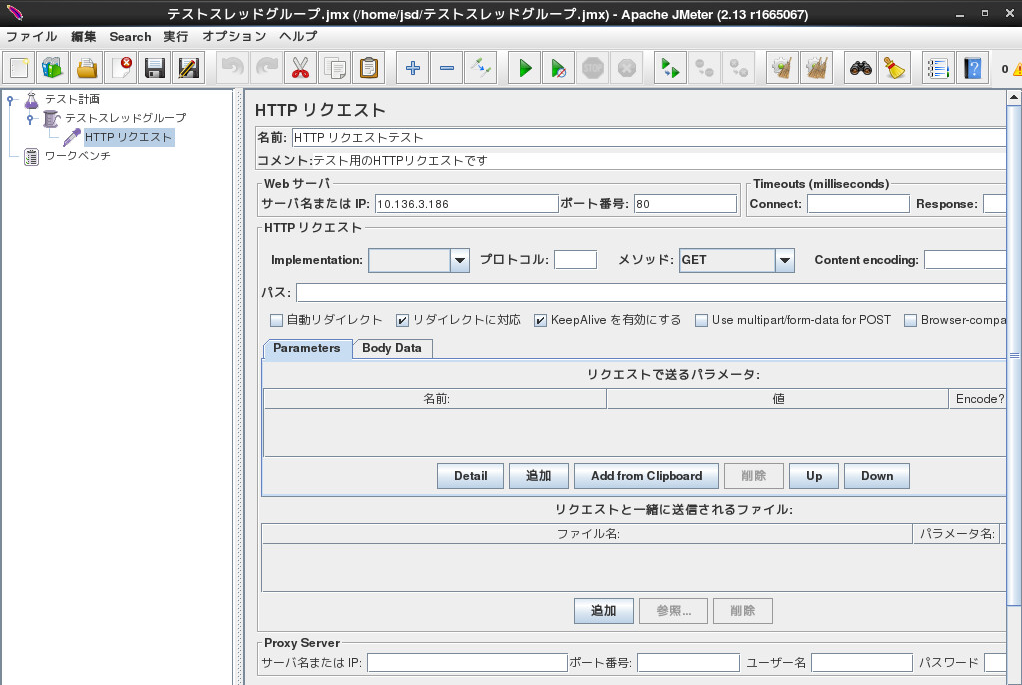
- リスナーの追加
- リスナー
- テスト中に収集した情報を表示したりファイルへ保存したりする機能
- 送ったリクエストの統計情報を表にして閲覧したり、レスポンス時間をグラフにして閲覧したりすることができる
- リスナー
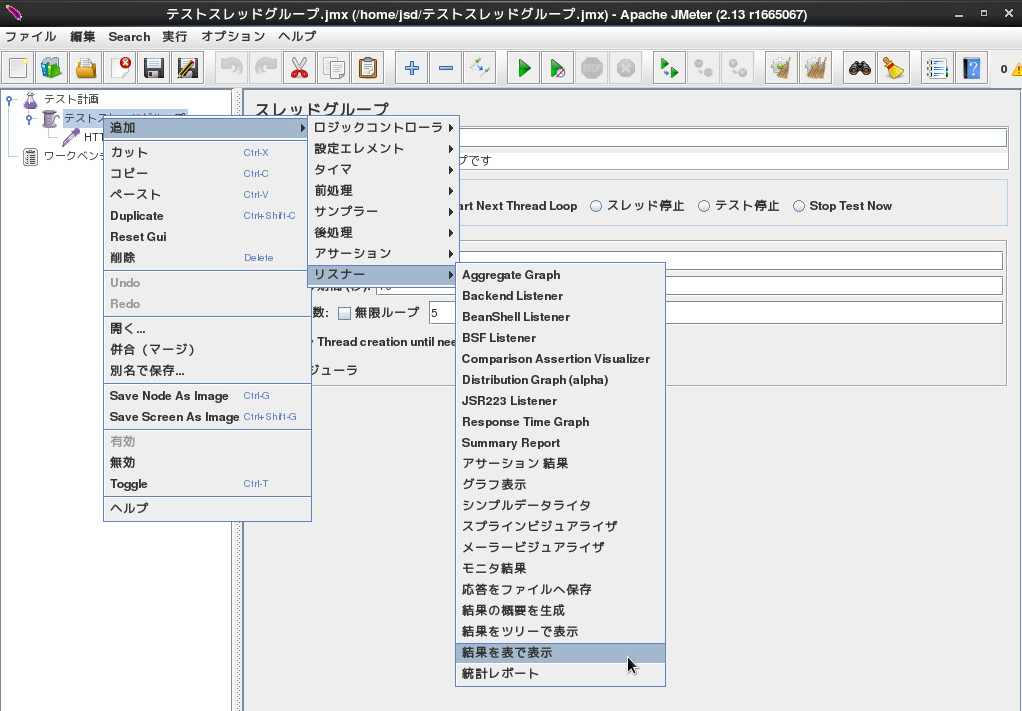
実行すると結果が表示される