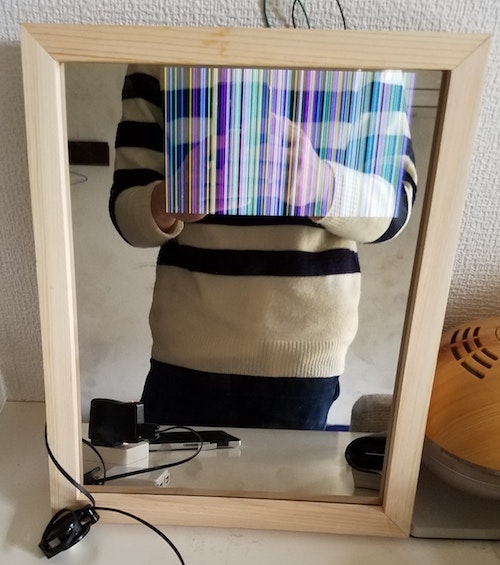
忙しい朝に携帯を開かず、最寄駅の次の電車の時間や、現在の時刻や、降水率などを鏡に表示されると便利だと思って、マジックミラーのディスプレーを作りました。
下記の記事を読んでマジックミラーを欲しくなったのと、Raspi上でAndroidアプリを作れるというニュースを聞いたので、土日を使ってマジックミラーとAndroid things を作ってみました。
https://www.hackster.io/Techblogogy/magic-mirror-with-stylist-4b3ff7?ref=search&ref_id=magic%20mirror&offset=2
実際、RaspiがWifiにうまく接続できなかったり、Wifi接続できたのにWifi経由でADBデバッグできなかったり、諸々のトラブルがあって完成したのは2,3週間後でした。
Android thingsの開発環境
- MacBook Air
- Mac OS Sierra
- Android Studio 2.2.3
- Raspberry Pi 3 model B
- Raspberry Pi用のtouch panel(普通のdisplayでもよかった)
Step.1 マジックミラーと額縁を用意
マジックミラーを売っているサイトが非常に多くて、普通にグッグたら作ってくれるところがいっぱいありました。ミラーの見積もりはネットでできたので、今回はkowaミラーショップを使いました。
https://sv166.xserver.jp/~kowa-j/magicmirror.htm
その次は額縁の製作です。友人のアドバイスをもらって、渋谷の東急ハンズ B1B階に木材を加工してくれる場所があると、それで試しにハンズを利用しました。初めてですが、木材の購入とカットが同じ場所にあって、簡単な図面を書いて作りたいものと寸法さえ伝えれば加工してくれるので、本当に便利でした。
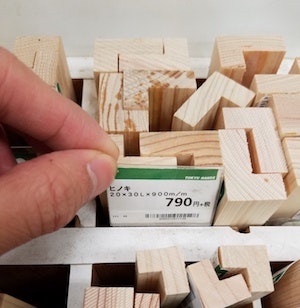
ハンズで購入したL字になっているヒノキ
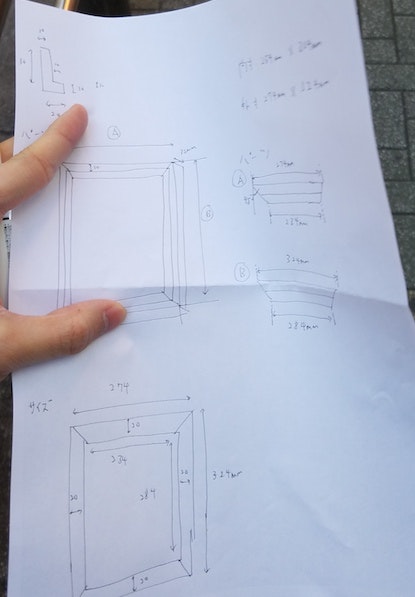
ヒノキのサイズに合わせて額縁の寸法図を設計しました。マジックミラーがハマるように 2mm程度 の余裕を空けました。これはハンズに向かっている最中に撮った、店員さんに見せた図面です。
あとは寸法図を元にカットしてくださいとB1B階のハンズの店員さんに伝えれば、加工してくれました。
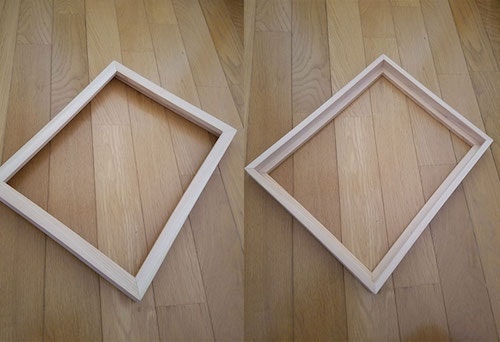
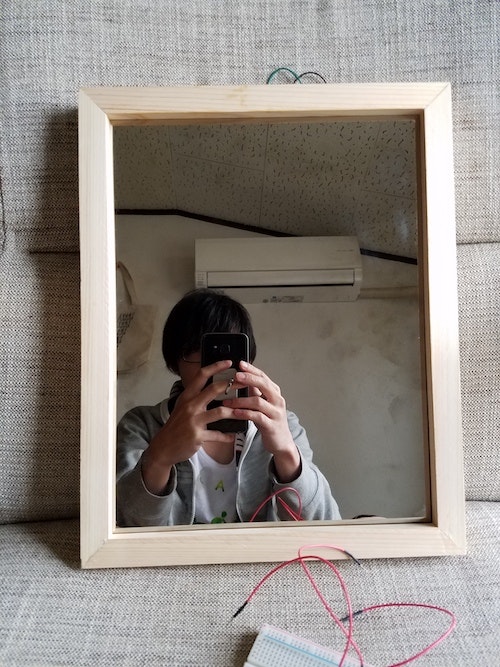
加工してもらった木材を木工ボンドでくっつけて、額縁の出来上がりです!
<補足>同じビルの5階に額縁、アルバムのフレームをオーダー発注できるところがあります。また額縁を使うような作品を作ることになったら使ってみたいです。
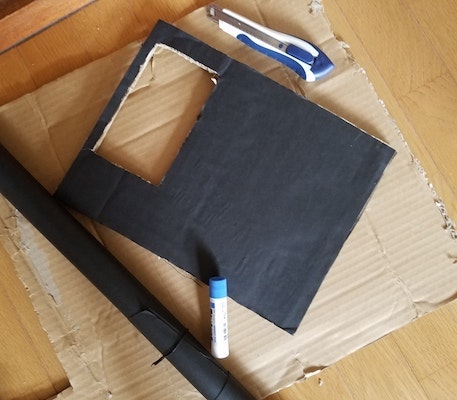
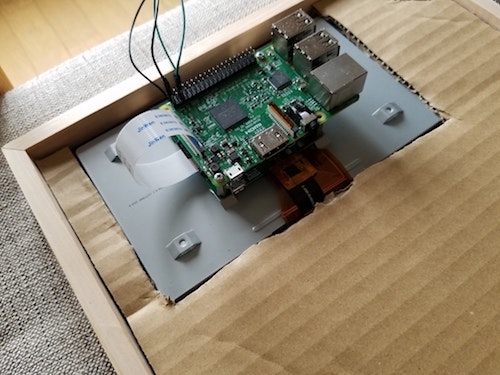
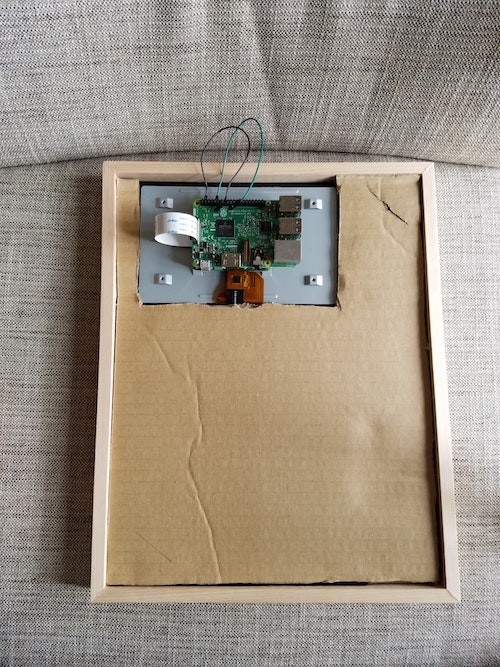
マジックミラーと同じサイズにダンボールを切り取って、黒色の紙を巻いて、ディスプレーがハマるサイズにダンボールに穴を空けました。
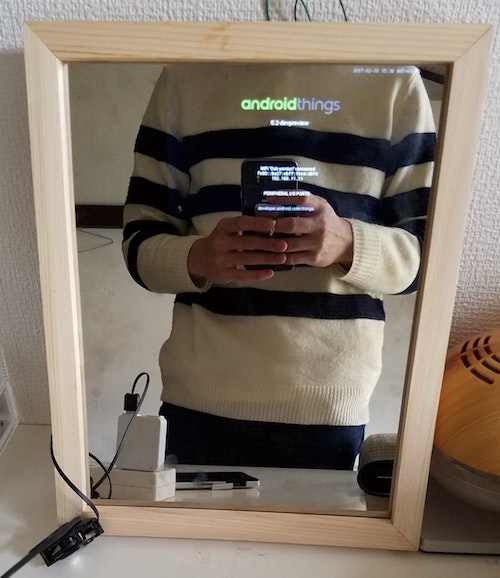
全てのパーツを用意したので、組み立てます。出来上がりの写真を共有します
壁掛けする方法や、RaspiのWifiが弱くて、寮の共通のルーターが廊下にあって、壁越しだとRaspiの内臓Wifiが繋がらない問題など、いくつまだ解決していない問題が残っていますが、解決する次第記事を更新します。
Step.2 Raspberry PIにAndroid Thingsをインストールし、起動
まずOSイメージを8GBのSD Cardにフラッシュしました。手順はリンク通りで省略します。
https://developer.android.com/things/hardware/raspberrypi.html
ちなみに、今回はDSIケーブルのディスプレーを購入しました。HDMIケーブルは使いませんでした。ただ、鏡の向こう側にディスプレーをはめるので、タッチパネルにしなくても良かったですが。。。
http://uk.rs-online.com/web/p/graphics-display-development-kits/8997466/
USB電源を入れました。ここで注意すべきなのは、Raspiの電源供給は5V、0.8A~1A が必要です、Macbook AirのUSBやスマホの充電器は基本的に問題がないはずです。
雑談ですが、5V 0.3Aの電源を入れると、こうなります。
電源を入れたら、RaspiのADBサーバーと接続します。ネットの接続ができたら、下記のコマンドを実行してADBサーバーと接続します。
adb connect Android.local
Connectedのメッセージが表示されたらオッケーです。
Step.3 Android Studio 2でAndroid thingsプロジェクトを新規
プロジェクトを新規時の条件です。
Form factors: Phone and Tablet
Minimum SDK: API 24: Android 7.0 (Nougat)
その次、公式サイト通りに、プロジェクトのManifest.xmlとbuild.gradleを設定しました。
https://developer.android.com/things/training/first-device/create-studio-project.html
<?xml version="1.0" encoding="utf-8"?>
<manifest xmlns:android="http://schemas.android.com/apk/res/android"
    package="com.example.edisonthk.homemagicmirror">

    <application
        android:allowBackup="true"
        android:icon="@mipmap/ic_launcher"
        android:label="@string/app_name"
        android:supportsRtl="true"
        android:theme="@style/AppTheme">

        <!-- Android things Library -->
        <uses-library android:name="com.google.android.things" android:required="true"/>
        <activity android:name=".MainActivity">

            <!-- Launch activity as default from Android Studio -->
            <intent-filter>
                <action android:name="android.intent.action.MAIN" />
                <category android:name="android.intent.category.LAUNCHER" />
            </intent-filter>

            <!-- Launch activity automatically on device boot -->
            <intent-filter>
                <action android:name="android.intent.action.MAIN" />
                <category android:name="android.intent.category.IOT_LAUNCHER"/>
                <category android:name="android.intent.category.DEFAULT" />
            </intent-filter>
        </activity>
    </application>

</manifest>
apply plugin: 'com.android.application'

android {
    compileSdkVersion 25
    buildToolsVersion "25.0.2"
    defaultConfig {
        applicationId "com.example.edisonthk.homemagicmirror"
        minSdkVersion 24
        targetSdkVersion 25
        versionCode 1
        versionName "1.0"
        testInstrumentationRunner "android.support.test.runner.AndroidJUnitRunner"
    }
    buildTypes {
        release {
            minifyEnabled false
            proguardFiles getDefaultProguardFile('proguard-android.txt'), 'proguard-rules.pro'
        }
    }
}

dependencies {
    provided 'com.google.android.things:androidthings:0.2-devpreview'

    compile fileTree(dir: 'libs', include: ['*.jar'])
    androidTestCompile('com.android.support.test.espresso:espresso-core:2.2.2', {
        exclude group: 'com.android.support', module: 'support-annotations'
    })
    compile 'com.android.support:appcompat-v7:25.1.0'
    compile 'com.android.support:support-v4:25.1.1'
    testCompile 'junit:junit:4.12'

}
設定ができたら、背景黒、白文字シンプルのアプリを作りました。
Step.4 Raspberry PIにデバッグ
Android Studioのrunボタンをクリックし、Android Thingsを選択したらRaspberry PIにデバッグされます。
Done! Happy Coding!
Android Things開発メモ
Raspberry PIにデバッグするのに便利なサイト
ADB Cheatsheet
入力キーボード設定
am start -n com.android.settings/.Settings$InputMethodAndLanguageSettingsActivity
バグ日記
2017/2/8 EmulatorでAndroid Thingsを実行しようとしたら、下記のエラーが発生しました。
Failure [INSTALL_FAILED_MISSING_SHARED_LIBRARY: Package couldn't be installed in /data/app/com.example.edisonthk.homemagicmirror-1: Package com.example.edisonthk.homemagicmirror requires unavailable shared library com.google.android.things; failing!]
現状はAndroid Things用のEmulatorがまだ出回っていないため、パソコンでデバッグする際にAndroidManifest.xmlで定義した android.things ライブライリーを無効化するしかない。ただし、こうするとGPIO系のライブライーも機能できなくなります。
<uses-library android:name="com.google.android.things" android:required="false"/>
参照リンク
http://stackoverflow.com/questions/41426922/android-things-emulator
2017/2/12 デバッグしてみました。寮の共通ルーターが廊下にあったため、RaspiのWifiがなかなか接続できなくて、wifi経由のADBデバッグがうまくいきませんでした。有線にしたらうまくいきました。<uses-library android:name="com.google.android.things" />をfalseのままにして、android thingsにデバッグできました。Android thingsライブラリーのクラスを使わない限り、Raspiにデバッグできますね。
2017/2/12 マルチバイトの文字は対応していません!とりあえずASCIIでUI設計します。こちらの記事に日本語の対応方法は書かれていますが、参考させてください
http://qiita.com/aoinakanishi/items/488c637d6005f55c10ad
