概説
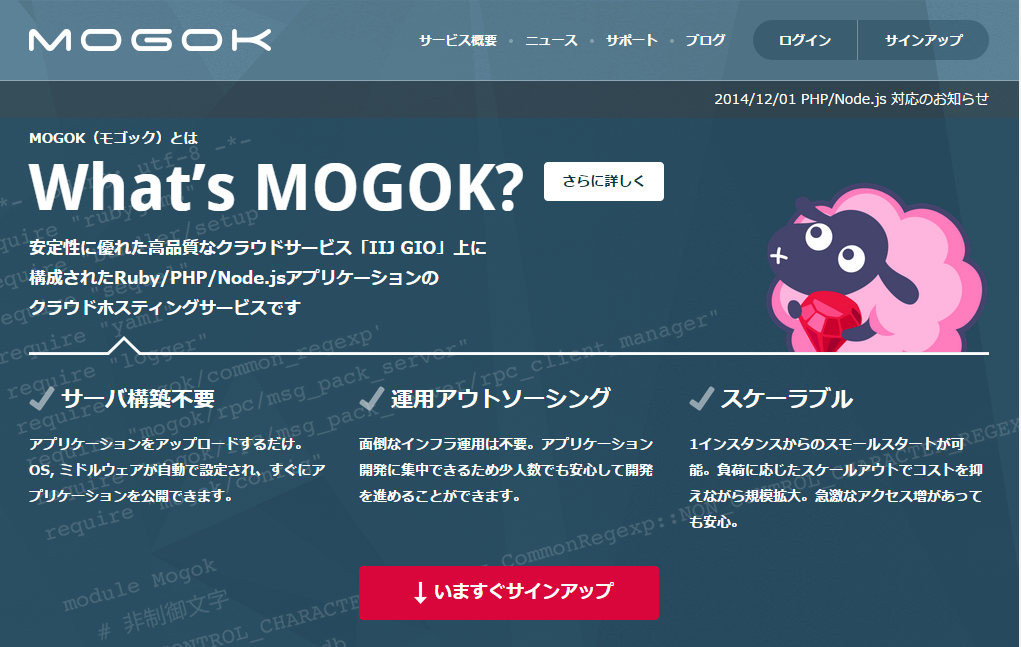
IIJが展開するIaaSサービスIIJ GIO上で稼働している、MOGOKというPaaSをご存じでしょうか。
そのMOGOKが、Rubyに加え、PHPとNode.jsに対応したというニュースが発表されましたので、さっそくPHPのアプリケーション(今回試してみたのはCakePHPをベースに開発されたOSSのCMSであるbaserCMS)を動かしてみようとチャレンジしてみました。
余談ですが、MOGOKの羊のキャラクターって、WordPressのわぷー、baserCMSのべっしー、NetBeansのねこび~んになんとなく似てますよね。
それもそのはず、MOGOKのキャラクターデザインはこれらのキャラクターと同じくカネウチカズコさんによる制作なのです。(※なおこのくだりはご本人に了解を取っております。)
前提
「Windowsパッケージの導入手順」を参照すると、32ビット環境のWindowsが前提で説明されており、手順書の中では以下の環境を前提とされています。
- Windows 7 (32ビット)
- RubyInstaller
- Ruby 2.0.0
- Development Kits
- DevKit-mingw64-32-4.7.2-20130224-1151-sfx (32ビット版)
- Git for Windows 1.9.4
今回使用したの以下の64ビット環境で、上記に示してあるバージョンとは多少異なりますが、問題なく稼働しました。
- Windows 8 (64ビット)
- RubyInstaller
- Ruby 2.1.5 (x64)
- Development Kits
- DevKit-mingw64-64-4.7.2-20130224-1432-sfx (64ビット版)
- Git for Windows 1.9.4
コマンド実行の説明を行う際の注意点
- 「git add」や「git commit」などのGitコマンドを実行する場合は、「GitBash」から実行します。
- 「mogok build」や「mogok start」などのmogokコマンドを実行する場合は、「Ruby コマンドプロンプトを開く」から実行します。
事前準備
上記のパッケージ群のインストールが完了したら、次に各ツールの下準備をしておきます。
※Windowsパッケージの導入手順では、gemコマンドでRuby on Railsのインストール方法が記載されていますが、今回はCakePHPアプリケーションを動作させるため、RoRのインストールは不要です。
Devkitの設定
「Ruby コマンドプロンプトを開く」を起動後、以下のコマンドを実行します。
C:\Users\hoge>cd c:\devkit

c:\devkit>ruby dk.rb init
[INFO] found RubyInstaller v2.1.5 at C:/Ruby21-x64

Initialization complete! Please review and modify the auto-generated
'config.yml' file to ensure it contains the root directories to all
of the installed Rubies you want enhanced by the DevKit.

c:\devkit>ruby dk.rb install
[INFO] Updating convenience notice gem override for 'C:/Ruby21-x64'
[INFO] Installing 'C:/Ruby21-x64/lib/ruby/site_ruby/devkit.rb'
MOGOKコマンドラインツールのインストール
次に、MOGOKコマンドラインツールのGemパッケージをインストールします。上記と同様に「Ruby コマンドプロンプトを開く」から以下のコマンドを実行します。
c:\devkit>gem install mogok
ERROR:  Could not find a valid gem 'mogok' (>= 0), here is why:
          Unable to download data from https://rubygems.org/ - SSL_connect returned=1 errno=0 state=SSLv3 read server certificate B: certificate verify failed (https://api.rubygems.org/latest_specs.4.8.gz)
もし、↑こんな感じでエラーが発生した場合は、「gem sources」で「 http://rubygems.org/ 」を追加後に再実行。
- 参考URL
c:\devkit>gem sources -a http://rubygems.org/
https://rubygems.org is recommended for security over http://rubygems.org/

Do you want to add this insecure source? [yn]  y
http://rubygems.org/ added to sources

c:\devkit>gem install mogok
Fetching: multipart-post-1.1.5.gem (100%)
Successfully installed multipart-post-1.1.5
Fetching: ruby-progressbar-0.0.10.gem (100%)
Successfully installed ruby-progressbar-0.0.10
Fetching: thor-0.19.1.gem (100%)
Successfully installed thor-0.19.1
Fetching: polling-0.1.5.gem (100%)
Successfully installed polling-0.1.5
Fetching: mogok-2.1.0.gem (100%)
Successfully installed mogok-2.1.0
Parsing documentation for mogok-2.1.0
Installing ri documentation for mogok-2.1.0
Parsing documentation for multipart-post-1.1.5
Installing ri documentation for multipart-post-1.1.5
Parsing documentation for polling-0.1.5
Installing ri documentation for polling-0.1.5
Parsing documentation for ruby-progressbar-0.0.10
Installing ri documentation for ruby-progressbar-0.0.10
Parsing documentation for thor-0.19.1
Installing ri documentation for thor-0.19.1
Done installing documentation for mogok, multipart-post, polling, ruby-progressbar, thor after 2 seconds
WARNING:  Unable to pull data from 'https://rubygems.org/': SSL_connect returned=1 errno=0 state=SSLv3 read server certificate B: certificate verify failed (https://api.rubygems.org/latest_specs.4.8.gz)
5 gems installed
PHPアプリケーションのひな形を作成
ここでは、Yeomanで言うところの「yo ~」を行います。
「Ruby コマンドプロンプトを開く」から以下のコマンドを実行します。
C:\Users\hoge>mogok new basercms-akase244
DL is deprecated, please use Fiddle
Choose your application language
ruby or php or node?: php <= 「php」と入力します

      create  basercms-akase244
Choose your php version
55 or 56?: 55 <= 今回はPHP5.5を利用するため「55」と入力します
      ・
      ・
      省略
      ・
      ・
Done!
もし↓こんな感じでエラーが発生しているのであれば、「git commit」をやり直してみてください。
      ・
      ・
      省略
      ・
      ・
Your bundle is complete!
Use `bundle show [gemname]` to see where a bundled gem is installed.
         run  git init from "./basercms-akase244"
Initialized empty Git repository in C:/Users/hoge/basercms-akase244/.git/
         run  git add . from "./basercms-akase244"
         run  git commit -m 'first commit' from "./basercms-akase244"
error: pathspec 'commit'' did not match any file(s) known to git.
Done!
↓手動でやり直し
$ cd ~/basercms-akase244

$ git commit -m "first commit"
[master (root-commit) dfa3332] first commit
 48 files changed, 97 insertions(+)
 create mode 100644 Gemfile
 create mode 100644 Gemfile.lock
 create mode 100644 Procfile
 create mode 100644 app/index.php
 create mode 100644 bin/php55
 create mode 100644 config.ru
 create mode 100644 ext/bz2.so
 create mode 100644 ext/calendar.so
 create mode 100644 ext/ctype.so
 create mode 100644 ext/curl.so
 create mode 100644 ext/dom.so
 create mode 100644 ext/exif.so
 create mode 100644 ext/fileinfo.so
 create mode 100644 ext/ftp.so
 create mode 100644 ext/gd.so
 create mode 100644 ext/gettext.so
 create mode 100644 ext/iconv.so
 create mode 100644 ext/json.so
 create mode 100644 ext/libXpm.so.4
 create mode 100644 ext/libgd.so.3
 create mode 100644 ext/libt1.so.5
 create mode 100644 ext/libvpx.so.1
 create mode 100644 ext/mbstring.so
 create mode 100644 ext/mysqlnd.so
 create mode 100644 ext/mysqlnd_mysql.so
 create mode 100644 ext/mysqlnd_mysqli.so
 create mode 100644 ext/pdo.so
 create mode 100644 ext/pdo_mysqlnd.so
 create mode 100644 ext/pdo_pgsql.so
 create mode 100644 ext/pdo_sqlite.so
 create mode 100644 ext/pgsql.so
 create mode 100644 ext/phar.so
 create mode 100644 ext/posix.so
 create mode 100644 ext/shmop.so
 create mode 100644 ext/simplexml.so
 create mode 100644 ext/sockets.so
 create mode 100644 ext/sqlite3.so
 create mode 100644 ext/sysvmsg.so
 create mode 100644 ext/sysvsem.so
 create mode 100644 ext/sysvshm.so
 create mode 100644 ext/tokenizer.so
 create mode 100644 ext/wddx.so
 create mode 100644 ext/xml.so
 create mode 100644 ext/xmlreader.so
 create mode 100644 ext/xmlwriter.so
 create mode 100644 ext/xsl.so
 create mode 100644 ext/zip.so
 create mode 100644 php.ini
MOGOK上にアプリケーションを作成
ここでは、Herokuで言うところの「heroku create ~」を行います。
「Ruby コマンドプロンプトを開く」から以下のコマンドを実行します。
C:\Users\hoge>cd basercms-akase244

C:\Users\hoge\basercms-akase244>mogok create basercms-akase244 <= MOGOK内でユニークなアプリケーション名を指定します
Creating App: basercms-akase244
Done!
Git remote mogok added
$ cd ~/basercms-akase244

$ git push mogok master
C:\Users\hoge>cd basercms-akase244

C:\Users\hoge\basercms-akase244>mogok build
Preprocessing..
Git pulling..
Bundler installing..
2014-12-22T11:53:35+09:00 console[app3000.50]:  $ bundle config --local build.pg --with-pg-config=/usr/pgsql-9.3/bin/pg_config
2014-12-22T11:53:35+09:00 console[app3000.50]:  $ bundle install --path=.bundle/gems --binstubs=.bundle/bin --without=test development
2014-12-22T11:53:36+09:00 console[app3000.50]: Fetching gem metadata from https://rubygems.org/...........
2014-12-22T11:53:40+09:00 console[app3000.50]: Resolving dependencies...
2014-12-22T11:53:42+09:00 console[app3000.50]: Installing daemons (1.1.9)
2014-12-22T11:53:55+09:00 console[app3000.50]: Installing eventmachine (1.0.4)
2014-12-22T11:53:59+09:00 console[app3000.50]: Installing rack (1.6.0)
2014-12-22T11:54:00+09:00 console[app3000.50]: Installing rack-reverse-proxy (0.4.4)
2014-12-22T11:54:04+09:00 console[app3000.50]: Installing thin (1.6.3)
2014-12-22T11:54:04+09:00 console[app3000.50]: Using bundler (1.5.3)
2014-12-22T11:54:04+09:00 console[app3000.50]: Your bundle is complete!
2014-12-22T11:54:04+09:00 console[app3000.50]: Gems in the groups test and development were not installed.
2014-12-22T11:54:04+09:00 console[app3000.50]: It was installed into ./.bundle/gems
2014-12-22T11:54:04+09:00 console[app3000.50]:  $ ruby /opt/mogok/bin/assets_checker.rb .
2014-12-22T11:54:04+09:00 console[app3000.50]: Auto-detecting assets ...........................
2014-12-22T11:54:04+09:00 console[app3000.50]: No compiled assets found ........................
2014-12-22T11:54:04+09:00 console[app3000.50]: Couldn't find config/application.rb
2014-12-22T11:54:05+09:00 console[app3000.50]: Detecting Rack...........  1.6.0detected!
2014-12-22T11:54:05+09:00 console[app3000.50]: Detecting Rails..........  No Rails found.
2014-12-22T11:54:05+09:00 console[app3000.50]: Processing time..........  29 seconds
2014-12-22T11:54:05+09:00 console[app3000.50]: Disk usage...............  20816896Bytes (19MB)
Package creating..
Done!
MOGOKアプリケーションの起動
上記の状態だと、まだアプリケーションが起動しておらず、アプリケーション管理画面で見るとこんな状態です。
なので、起動させてみます。
C:\Users\hoge\basercms-akase244>mogok start
Error: Starting application is failed
起動しない。。。「mogok log」コマンドで調べてみると、以下の気になるメッセージを見つけたので、サポートの掲示版で質問してみたところ、「Git for Windows」を利用している場合にのみ発生する問題のようでした。
C:\Users\hoge\basercms-akase244>mogok log
      ・
      ・
2014-12-22T12:01:04+09:00 app[app3012.14]: Permission denied - bin/php55
      ・
      ・
ということで、以下を実行します。
$ cd ~/basercms-akase244

$ git update-index --chmod=+x bin/php55

$ git add .

$ git commit -m "add executable attribute."
[master 1586c03] add executable attribute.
 1 file changed, 0 insertions(+), 0 deletions(-)
 mode change 100644 => 100755 bin/php55

$ git push mogok master
C:\Users\hoge\basercms-akase244>mogok build

C:\Users\hoge\basercms-akase244>mogok start
Application started. <=今度はうまくいった!
アプリケーション管理画面で起動したことが確認できます。
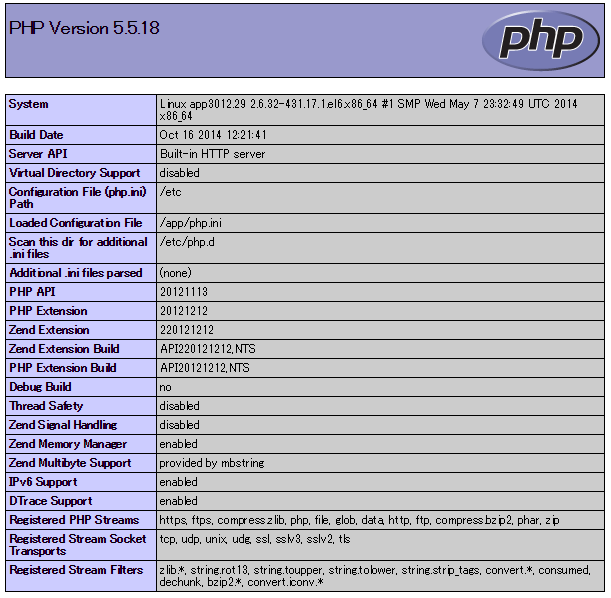
URLにアクセスしてみると、phpinfoが確認できます。
baserCMSのアプリケーションを準備
baserCMSのパッケージは、事前に「ダウンロードページ」から最新(2014/12/21時点)の3.0.6.1を取得しておきます。
「mogok new」コマンドによって作成された「C:\Users\hoge\basercms-akase244」の配下にbaserCMSのアプリケーションを配置します。
配置例
C:\Users\hoge\basercms-akase244
└─basercms
  ├─app
  ├─lib
  ├─.htaccess
  ├─.travis.yml
  ├─CONTRIBUTING.md
  ├─index.php
  ├─README.md
  └─web.default.config
上記の配置例を元に「Procfile」を修正し、ブラウザでアクセスした際のRootディレクトリを設定します。
修正前
web: bin/php55 -S localhost:8080 -c . -t app

修正後
web: bin/php55 -S localhost:8080 -c . -t basercms/app/webroot
baserCMSをMOGOKにデプロイ
baserCMSのアプリケーション群をMOGOKにデプロイします。
$ cd ~/basercms-akase244

$ git add .

$ git commit -m "baserCMS deploy"

$ git push mogok master
C:\Users\hoge>cd basercms-akase244

C:\Users\hoge\basercms-akase244>mogok build

C:\Users\hoge\basercms-akase244>mogok stop

C:\Users\hoge\basercms-akase244>mogok start
baserCMSのインストール
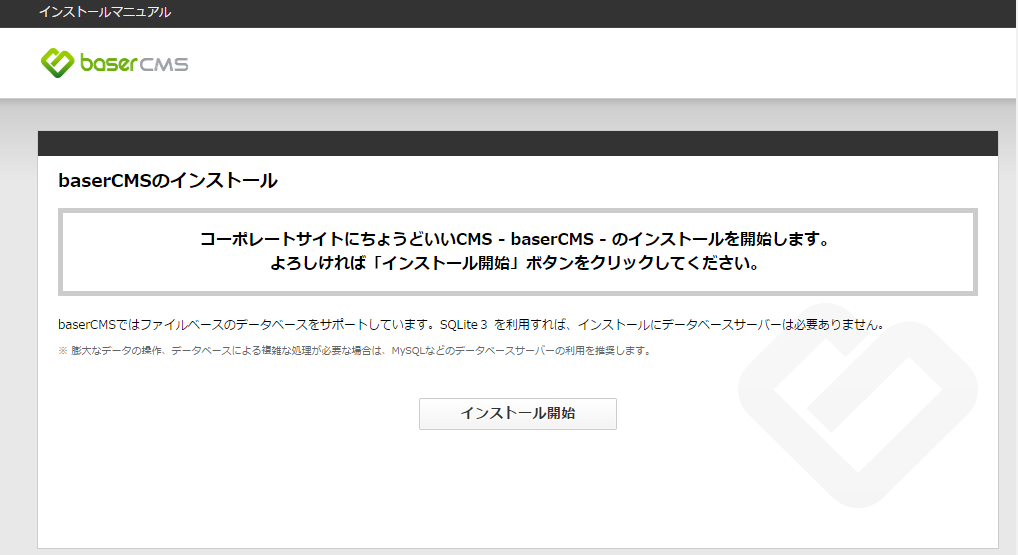
URLにアクセスしてみると、baserCMSのインストール画面が確認できます。
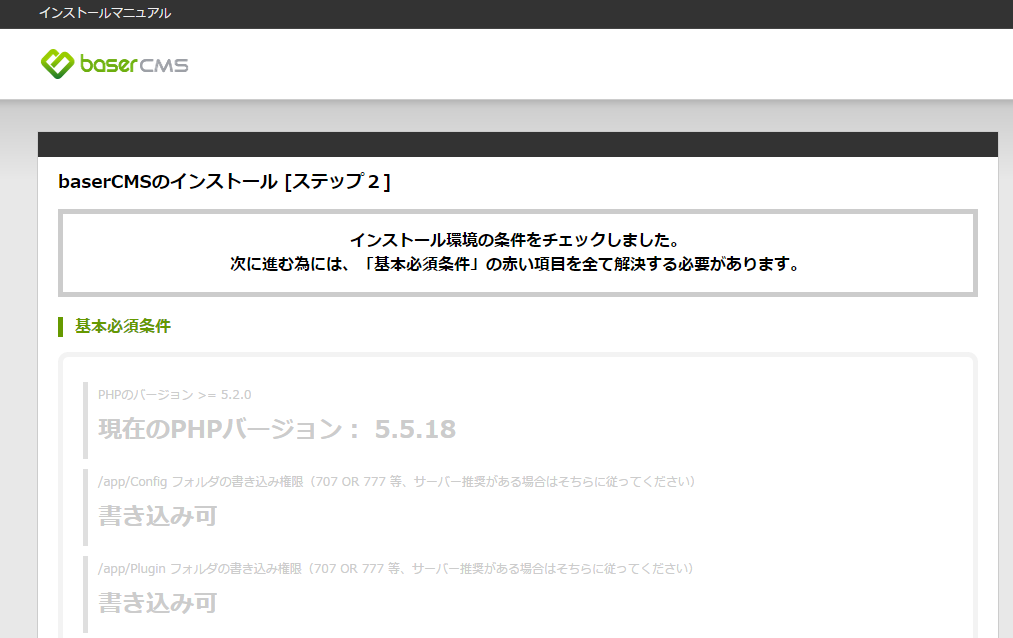
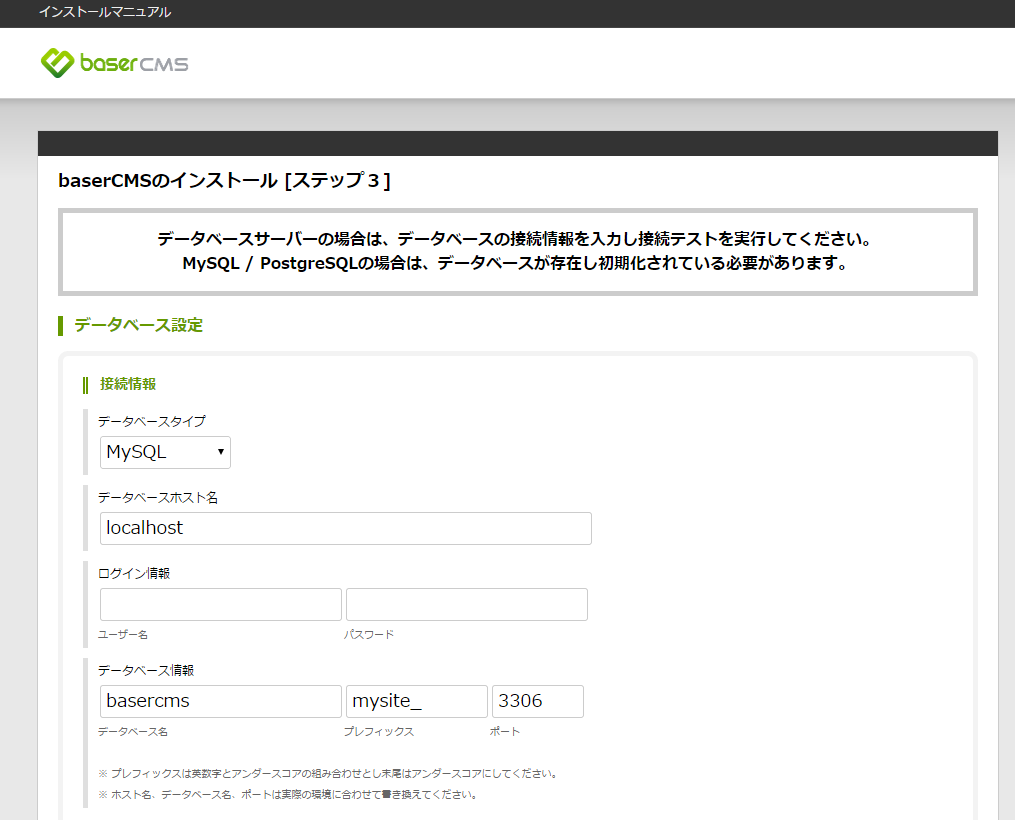
baserCMSの「インストール環境の条件」は全てクリアしているので、次のステップへ進みます。
「mogok db info」を実行し、DBの接続情報を取得しておきます。
C:\Users\hoge>cd basercms-akase244

C:\Users\hoge\basercms-akase244>mogok db info
DbName: データベース名
DbType: Shared DB
User: ユーザー名
Password: パスワード
IpAddress: IPアドレス
Port: ポート番号
MaxSize: 100.0MB
CurrentSize: 0.0MB
Dbms:
  Label: MySQL
  Version: '5.5'
Command:
  Status:
  Method:
  Progress: 0
  StartTime:
  EndTime:
DSN: mysql://ユーザー名:パスワード@IPアドレス:ポート番号/データベース名
「データベース設定」の画面で上記の情報を入力し、「接続テスト」を実行後、次のステップへ進みます。
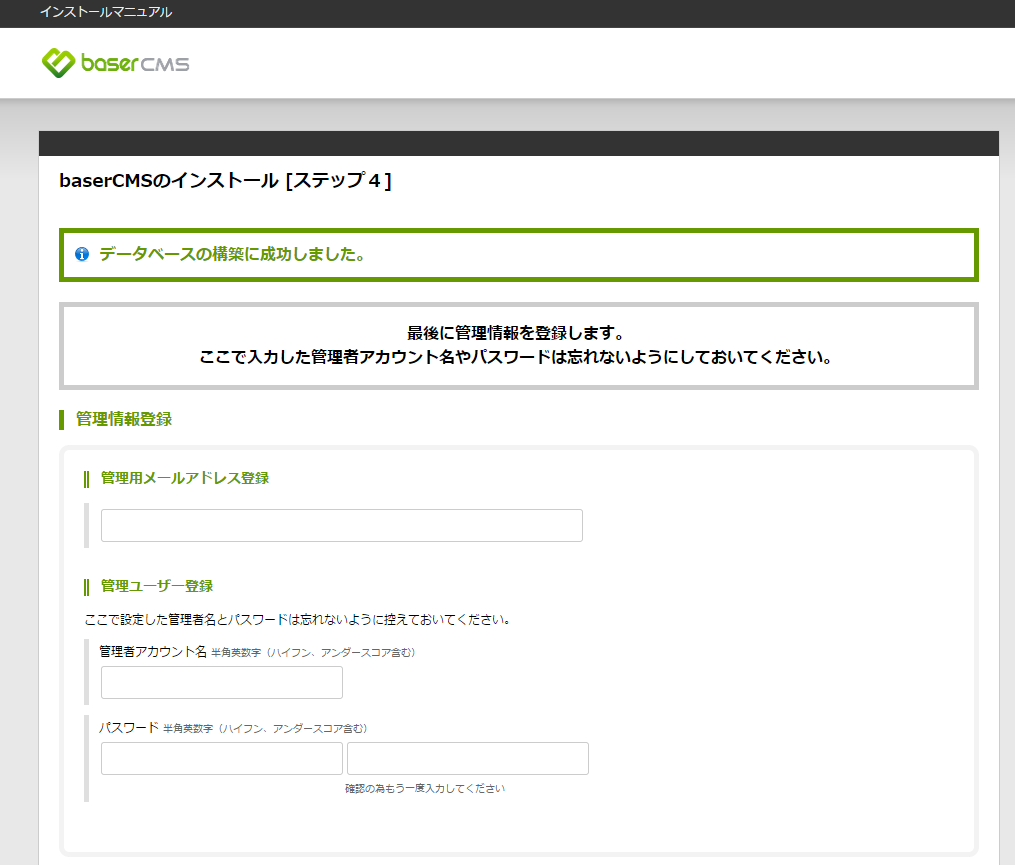
最後に管理者アカウントに関する情報を入力すると、作業完了です。
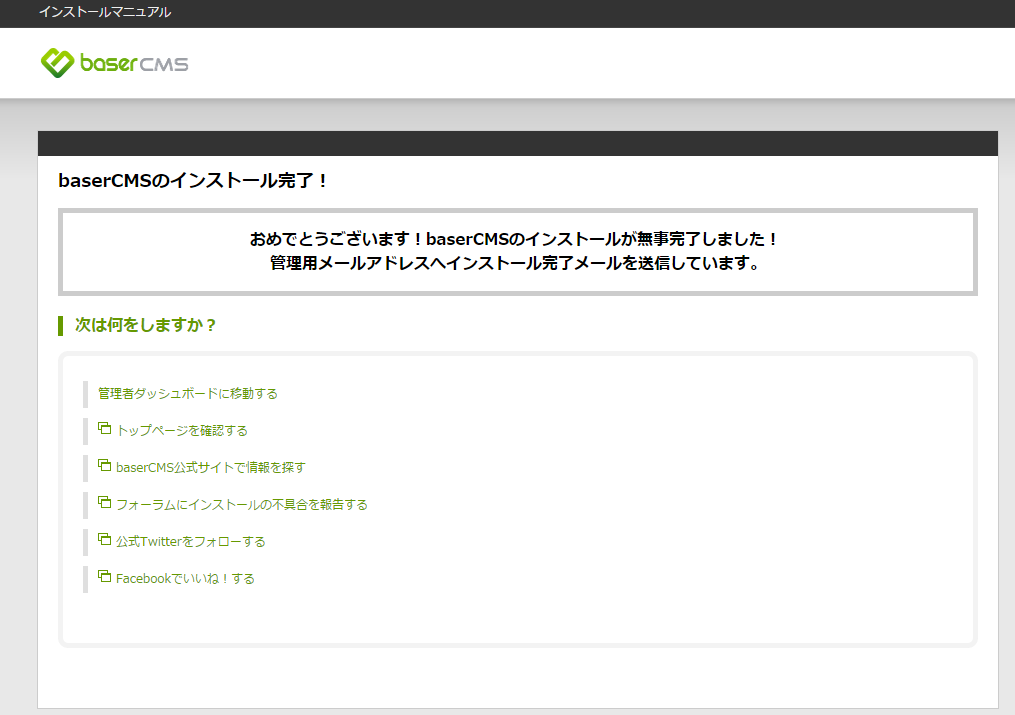
インストール作業完了
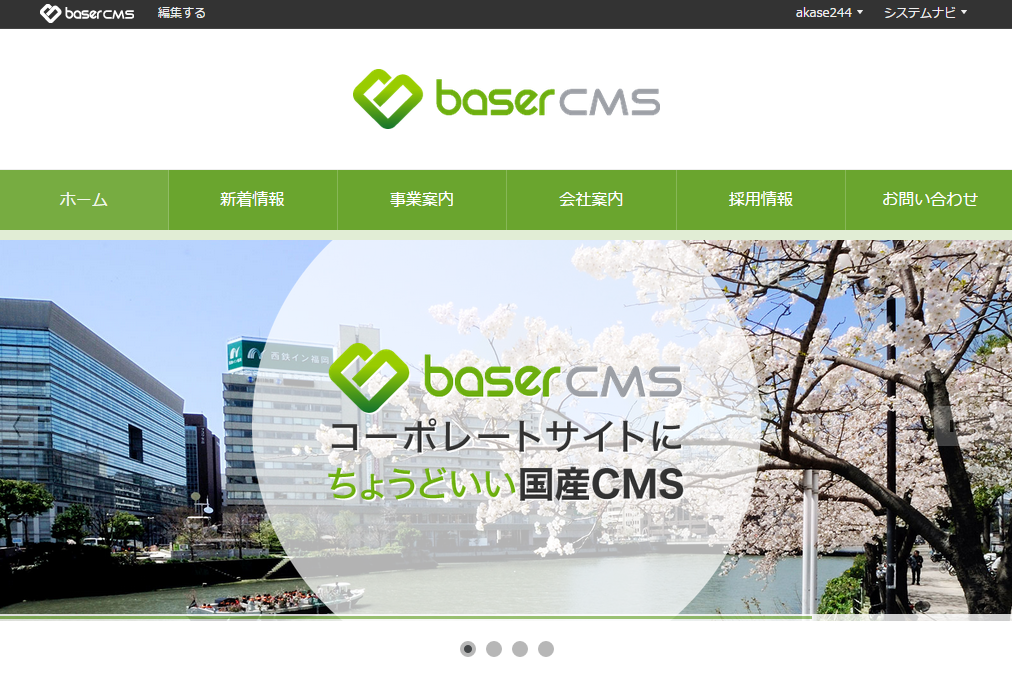
インストール完了画面より「トップページを確認する」をクリックすると、正しくインストールされていることが確認できます。
注意点
- MOGOKではアプリケーションという単位があり、1アプリケーションあたり複数のインスタンス(最大199インスタンス)を利用し、スケールアウトすることが可能となっています。ただし、無料枠ではWebインスタンスは1インスタンスのみが利用可能です。つまり、Herokuのように無料枠でDynoを増やして、色んなアプリケーションを試してみるといった使い方はできません。その辺りは、「IIJ GIO MOGOKサービス ご利用の手引き」にも、「実行環境は1インスタンスのみで、無償サービス利用規約を承諾いただいた個人の私的な開発・研究・検証目的に限る」と明記されています。
- FAQの「アプリケーションの削除後、同名のアプリケーションを作りたい」に記載されている通り、削除処理を行うと反映に数日を要するとのことで、詳細をサポートに問い合わせたところ、同名のアプリケーションを作成する場合は、最大48時間かかるようです。もし、同名で作り直しを行う場合は以下の方法で対応できるようです。
> mogok db clear
> git push mogok master -f
