はじめに
Leap Motion Orionの登場により、トラッキング精度が格段に向上しました。
本記事では、Unity Assets for Leap Motion Orionを使ってキャラクターの手を動かす方法を説明します。
こちらの記事のLeapMotionのOrion対応です。
併せて参照してください。
注意:LeapMotion Orionは現在(2016/02/22)ベータ版です。その点を十分理解の上ご利用ください。
必要な有料アセット
・FinalIK(90$)
Leap Motion Orion SDKのインストール
こちらのOrion VR(Beta)ボタンより、SDKをダウンロードしてインストールしてください。
https://developer.leapmotion.com/get-started
Unity Assets for Leap Motion Orionのインストール
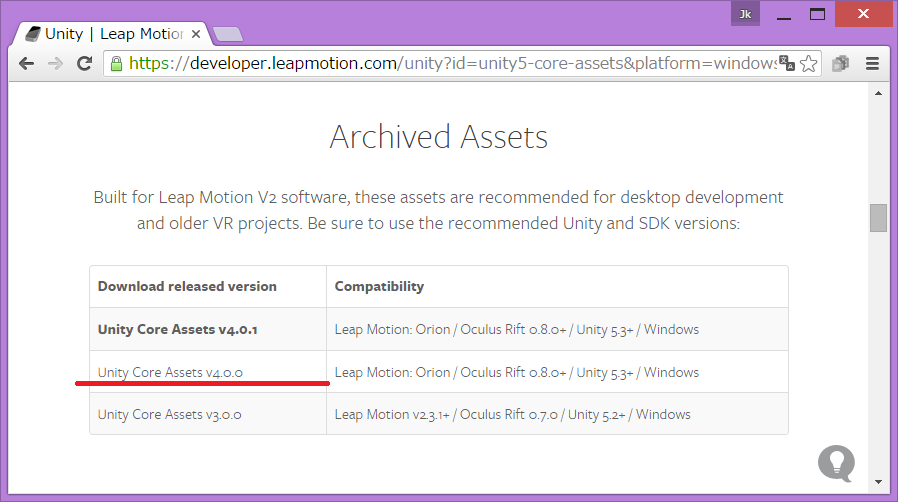
このページの下のほうにあるArchived Assetsから、Uity Core Assets v4.0.0をダウンロード
※最新のv4.0.1には今回必要なRigged Fingerスクリプトが含まれていないため、このバージョンを使用します。
[2016/03/25追記] v4.0.2にはRigged Fingerスクリプトが復活していますので、そちらを使用可能です。
手順
Unity Assets for Leap Motion Orionをインポート。
Leap_Hands_Demoシーンを開く。
手の位置にCubeを追従させる
HierarchyのCamera>LeapHandController>RigidRoundHand_RのPalmにCubeを設定すると、Cubeが右手の位置に追従する。
Leap Motion Orion、Rigid HandのpalmにCubeを設定するとCubeがpalmの位置に追従する。 https://t.co/JU0PvBnLj0
— afjk(エーエフ) (@afjk01) 2016, 2月 23
不要なCapsuleHandを削除
LeapHandControllerのLeft/Right Graphics ModelをNoneに設定する。
エラーが出るのでHandPool.csスクリプトを修正。
GraphicsModelが設定されていない場合は、ModelPoolにAddしない
[2016/03/25追記] v4.0.2ではエラーは出ないのでスクリプトの修正は不要です。
    // Use this for initialization
    void Start() {
      ModelPool = new List<IHandModel>();
      //GraphicsModelが設定されていない場合は、ModelPoolにAddしない
      if(LeftGraphicsModel)
          ModelPool.Add(LeftGraphicsModel);
      if(RightGraphicsModel)
          ModelPool.Add(RightGraphicsModel);
      ModelPool.Add(LeftPhysicsModel);
      ModelPool.Add(RightPhysicsModel);
      controller_ = GetComponent<LeapHandController>();
    }
モデルを読み込んでLeapMotionを配置
プロ生ちゃん(暮井 慧)MMDモデルで説明します。
http://3d.nicovideo.jp/works/td8608
LeapHandControllerはCameraの下から出してプロ生ちゃんに対してのLeapMotionの位置に対応するように配置。
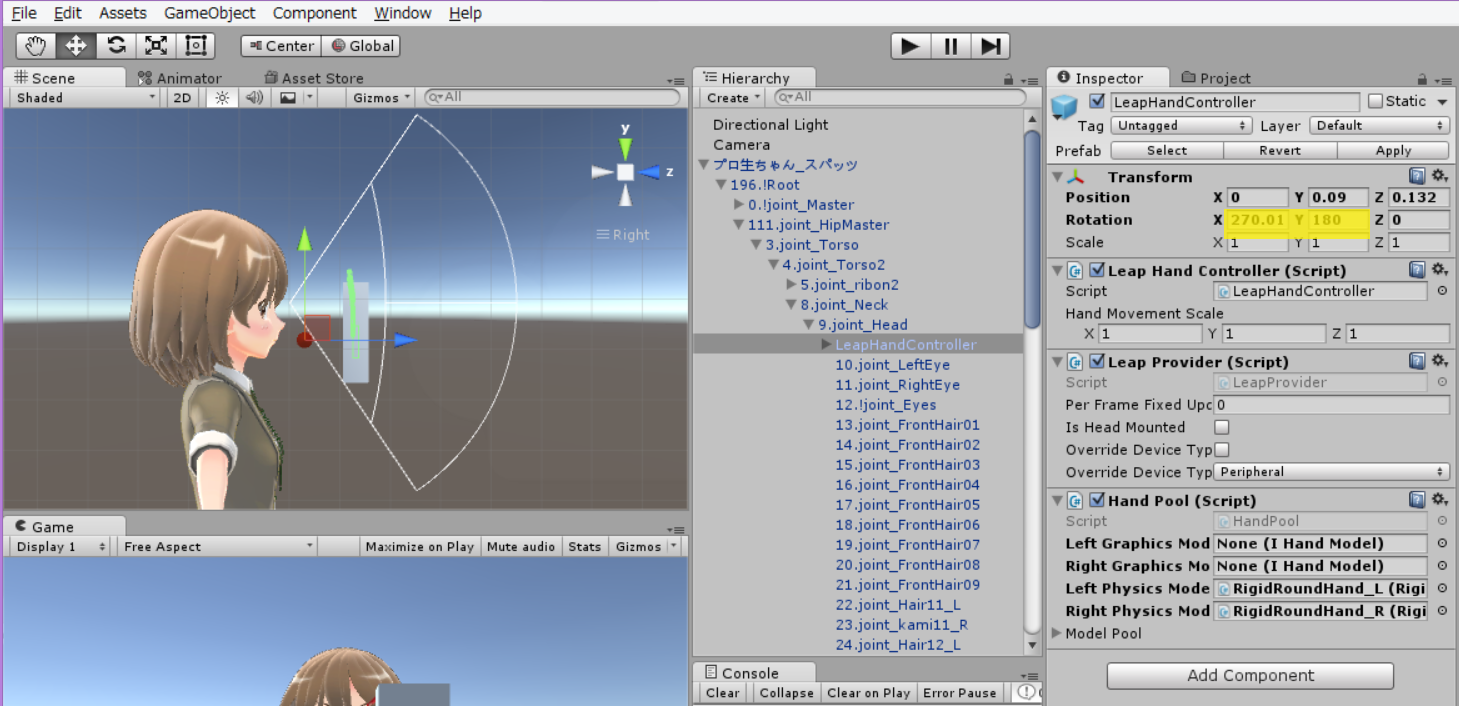
[2016/03/25追記] 机の上にLeapMotionを置いて使用する場合は、LeapHandControllerのLeapServiceProvider>Is Head MountedのチェックはOFFに。
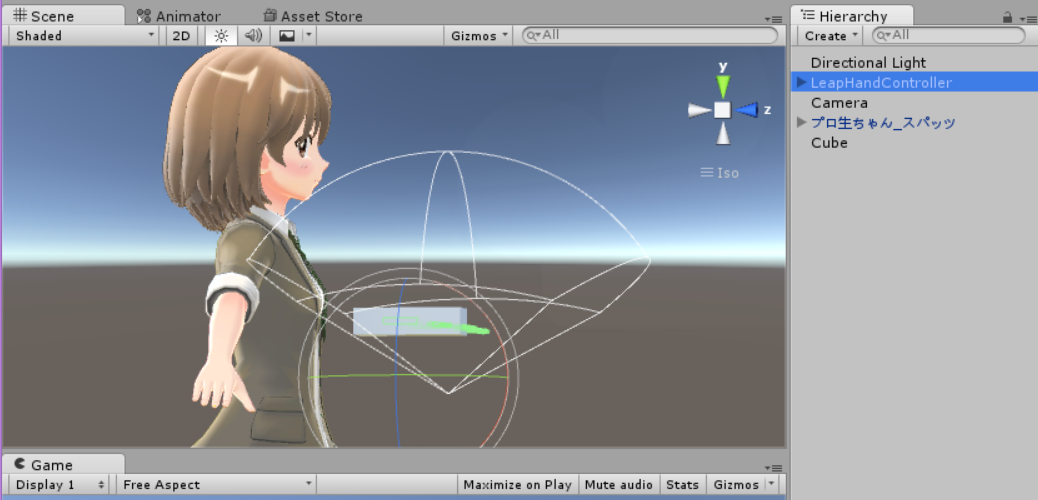
LeapMotionをHMDにマウントするときはjoint_headの子に、回転させて目の前あたりに配置。
[2016/03/25追記] LeapHandControllerのLeapServiceProvider>Is Head MountedのチェックはON
プロ生ちゃんにFull Body Biped IKを適用。
Right Hand EffectorのTargetにCubeを設定し、Position Weightを1に。
LeapMotionにプロ生ちゃんの手が追従する。
## 手の向きを調整 Rotation Weightを1にすると手の向きも反映されます。 向きが合っていない時はCubeの子にCubeを追加し、こちらをIK Targetとして再設定。 IK Targetを回転させて正しい方向に調整。 ※再生中の変更は停止すると戻されるので値を控えておく。Final IKのFull body biped IKを適用したモデルのHand Effector targetとして先程のCubeを設定すれば、Leap Motionの手の位置にモデルの手が追従する。 https://t.co/93lKX4GzWH
— afjk(エーエフ) (@afjk01) 2016, 2月 23
手の向きが合っていない時は、Cubeの子にオブジェクトを追加してこれをIK targetに設定。回転して正しい向きに調整する。 https://t.co/fpgGccDKia
— afjk(エーエフ) (@afjk01) 2016, 2月 23
指を動かす
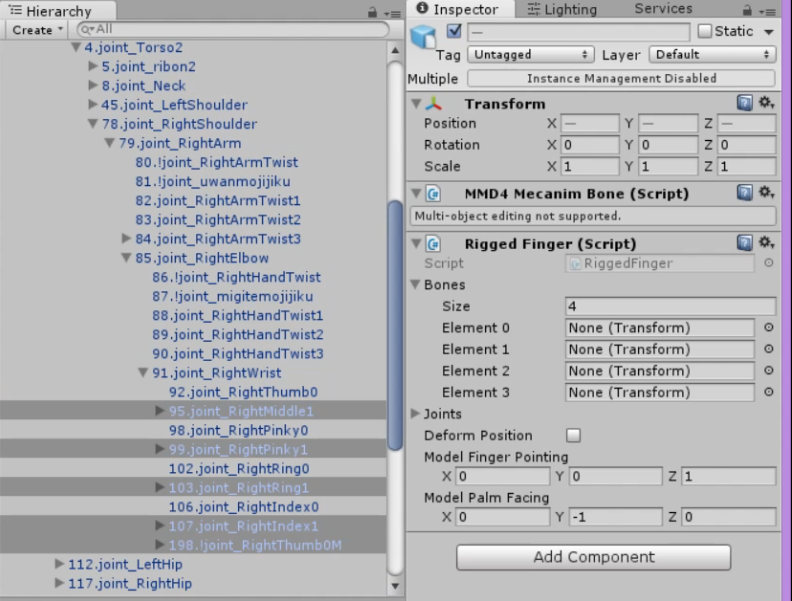
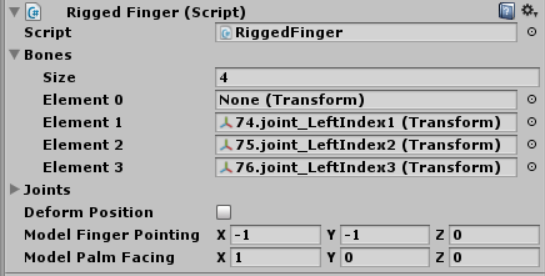
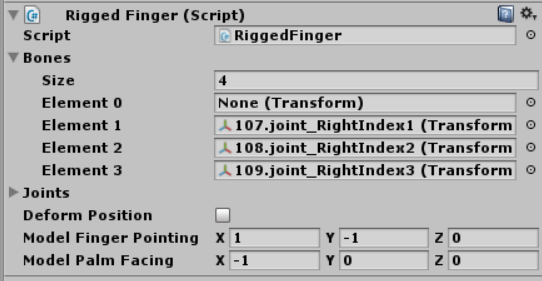
画像に従って指のBone、Model Finger Pointing、Model Palm Facingを設定してください。
Model Finger PointingとModel Palm Facingは指の向きを決めています。
指の向きがおかしい場合はこの値を調整してください。
左手:親指
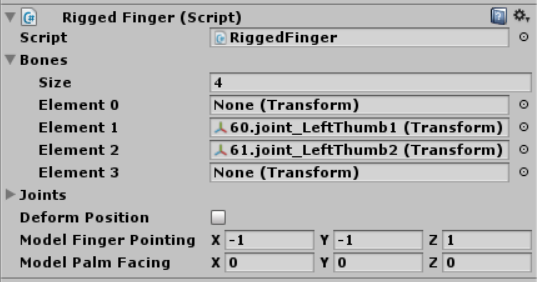
LeapHandControllerのRigidRoundHand_RのFingersをプロ生ちゃんのものに置き換える。
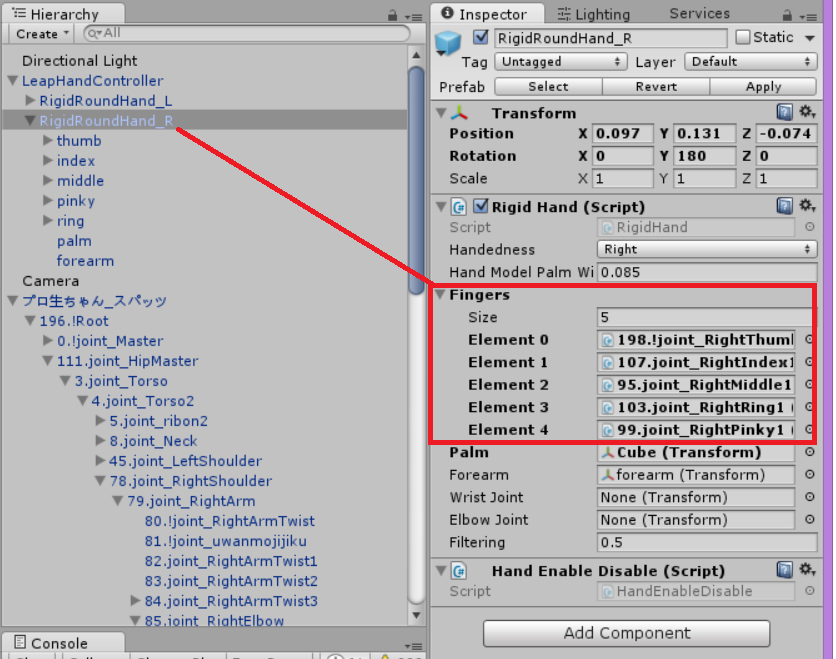
これで右手の設定は完了です。左手も同様に設定してください。モデルの指にRigged Handコンポーネントを設定。各指のbonesや向きを設定したらLeapHandController下のRigid HandのFingersに設定。これで指の動きも反映されます。 https://t.co/3kGgmlrspQ
— afjk(エーエフ) (@afjk01) 2016, 2月 23
指を動かす(ユニティちゃん編)
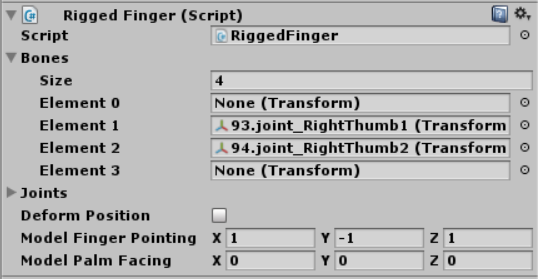
ユニティちゃんの場合、手の向きが異なるためRiggedFingerの設定値を以下の通り読み替えて設定してください。 全ての指で共通です。親指はBonesのElement3は不要かもしれません。 ユニティちゃんの指も調整出来ました。 https://t.co/12W86WgKnI
— afjk(エーエフ) (@afjk01) 2016年3月2日

この作品はユニティちゃんライセンス条項の元に提供されています
ご質問などあれば、Twitter:@afjk01までお気軽にお問い合わせください。
あとがき
本記事は、2016/2/21に開催された「VRまつり冬」にてデモを行った「Mimic」でOrionに対応した際に調べた内容です。
Orionは飛躍的に認識精度が上がっていて素晴らしいですね。
Leapmotionをお持ちの方は是非試してみてください。
