はじめに
今、Angular+Firebaseでプロダクト開発をしていますが、何分初めてのことばかりで何度もつまづきながら進んでいます。
最近ようやく、canvasとFirebase RealtimeDBとの連携ができるようになったので、そこに至るまでの制作過程を簡単なWEBアプリで紹介します。
- angular-cliでプロジェクトを作る
- angularfire2をインストールする
- firebaseのアカウントを作成する
- coreモジュールを作成する
- canvasコンポーネントを作成する
- canvasテンプレートを更新する
- canvasに描きこむロジックを作る
- ロジックをサービスに分離する
- RealtimeDBを設定する
- canvasのデータをRealtimeDBと連携させる
開発環境
Mac: OSX
angular-cli: v1.0.0-beta.19-3
node: v6.6.0
レポジトリ
アプリ動作イメージ
制作過程
angular-cliでプロジェクトを作る
npmライブラリであるangular-cliを使って、新しいプロジェクトを作成します。
npm install -g angular-cli --save
cd <プロジェクトの設置パス>
ng new canvas-app
angular-cliの初期設定については、Angular2の環境構築(Angular CLIで構築)
を参照してください。
angularfire2をインストールする
AngularとFirebaseの連携を容易にしてくれるangularfire2をアプリケーションにインストールします。ターミナルを起動し、プロジェクト直下で下記コマンドを実行してください。
npm install firebase angularfire2 --save
firebaseのアカウントを作成する
firebaseのアカウントを作り、新しいプロジェクトを作成します。
このあたりの操作はすでに詳しく書いている方かいるので、そちらを参照してください。
参考:Firebaseを用いて5分でセキュアなWebサイトを公開する
coreモジュールを作成する
次にcoreモジュールを作成します。Angularのスタイルガイドでは、全体で共有するモジュール(CommonModuleやFormsModuleなど)は、coreモジュールに導入した方がよいとされていますので、angularfire2のモジュールはcoreモジュールから読み込むようにします。
ng g module core
上記コマンドを実行すると、/appフォルダ以下にcoreフォルダが作られ、その中にcore.module.tsとそれ以外のファイルが作成されますが、今回使用するのはcore.module.tsなので、それ以外のファイルは削除します。このとき、app.module.tsのimportsにCoreModuleを追加しておきます。
import {NgModule} from '@angular/core';
import {BrowserModule} from '@angular/platform-browser';
import {CoreModule} from './core/core.module'; // 追加

import {AppComponent} from './app.component';

@NgModule({
  declarations: [
    AppComponent
  ],
  imports: [
    BrowserModule,
    CoreModule // 追加
  ],
  providers: [],
  bootstrap: [AppComponent]
})
export class AppModule {
}
core.module.tsを更新し、importsにAngularFireModuleを加えます。
また、全体で一度しか読み込まないというこのモジュールの特性を活かし、このファイル内にangularfire2の設定を書き込みます。
firebaseのプロジェクトで確認できる設定を、firebaseConfigのyour~に入れてください。
import { NgModule } from '@angular/core';
import { CommonModule } from '@angular/common';
import { AngularFireModule } from 'angularfire2';

export const firebaseConfig = {
  apiKey: '<your-key>',
  authDomain: '<your-project-authdomain>',
  databaseURL: '<your-database-URL>',
  storageBucket: '<your-storage-bucket>'// 必要に応じて
};

@NgModule({
  imports: [
    CommonModule, // ngForとかngIFを使うときに使用するmodule
    AngularFireModule.initializeApp(firebaseConfig)
  ],
  exports: [],
  declarations: [],
  providers: []
})
export class CoreModule { }
canvasコンポーネントを作成する
/app配下にcanvasコンポーネントを追加します。コンポーネントをどこに配置するか、ということで最初色々と悩みましたが、スタイルガイドの指摘を受け、/app配下に配置することにします。
ng g component canvas
コンポーネントが作成され、app.module.tsのdeclarationsにも自動的にCanvasComponentが追加されます。
import { Component, OnInit } from '@angular/core';

@Component({
  selector: 'app-canvas',
  templateUrl: './canvas.component.html',
  styleUrls: ['./canvas.component.css']
})
export class CanvasComponent implements OnInit {

  constructor() { }

  ngOnInit() {
  }

}
canvasテンプレートを更新する
canvasコンポーネントのテンプレートを更新します。
canvas要素には、idプロパティの代わりにテンプレート参照変数(template reference variable)#myCanvasを追加しておきます。これによって要素の特定をすることができます。
また、RealtimeDBの変化を確認するため、<button>要素も加えておきます。
<section>
  <div class="canvas">
    <canvas #myCanvas width="300" height="300"></canvas>
  </div>
  <div class="btn">
    <button (click)="drawLine()">線を追加</button>
    <button (click)="removeLine()">線を削除</button>
  </div>
</section>
最低限のCSSを実装しておきます。
.canvas {
  text-align: center;
  padding: 20px;
}
.canvas canvas {
  border: 1px #ccc solid;
}
.btn {
  text-align: center;
}
.btn button {
  border: 1px #ccc solid;
}
app.component.htmlに、canvasコンポーネントを読み込ませます。
<app-canvas></app-canvas>
canvasに描きこむロジックを作る
app.module.tsのCanvasComponentクラスに、canvasへ描きこむためのロジックを追加します。今回はボタンを押すと、少しづつずれながらひし形状に線を描きこんでいくメソッドを作成します。
まず#myCanvasを取得するために、@ViewChildデコレータをインポートし、myCanvas変数を宣言します。
次にAfterViewInitクラスをインポートしてCanvasComponentに継承させ、ngAfterViewInit()の中でmyCanvasを参照します。ここで気を付けないといけないのは、@ViewChildデコレータは描画後でないと値を参照できないため、ngOnInit()ではなく、ngAfterViewInit()メソッドの中で参照する必要があります。
import {Component, ViewChild, OnInit, AfterViewInit} from '@angular/core'; // クラスを追加

@Component({
  selector: 'app-canvas',
  templateUrl: 'canvas.component.html',
  styleUrls: ['canvas.component.css']
})
export class CanvasComponent implements OnInit, AfterViewInit { // AfterViewInitを継承
  @ViewChild('myCanvas') myCanvas; // myCanvasを宣言
  public canvas: HTMLCanvasElement = null; // canvasを宣言
  public ctx: CanvasRenderingContext2D = null; // contextを宣言

  constructor() {
  }

  ngOnInit() {
  }

  ngAfterViewInit() {
    this.canvas = this.myCanvas.nativeElement;
    this.ctx = this.canvas.getContext( '2d' );
  }
}
myCanvasの参照が完了したら、次はメソッドを作成します。
ロジックの詳細については省略しますが、drawLine()、addLine()、removeLine()の3つのメソッドを実装します。その際、初期値はコンストラクタではなく、ngOnInitで入れておきます。
export class CanvasComponent implements OnInit, AfterViewInit {
  @ViewChild("myCanvas") myCanvas;
  public canvas: HTMLCanvasElement = null;
  public ctx: CanvasRenderingContext2D = null;
  Lines: {x:number, y:number, rx:number, ry:number}[]; // 型を宣言

  constructor() {
  }

  ngOnInit() { // 初期値を入れる
    this.Lines = [{x:0, y:150, rx:300, ry:150 }];
  }

  ngAfterViewInit() { // myCanvasを参照
    this.canvas = this.myCanvas.nativeElement;
    this.ctx = canvas.getContext("2d");
  }

  // 線を描く
  drawLine(): void {
    let len = this.Lines.length;
    for(let i=0;i<len;i++){
      this.ctx.beginPath();
      this.ctx.moveTo(this.Lines[i].x,this.Lines[i].y);
      this.ctx.lineTo(this.Lines[i].rx,this.Lines[i].ry);
      this.ctx.closePath();
      this.ctx.stroke();
    }
    this.addLine(this.Lines[len-1]);
  };

  // 起点の位置により、次の配列の値を変化させつつ追加する
  addLine(el): void{
    // 左から上へ
    if(el.x>=0 && el.x<150 && el.y>0 && el.y<=150){
      Lines.push({x:el.x+5,y:el.y-5,rx:el.rx-5, ry:el.ry+5 });
    // 上から右へ
    }else if(el.x>=150 && el.x<300 && el.y>=0 && el.y<150){
      Lines.push({x:el.x+5,y:el.y+5,rx:el.rx-5, ry:el.ry-5 });
    // 右から下へ
    }else if(el.x>150 && el.x<=300 && el.y>=150 && el.y<300){
      Lines.push({x:el.x-5,y:el.y+5,rx:el.rx+5, ry:el.ry-5 });
    // 下から左へ
    }else if(el.x>0 && el.x<=150 && el.y>150 && el.y<=300){
      Lines.push({x:el.x-5,y:el.y-5,rx:el.rx+5, ry:el.ry+5 });
    }
  }

  // 線を削除し、データを初期化する
  removeLine(): void{
    this.ctx.clearRect(0, 0, 300, 300);
    this.Lines = [{x:0, y:150, rx:300, ry:150 }];
  }
}
この段階で一度実行してみましょう。
ターミナルでng serveを実行し、http://localhost:4200をブラウザで確認します。
ボタンをクリックした時の動作は、次のようになります。
ロジックをサービスに分離する
CanvasComponentクラスが肥大化してしまったので、ロジックをサービスに分離します。
まず、app/canvas内にサービスを作成します。
ng g service canvas/drawline
drawline.service.tsが作成されるので、その中にCanvasComponentクラスで作成したメソッドを移動させます。
import { Injectable } from '@angular/core';

@Injectable()
export class DrawlineService {

  constructor() { }

  // 線を描く
  drawLine(lines, ctx): void {
    let len = lines.length;

    for(let i=0;i<len;i++){
      ctx.beginPath();
      ctx.moveTo(lines[i].x,lines[i].y);
      ctx.lineTo(lines[i].rx,lines[i].ry);
      ctx.closePath();
      ctx.stroke();
    }
  };

  // 起点の位置により、次の配列の値を変化させつつ追加する
  addLine(lines): void{
    let el = lines[lines.length-1];
    // 左から上へ
    if(el.x>=0 && el.x<150 && el.y>0 && el.y<=150){
      lines.push({x:el.x+5,y:el.y-5,rx:el.rx-5, ry:el.ry+5 });
      // 上から右へ
    }else if(el.x>=150 && el.x<300 && el.y>=0 && el.y<150){
      lines.push({x:el.x+5,y:el.y+5,rx:el.rx-5, ry:el.ry-5 });
      // 右から下へ
    }else if(el.x>150 && el.x<=300 && el.y>=150 && el.y<300){
      lines.push({x:el.x-5,y:el.y+5,rx:el.rx+5, ry:el.ry-5 });
      // 下から左へ
    }else if(el.x>0 && el.x<=150 && el.y>150 && el.y<=300){
      lines.push({x:el.x-5,y:el.y-5,rx:el.rx+5, ry:el.ry+5 });
    }
  }

  // 線を削除し、データを初期化する
  removeLine(ctx): void {
    ctx.clearRect(0, 0, 300, 300);
  }
}
移動した分のロジックをdrawline.service.tsから削除し、DrawlineServiceクラスをDIします。
import {Component, ViewChild, OnInit, AfterViewInit} from '@angular/core';
import {DrawlineService} from './drawline.service.ts'; // DrawlineServiceをimportします。

@Component({
  selector: 'app-canvas',
  templateUrl: 'canvas.component.html',
  styleUrls: ['canvas.component.css'],
  providers: [DrawlineService] // providersにDrawlineServiceを加えます。
})
export class CanvasComponent implements OnInit, AfterViewInit {
  @ViewChild('myCanvas') myCanvas;
  public canvas: HTMLCanvasElement = null;
  public ctx: CanvasRenderingContext2D = null;
  public Lines: {x: number, y: number, rx: number, ry: number}[];

  constructor(private drawlineService: DrawlineService) { // DrawlineServiceをDIする
  }

  ngOnInit() {
    this.Lines = [{x: 0, y: 150, rx: 300, ry: 150}];
  }

  ngAfterViewInit() {
    this.canvas = this.myCanvas.nativeElement;
    this.ctx = canvas.getContext("2d");
  }

  // 線を描く
  drawLine(): void {
    this.drawlineService.drawLine(this.Lines, this.ctx);
    this.drawlineService.addLine(this.Lines);
  };

  // 線を削除し、データを初期化する
  removeLine(): void {
    this.drawlineService.removeLine(this.ctx);
    this.Lines = [{x: 0, y: 150, rx: 300, ry: 150}];
  }
}
RealtimeDBを設定する
firabaseの「RealtimeDB」にあるルールを開き、認証条件を変更して公開します。
{
  "rules": {
    ".read": "auth == null",
    ".write": "auth == null"
  }
}
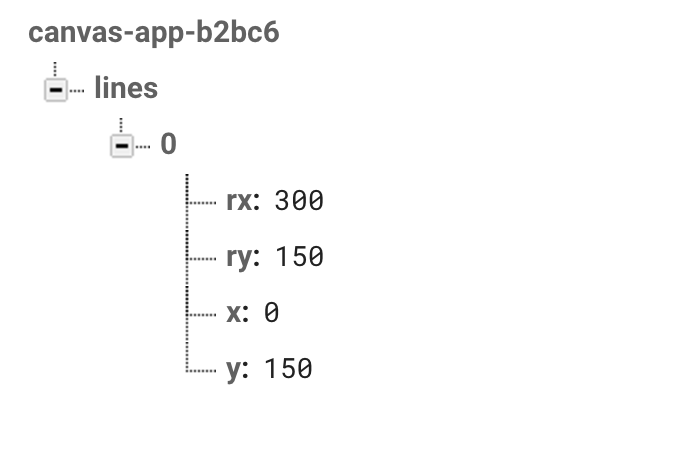
次にfirabaseの「RealtimeDB」にあるデータを開き、Linesの初期値を設定します。
canvasのデータをRealtimeDBと連携させる
canvas.component.tsにangularfire2のクラスをインストールし、初期値を設定します。
angularfire2にはオブジェクトと配列を取得するメソッドがありますが、今回はオブジェクトとしてデータを取得します。ngAfterViewInitにdrawLine()メソッドを追加しておけば、ブラウザ更新時にリアルタイムでデータが同期されます。
最後に変更後のデータをRealtimeDBに保存するため、set()をメソッドに加えます。
import {Component, ViewChild, OnInit, AfterViewInit} from '@angular/core';
import {AngularFire, FirebaseObjectObservable} from 'angularfire2'; // angularfire2のクラスをインストール
import {DrawlineService} from './drawline.service.ts';

@Component({
  selector: 'app-canvas',
  templateUrl: 'canvas.component.html',
  styleUrls: ['canvas.component.css'],
  providers: [DrawlineService]
})
export class CanvasComponent implements OnInit, AfterViewInit {
  @ViewChild('myCanvas') myCanvas;
  public canvas: HTMLCanvasElement = null;
  public ctx: CanvasRenderingContext2D = null;
  public baseLines: FirebaseObjectObservable<any>; // firebaseの型を設定
  public Lines: {x: number, y: number, rx: number, ry: number}[];

  constructor(private drawlineService: DrawlineService,
              private af: AngularFire) { // AngularFireをDI
  }

  ngOnInit() {
    this.baseLines = this.af.database.object('/lines', {preserveSnapshot: true}); // オブジェクトを取得
  }

  ngAfterViewInit() {
    this.canvas = this.myCanvas.nativeElement;
    this.ctx = canvas.getContext("2d");
    this.baseLines.subscribe(snapshot => {  // subscribeでデータを取得
      this.Lines = snapshot.val();
      this.drawlineService.drawLine(this.Lines, this.ctx);
    })
  }

  // 線を描く
  drawLine(): void {
    this.drawlineService.drawLine(this.Lines, this.ctx);
    this.drawlineService.addLine(this.Lines);
    this.baseLines.set(this.Lines); // setで保存する
  };

  // 線を削除し、データを初期化する
  removeLine(): void {
    this.drawlineService.removeLine(this.ctx);
    this.Lines = [{x: 0, y: 150, rx: 300, ry: 150}];
    this.baseLines.set(this.Lines); // setで保存する
  }
}
まとめ
急ピッチではありましたが、canvasを使ったWEBアプリの実装を紹介しました。
まだまだベストプラクティスとは言い難いところもあるかもしれませんので、何かお気付きの点がありましたらご指摘ください。