前: その1
次: その3
閲覧、ストックありがとうございます。拙い文章・内容ですが、よろしくお願いします。
3DCGなどを専攻して学んでいるわけではないので、その点はご了承いただきたいです。
今回やること
MMDモデルの表示の準備のため、DirectXの初期化
今回のソース
環境
VisualStudio2015 Community / SlimDX(DirectX11)
SlimDXはDirectXのC#ラッパライブラリです。
こちらを参考にしながら、開発していきます。
DirectXデバイスの初期化
開発準備
- VisualStudioを起動し、Windowsフォームアプリケーションでプロジェクトを作成する。
- NugetからSlimDXをインストールする。
- "Core.cs"を追加し、以下のコードを記述する。
- プロジェクトから"form1.cs"を削除し、以下のように"Program.cs"を書き換える。
using SlimDX.Windows;
using System.Windows.Forms;

namespace ModelViewer {
	class Core : Form {
		public void Run() {
			MessagePump.Run(this, Draw);
		}

		protected virtual void Draw() {
			//描画処理
		}
	}
}
namespace ModelViewer {
	static class Program {
		static void Main() {
			using(var core = new Core()) {
				core.Run();
			}
		}
	}
}
ここまでで、ウィンドウに描画したもの表示する準備ができました。描画の処理を一切行っていないため、プログラムを実行してもウィンドウが表示されるだけです。
DirectXデバイスの初期化
次に、DirectXで3DCGの処理・表示を行うためにデバイスの初期化を行います。
また、背景色を設定し、DirectXが動いているか確認をします。
- CreateWithSwapChain()を使用して、3DCGの処理を行うデバイスと、ウィンドウに画像を表示するためのスワップチェーンを生成します。
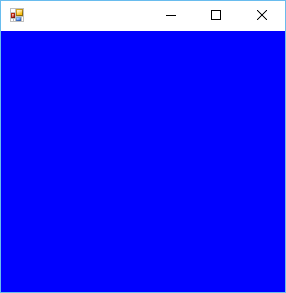
- 描画対象を表すRenderTargetViewを生成し、青一色で初期化する。
Core.csを以下のように書き換えます。
using SlimDX;
using SlimDX.Windows;
using System.Windows.Forms;
using Dx11 = SlimDX.Direct3D11;
using Dxgi = SlimDX.DXGI;

namespace ModelViewer {
	class Core : Form {
		private Dx11.Device device;
		private Dxgi.SwapChain swapChain;
		private Dx11.RenderTargetView renderTarget;

		public void Run() {
			InitializeDevice();
			MessagePump.Run(this, Draw);
			DisposeDevice();
		}

		protected virtual void Draw() {
			device.ImmediateContext.ClearRenderTargetView(renderTarget, new Color4(1, 0, 0, 1));

			swapChain.Present(0, Dxgi.PresentFlags.None);
		}

		private void InitializeDevice() {
			Dx11.Device.CreateWithSwapChain(
				Dx11.DriverType.Hardware, Dx11.DeviceCreationFlags.None,
				new Dxgi.SwapChainDescription() {
					BufferCount = 1, OutputHandle = this.Handle,
					IsWindowed = true,
					SampleDescription = new Dxgi.SampleDescription() {
						Count = 1, Quality = 0,
					}, ModeDescription = new Dxgi.ModeDescription() {
						Width = ClientSize.Width, Height = ClientSize.Height,
						RefreshRate = new Rational(60, 1),
						Format = Dxgi.Format.R8G8B8A8_UNorm
					}, Usage = Dxgi.Usage.RenderTargetOutput
				}, out device, out swapChain
			);

			InitializeRenderTarget();
		}

		private void InitializeRenderTarget() {
			using(var backBuffer = Dx11.Resource.FromSwapChain<Dx11.Texture2D>(swapChain, 0)) {
				renderTarget = new Dx11.RenderTargetView(device, backBuffer);
			}
		}

		private void DisposeDevice() {
			renderTarget.Dispose();
			device.Dispose();
			swapChain.Dispose();
		}
	}
}
細かいことはこちらとこちらを参照してください。
上手くいけば、下の画像のようになります。

おわりに
次回は、3DCGの基本である三角形の表示を行います。
次々回は、読み込んだPMDファイルのデータを用いて、頂点だけでモデルの表示を行う予定です。