前回の続き
Drag & drop
こちらのサイトを日本語でざっくりとまとめていきます。
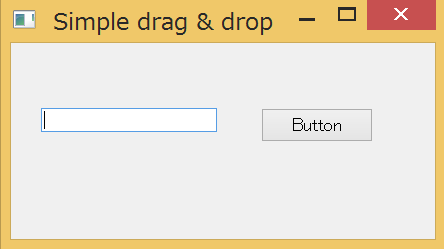
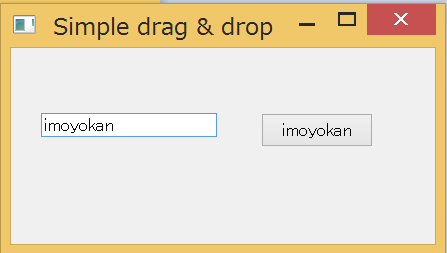
【ボタンにドラッグ&ドロップ】
Simple_drag_and_drop.py
# !/usr/bin/python3
# -*- coding: utf-8 -*-


import sys
from PyQt5.QtWidgets import (QPushButton, QWidget,
    QLineEdit, QApplication)

# QPushButtonを継承
class Button(QPushButton):

    def __init__(self, title, parent):
        super().__init__(title, parent)

        # ボタンに対してドロップ操作を可能にする
        self.setAcceptDrops(True)


    def dragEnterEvent(self, e):

        # ドラッグ可能なデータ形式を設定
        if e.mimeData().hasFormat('text/plain'):
            e.accept()
        else:
            e.ignore()

    def dropEvent(self, e):

        # ドロップしたときにボタンラベルを入れ替える
        self.setText(e.mimeData().text())


class Example(QWidget):

    def __init__(self):
        super().__init__()

        self.initUI()


    def initUI(self):

        edit = QLineEdit('', self)
        # ドラッグ可能にする
        edit.setDragEnabled(True)
        edit.move(30, 65)

        button = Button("Button", self)
        button.move(250, 65)

        self.setWindowTitle('Simple drag & drop')
        self.setGeometry(300, 300, 300, 150)


if __name__ == '__main__':

    app = QApplication(sys.argv)
    ex = Example()
    ex.show()
    app.exec_()
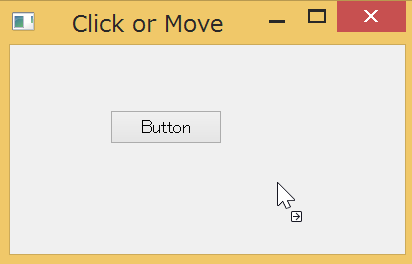
初期状態
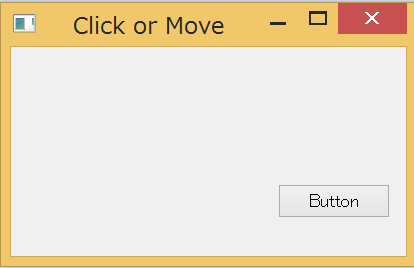
ドラッグ&ドロップ後
【ボタンをドラッグ&ドロップ】
Drag&drop_a_button_widget.py
# !/usr/bin/python3
# -*- coding: utf-8 -*-


import sys
from PyQt5.QtWidgets import QPushButton, QWidget, QApplication
from PyQt5.QtCore import Qt, QMimeData
from PyQt5.QtGui import QDrag


class Button(QPushButton):

    def __init__(self, title, parent):
        super().__init__(title, parent)


    def mouseMoveEvent(self, e):

        # 右クリックだけドラッグ&ドロップ可能にする
        if e.buttons() != Qt.RightButton:
            return

        # ドラッグ&ドロップされるデータ形式を代入
        mimeData = QMimeData()

        drag = QDrag(self)
        drag.setMimeData(mimeData)
        # ドロップした位置にボタンの左上をセット
        drag.setHotSpot(e.pos() - self.rect().topLeft())
        dropAction = drag.exec_(Qt.MoveAction)


    def mousePressEvent(self, e):

        # ボタンが押されたときのボタンの色の変化
        QPushButton.mousePressEvent(self, e)

        # 左クリックしたときにコンソールにpress表示
        if e.button() == Qt.LeftButton:
            print('press')


class Example(QWidget):

    def __init__(self):
        super().__init__()

        self.initUI()


    def initUI(self):

        self.setAcceptDrops(True)

        self.button = Button('Button', self)
        self.button.move(100, 65)

        self.setWindowTitle('Click or Move')
        self.setGeometry(300, 300, 280, 150)


    def dragEnterEvent(self, e):

        e.accept()


    def dropEvent(self, e):

        # ドラッグ後のマウスの位置にボタンを配置
        position = e.pos()
        self.button.move(position)

        # よくわからん
        e.setDropAction(Qt.MoveAction)
        e.accept()


if __name__ == '__main__':

    app = QApplication(sys.argv)
    ex = Example()
    ex.show()
    app.exec_()