- ArgoCDをクラスタに展開完了すると、
kind: Applicationのカスタムリソースが作成される - そのため、マニフェストファイルをkubectl applyすれば、自動的にArgoCDにリソースが登録されるようになる
- ArgoCDでは、Helm、kustomize,jsonnetなども扱うことができる
How it works
Argo CD follows the GitOps pattern of using Git repositories as the source of truth for defining the desired application state. Kubernetes manifests can be specified in several ways:
kustomize applications
helm charts
jsonnet files
Plain directory of YAML/json manifests
Any custom config management tool configured as a config management plugin
https://argo-cd.readthedocs.io/en/stable/
マニフェストファイルを用意する
- AWSの公式手順に習って対応するように、マニフェストファイルを作る
- helm install時に指定しているリポジトリやパラメータを以下のように指定する
helm installコマンド
helm install aws-load-balancer-controller eks/aws-load-balancer-controller \
  -n kube-system \
  --set clusterName=cluster-name \
  --set serviceAccount.create=false \
  --set serviceAccount.name=aws-load-balancer-controller
マニフェストファイル
argocd-aws-loadbalancer-controller.yaml
apiVersion: argoproj.io/v1alpha1
kind: Application
metadata:
  name: aws-loadbalancer-controller
  namespace: argocd
spec:
  project: default
  source:
    repoURL: https://github.com/aws/eks-charts ← リポジトリURL
    path: stable/aws-load-balancer-controller ← リポジトリURLのルートから対象リソースがあるまでのパス
    helm:
      parameters:
      - name: "clusterName" ← --setで指定しているパラメータ
        value: "vamdemic-stg-eks-cluster" ← --setで指定しているパラメータ
      - name: "serviceAccount.create"
        value: "false"
      - name: "serviceAccount.name"
        value: "aws-load-balancer-controller"
      releaseName: aws-load-balancer-controller
  destination:
    server: https://kubernetes.default.svc
    namespace: kube-system
  syncPolicy:
    automated:
      prune: true
  ignoreDifferences:
  - group: ""
    kind: Service
    jsonPointers:
    - /spec/clusterIP
デプロイ
kubectl apply -f manifests/argocd-aws-loadbalancer-controller.yaml
確認
kubectl -n argocd get application
NAME                          SYNC STATUS   HEALTH STATUS
aws-loadbalancer-controller   Synced        Healthy
guestbook                     Synced        Healthy
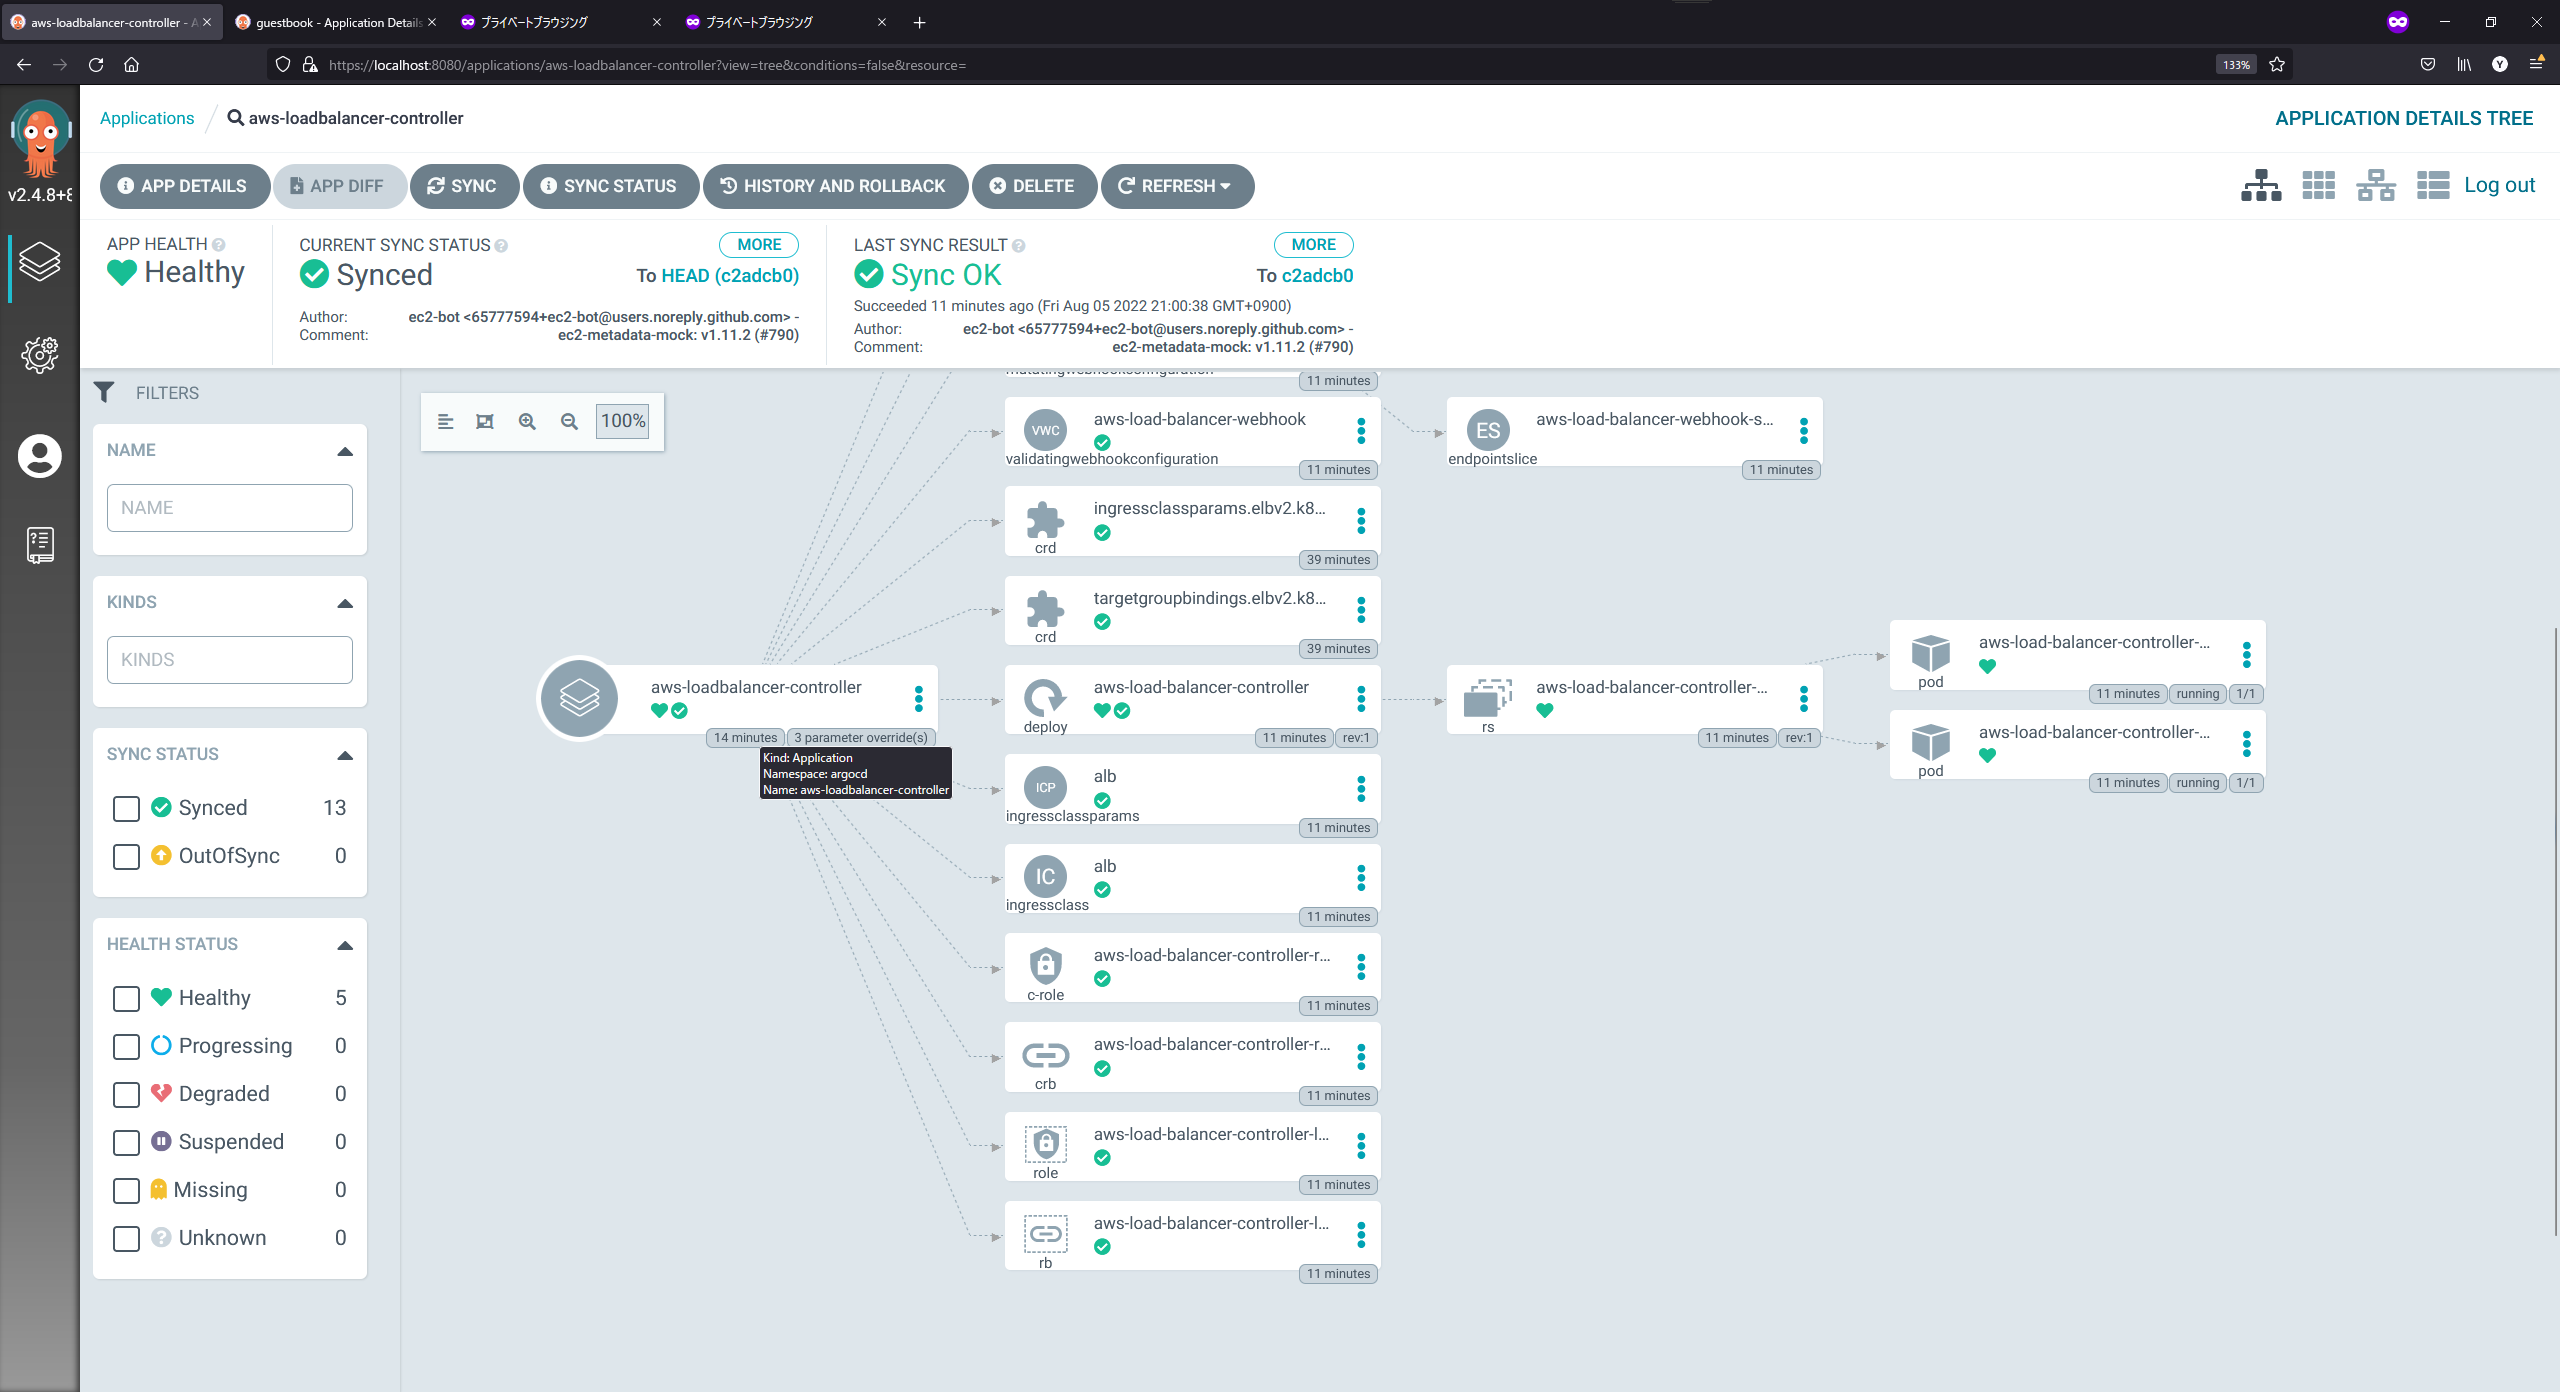
きれいにデプロイがかかると、GUIからはこのように見える