ただの集団 Advent Calendar 2018の7日目の記事です。
LambdaでRubyが使えるようになった!!!
Announcing Ruby Support for AWS Lambda | AWS Compute Blog

Gemを使わない場合、AWS Management Consoleからポチポチして、オンラインのエディタでラムダを作成できます。
しかし、Gemを使う場合はローカルでパッケージを作成してからそれをデプロイしなければいけません。
こちらの手順の日本語での説明がなかなか見つからなかったので、作ることにしました。
本記事でカバーする手順は、ざっくりこんな感じです!
- Slackにメッセージを送る簡単なrubyアプリケーションを作成
- sam-cliを使ってデプロイ
- AWS Management Consoleで動作確認
前提条件
- ローカルにRuby2.5.0(他のバージョンだから動作しないということもないが、2.5.0使っていれば安心)
- aws-cli
- IAMは以下のポリシーが必要(もう少し狭めることはできるかもしれませんが今回はサンプル用に作っただけなので適当です笑)
- AWSLambdaFullAccess
- IAMFullAccess
- AmazonS3FullAccess
- CloudfrontのFullAccess(AWSがデフォルトで提供しているポリシーにはないので、自分でポリシーを作成する必要がある)
- sam-cli
- S3Bucketが作成済み
- SlackのwebhookUrl(参考ドキュメント)
{
    "Version": "2012-10-17",
    "Statement": [
        {
            "Sid": "VisualEditor0",
            "Effect": "Allow",
            "Action": "cloudformation:*",
            "Resource": "*"
        }
    ]
}
- Slackにメッセージを送る簡単なrubyアプリケーションを作成 今回は、slack-notifierというGemを使って、Slackに通知を送るLambdaを作ります!
mkdir example_project
cd example_project
bundle init
これらのコマンドを実行後、Gemfileが作成されるのでここにslack-notifierを追加しましょう。
# frozen_string_literal: true

source "https://rubygems.org"

git_source(:github) {|repo_name| "https://github.com/#{repo_name}" }

gem 'slack-notifier' # この一行を追加!
Gemfileにgemを追加後、bundle installすれば準備完了!
$ bundle install
Fetching gem metadata from https://rubygems.org/..............
Resolving dependencies...
Using bundler 1.17.1
Using slack-notifier 2.3.2
Bundle complete! 1 Gemfile dependency, 2 gems now installed.
Use `bundle info [gemname]` to see where a bundled gem is installed.

$ bundle install --deployment
Fetching gem metadata from https://rubygems.org/..............
Using bundler 1.17.1
Fetching slack-notifier 2.3.2
Installing slack-notifier 2.3.2
Bundle complete! 1 Gemfile dependency, 2 gems now installed.
Bundled gems are installed into `./vendor/bundle`
プロジェクトのルートに、Slackにメッセージを送るrubyファイルを作成します。
require 'slack-notifier'

# ↓自分んおwebhook urlで置き換え
webhook_url = "https://hooks.slack.com/services/your/webhook/url"

def test(event:,context:)
  notifier = Slack::Notifier.new webhook_url
  notifier.ping "Hello World"
end
今回書くコードはこれだけ!
この時点でのディレクトリ構造はこんな感じです。
$ tree -L 2 -a
.
├── .bundle
│   └── config
├── .ruby-version
├── Gemfile
├── Gemfile.lock
├── example.rb
└── vendor
    └── bundle
2. sam-cliを使ってデプロイ
プロジェクトのルートに、以下のファイルを追加しましょう。
AWSTemplateFormatVersion: '2010-09-09'
Transform: AWS::Serverless-2016-10-31
Description: 'sample ruby application'

Resources:
  ExampleFunction:
    Type: AWS::Serverless::Function
    Properties:
      Handler: example.test
      Runtime: ruby2.5
      Policies:
      Environment:

Outputs:
  ExampleFunction:
    Description: Example Lambda Function ARN
    Value:
      Fn::GetAtt:
      - ExampleFunction
      - Arn
このテンプレートファイルを元に、sam-cliでデプロイすることが可能になります。
次に、アプリケーションをパッケージし、S3 Bucketに保存しましょう。
$ sam package --template-file template.yml  \
              --s3-bucket <S3Bucket名> \
              --output-template-file packaged-template.yml
Uploading to 1a2b3c4d5e6f7gb7df26ff74638ec  32396 / 32396.0  (100.00%)
Successfully packaged artifacts and wrote output template to file packaged-template.yml.
Execute the following command to deploy the packaged template
aws cloudformation deploy --template-file /path/to/example_project/packaged-template.yml --stack-name <YOUR STACK NAME>
最後に出力されるコマンドは無視して、下記のコマンドでデプロイしましょう!
stack-nameオプションの内容は、適当な名前で大丈夫です。
$ sam deploy --template-file packaged-template.yml \
             --stack-name example-stack-name \
             --capabilities CAPABILITY_IAM
Waiting for changeset to be created..
Waiting for stack create/update to complete
Successfully created/updated stack - example-stack-name
これでラムダ関数は作成できました!
3. AWS Management Consoleで動作確認
Management ConsoleのLambdaのページに、1つ関数が追加されているはずです。

Lambda関数が追加されているのが確認できたら、関数のページで動作を確認しましょう!
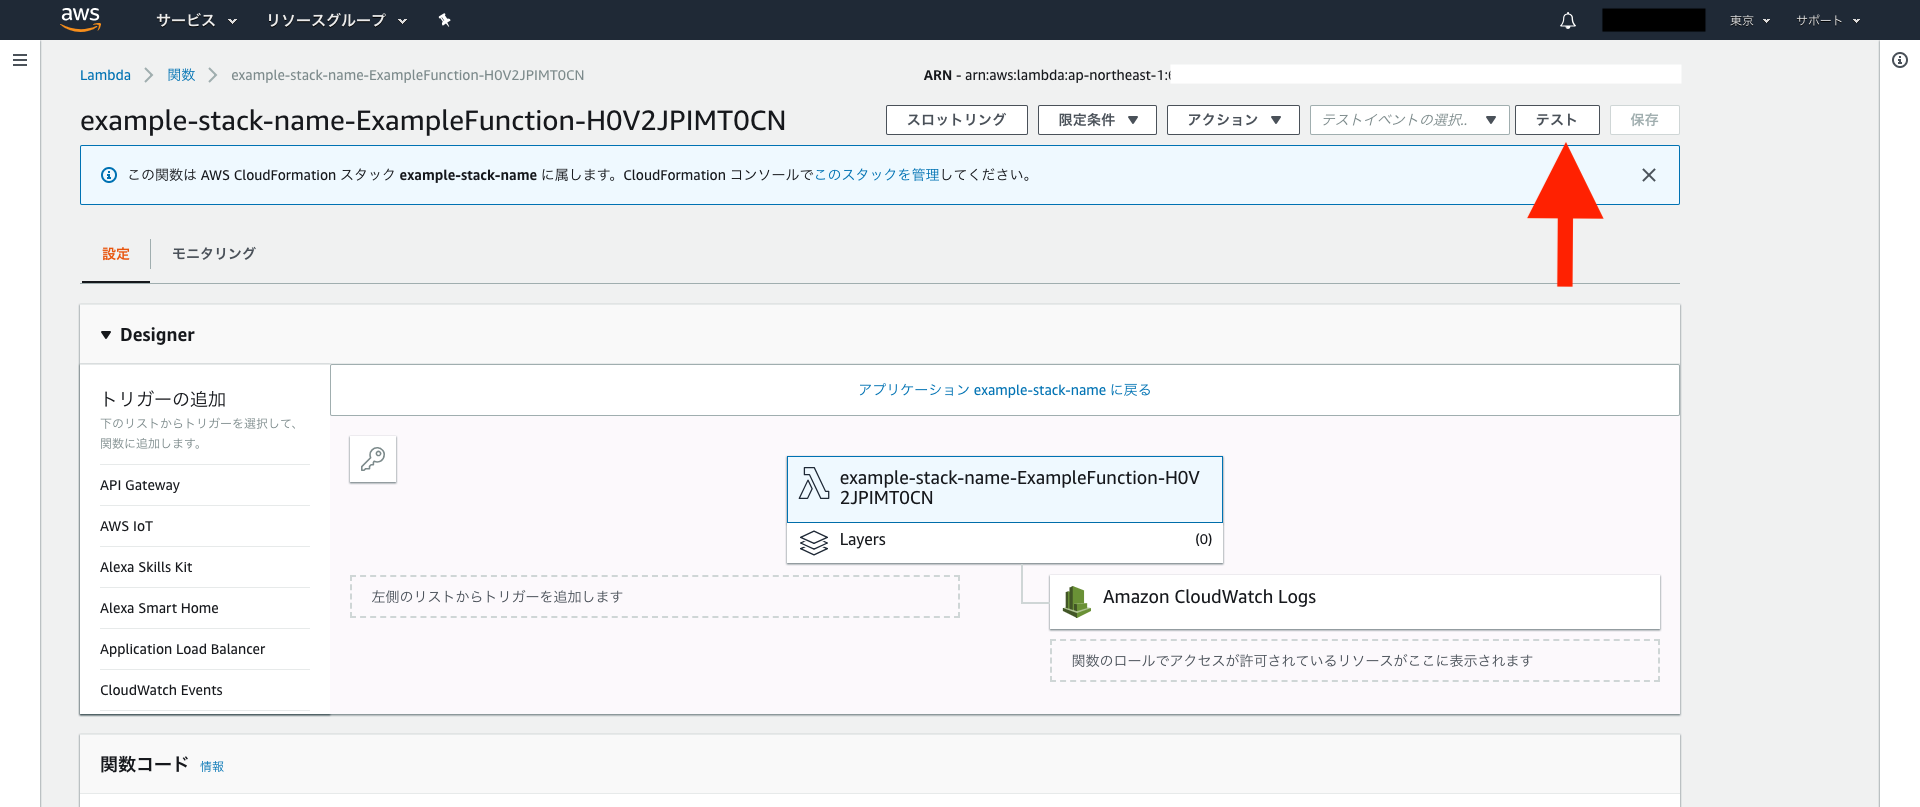
「テスト」ボタンをクリックして、テストを作成しましょう。
イベント名を入力しましょう。"key1": "value1" ...とある波括弧の中身は今回不要なので削除して大丈夫です。

テストを実行して、下記のような画面になれば成功です!

Slackにメッセージが届いているはずです。

注意点
- ラムダの制約として、250MB以上のパッケージはアップロードできません。
- 当然ですが課金は発生します