circuits.ioでLチカしてみた
https://circuits.io/
このサイトで回路を作ってたら脳汁が出まくりだったのでメモ。
準備
- circuits.ioでアカウントを作成し、新しいプロジェクトを作成します。
部品を置いてみる
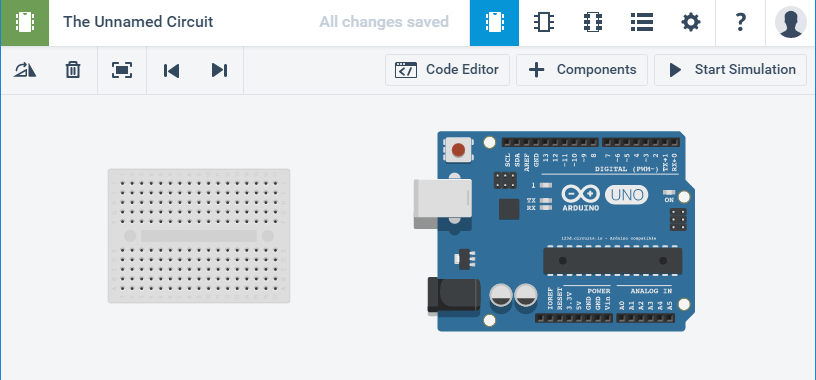
- 「+Components」を押して、部品を追加する
> とりあえずArduino UNO R3とブレットボードを追加してみる
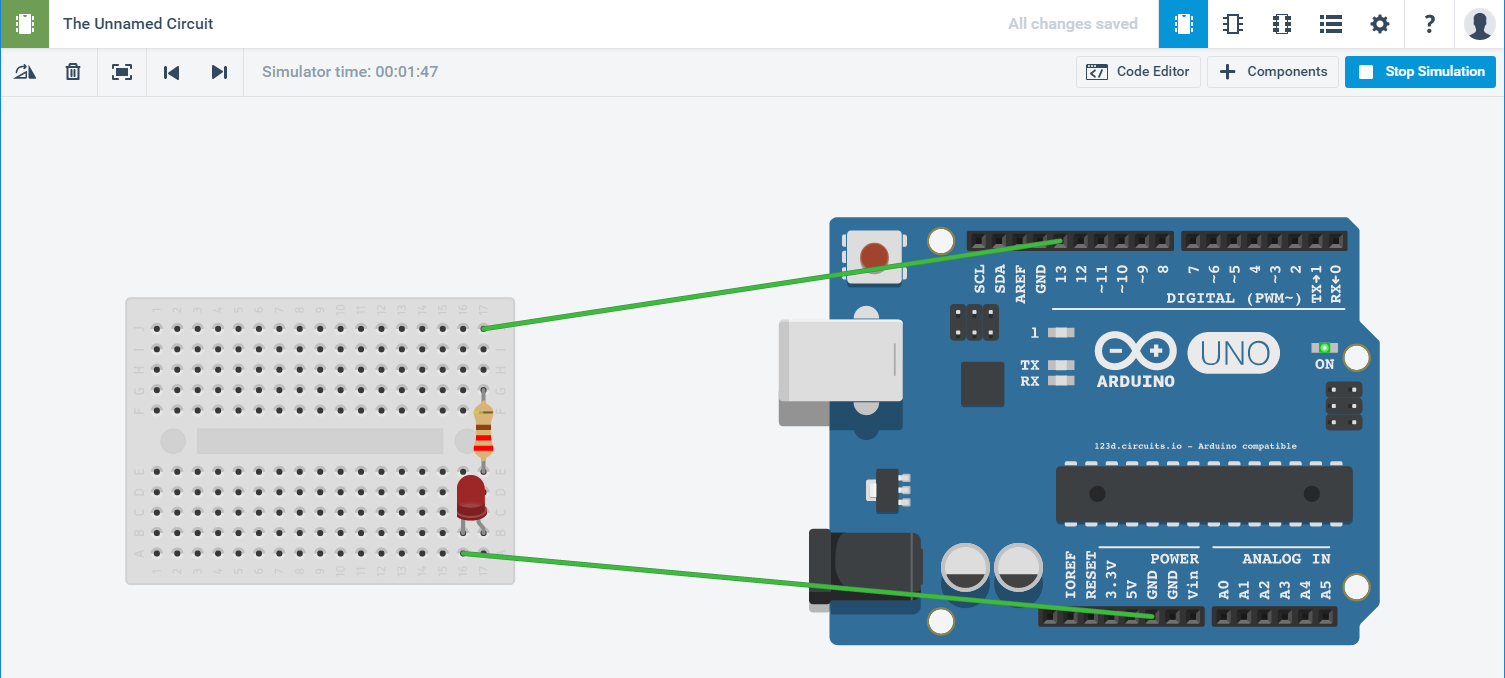
配線していく
GND → ブレッドボード → LEDの左ピン
LEDの右ピン → 抵抗 → Arduinoの13ピン
というように接続していきます。
プログラムの準備
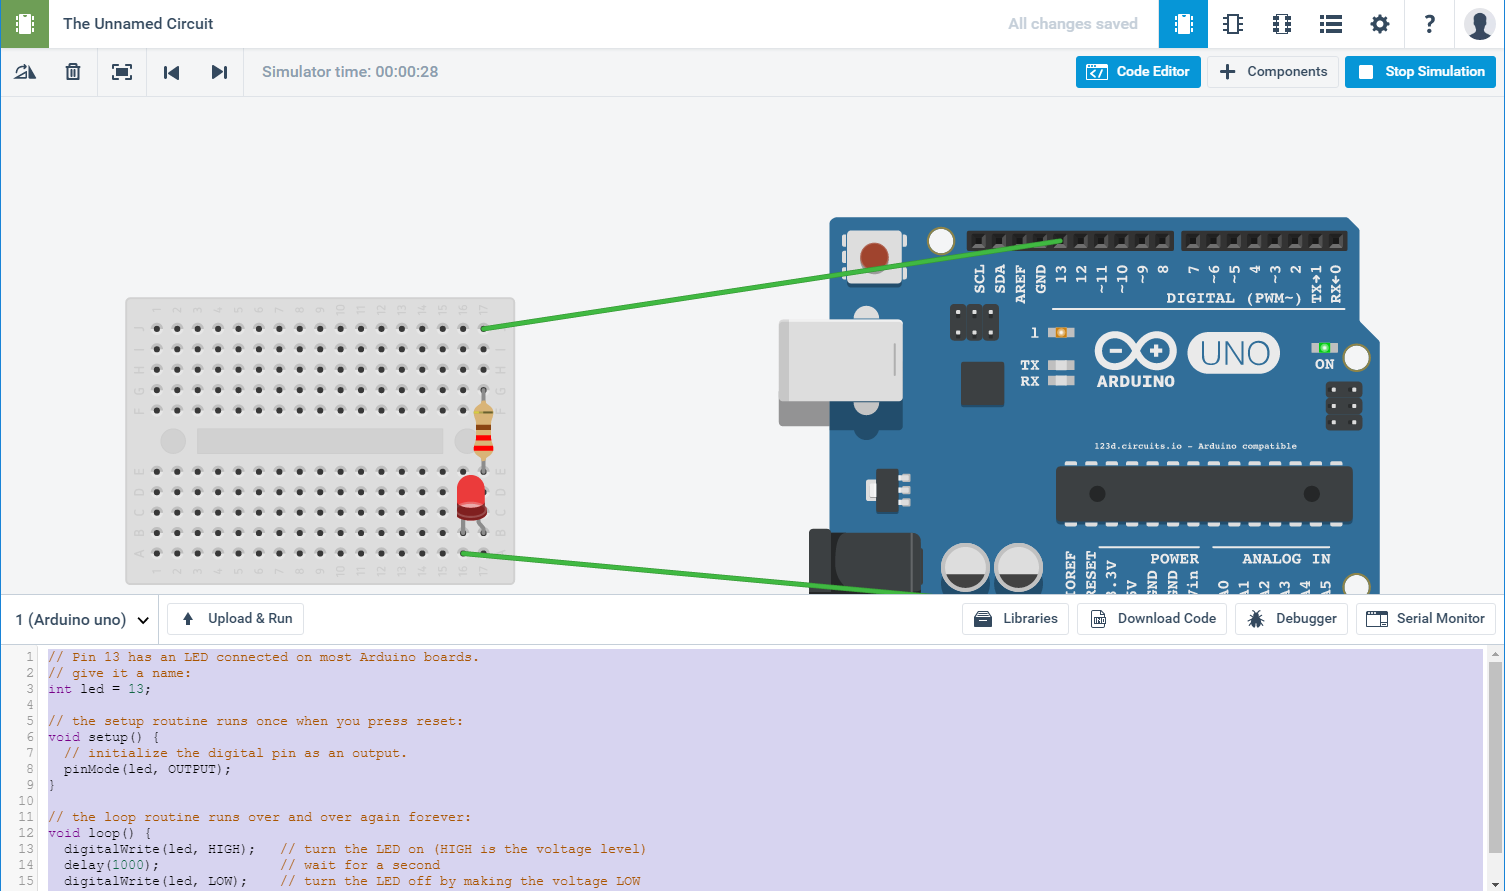
Code Editorボタンを押すと、Arduinoのプログラムを編集する事ができます。
とりあえず今はデフォルトのままで、「Start Simulation」を押しましょう
クララが立った!!
LEDが光ってたらうまく動いたという事です。
感想
電子ブロックにあこがれた世代からすると、WEB上でこんなに簡単に電子実験ができるなんて・・と感慨深いです。
プログラムを覚えたい人は、最初はこれくらい直観的な環境でLチカをコントロールする所から始めるのも
いいんじゃないでしょうか。
とりあえず、お手本を何種類か用意して、早押しゲームみたいな回路を子供と作ってみようかと思ってます。
↓上で使用したデフォルトコードを載せておきます
プログラムを見て、どのようにLEDが光るか想像してみてください。
arduinoデフォルトコード
// Pin 13 has an LED connected on most Arduino boards.
// give it a name:
int led = 13;

// the setup routine runs once when you press reset:
void setup() {
  // initialize the digital pin as an output.
  pinMode(led, OUTPUT);
}

// the loop routine runs over and over again forever:
void loop() {
  digitalWrite(led, HIGH);   // turn the LED on (HIGH is the voltage level)
  delay(1000);               // wait for a second
  digitalWrite(led, LOW);    // turn the LED off by making the voltage LOW
  delay(1000);               // wait for a second
}