はじめに
題名の通り、TableViewCellの高さを動的に変えてみます。
Self-Sizing Cellsとかいうやつです。
本記事のサンプルは、Xcode Ver7.3.1で実装しました。
iOS 8.0以降対象です。
Self-Sizing Cells??
セルの高さを自力で計算することなく動的な高さを持つセルを定義できるものです。
完成イメージ
name, commentを持つJSONからデータを取得します。
サンプルなので、表示する文字列はテキトーです。
{
    "profile": [
                {"name": "AAA", "comment": "abcd123"},
                {"name": "BBB", "comment": "あいう\nえお"},
                {"name": "CCC", "comment": "こめんと\nコメント\nComment"},
                {"name": "DDD", "comment": "01234\n56789\n98765\n43210"},
                {"name": "EEE", "comment": "コメント\nコメント\nコメントコメント\nコメコメントントコメントコメント\nabc123"},
                {"name": "FFF", "comment": ""},
                {"name": "GGG", "comment": "abcd123"},
                {"name": "HHH", "comment": "あいう\nえお"},
                {"name": "III", "comment": "こめんと\nコメント\nComment"},
                {"name": "JJJ", "comment": "01234\n56789\n98765\n43210"},
                {"name": "KKK", "comment": "コメント\nコメント\nコメントコメント\nコメコメントントコメントコメント\nabc123"},
                {"name": "LLL", "comment": ""},
                {"name": "MMM", "comment": "コメント\nコメント\nコメント\nコメント\nコメント\nコメント"},
                {"name": "NNN", "comment": "apple\niOS"},
                {"name": "OOO", "comment": ""},
                {"name": "PPP", "comment": "0\n11\n222\n3333\n44444\n555555\n6666666\n77777777\n888888888\n9999999999"},
                ]
}
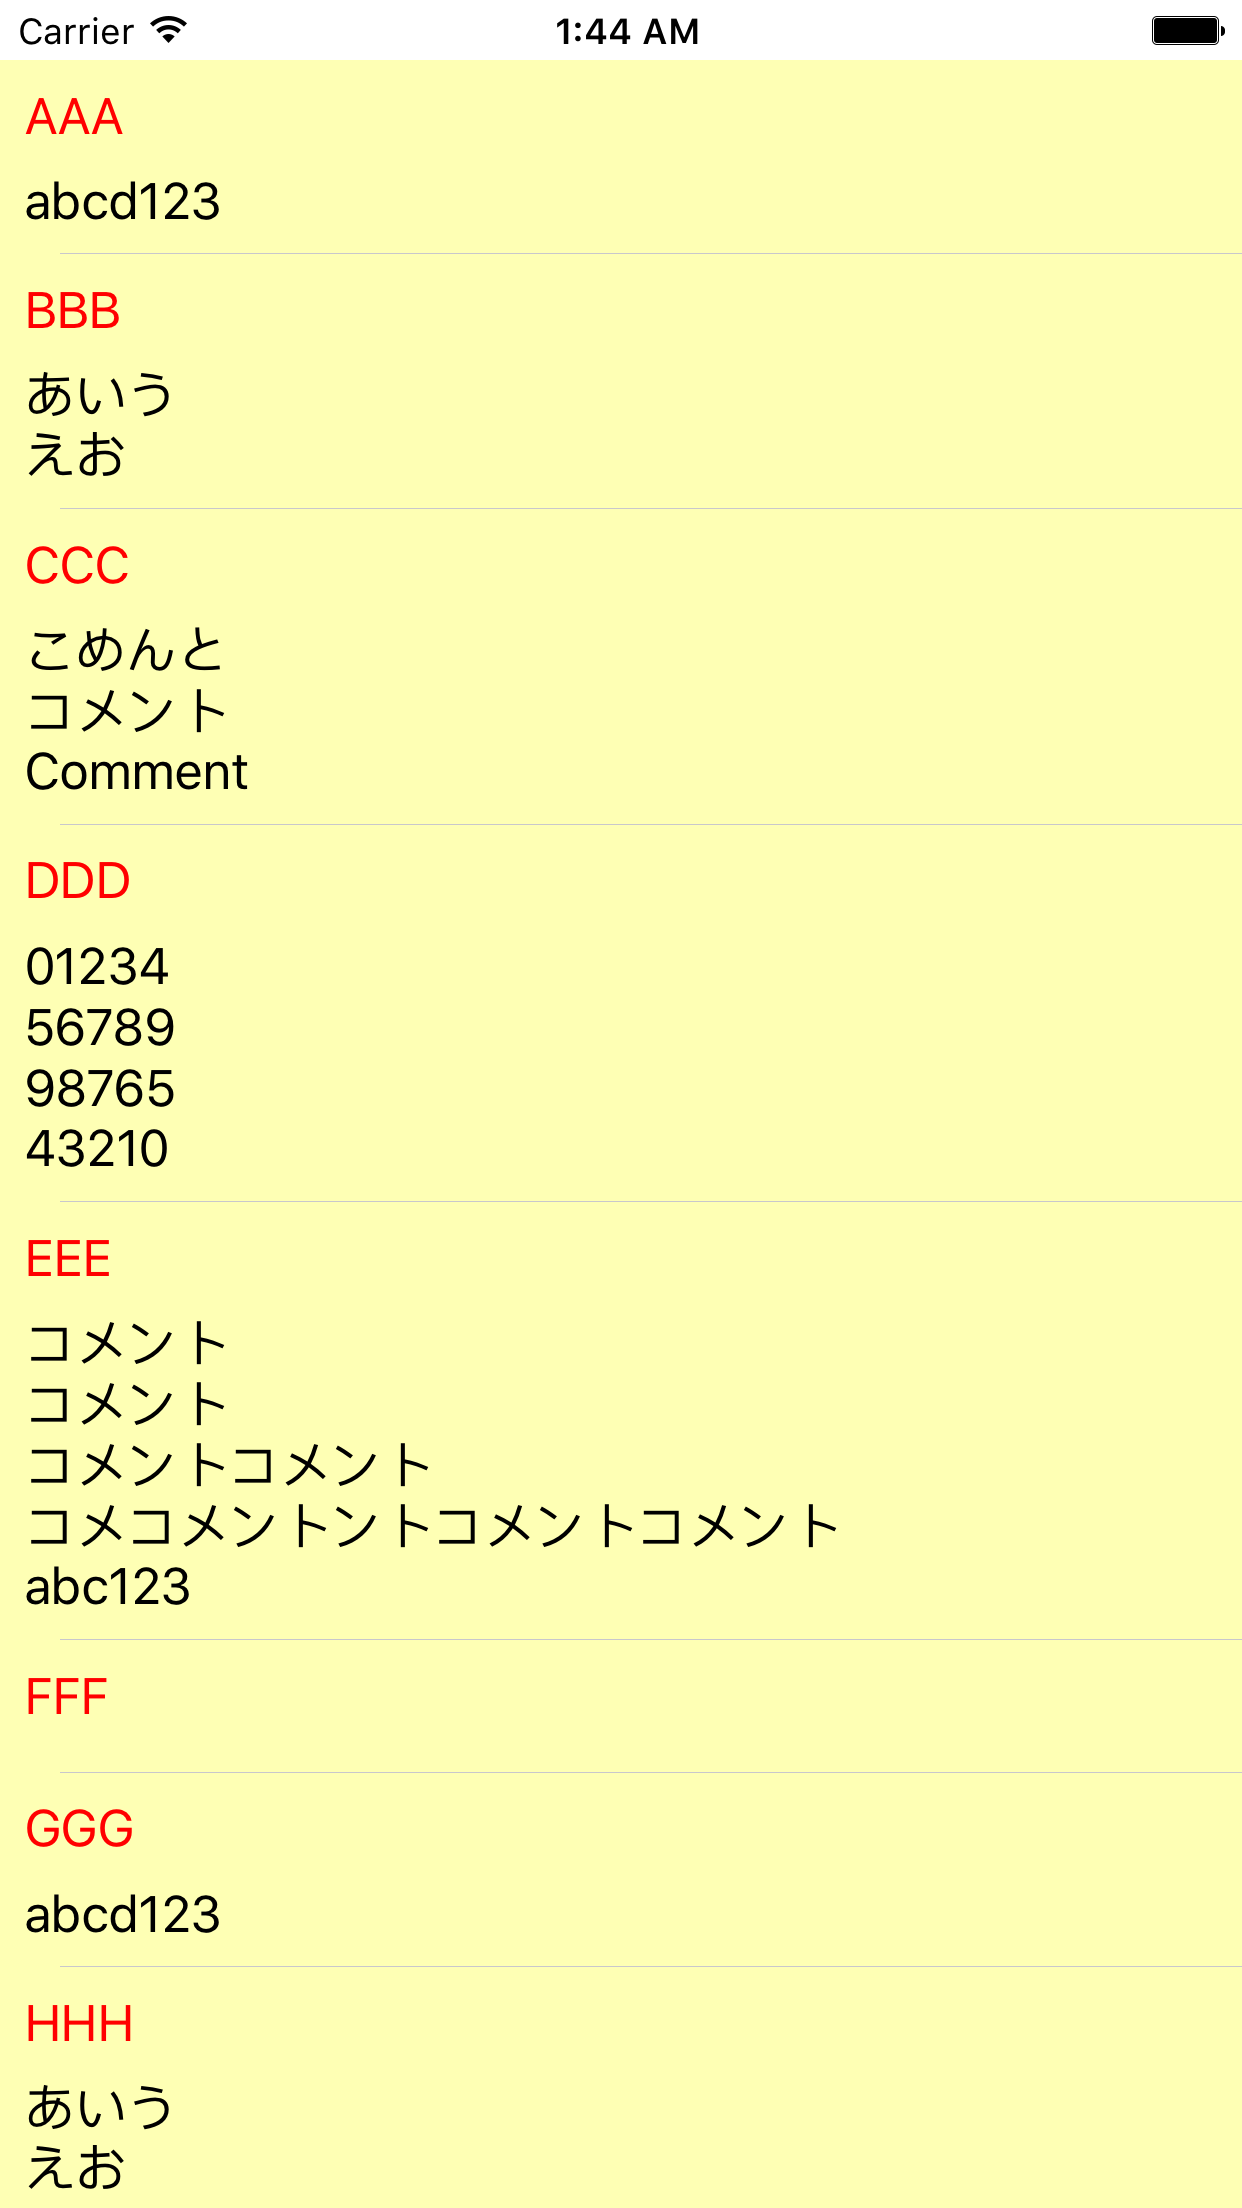
このデータから、
名前(赤字)とコメント(黒字、複数行)を持つTableViewCellを作ります。
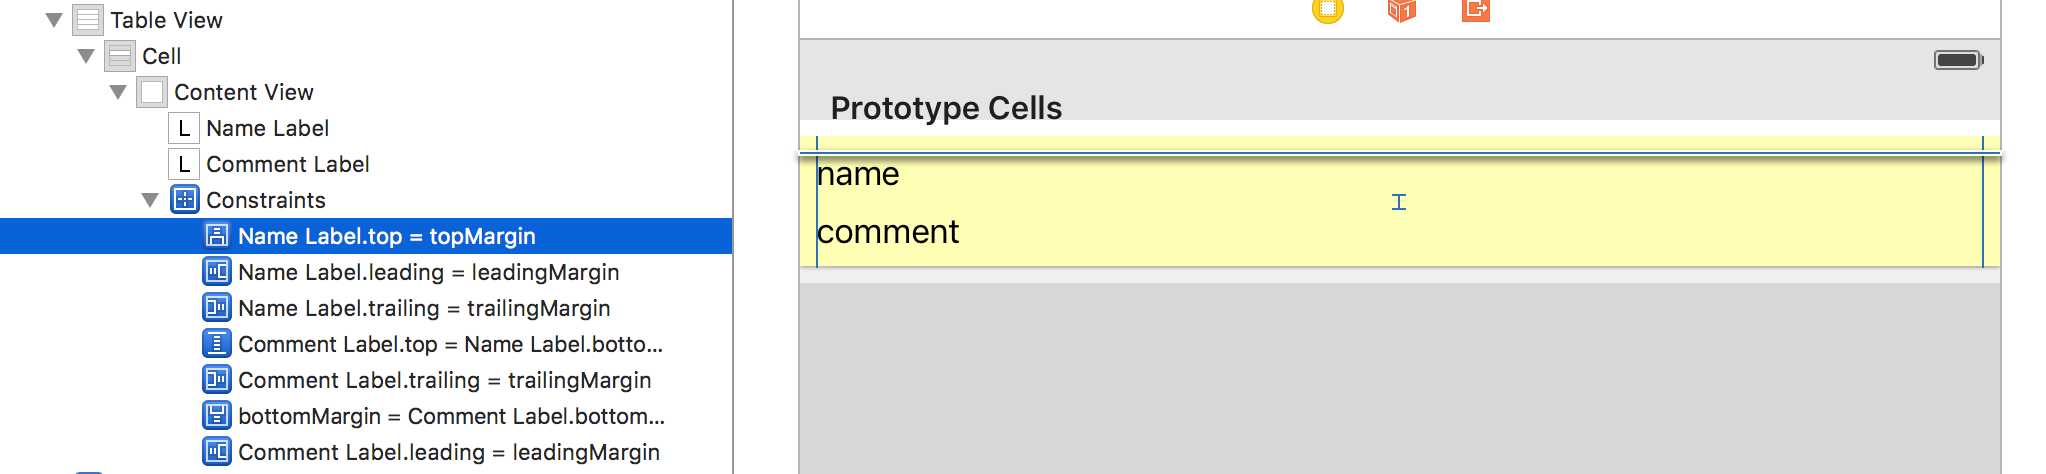
Cell内に配置したパーツに適切な制約をつける
本サンプルでは、Cell内にnameLabelとcommentLabelの二つ配置しています。
それぞれのラベルに適切な制約をつけてあげます。
nameLabelは、
上左右 Constrain 0
下 Constrain 8としました。
commentLabelは、
下左右 Constrain 0
上 Constrain 8としました。
(単に上下左右に制約をつけただけです。)
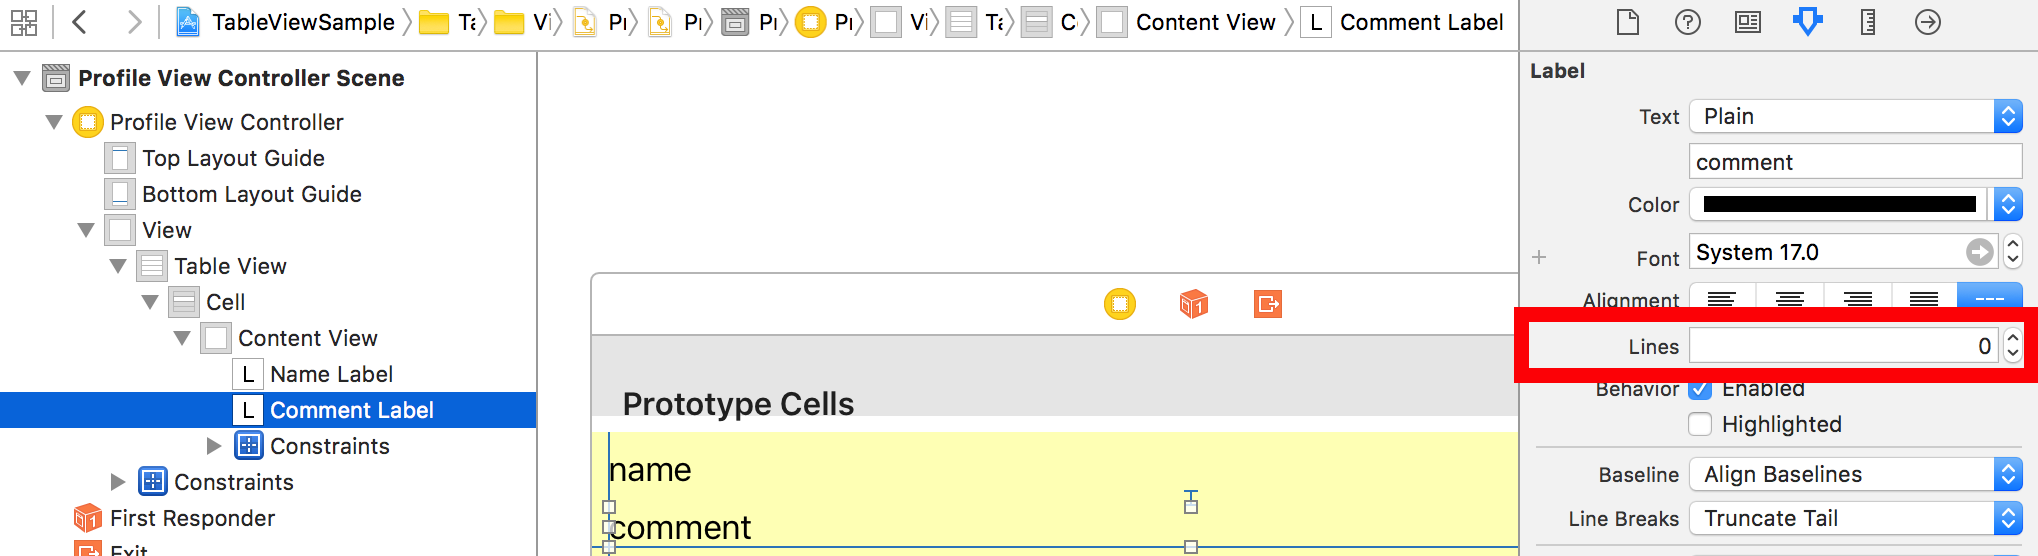
また、commentLabelは複数行のテキストを表示するので
Linesに0を設定しておきます。
TableViewの設定
estimatedRowHeightを設定する
tableView.estimatedRowHeight = 66
セルの高さを計算する直前までの高さになります。
(デフォルトの高さというイメージですかね。)
rowHeightにUITableViewAutomaticDimensionを設定する
tableView.rowHeight = UITableViewAutomaticDimension
estimatedRowHeightに任意の値を設定し、
rowHeightにUITableViewAutomaticDimensionを設定することで
動的にセルの高さを設定してくれるようになります。
その他の部分は、基本的なTableViewの実装と変わりません。
セルに表示するデータを取得したり、UITableViewDataSourceのデリゲートメソッドを定義したりするだけです。(基本的なTableViewの実装部分については説明を割愛させていただきます。)
作成したコード
import UIKit

struct ProfileModel {
    var name = ""
    var comment = ""
}

struct ProfilesModel {
    var profiles = [ProfileModel]()
}

class ProfileViewController: UIViewController {

    @IBOutlet weak var tableView: UITableView!
    var profilesModel = ProfilesModel()


// MARK: Life Cycle
    override func viewDidLoad() {
        super.viewDidLoad()

        tableView.estimatedRowHeight = 66
        tableView.rowHeight = UITableViewAutomaticDimension

        guard let jsonFilePath = NSBundle.mainBundle().pathForResource("profileSample", ofType: "json") else {
            return
        }
        // JSONファイルのデータ整形し、profilesModelにセットする
        JsonParser.parse(&profilesModel, jsonFilePath: jsonFilePath)


        tableView.dataSource = self
    }
}


// MARK: UITableViewDataSource
extension ProfileViewController: UITableViewDataSource {
    func tableView(tableView: UITableView, numberOfRowsInSection section: Int) -> Int {

        return profilesModel.profiles.count
    }

    func tableView(tableView: UITableView, cellForRowAtIndexPath indexPath: NSIndexPath) -> UITableViewCell {

        let cell = tableView.dequeueReusableCellWithIdentifier("Cell", forIndexPath: indexPath) as! ProfileCell
        cell.nameLabel.text = profilesModel.profiles[indexPath.row].name
        cell.commentLabel.text = profilesModel.profiles[indexPath.row].comment
        return cell
    }
}
import UIKit

class ProfileCell: UITableViewCell {
    @IBOutlet weak var nameLabel: UILabel!
    @IBOutlet weak var commentLabel: UILabel!


    override func awakeFromNib() {
        super.awakeFromNib()
        nameLabel.textColor = UIColor.redColor()
    }
}
JSONのparseしているのは、こちら。
import UIKit

class JsonParser: NSObject {
    /// JSONをparseする
    class func parse(inout profilesModel: ProfilesModel, jsonFilePath: String) {
        guard let data = NSData(contentsOfFile: jsonFilePath) else {
            return
        }

        let dictionary:NSDictionary = try!
            NSJSONSerialization.JSONObjectWithData(data, options: NSJSONReadingOptions.MutableContainers) as! NSDictionary

        var profileModel = ProfileModel()

        let profiles = dictionary["profile"] as! Array<NSDictionary>
        for profile in profiles {
            profileModel.name = profile["name"] as! String
            profileModel.comment = profile["comment"] as! String

            profilesModel.profiles.append(profileModel)
        }

    }
}
さいごに
TableViewCellの高さを動的に変えるのって大変なのかなーと思っていたけれど
ちゃんと整理してみたらとても簡単にできました。