動機
- 4月の連休で帰省したが、データ通信量が契約を超過し低速モード突入したため重い
- 特に画像が出てくるまでが遅い
- 古くからある圧縮プロキシであるziproxyではhttpsサイトの圧縮に対応できないため、昨今メジャーなhttpsサイトでは圧縮されない
- そこで、なんとかしてhttpsサイトに対応したデータ削減プロキシを作ってみよう!
mitmproxyとは
- https://mitmproxy.org/
- MITM = Man-In-The-Middle : 中間者
- 本来、通常のSSL通信はサーバとクライアント間で暗号化と復号がされるため、中継する装置ではその内容を見ることはできない
- squid等のProxyも暗号化されたままデータを中継する
- データ圧縮に対応したziproxyもhttpsについては中継するのみ
- しかし、mitmproxyは、サーバとクライアントの間のプロキシ側で一旦復号・暗号化をする
- そのため、データの中を見てデバッグしたり、スクリプトによって処理を変更することができる
仕組み
https://docs.mitmproxy.org/stable/concepts-howmitmproxyworks/
HTTPプロキシとしての動作
1. クライアントはプロキシに接続し、要求を出します。
2. Mitmproxyは上流のサーバーに接続し、単に要求を転送します。HTTPSプロキシとしての動作
1. クライアントはmitmproxyに接続し、HTTP CONNECT要求を発行します。
2. Mitmproxyは200 Connection Established、CONNECTパイプを設定したかのように応答します。
3. クライアントは、リモートサーバーと通信していると考え、TLS接続を開始します。SNIを使用して、接続先のホスト名を示します。
4. Mitmproxyはサーバーに接続し、クライアントが指定したSNIホスト名を使用してTLS接続を確立します。
5. サーバは、傍受証明書を生成するために必要なCNとSANの値を含む、一致する証明書で応答します。
6. Mitmproxyはインターセプト証明書を生成し、手順3で一時停止したクライアントTLSハンドシェイクを続行します。
7. クライアントは、確立されたTLS接続を介して要求を送信します。
8. Mitmproxyは、手順4で開始したTLS接続を介してサーバーに要求を渡します。


作り方(2021/1/4更新)
動作確認した環境
Server: CentOS 8.1 @ Conoha (indigoでもOK)
Client: OpenVPN Client 3.2.2 @ iPhone 7 Plus IOS 14.3
# cat /etc/redhat-release
CentOS Linux release 8.1.1911 (Core)

# python3 --version
Python 3.6.8

# mitmdump --version
Mitmproxy: 5.3.0
Python:    3.6.8
OpenSSL:   OpenSSL 1.1.1h  22 Sep 2020
Platform:  Linux-4.18.0-147.5.1.el8_1.x86_64-x86_64-with-centos-8.1.1911-Core
登場人物
- mitmdump (mitmproxyのCUI版)
- pillow-simd (画像を圧縮する処理をするpillowをSIMD命令に対応させた高速版)
- flows.py (mitmdumpにpillow-simdを使って画像を圧縮する処理をさせるための自作Pythonスクリプト)
- OpenVPN (iPhoneからのVPN接続に使用)
流れ
コンパイルに必要なライブラリをインストール
sudo yum -y groupinstall "Development Tools"
sudo yum -y install zlib-devel libjpeg-devel python3-devel python3-pip libwebp-devel
pipをアップグレードし、pillow-simdとmitmdumpをインストール
pip3 install --upgrade pip
CC="cc -mavx2" pip install -U --force-reinstall pillow-simd --global-option="build_ext" --global-option="--enable-webp"
pip3 install mitmdump
viコマンドなどでflows.pyを作成
#!/usr/bin/env python3

from PIL import Image
import io, time, gzip
import brotli

def response(flow):
  if "content-type" in flow.response.headers and "content-length" in flow.response.headers:
    ru = str(flow.request.url)
    ae = str(flow.request.headers["accept-encoding"])
    ct = str(flow.response.headers["content-type"])
    cl = int(flow.response.headers["content-length"])
    s = io.BytesIO(flow.response.content)
    s2 = io.BytesIO()
    if (cl) > 10000:

     # jpeg を quality 10/100 に変換する
     if (ct) [0:10] == ("image/jpeg"):
         print("*** start %s ***" % (ru))
         start = time.time()
         img = Image.open(s)
         img.save(s2, "jpeg", quality=10, optimize=True, progressive=True)
         flow.response.content = s2.getvalue()
         ct2 = str(flow.response.headers["content-type"])
         cl2  = int(flow.response.headers["content-length"])
         i = int(cl2 /cl * 100)
         elapsed_time = time.time() - start
         print("*** compressed %s percent, size = %s/%s bytes, %s to %s, %s is processed, %s sec ***" % (i, cl2, cl, ct, ct2, ru, elapsed_time))
         #return

     # png を compress_level=9, 8bit に変換する
     if (ct) [0:9] == ("image/png"):
         print("*** start %s ***" % (ru))
         start = time.time()
         img = Image.open(s).convert(mode='P', palette=Image.ADAPTIVE)
         img.save(s2, "png", compress_level=9, bits=8)
         flow.response.content = s2.getvalue()
         ct2 = str(flow.response.headers["content-type"])
         cl2  = int(flow.response.headers["content-length"])
         i = int(cl2 /cl * 100)
         elapsed_time = time.time() - start
         print("*** compressed %s percent, size = %s/%s bytes, %s to %s, %s is processed, %s sec ***" % (i, cl2, cl, ct, ct2, ru, elapsed_time))
         return

     # webp を quality 10/100 に変換する
     if (ct) [0:10] == ("image/webp"):
         print("*** start %s ***" % (ru))
         start = time.time()
         img = Image.open(s)
         img.save(s2, "webp", quality=10)
         flow.response.content = s2.getvalue()
         ct2 = str(flow.response.headers["content-type"])
         cl2  = int(flow.response.headers["content-length"])
         i = int(cl2 /cl * 100)
         elapsed_time = time.time() - start
         print("*** compressed %s percent, size = %s/%s bytes, %s to %s, %s is processed, %s sec ***" % (i, cl2, cl, ct, ct2, ru, elapsed_time))
         return
mitmdump起動 (1行目ですでに起動しているプロセスを終了、2行目でmitmdumpをバックグラウンド起動、3行目でログ参照の3行セット)
killall -9 mitmdump
nohup mitmdump --listen-port 3126 --ssl-insecure -s flows.py --set stream_large_bodies=10m --ignore-hosts '(mzstatic|apple|icloud|mobilesuica|crashlytic|google-analytics|merpay|paypay|rakuten-bank|fate|colopl|rakuten-sec|line|kyash|plexure)' --set block_global=true --set flow_detail=1 --set http2=false --showhost --rawtcp --mode transparent &
tail -f nohup.out
| 起動オプション | 解説 |
|---|---|
| --listen-port 3126 | 待受ポート 3126 |
| --ssl-insecure | SSLの厳密な確認をスキップ |
| -s flows.py | flows.pyスクリプトを読み込む |
| --set stream_large_bodies=10m | 処理上限を10Mbyteに指定 |
| --ignore-hosts | ホスト名(ドメイン名)にマッチする場合は処理をスキップ |
| --set block_global=true | グローバルアドレスからの接続をブロック(default=true) |
| --set flow_detail=1 | 処理ログの冗長さレベル1 |
| --set http2=false | http2を無効(default=true) |
| --showhost | ログにリクエスト元のホスト名(IPアドレス)を挿入 |
| -rawtcp | 内容を処理できないtcpパケットを透過(Lineが動くようになる) |
| --mode transparent | トランスペアレントモード(VPN経由で接続する場合に指定) |
openvpnインストール (デフォルトでは1194/udpで待受)
wget https://git.io/vpn -O openvpn-install.sh
sudo bash openvpn-install.sh
sudo firewall-cmd --list-ports
netstat -pantu | grep openvpn
マスカレード、NAT追加 (1行目のadd-masqueradeによりVPNからインターネットに接続可能にし、2行目と3行目のnatにより送信先ポート番号80(http)と443(https)からの応答を自サーバのポート3126(mitmdump)にリダイレクトする)
sudo firewall-cmd --permanent --zone=public --add-masquerade
sudo firewall-cmd --permanent --direct --add-rule ipv4 nat PREROUTING 0 -p tcp --dport 80 -j REDIRECT --to-port 3126
sudo firewall-cmd --permanent --direct --add-rule ipv4 nat PREROUTING 0 -p tcp --dport 443 -j REDIRECT --to-port 3126
sudo firewall-cmd --reload
sudo firewall-cmd --direct --get-all-rules
sudo cat /etc/firewalld/direct.xml
あとは、openvpnのclient.ovpnをgmail等を経由してiPhoneのOpenVPNクライアントに導入する。
safariから証明書サイトにアクセスして証明書をインストール http://mitm.it
証明書を信頼する (iPhone: 設定 -> 一般 -> 情報 -> 証明書信頼設定 -> ルート証明書を全面的に信頼する)
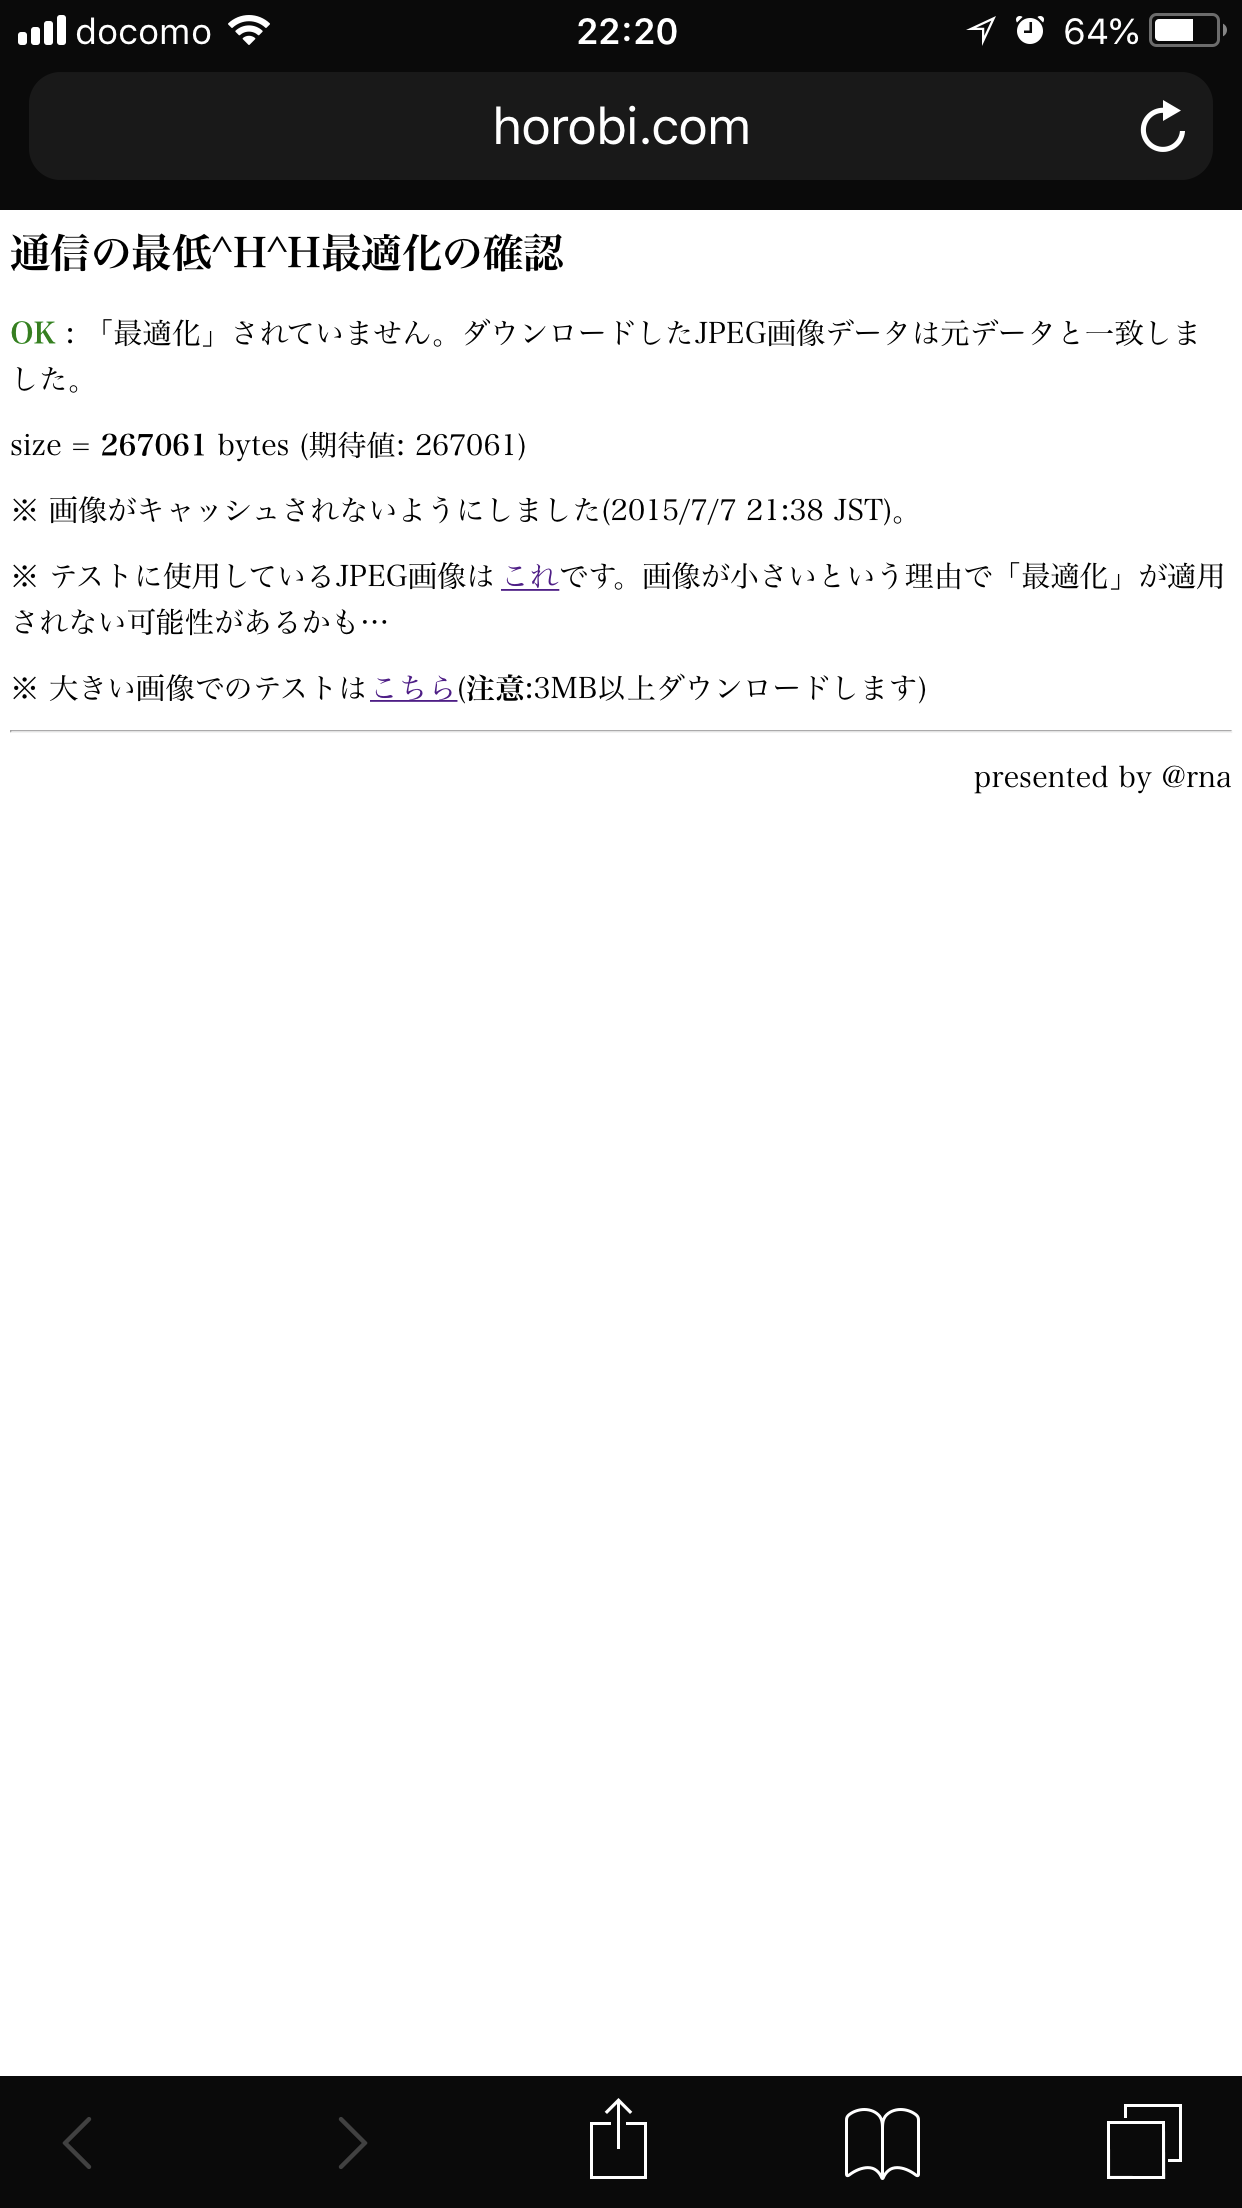
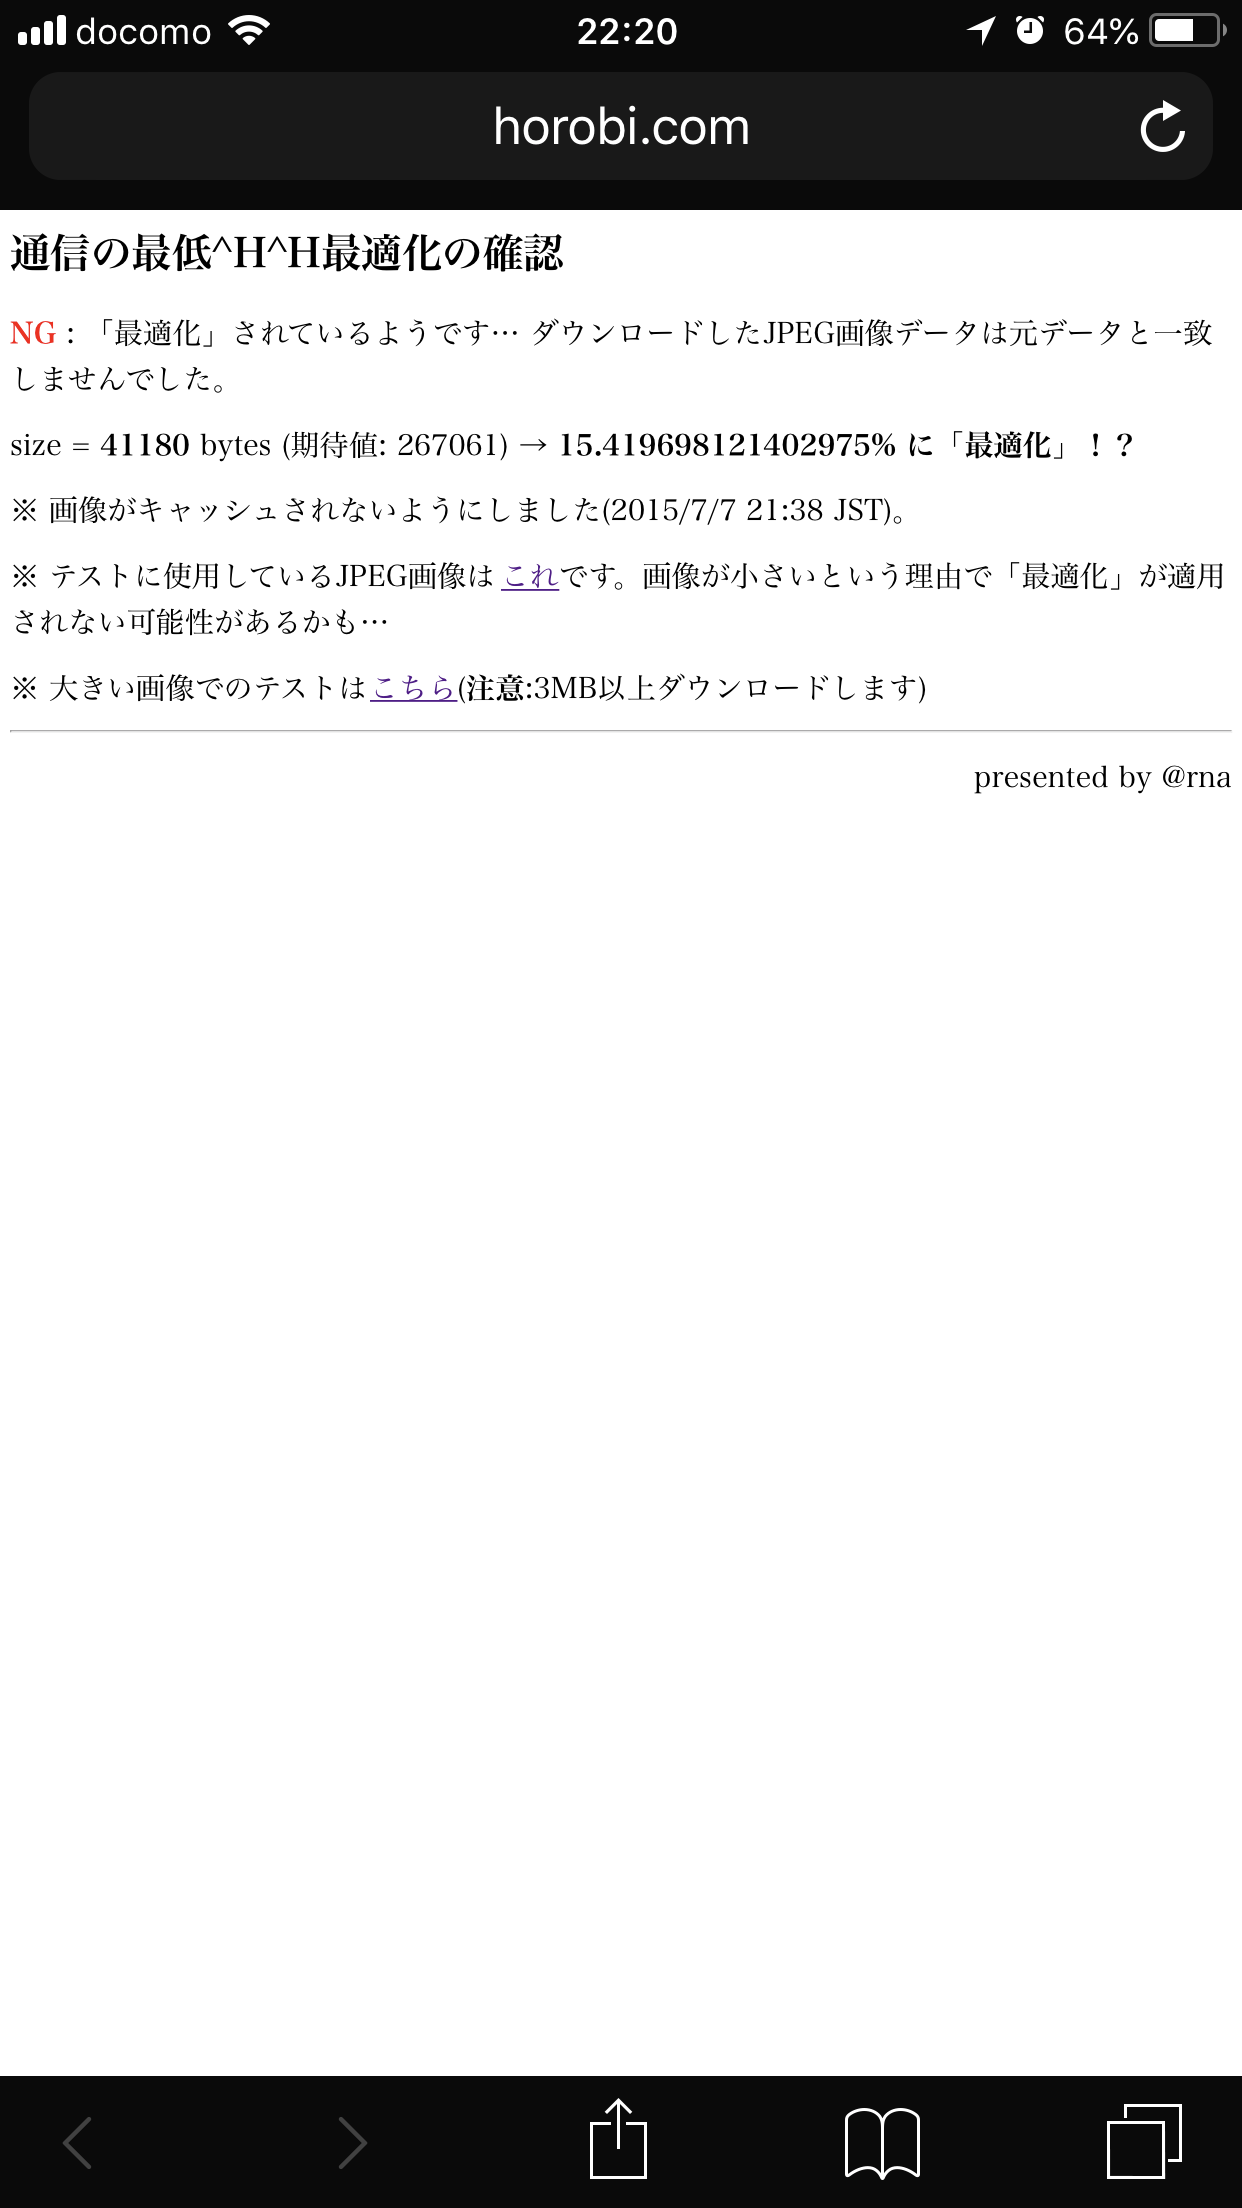
通信の最適化確認サイトでテスト、元画像の約20パーセントの容量になることを確認 http://horobi.com/Saiteika/
おまけ
openvpnのtcp/udp、portを変更したい場合は、server.confとclient.ovpnの内容をそれぞれ編集する。client.ovpnは別名で保存すると、OpenVPNクライアント内でプロファイルを分けることができる。(port 53/udpに変更すると、公衆無線LANが繋がりやすくなるかも?)
sudo vi /etc/openvpn/server/server.conf
sudo systemctl restart openvpn@server.service
sudo firewall-cmd --add-port=53/tcp --add-port=53/udp --permanent
sudo firewall-cmd --reload
sudo firewall-cmd --direct --get-all-rules
vi client.ovpn
TCP接続のOpenVPNが速くなるかもしれないTCP BBRを導入するには以下。
wget https://github.com/teddysun/across/raw/master/bbr.sh
chmod +x ./bbr.sh
sudo ./bbr.sh
特定サイトにつながらないときにログを見ると、以下のようなサイトとのハンドシェイクに失敗を示すログが出力されていることがある。この場合は、ignore-hostsに追加するとつながるようになる。
# 10.8.0.2:51729: Client Handshake failed. The client may not trust the proxy's certificate for mopfd.plexure.io.
なお、abematvはVPSサーバからの接続の場合は海外からの接続とみなしている模様のため、サービスを利用できない。
以下、更新前の古い情報です。
作り方(今はもう動かない旧版)
- Python環境構築用のシェルをダウンロード wget https://repo.continuum.io/miniconda/Miniconda3-latest-Linux-x86_64.sh
- シェル実行 sh ./Miniconda3-latest-Linux-x86_64.sh
- バージョン3.6以上であることを確認 python -V
- Pythonパッケージ管理システムでmitmproxyとpillow-simdとbrotliをインストール pip3 install mitmproxy pillow-simd brotli
- mitmproxy用のデータ圧縮スクリプトを作成(内容は後述) vi flows.py
- mitmproxyのCLIバージョンを起動 nohup mitmdump --listen-port 3126 --ssl-insecure -s flows.py --set stream_large_bodies=10m --ignore-hosts '(mzstatic.com|apple.com|icloud.com|mobilesuica.com|crashlytics.com|google-analytics.com)' --anticomp --set block_global=false --set flow_detail=2 &
- ポート3129でLISTENしていることを確認 lsof -i | grep mitm
- ログ確認 tail -f nohup.out
- スマホメールにプロキシサーバを追記したプロファイルを送付し導入するか、wifiにプロキシを設定する
- ブラウザから証明書サイトにアクセスして証明書をインストール http://mitm.it
- 証明書を信頼する (iPhone: 設定 -> 一般 -> 情報 -> 証明書信頼設定 -> ルート証明書を全面的に信頼する)
- 通信の最適化確認サイトでテスト、元画像の約20パーセントの容量になる http://horobi.com/Saiteika/
- 終了するとき pkill -9 mitm
#!/usr/bin/env python3

from PIL import Image
import io, time, gzip
import brotli

def response(flow):
  if "content-type" in flow.response.headers and "content-length" in flow.response.headers:
    ru = str(flow.request.url)
    ae = str(flow.request.headers["accept-encoding"])
    ct = str(flow.response.headers["content-type"])
    cl = int(flow.response.headers["content-length"])
    s = io.BytesIO(flow.response.content)
    s2 = io.BytesIO()
    if (cl) > 100:

     # 画像を jpeg quality 10/100 に変換する
     if (ct) [0:6] == ("image/") and (cl) > 1000 and (ct) [0:9] != ("image/svg"):
         start = time.time()
         if (ct) [0:9] == ("image/png"):
           img = Image.open(s)
           if img.mode == 'RGBA' or "transparency" in img.info:
             img.save(s2, "png", optimize=True, bits=8)
           else:
             img = Image.open(s).convert("RGB")
             img.save(s2, "jpeg", quality=10, optimize=True, progressive=True)
             flow.response.headers["content-type"] = "image/jpeg"
         else:
           img = Image.open(s).convert("RGB")
           img.save(s2, "jpeg", quality=10, optimize=True, progressive=True)
           flow.response.headers["content-type"] = "image/jpeg"
         flow.response.content = s2.getvalue()
         ct2 = str(flow.response.headers["content-type"])
         cl2  = int(flow.response.headers["content-length"])
         i = int(cl2 /cl * 100)
         elapsed_time = time.time() - start
         print("*** compressed %s percent, size = %s/%s bytes, %s to %s, %s is processed, %s sec ***" % (i, cl2, cl, ct, ct2, ru, elapsed_time))
         return

     # スキームが http のテキストを gzip 圧縮する
     elif flow.request.scheme == "http" and not "content-encoding" in flow.response.headers:
         flow.response.headers["content-encoding"] = "none"
         if (ct) [0:5] == ("text/") or (ct) [0:12] == ("application/") or (ct) [0:9] == ("image/svg"):
             start = time.time()
             gz = gzip.GzipFile(fileobj=s2, mode='w')
             gz.write(flow.response.content)
             gz.close()
             flow.response.content = s2.getvalue()
             ce = str(flow.response.headers["content-encoding"])
             flow.response.headers["content-encoding"] = "gzip"
             ct2 = str(flow.response.headers["content-type"])
             cl2 = int(flow.response.headers["content-length"])
             ce2 = str(flow.response.headers["content-encoding"])
             i = int(cl2 / cl * 100)
             elapsed_time = time.time() - start
             print("*** compressed %s percent, size = %s/%s bytes, %s to %s, %s to %s, %s is processed, %s sec ***" % (i, cl2, cl, ct, ct2, ce, ce2, ru, elapsed_time))
#             return

     # スキームが https のテキストを brotli 圧縮する
     elif flow.request.scheme == "https" and not "content-encoding" in flow.response.headers:
         flow.response.headers["content-encoding"] = "none"
         if (ct) [0:5] == ("text/") and (ct) [0:10] != ("text/plain") and (ct) [0:9] != ("text/html") or (ct) [0:12] == ("application/") and (ct) [0:16] != ("application/json") or (ct) [0:9] == ("image/svg"):
             start = time.time()
             s2 = flow.response.content
             s3 = brotli.compress(s2, quality=10)
             flow.response.content = s3
             ce = str(flow.response.headers["content-encoding"])
             flow.response.headers["content-encoding"] = "br"
             ct2 = str(flow.response.headers["content-type"])
             cl2 = int(flow.response.headers["content-length"])
             ce2 = str(flow.response.headers["content-encoding"])
             i = int(cl2 / cl * 100)
             elapsed_time = time.time() - start
             print("*** compressed %s percent, size = %s/%s bytes, %s to %s, %s to %s, %s is processed, %s sec ***" % (i, cl2, cl, ct, ct2, ce, ce2, ru, elapsed_time))
#             return

     else:
         ce = str(flow.response.headers["content-encoding"])
         print("*** %s, %s, %s, %s is not processed ***" % (ce, ct, cl, ru))
注意点
- セキュリティのリスクは高まるので、自分専用で実験用に使う
- 透過gif,pngは背景が黒になる、アニメーションはしなくなるのは割り切る → 透過 png は別処理を追加することで対応しました
- Certificate pinning対応のサイトにはつながらない → --ignore-hostsオプションで復号せずに中継させる https://docs.mitmproxy.org/stable/howto-ignoredomains/
- アプリのパッチダウンロードでエラーが出る → --anticompオプションを外す、flows.pyからテキスト圧縮処理を消す(必要に応じて配信側でgzip圧縮していることも多いし、FGOが起動できなくなったりと不具合も多いので、テキスト圧縮は外した方が良いです)
おわりに
作成したProxyはiPhoneからmineoの低速モードで使っていますが、google mapの検索が2回ほど失敗する程度で、ほぼ不自由なく利用できています。
今回Pythonのコードを生まれて初めて書きました。GW中の暇を利用して、iPhoneからTermiusというアプリでサーバにssh接続、safariで検索という環境でトライアンドエラーしました。
コード書きにあたっては、QiitaのPython先輩方、オライリー・ジャパン発刊「Pythonチュートリアル 第3版」を参考にさせていただきました。
リファレンス
https://mitmproxy.org/
https://docs.mitmproxy.org/stable/
http://pillow.readthedocs.io/en/5.1.x/handbook/image-file-formats.html
http://pillow.readthedocs.io/en/latest/reference/Image.html
http://yalis.fr/cms/index.php/post/2014/01/23/Compress-the-mobile-web-even-further-both-HTTP-and-HTTPS
https://conda.io/miniconda.html
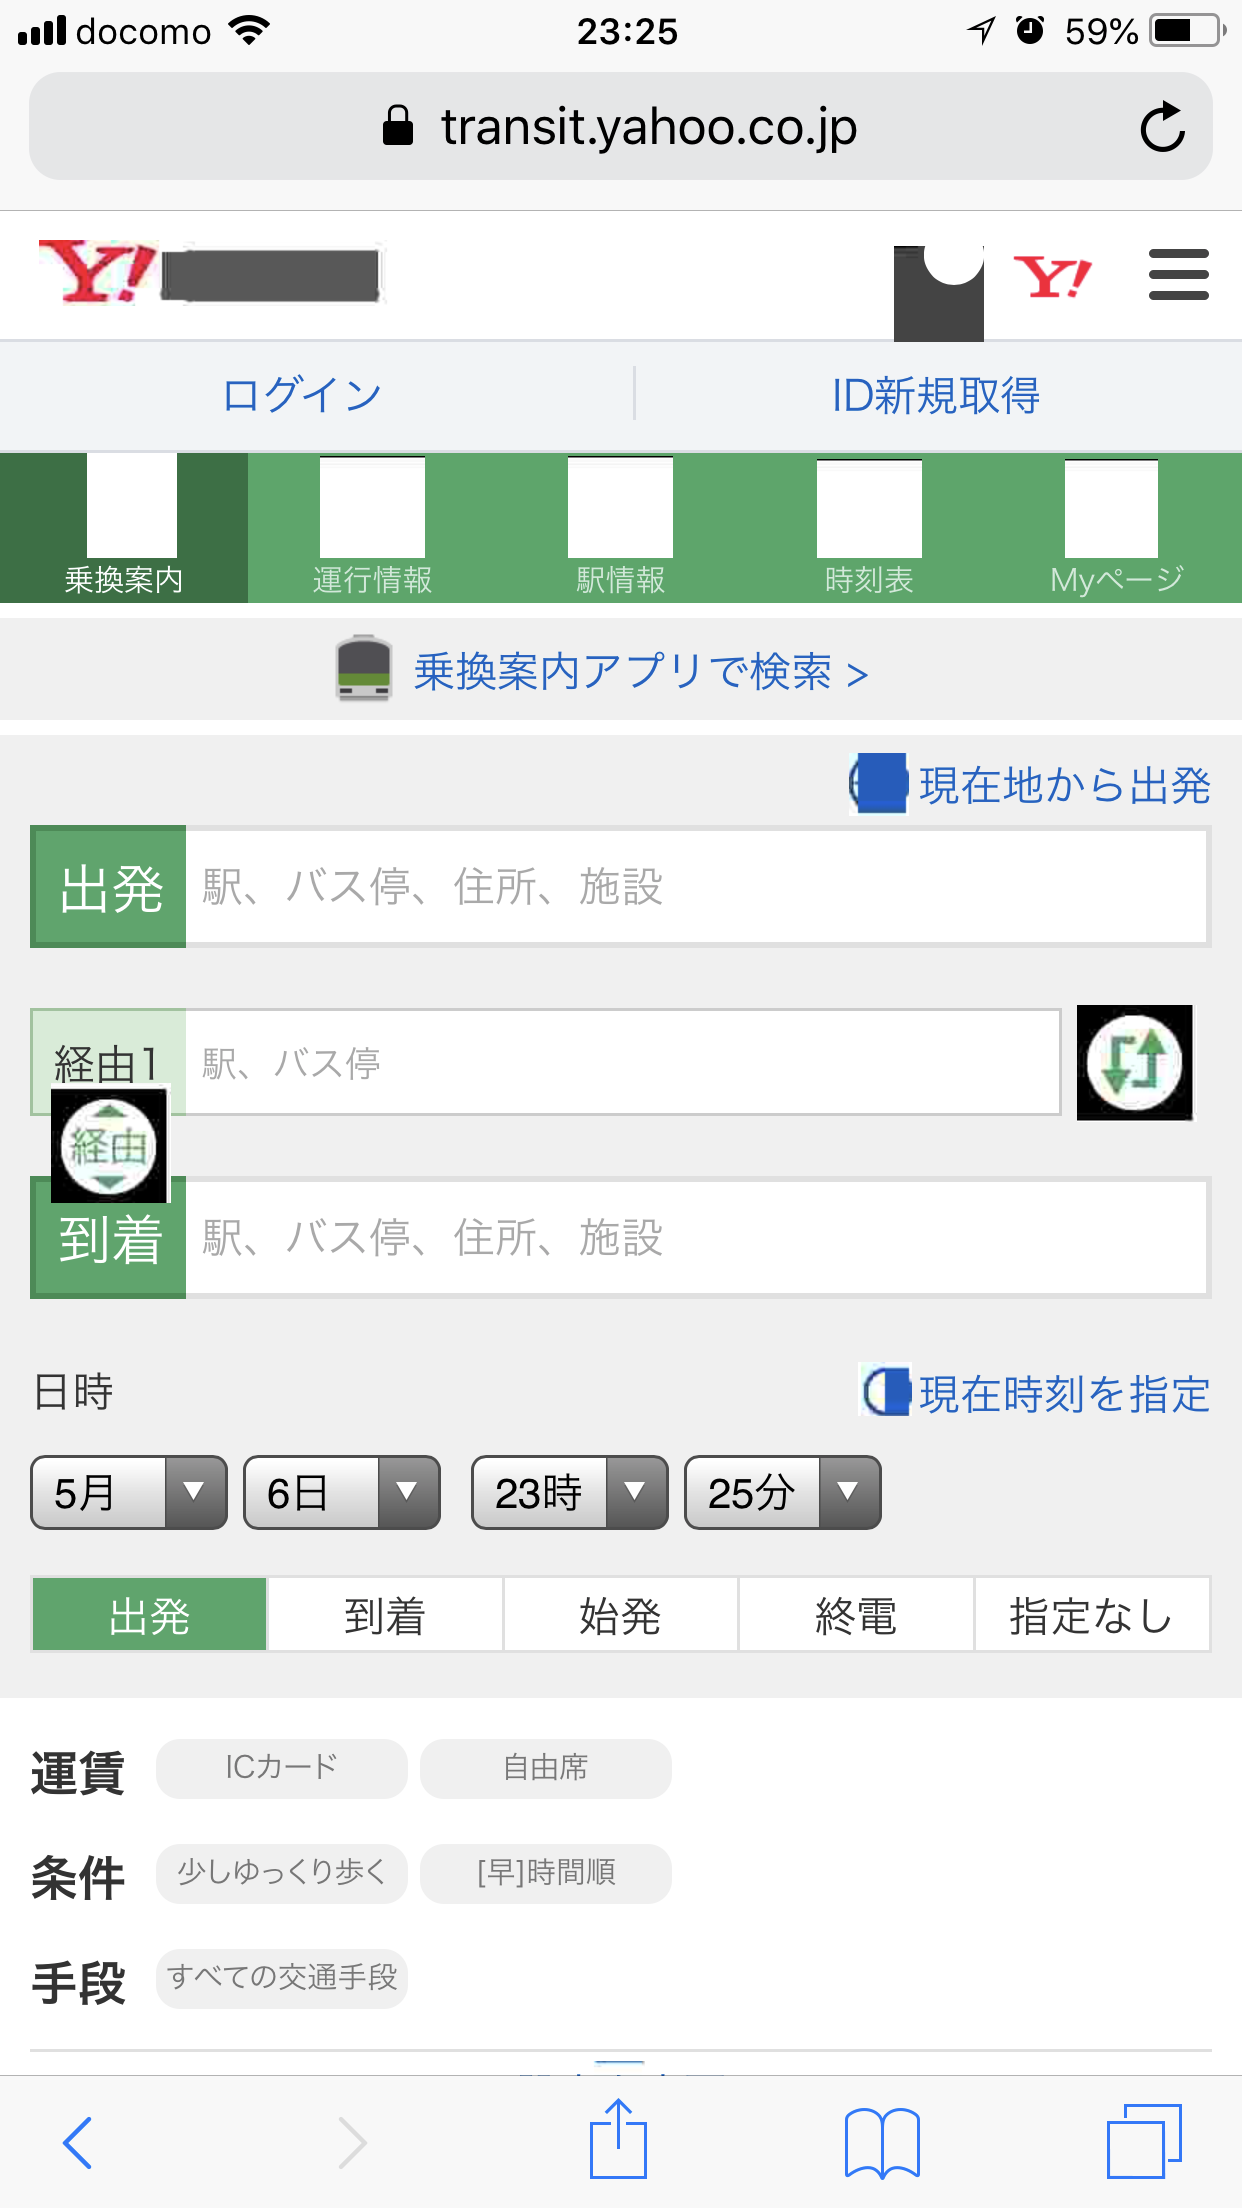
スクリーンショット
左:未圧縮 右:圧縮


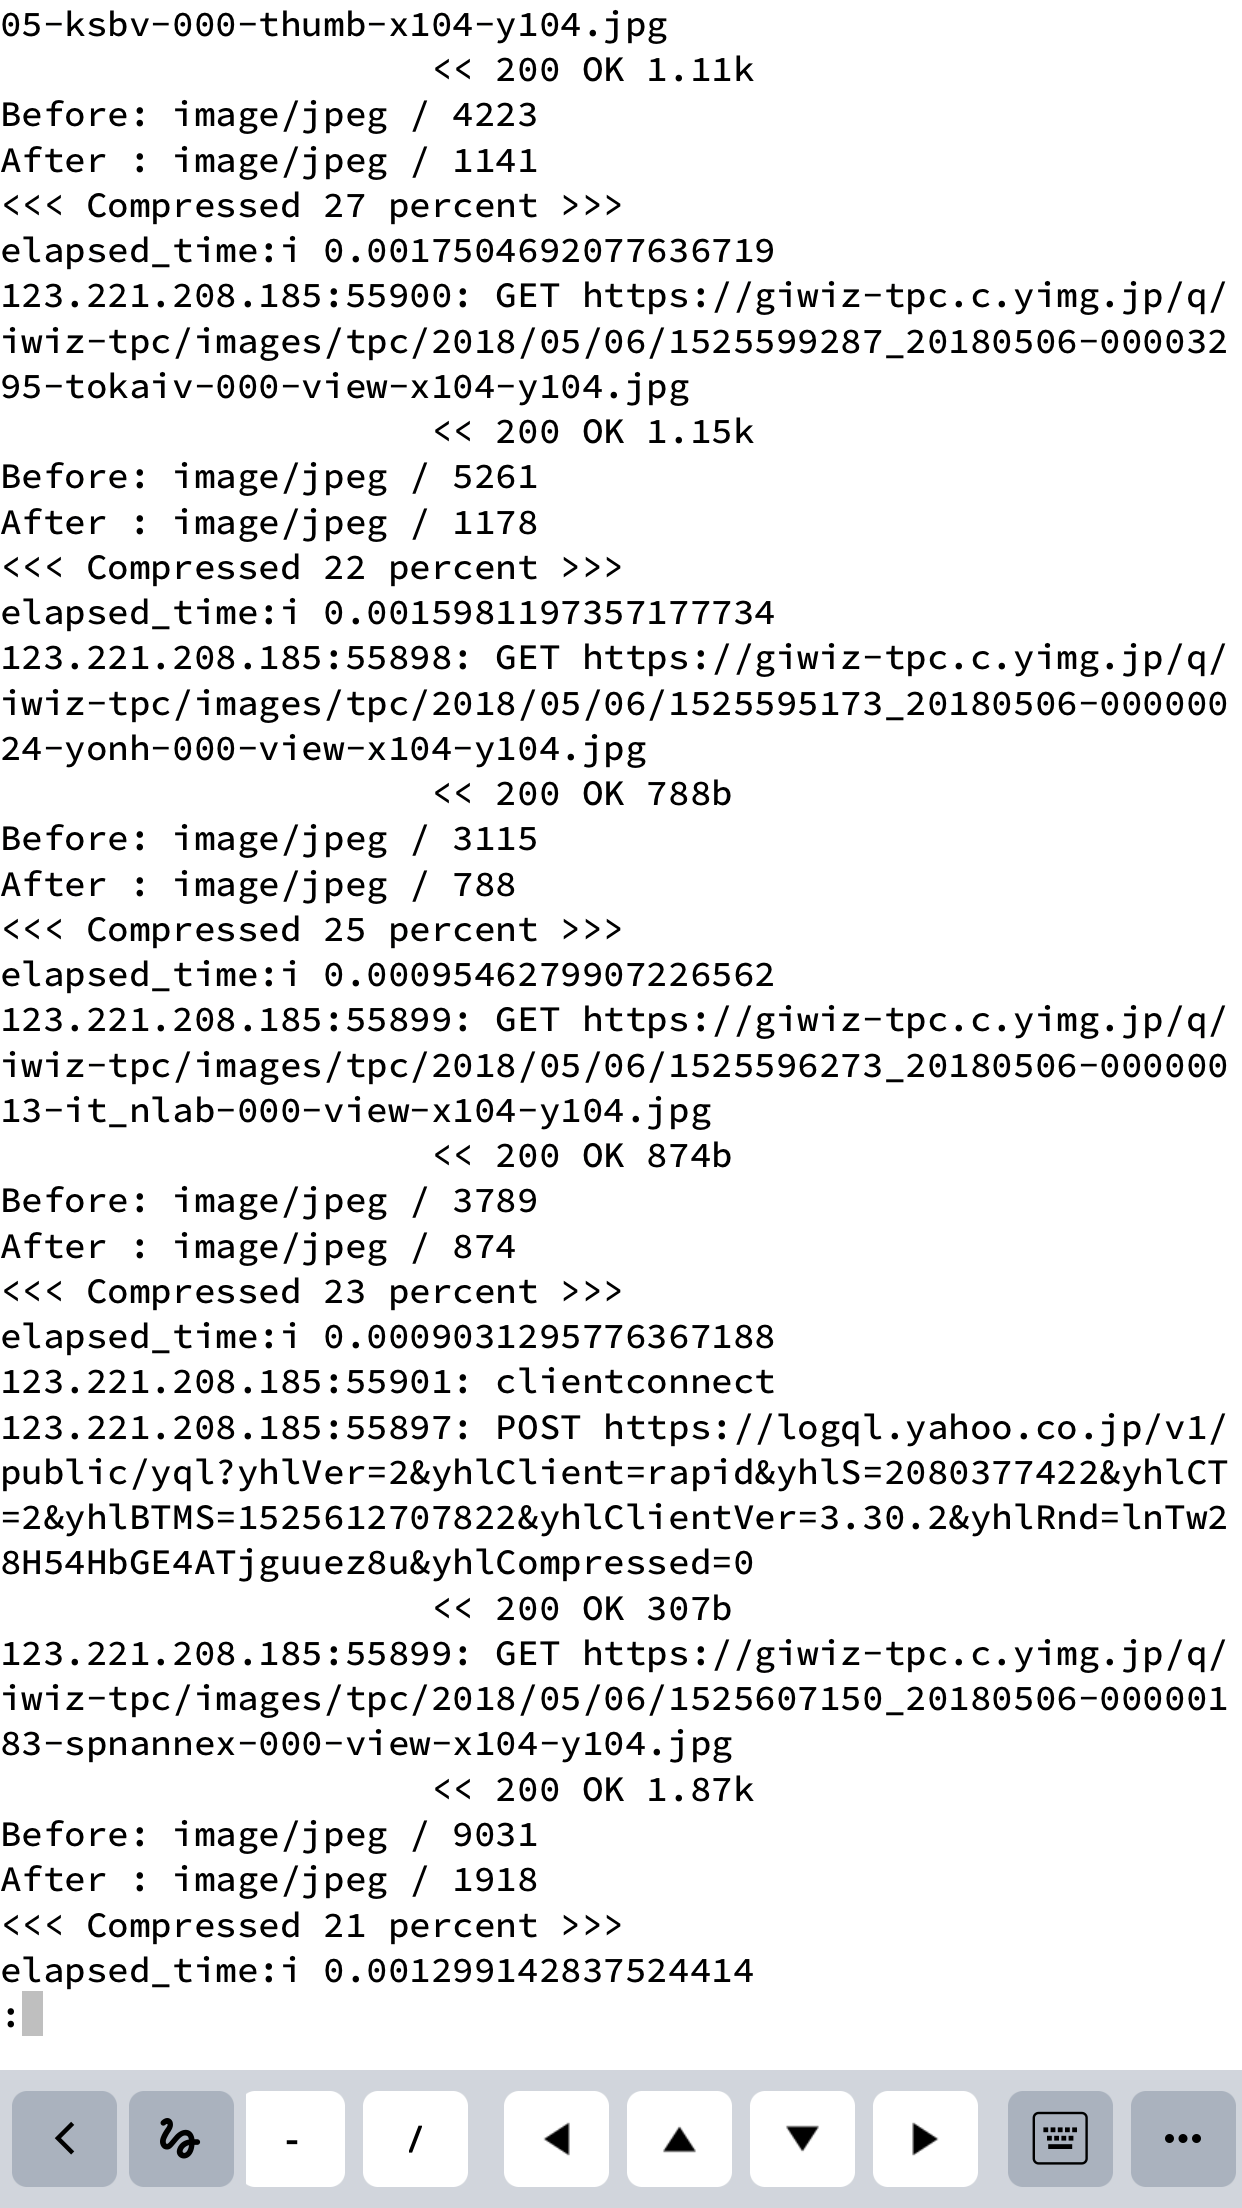
ログ