はじめに
CAPでPrincipal Propagationの宛先を使用してODataサービスを呼ぶ場合、リクエストヘッダにユーザのJWT (JSON Web Token) を設定する必要があります。BTPにデプロイされたサービスではApprouterが自動でJWTを取得・設定してくれるので問題ありませんが、BASでテストする場合にどうしたらよいか、というのが本記事のテーマです。
検証をしていたところ、途中からなぜか特別な設定をしなくてもハイブリッドモードでPrincipal Propagationができるようになりました。リモートサービスにアクセスするときに以下のエラーが出る場合は、本記事の設定を行ってみてください。

ベースとなるプロジェクトの設定
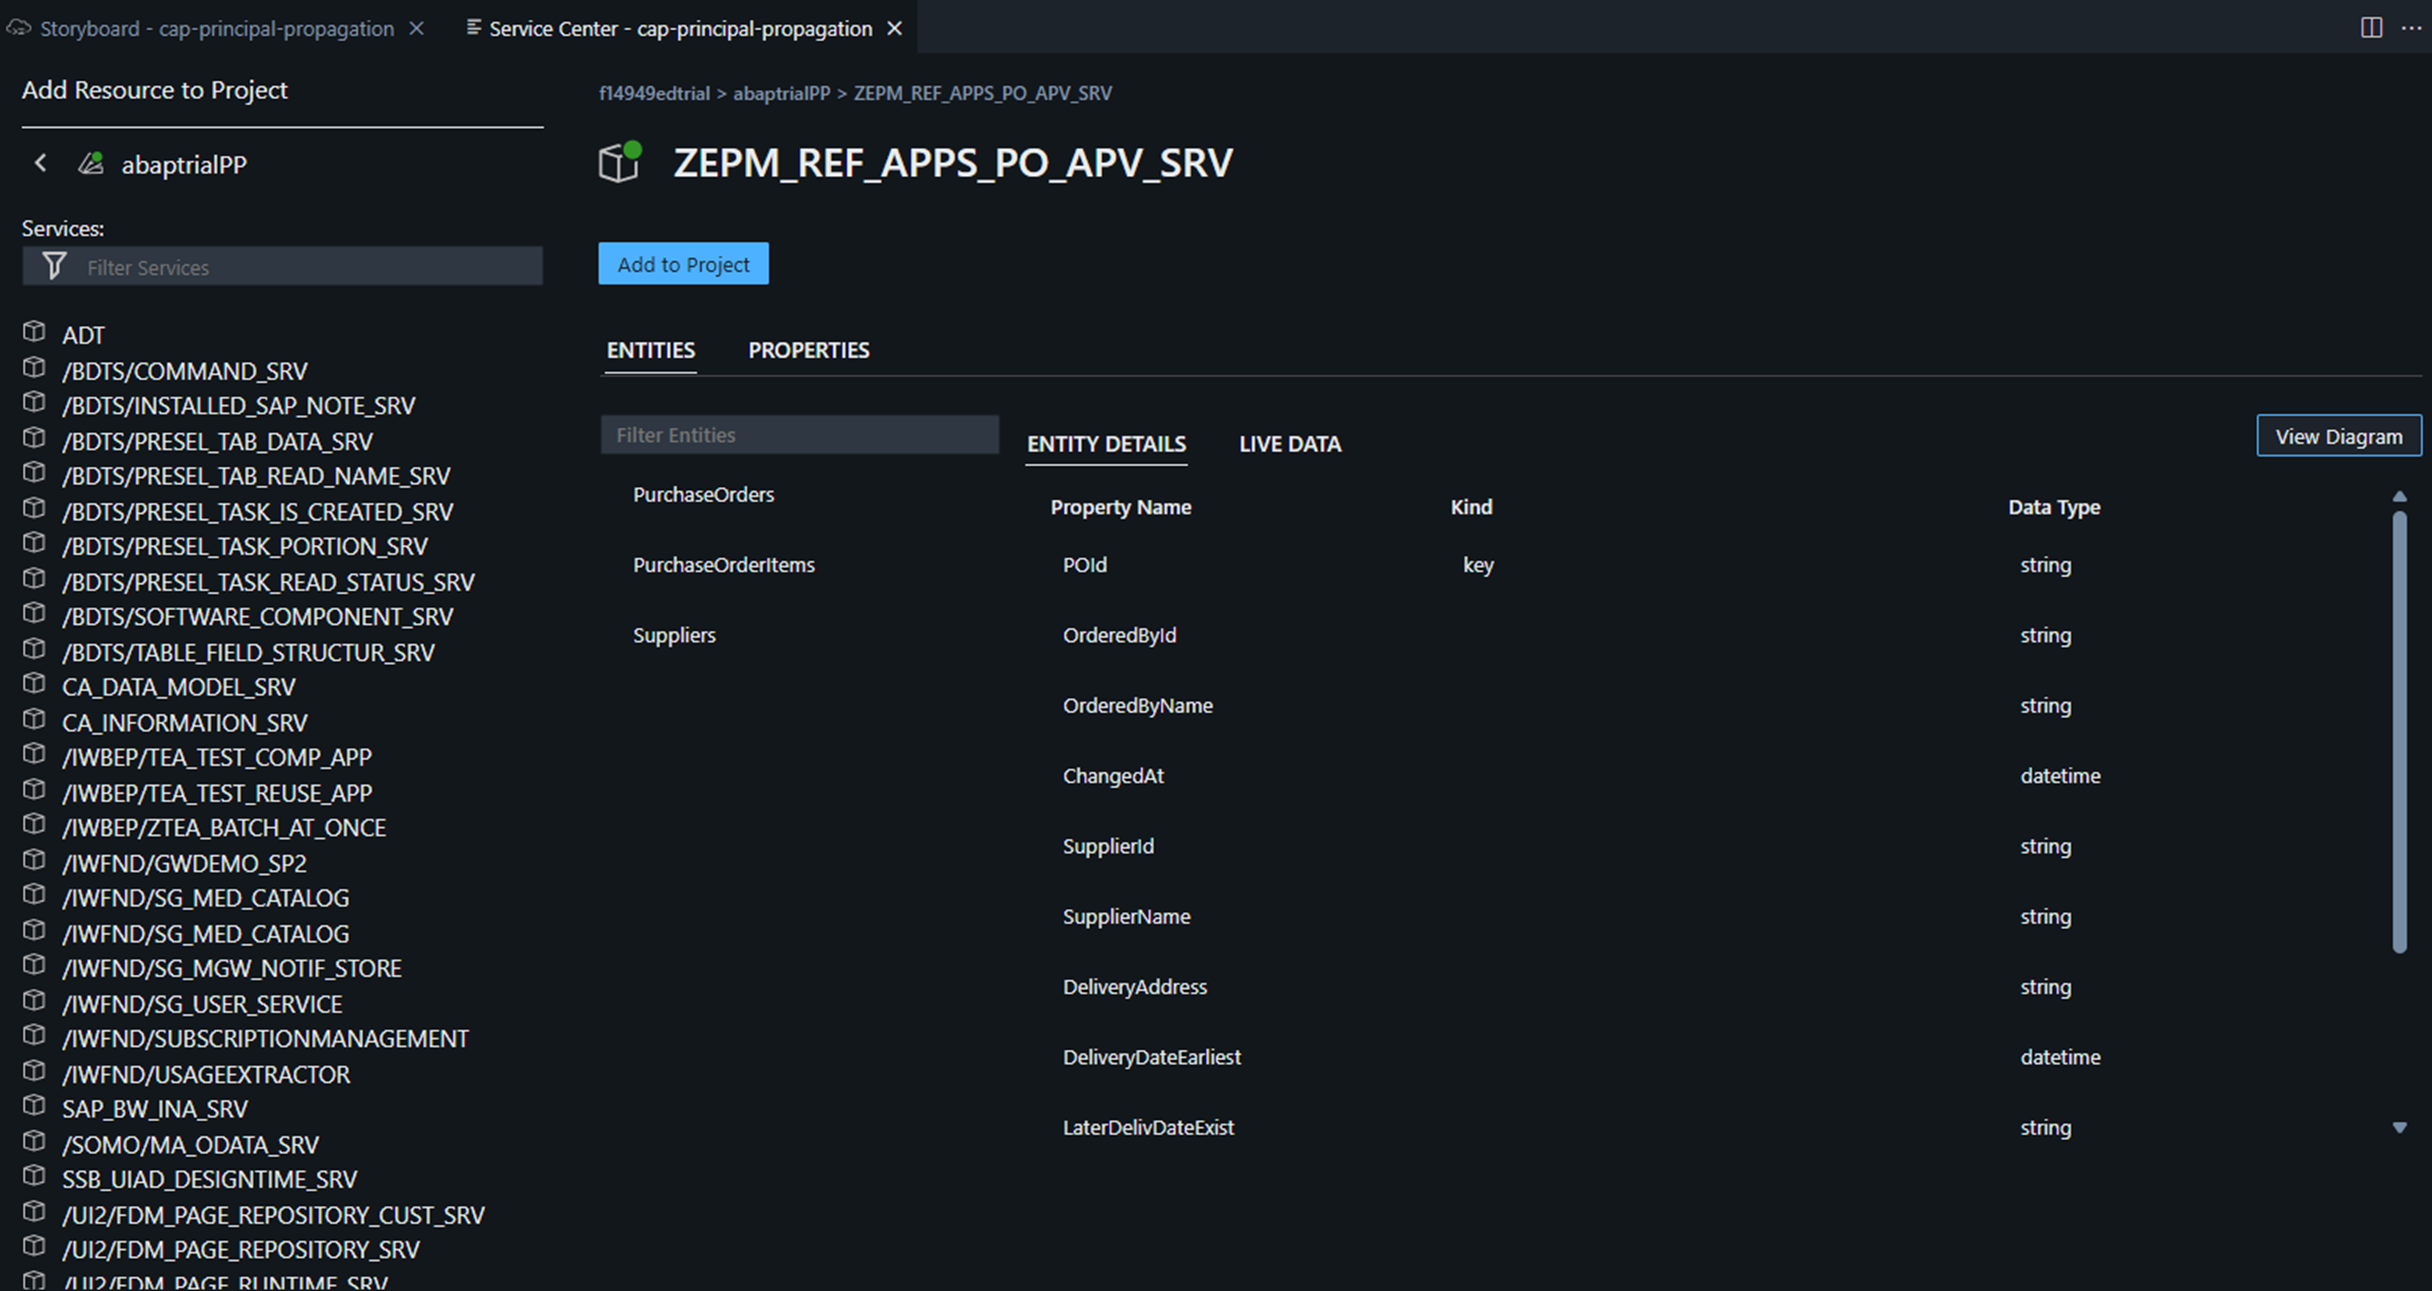
CAPのプロジェクトを作成し、BASのService CenterからEPM_REF_APPS_PO_APV_SRVというサービスを取り込みました。DestinationにPrincipal Propagation用のものを選択します(※)。
※Principal Propagation用のDestinationは以下の記事で登録
サービス定義
using { ZEPM_REF_APPS_PO_APV_SRV as external } from './external/ZEPM_REF_APPS_PO_APV_SRV';

service MyService {
    entity PurchaseOrders as projection on external.PurchaseOrders;
}
イベントハンドラ定義
const cds = require('@sap/cds')

module.exports = class MyService extends cds.ApplicationService { async init() {

  const { PurchaseOrders } = cds.entities('MyService')
  const apvService = await cds.connect.to('ZEPM_REF_APPS_PO_APV_SRV');

  this.on ('READ', PurchaseOrders, req => {
    return apvService.run(req.query);
  })


  return super.init()
}}
package.jsonの設定
  "cds": {
    "requires": {
      "ZEPM_REF_APPS_PO_APV_SRV": {
        "kind": "odata-v2",
        "model": "srv/external/ZEPM_REF_APPS_PO_APV_SRV",
        "[production]": {
          "credentials": {
            "destination": "abaptrialPP",
            "path": "/sap/opu/odata/sap/EPM_REF_APPS_PO_APV_SRV"
          }
        },
        "csrf": true,
        "csrfInBatch": true
      }
デプロイ
上記の状態でいったんデプロイし、hybridテストに必要なサービスインスタンスを作成します。
//必要な設定を追加
cds add xsuaa --for prduction
cds add connectivity //オンプレの宛先を使用するため
cds add mta
PostmanおよびApprouterからのリダイレクトを許可するため、mta.yamlのXSUAAのサービスインスタンスの設定でredirect-urisを追加します。
resources:
  - name: cap-principal-propagation-auth
    type: org.cloudfoundry.managed-service
    parameters:
      service: xsuaa
      service-plan: application
      path: ./xs-security.json
      config:
        xsappname: cap-principal-propagation-${org}-${space}
        tenant-mode: dedicated
        oauth2-configuration:
          redirect-uris:
            - https://*~{app-api/app-uri}/**
            - https://oauth.pstmn.io/v1/browser-callback #Postman用
            - https://*.applicationstudio.cloud.sap/login/callback #Approuter用
    requires:
デプロイ
npm install
cds up
ハイブリッド実行用の設定
DestinationとConnectivityのサービスをバインドします。
cds bind -2 <Destinationのサービスインスタンス>,<Connectivityのサービスインスタンス>
Cloud Connector経由での接続になるため、プロジェクトのルートに以下の内容で.envファイルを作成します。
destinations='[{"name":"<Destination名>","url":"https://<Destination名>.dest","proxyHost":"http://127.0.0.1","proxyPort":"8887"}]'
ハイブリッド実行
以下のコマンドで、ハイブリッドモードで実行します。
cds watch --profile hybrid
BASでPrincipal Propagation用の宛先を使用する方法
以下の方法が考えられます。
- JWTをマニュアルで取得してリクエストヘッダに設定
- スタンドアロンApptouerを介してサービスにアクセス
1. JWTをマニュアルで取得してリクエストヘッダに設定
.httpファイルを使用してテストする場合はこの方法を使います。JWTはPostmanを使用して取得します。JWTを取得するためにAuthorization Codeを使用した認証が必要で、.httpファイルではできないためです。
1.1. CAPにバインドされたXSUAAのサービスキーを登録
以下のコマンドでサービスキーを登録します。
cf create-service-key <xsuaaサービスインスタンス名> <サービスキー名>
cf service-key <xsuaaサービスインスタンス名> <サービスキー名> //登録されたサービスキーを確認
Postmanでリクエストを作って、Authorizationタブで以下の設定を行います。
| 項目 | 設定値 |
|---|---|
| Auth Type | OAuth 2.0 |
| Auth URL |
<サービスキーのcredentials.url>/oauth/authorize |
| Access Token URL |
<サービスキーのcredentials.url>/oauth/token |
| Client ID | <サービスキーのcredentials.clientid> |
| Client Secret | <サービスキーのcredentials.clientsecret> |
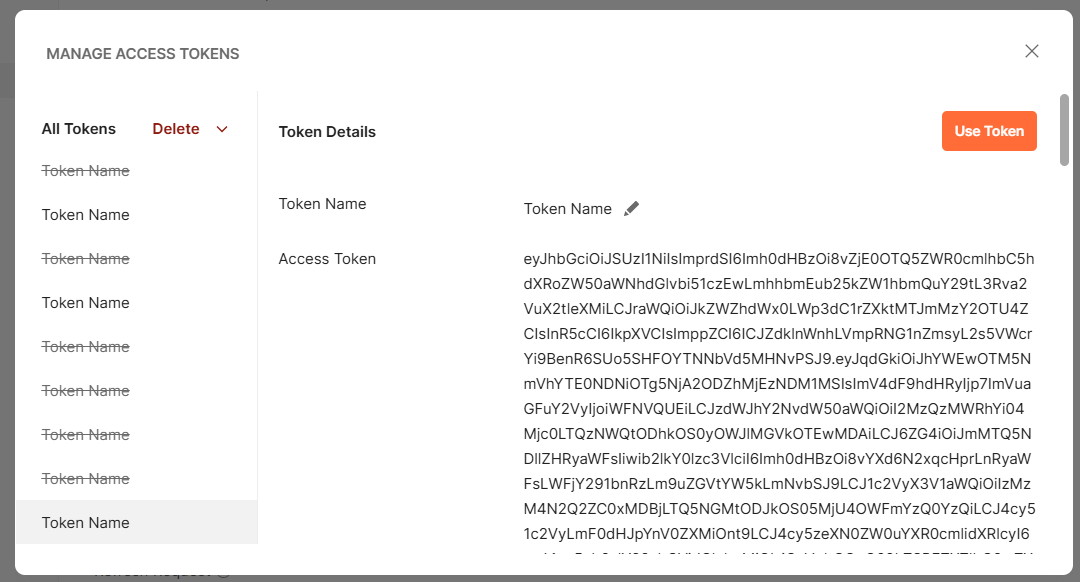
Get New Acces TokenをクリックするとBTPの認証画面が表示されます。認証が完了するとトークンが表示されるのでこれをコピーします。
.httpファイルを以下のように設定します。
@server=http://localhost:4004
@token=<コピーしたトークン>

### PurchaseOrders
# @name PurchaseOrders_GET
GET {{server}}/odata/v4/my/PurchaseOrders
Authorization: Bearer {{token}}
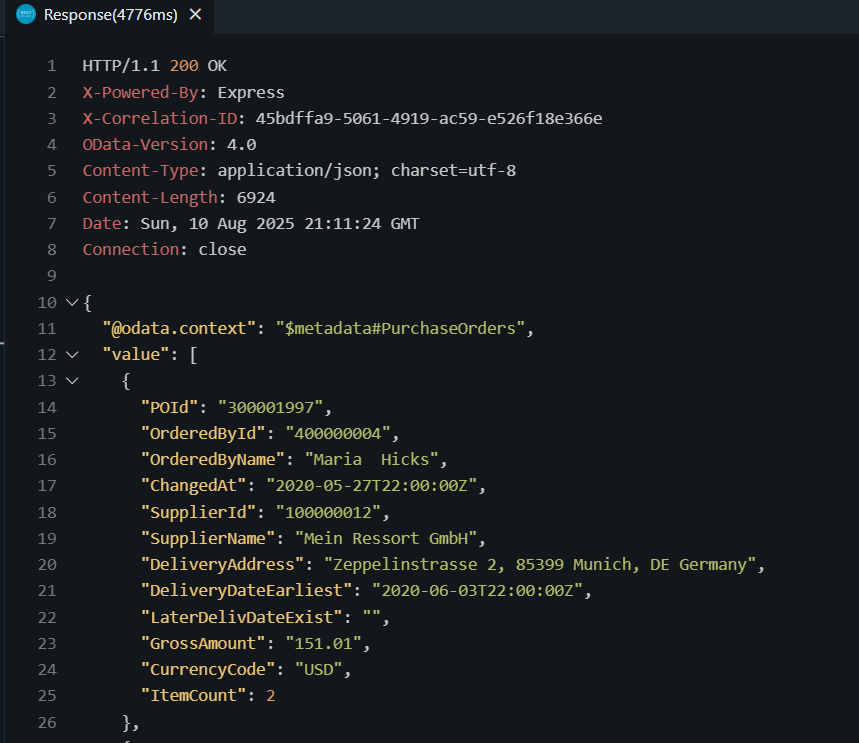
リクエストを実行し、レスポンスが返ってくることを確認します。
2. スタンドアロンApptouerを介してサービスにアクセス
プロジェクトにUIを含む場合、スタンドアロンApprouterを利用してリクエストヘッダにJWTを差し込みます。
2.1. Approuterを追加
cds add approuter
デプロイ先でManaged Approuterを使用する場合、このApprouterはデプロイ不要なのでmta.yamlから削除しておきましょう。
2.2. default-services.jsonファイルを追加
Approuterをローカルで動かす際にXSUAAを使用して認証するため、app/router配下にdefault-services.jsonを追加します。"uaa"にXSUAAのサービスキーから取得した認証情報(credentialsの内容)を設定します。
{
    "uaa": {
      "apiurl": "https://api.authentication.us10.hana.ondemand.com",
      "clientid": "sb-cap-principal-propagation-f14949edtrial-dev!t462905",
      "clientsecret": "xxx",
      "credential-type": "binding-secret",
      "identityzone": "f14949edtrial",
      "identityzoneid": "63431dab-8274-435d-88d9-29be0ed91000",
      "sburl": "https://internal-xsuaa.authentication.us10.hana.ondemand.com",
      "serviceInstanceId": "4aff9f0e-e276-48e2-8aab-00994137c7e9",
      "subaccountid": "63431dab-8274-435d-88d9-29be0ed91000",
      "tenantid": "63431dab-8274-435d-88d9-29be0ed91000",
      "tenantmode": "dedicated",
      "uaadomain": "authentication.us10.hana.ondemand.com",
      "url": "https://f14949edtrial.authentication.us10.hana.ondemand.com",
      "verificationkey": "-----BEGIN PUBLIC KEY-----\nMIIBIjANBgkqhkiG9w0BAQEFAAOCAQ8AMIIBCgKCAQEArpzVeim1jpx5jOVg1otQ\n/AFd0Lr3wxtjWC4AKNq80cD7huucHJeZb+9K49IV/RjMXCnjC71aFdEtgPpfUGex\n7/akoSBpRSc5dTWLNtpvK7VVE36YkyQkJfUWVH8IMOwoTs28lzekNZqkE+HMQT9o\nNepS/SJec8/LjJELm6L+IiAPSjit9c5ddoc7uS/UyOV9tZkXI1tDhUKYkt2HdGYw\nPwSYnrzaokrXqepeAkGsAG+H0Lt+2SGFIntzkj2SNEDzOvJZVYVLBnOI0UbqWtot\nDqgAGd6jgu5/eBP+13Xm53YfS76PDzGMEA386gkUjpCoNZLy4nTPSNmfZqOjiH55\niwIDAQAB\n-----END PUBLIC KEY-----",
      "xsappname": "cap-principal-propagation-f14949edtrial-dev!t462905",
      "zoneid": "63431dab-8274-435d-88d9-29be0ed91000"
    }
  }
2.3. Approuterを起動
Approuterのディレクトリ(app/router)に移動し、Approuterを起動します。
cd app/router
npm start
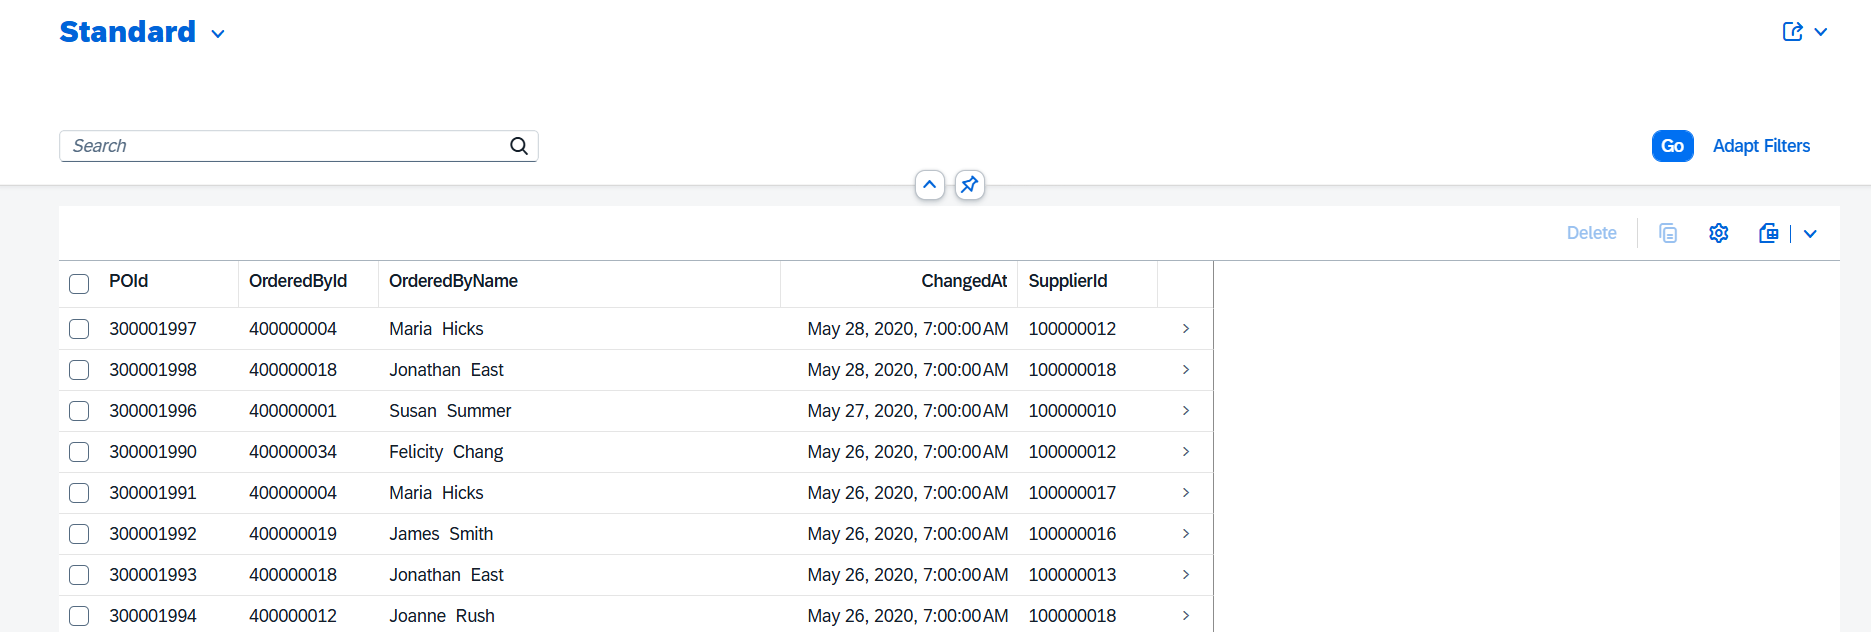
ブラウザからApprouterにアクセスするとCAPのテスト用画面が開きます。ここからUIにアクセスします。

"Go"ボタンを押すとレコードが取得できます。