- 1回目: 開発環境の準備
- 2回目: Hello Worldプロジェクト
- 3回目: PSのGPIOでLチカ
- 4回目: PLのAXI GPIOでPSからLチカ
- 5回目: PLだけでLチカ
- 6回目: 自作IPでLチカ
- 7回目: ブートイメージを作る
- 8回目: Linux起動する <--- 今回の内容
- 9回目: Linuxカーネルを少しカスタマイズする
- 10回目: LinuxのRootFSをカスタマイズする / PythonでHello World
- 11回目: LinuxユーザアプリケーションでLチカ
- 12回目: LinuxカーネルモジュールでLチカ
- 13回目: LAN(Ethernet 0)を使う
- 14回目: Linuxユーザアプリをデバッグする / RootFSに取り込む
- 15回目: Linux起動時にアプリケーションを自動実行させる
- 16回目: Linuxから自作IPをUIOで制御する
- 17回目: Linuxで自作IPのデバイスドライバを作る
- 18回目: IoT化してスマホからLチカ
この記事の内容を3分で見る ( https://youtu.be/ARlSAwkGriE )
環境
- 開発用PC: Windows 10 64-bit
- Vivado 2017.4 WebPACKライセンス
- Xilinx SDK 2017.4 <- 今回は使わない
- 開発用PC (Linux): Ubuntu 16.04 本家 (日本語版じゃない) (on VirtualBox 5.2.4)
- PetaLinux 2017.4
- ターゲットボード: ZYBO (Z7-20)
Windows環境は1回目を参照。
Linux起動する
今までSDKでプロジェクトを作るとき、OS Platformにはstandaloneを指定していました。そのため、OSなしの環境(ベアメタル環境)となっていました。今回は、Linuxのイメージファイルを作って起動確認するところまでをやります。
(ちなみに、RTOSを使いたい場合は、SDKでOS Platformとしてfreertosを選ぶだけでOKです。Free RTOS用ライブラリを含むbspプロジェクトと、タスクが2個あるサンプルプロジェクトが作られます。)
PetaLinuxツール
一般的に、オリジナルボードのLinuxシステムの構築には、Yocto Projectを使うようです。Zynqでは、XilinxからPetaLinuxというLinuxシステム開発キットが用意されているので、それを使います。
結局、PetaLinux内部で、Yoctoを使用しているようです。
紛らわしいのですが、PetaLinuxというのはあくまでツール名であって、Linuxの名称(Ubuntu等)ではありません。(SDKといい、HLx、HLSといい、Xilinxの付ける名前はセンスがないというか、紛らわしいのが多い。。。)
PetaLinuxツールをインストールする
基本的には、ここ(https://github.com/Digilent/Petalinux-Zybo-Z7-20/blob/master/README.md )やここ (https://japan.xilinx.com/support/documentation/sw_manuals_j/xilinx2017_2/ug1144-petalinux-tools-reference-guide.pdf )の手順通りに進めていけばOKです。
開発用ホストPCにLinux環境を入れる
開発PCがLinuxの場合は、そのまま使えます。Windowsの場合は、VirtualBox上でUbuntuをインストールしておきます。
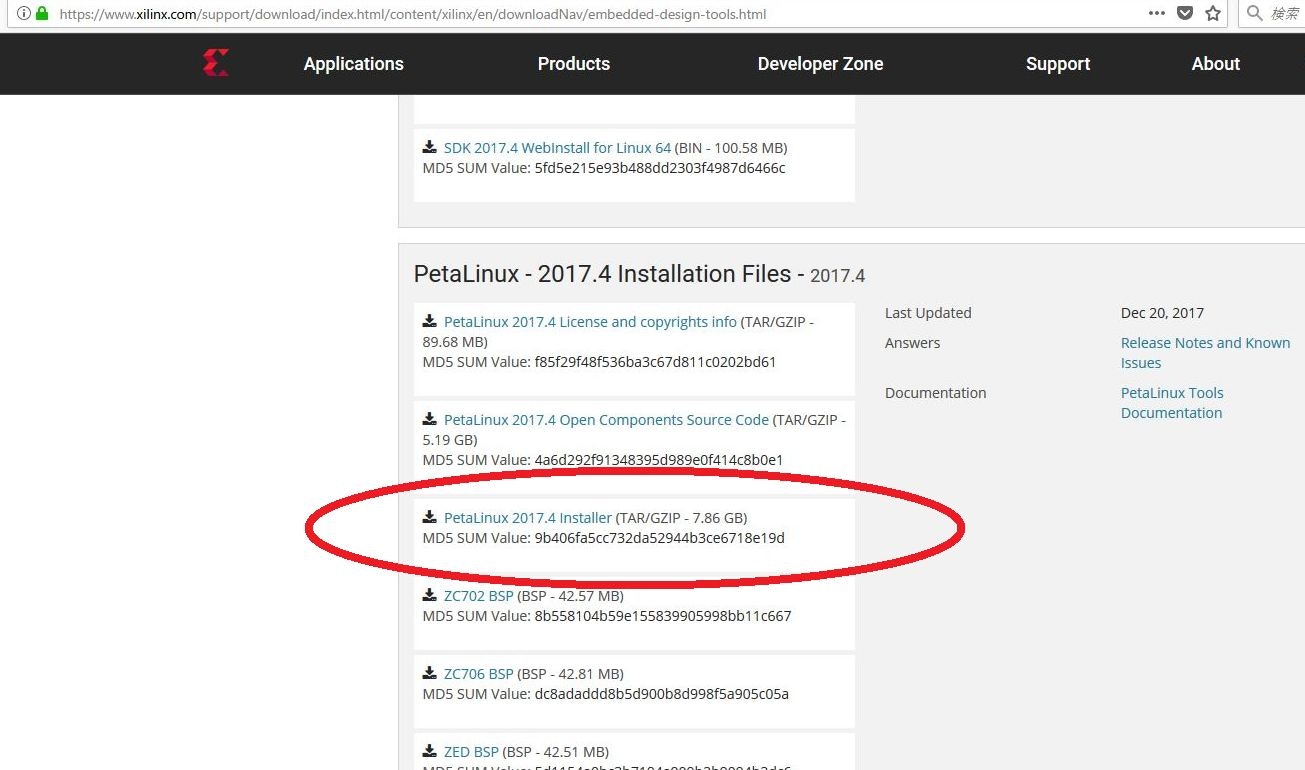
PetaLinuxツールのインストーラをダウンロードしておく
Xilinxのページから、PetaLinuxツールのインストーラ(petalinux-v2017.4-final-installer.run)をダウンロードしておきます (https://www.xilinx.com/support/download/index.html/content/xilinx/en/downloadNav/embedded-design-tools.html )。
ダウンロード後、Ubuntu上の~/work/tempに配置しておきます。
必要なライブラリ/ツールのインストール
下記コマンドで、必要なライブラリ/ツールをインストールします。
sudo apt-get install tofrodos gawk xvfb git libncurses5-dev tftpd zlib1g-dev zlib1g-dev:i386 libssl-dev flex bison chrpath socat autoconf libtool texinfo gcc-multilib libsdl1.2-dev libglib2.0-dev screen pax
さらに、以下もインストールしておきます。ビルド時にエラーが発生したため、調べた結果、以下が必要らしい (一部冗長かもしれません。)
https://forums.xilinx.com/t5/Embedded-Linux/petalinux-build-ERROR-Failed-to-generate-Kconfig-syshw/td-p/812430
https://github.com/RobertBerger/meta-mainline/issues/8
sudo apt-get install rsync
sudo apt-get install locales
sudo dpkg-reconfigure locales
sudo locale-gen en_US.UTF-8
sudo update-locale LC_ALL=en_US.UTF-8 LANG=en_US.UTF-8
sudo apt-get install libgtk2.0-0
PetaLinuxツールをインストールする
/opt/pkg/petalinux/にインストールします。まず、ディレクトリ作成後、一般ユーザ(ここだと、takさん)も使えるように権限を設定しておきます。その後、~/work/tempに配置しておいたインストーラを実行します。インストール完了後、統計データの送信設定をOFFにしておきます(任意)。
sudo mkdir -p /opt/pkg/petalinux
sudo chown tak /opt/pkg/
sudo chgrp tak /opt/pkg/
sudo chgrp tak /opt/pkg/petalinux/
sudo chown tak /opt/pkg/petalinux/
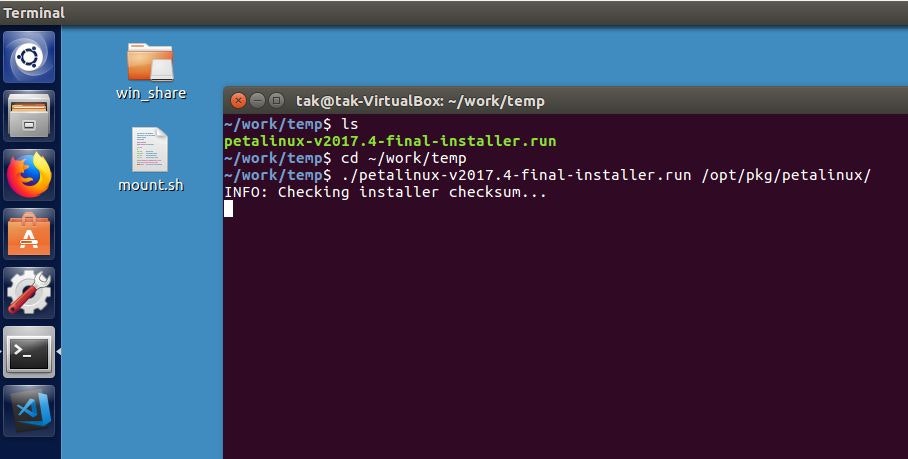
cd ~/work/temp
./petalinux-v2017.4-final-installer.run /opt/pkg/petalinux/
petalinux-util --webtalk off
ボードファイルのコピー (不要かも)
Zyboのボードファイルをコピーしておいた方がいいかもしれません。なくても大丈夫でしたが。Digilentから取得したボードファイルをここ(/opt/pkg/petalinux/tools/hsm/data/boards/board_files/)にコピーします。
PetaLinuxツールでLinuxイメージを作る
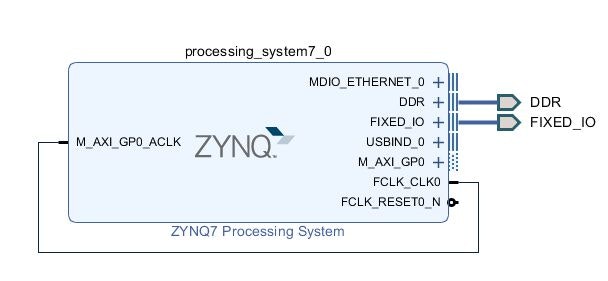
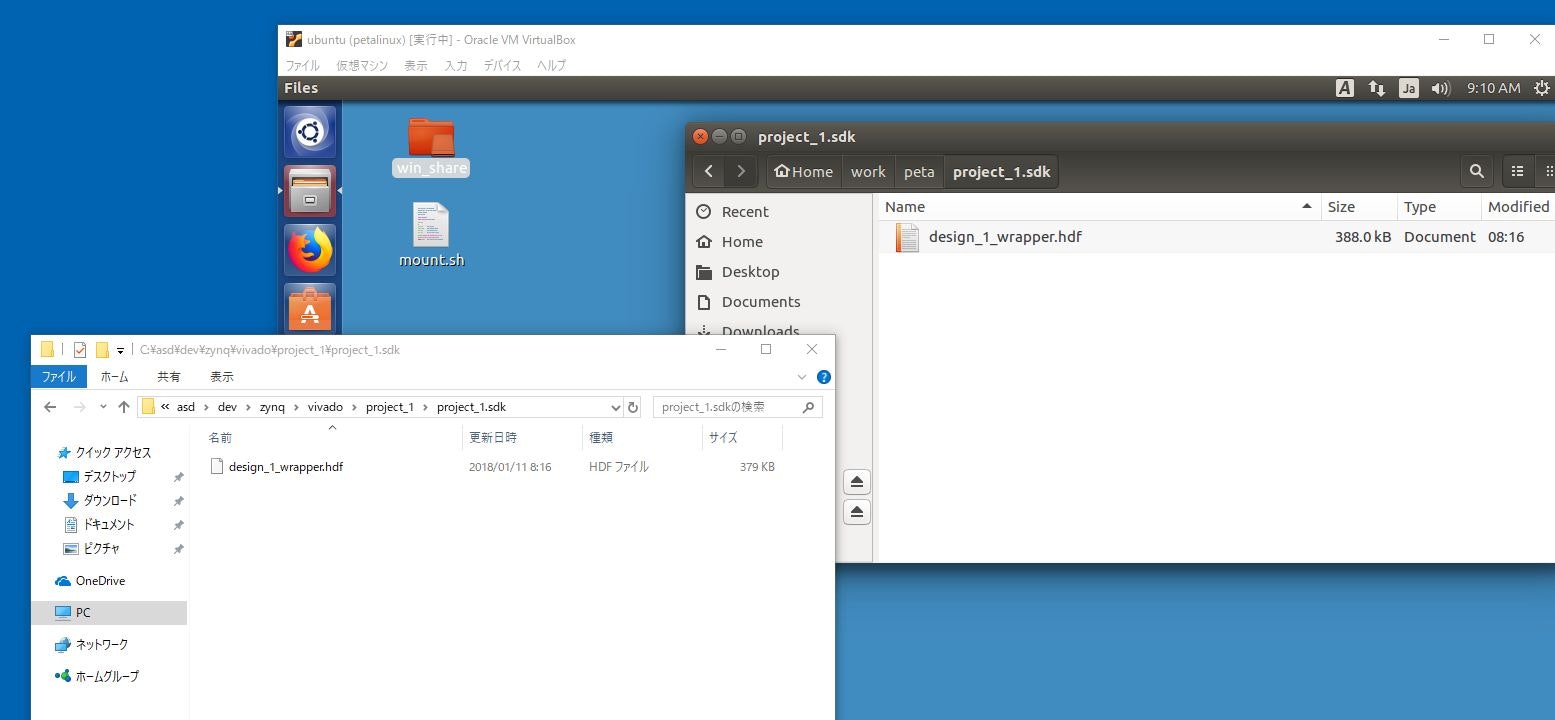
ハードウェア(hdf)の用意
Vivadoで、PSだけを配置したハードウェアを作って、hdfをエクスポートして(ビットストリーム込みで)、Ubuntu側にコピーしておきます。今回は、作業ディレクトリを、~/work/petaとして、project_1.sdkのフォルダごとコピーしました。
環境設定
新規ターミナルで作業開始のたびに、下記コマンドで環境設定が必要です。PetaLinux専用環境なら、~/.bashrcに書いておいても良いと思います。(言語設定は一部冗長かもしれません。)
export LC_ALL=en_US.UTF-8
export LANG=en_US.UTF-8
export LANGUAGE=en_US.UTF-8
source /opt/pkg/petalinux/settings.sh
settings.shで、シェルがbashじゃない、tftpサーバが見つからない、といった警告が出ますが、無視してOKです。
Linuxイメージを作る
SimplePSという名前のプロジェクトを作り(petalinux-create)、指定したハードウェア情報(hdf)に基づくカーネル設定(petalinux-config)をして、ビルドします(petalinux-build)。petalinux-configをしたときに、設定画面が出ますが、なにもせずにExitしてOKです。(make menuconfigと同じ)
Linuxシステムイメージのビルドが完了したら、ブートイメージ(BOOT.bin)を作ります(petalinux-package)
cd ~/work/peta
petalinux-create --type project --template zynq --name SimplePS
cd SimplePS/
petalinux-config --get-hw-description=../project_1.sdk
petalinux-build
petalinux-package --boot --force --fsbl images/linux/zynq_fsbl.elf --fpga images/linux/design_1_wrapper.bit --u-boot
成果物
最終的に必要となる成果物は、以下の2つです。
- images/linux/BOOT.bin
- FSBL (First Stage Boot Loader)、ビットストリーム、U-Boot (Second Stage Boot Loader)
- images/linux/image.ub
- Linuxシステムイメージ (カーネルなど)
SDカードからLinux起動してみる
作成したBOOT.binとimage.ubを、SDカード(FAT32フォーマット)にコピーします。(以下コマンドは、SDカードがUbuntu上で/media/tak/BOOTにマウントされている場合。GUIでコピーしてもOK)
cp images/linux/BOOT.BIN /media/tak/BOOT/
cp images/linux/image.ub /media/tak/BOOT/
イメージをコピーしたSDカードを、ZYBOボードにさして、SDカード起動するようにジャンパ(JP5)を設定します。
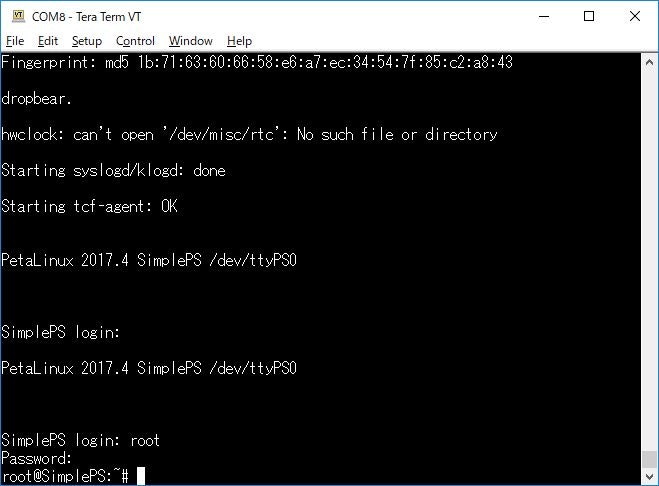
TeraTermなどにシリアル接続して、電源ONすると、U-BootからLinuxが起動していることが分かると思います。
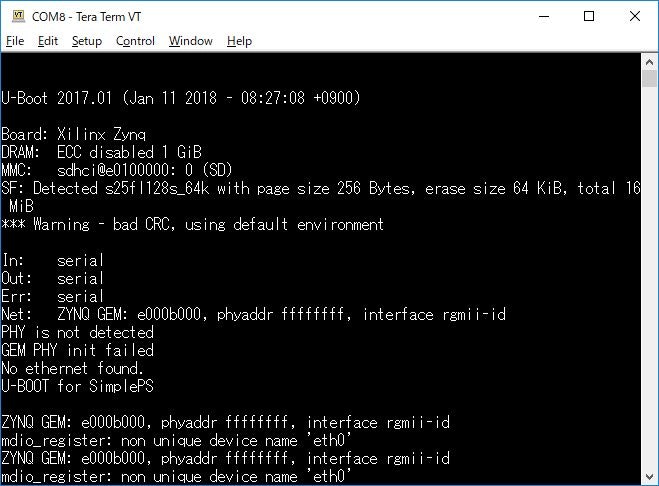
ちなみに、ログインユーザ = root、パスワード = rootです。
ノート
ノート: clean方法
ビルドに失敗した時は、以下でclean出来ます。やりすぎかもしれません。
petalinux-build -c clean
petalinux-build -x clean
petalinux-build -x distclean
petalinux-build -x mrproper
念のため、以下もやった方がいいみたいです。
Go to <petalinux_proj> directory and remove the below directories:
rm -rf components/plnx_workspace/
rm -rf build/cache build/tmp
https://forums.xilinx.com/t5/Embedded-Linux/Petalinux-2016-4-u-boot-doesn-t-compile/td-p/760308
https://forums.xilinx.com/t5/Embedded-Linux/petalinux-build-fails-on-device-tree-generation/td-p/762108
ノート: BSPをパッケージ化する / BSPからプロジェクトを作りビルドする
配布用に、以下コマンドでパッケージ化(BSPファイル化)できます。
cd ~/work/peta/SimplePS/
petalinux-package --prebuilt --clean --fpga images/linux/design_1_wrapper.bit -a images/linux/image.ub:images/image.ub
petalinux-build -x distclean
petalinux-build -x mrproper
petalinux-package --bsp --force -p ./ --output SimplePS.bsp
BSPファイルから再度プロジェクトを作ってビルドするときは、
petalinux-create -t project -s SimplePS.bsp
cd SimplePS/
petalinux-config --oldconfig
petalinux-build
ちなみに、petalinux-package --prebuiltをしてpre-builtディレクトリを作った後だと、JTAG起動や、QEMU起動ができるようになります。
petalinux-boot --qemu --prebuilt 3
ノート: Digilent提供のBSP
Digilentから、ZYBO用のPetaLinux BSPが提供されています(https://github.com/Digilent/Petalinux-Zybo-Z7-20 )。しかし、これはPetaLinux 2017.2で作られています。それが理由か分かりませんが、僕の環境(2017.4)だと、petalinux-build中にエラーが出ました。
とはいえ、デバイスツリーの設定などは非常に参考になるので、手元にコピーしておくと後々便利だと思います。