はじめに
先週、HoloLens RS4 Preview公開記念勉強会!@アカツキのLT枠で深度(Depth)データの可視化について話しました。今回はその実装方法について解説します。
前回の「C#でHoloLens RS4 PreviewのResearch modeを使う」で動かしたC#のサンプルを一部修正して可視化の方法を変えていきます。
最終的なソースコードはこちら → https://github.com/sotanmochi/CameraFramesSampleForHoloLensRS4
検証環境
- Windows 10 Pro Insider Preview (Version: 1803, OS build: 17127.1)
- Visual Studio 2017 (Version 15.6.6)
- HoloLens RS4 Preview (OS build: 10.0.17123.1004)
実装方法
Samples/CameraFrames/cs/FrameRenderer.csのPseudoColorHelper.PseudoColorForDepthメソッドの処理内容を以下のように変更します。
元の実装で使っていたminReliableDepthとmaxReliableDepthは今回の実装では不要になりますが、引数はそのままでも特に問題ありません。
/// <summary>
/// Maps each pixel in a scanline from a 16 bit depth value to a pseudo-color pixel.
/// </summary>
/// <param name="pixelWidth">Width of the input scanline, in pixels.</param>
/// <param name="inputRowBytes">Pointer to the start of the input scanline.</param>
/// <param name="outputRowBytes">Pointer to the start of the output scanline.</param>
/// <param name="depthScale">Physical distance that corresponds to one unit in the input scanline.</param>
/// <param name="minReliableDepth">Shortest distance at which the sensor can provide reliable measurements.</param>
/// <param name="maxReliableDepth">Furthest distance at which the sensor can provide reliable measurements.</param>
public static unsafe void PseudoColorForDepth(int pixelWidth, byte* inputRowBytes, byte* outputRowBytes, float depthScale, float minReliableDepth, float maxReliableDepth)
{
    ushort* inputRow = (ushort*)inputRowBytes;
    uint* outputRow = (uint*)outputRowBytes;

    float minInMeters = 0.01f;
    float maxInMeters = 4.21f;

    for (int x = 0; x < pixelWidth; x++)
    {
        var depth = inputRow[x] * depthScale;

        float h = 300.0f/360.0f * (depth - minInMeters)/(maxInMeters - minInMeters);
        float s = 1.0f;
        float v = 1.0f;

        if(depth <= 0.1565) // Minimum depth estimation for short-throw mode is 0.156m.
        {
            s = 0.1f;
            v = 1.0f;
        }
        if(depth >= 0.945 && depth < 0.955) // Maximum depth estimation for short-throw mode is 0.95m.
        {
            s = 0.1f;
            v = 1.0f;
        }
        if(depth >= 3.515 && depth < 3.525) // Maximum depth estimation for long-throw mode is 3.52m.
        {
            s = 0.1f;
            v = 1.0f;
        }
        if(depth >= 4.090 && depth < 4.095) // Invalid depth value.
        {
            s = 0.1f;
            v = 0.3f;
        }
        if(depth >= 4.095 && depth < 4.100) // Invalid depth value.
        {
            v = 0.0f;
        }

        float r = 0.0f;
        float g = 0.0f;
        float b = 0.0f;
        if (s > 0.0f) {
            h *= 6.0f;
            int i = (int)h;
            float f = h - (float)i;
            float aa = v * (1 - s);
            float bb = v * (1 - s * f);
            float cc = v * (1 - s * (1 - f));
            switch (i) {
                default:
                case 0:
                    r = v;
                    g = cc;
                    b = aa;
                    break;
                case 1:
                    r = bb;
                    g = v;
                    b = aa;
                    break;
                case 2:
                    r = aa;
                    g = v;
                    b = cc;
                    break;
                case 3:
                    r = aa;
                    g = bb;
                    b = v;
                    break;
                case 4:
                    r = cc;
                    g = aa;
                    b = v;
                    break;
                case 5:
                    r = v;
                    g = aa;
                    b = bb;
                    break;
            }
        }

        // ピクセルデータに変換
        // r,g,bの値: 0.0f ~ 1.0f
        uint color =  (uint)(0 / 255) << 24 | // Alpha
                      (uint)(r * 255) << 16 | // Red
                      (uint)(g * 255) << 8  | // Green
                      (uint)(b * 255);        // Blue

        outputRow[x] = color;
    }
}
可視化方法の概要
詳細解説
PseudoColorForDepthの詳細を解説していきます。
最初の2行は入出力データの配列(へのポインタ)です。
入力は深度値でunsigned short(16bit符号なし整数)の配列、出力は32bitカラーでunsigned int(32bit符号なし整数)の配列となっています。
ushort* inputRow = (ushort*)inputRowBytes;
uint* outputRow = (uint*)outputRowBytes;
次に、可視化する深度の範囲を指定しています。LT資料にもあるように0[m]~4.2[m]の範囲としています。
float minInMeters = 0.01f;
float maxInMeters = 4.21f;
ここからは各ピクセルごとの処理を見ていきます。
まずは、ミリメートル(mm)単位の深度をメートル(m)単位に変換します。
PseudoColorForDepthの呼び出し元を見るとわかりますが、depthScaleにはDepthInMetersの値が渡されており、0.001[m]という値が入っています。
var depth = inputRow[x] * depthScale;
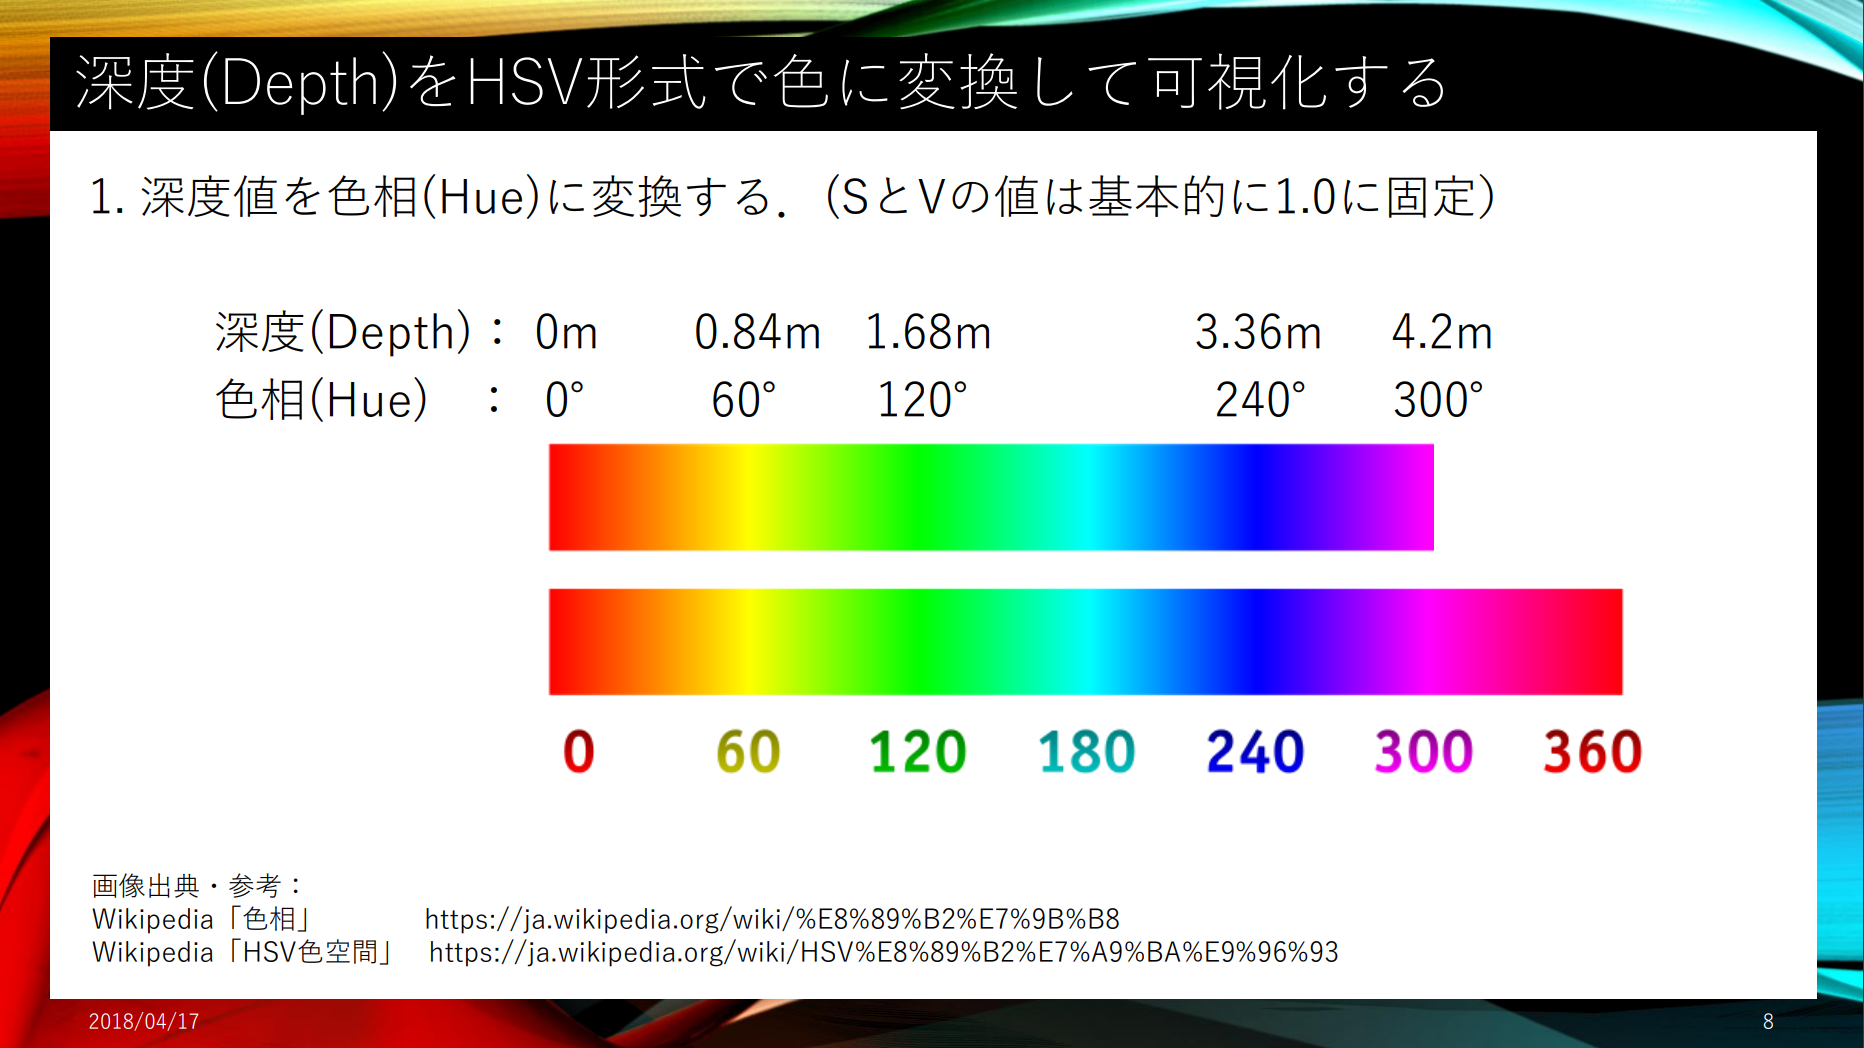
次に深度値を色相(Hue)に変換します。minInMetersからmaxInMetersまでの深度値を色相の0°~300°にマッピングしています。また、Hueを0.0~1.0に正規化しています。基本的にSとVの値は1.0とします。
float h = 300.0f/360.0f * (depth - minInMeters)/(maxInMeters - minInMeters);
float s = 1.0f;
float v = 1.0f;
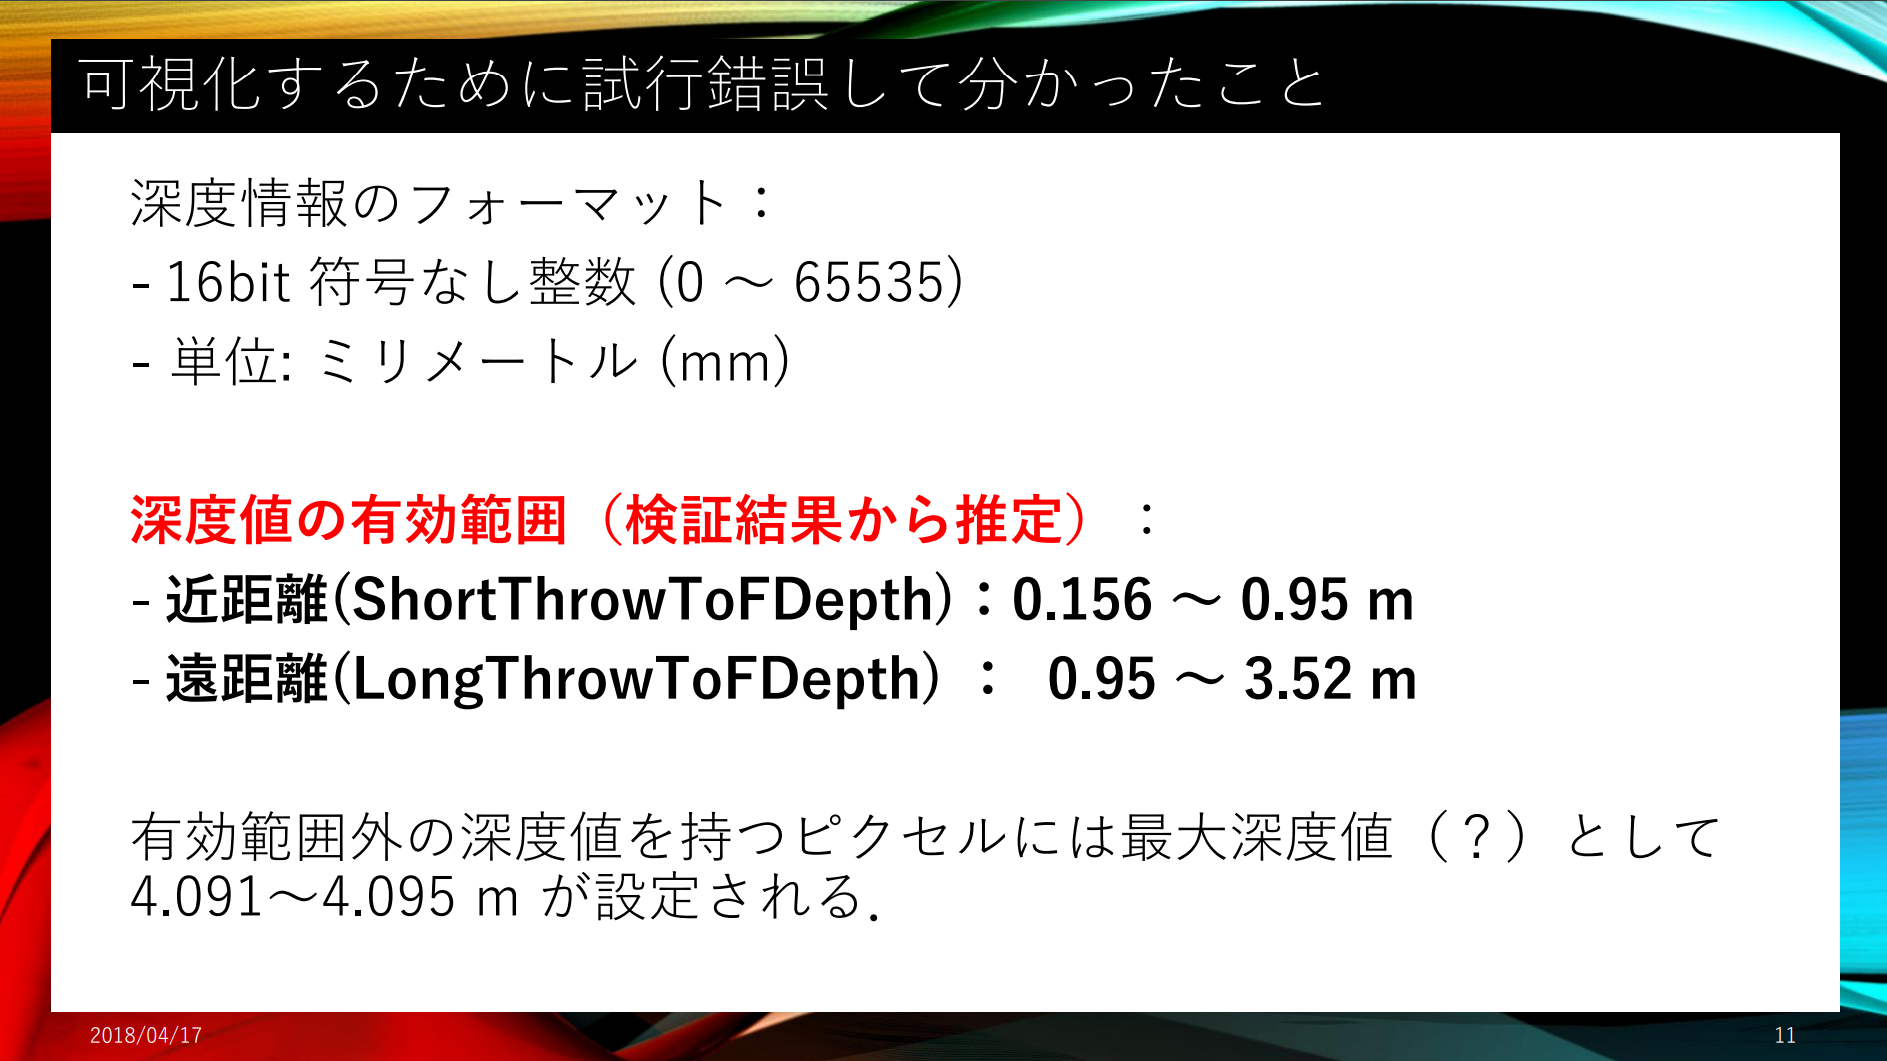
深度値を色相に変換した後、条件によってSとVの値を修正していますが、これはHoloLensのResearch modeで取得した深度値の有効範囲を推定・可視化するための処理です。
if(depth <= 0.1565) // Minimum depth estimation for short-throw mode is 0.156m.
{
    s = 0.1f;
    v = 1.0f;
}
if(depth >= 0.945 && depth < 0.955) // Maximum depth estimation for short-throw mode is 0.95m.
{
    s = 0.1f;
    v = 1.0f;
}
if(depth >= 3.515 && depth < 3.525) // Maximum depth estimation for long-throw mode is 3.52m.
{
    s = 0.1f;
    v = 1.0f;
}
if(depth >= 4.090 && depth < 4.095) // Invalid depth value.
{
    s = 0.1f;
    v = 0.3f;
}
if(depth >= 4.095 && depth < 4.100) // Invalid depth value.
{
    v = 0.0f;
}
HSVからRGBに変換します。
float r = 0.0f;
float g = 0.0f;
float b = 0.0f;
if (s > 0.0f) {
    h *= 6.0f;
    int i = (int) h;
    float f = h - (float) i;
    float aa = v * (1 - s);
    float bb = v * (1 - s * f);
    float cc = v * (1 - s * (1 - f));
    switch (i) {
        default:
        case 0:
            r = v;
            g = cc;
            b = aa;
            break;
        case 1:
            r = bb;
            g = v;
            b = aa;
            break;
        case 2:
            r = aa;
            g = v;
            b = cc;
            break;
        case 3:
            r = aa;
            g = bb;
            b = v;
            break;
        case 4:
            r = cc;
            g = aa;
            b = v;
            break;
        case 5:
            r = v;
            g = aa;
            b = bb;
            break;
    }
}
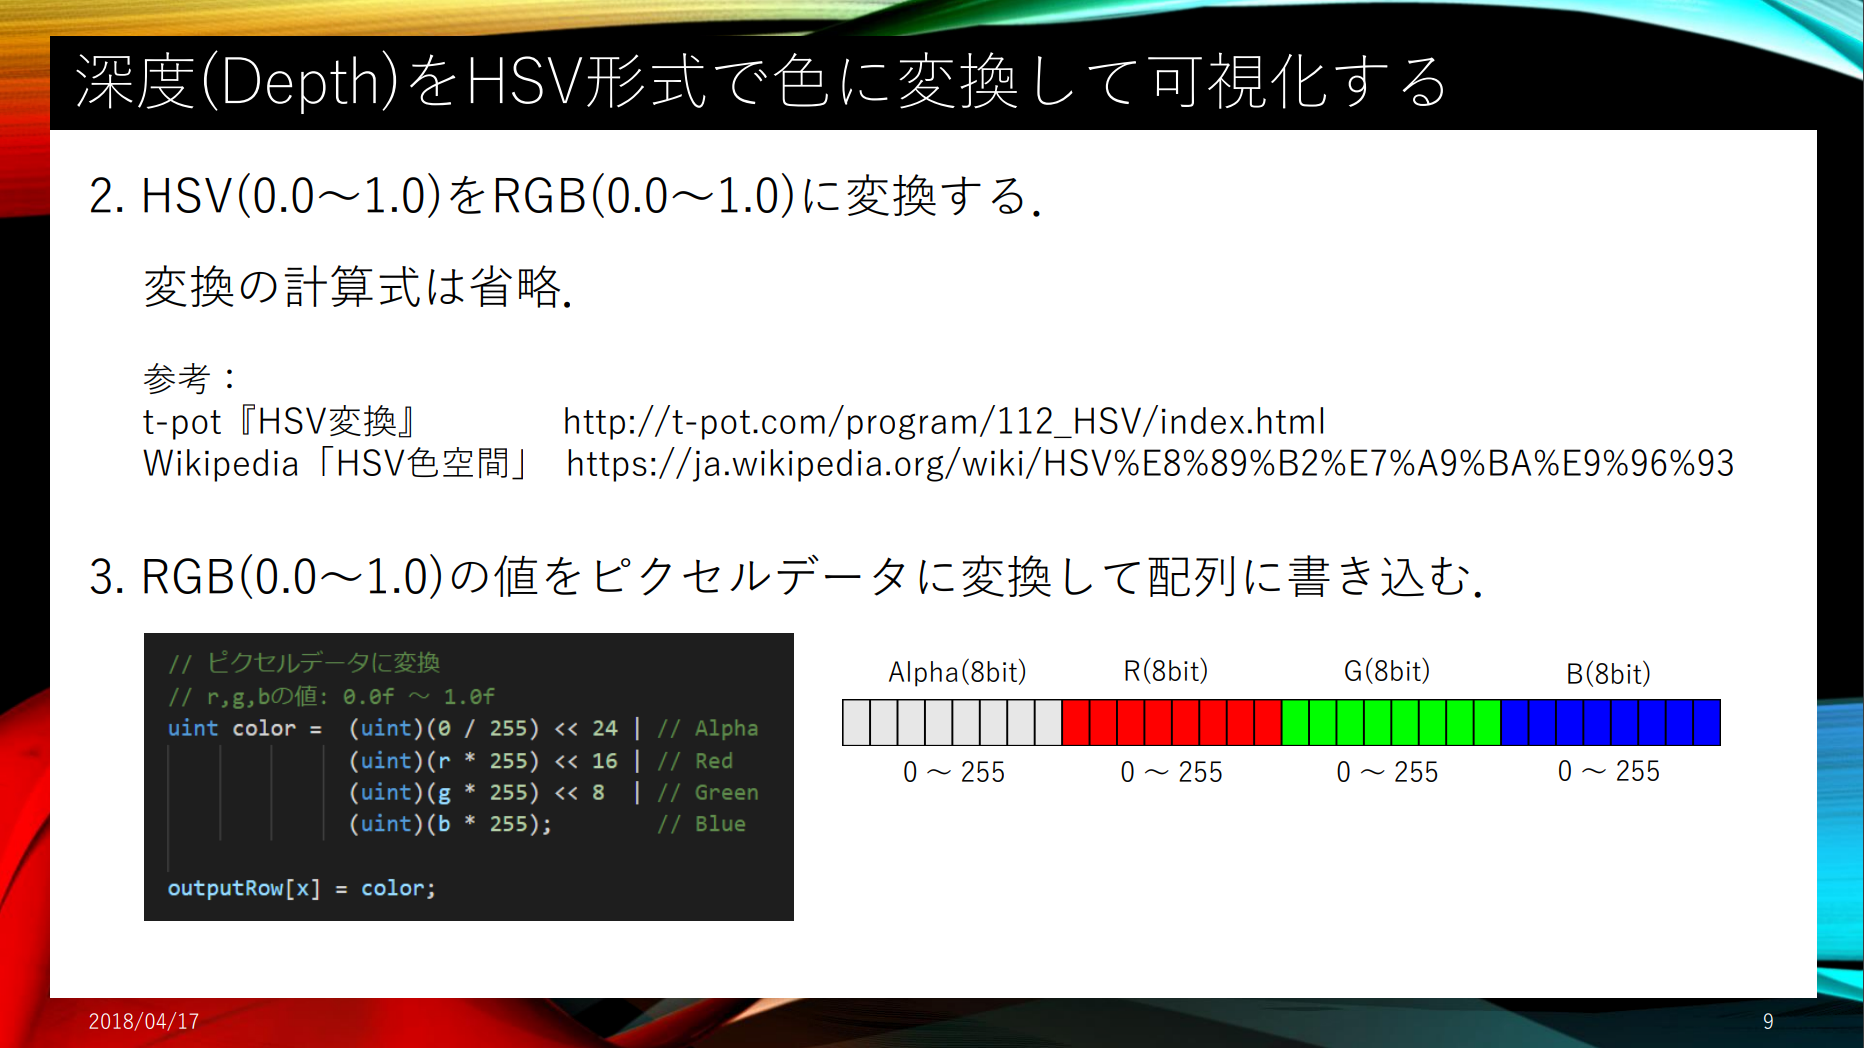
最後に32bitのピクセルデータに変換して、出力データの配列に値を格納しています。
// ピクセルデータに変換
// r,g,bの値: 0.0f ~ 1.0f
uint color =  (uint)(0 / 255) << 24 | // Alpha
              (uint)(r * 255) << 16 | // Red
              (uint)(g * 255) << 8  | // Green
              (uint)(b * 255);        // Blue

outputRow[x] = color;
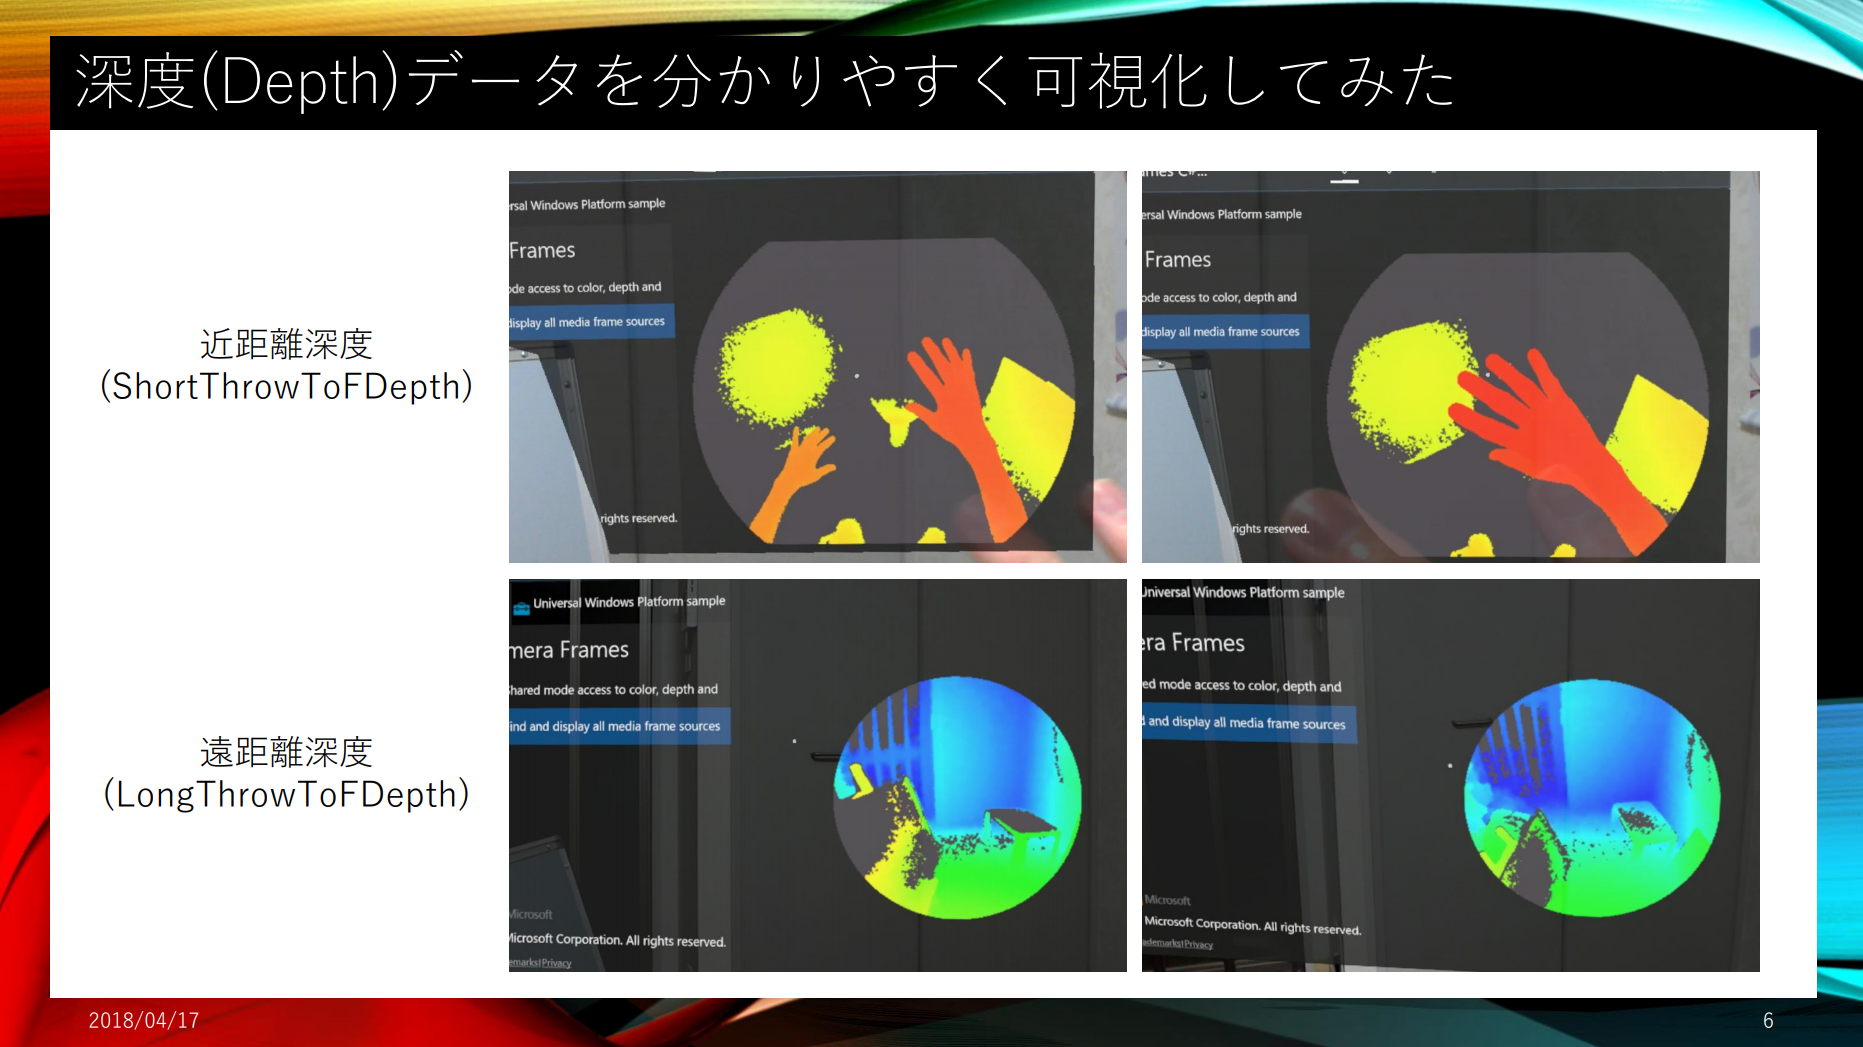
実行結果
実行結果はこんな感じになります。
まとめ
- 深度データを色に変換して可視化する方法について解説しました