概要
goの軽量web frameworkであるechoを使ってpprofをやる手順について
手順
echoにpprofをbindしてくれるラッパーあるのでそれを使った
コードを編集(github のサンプルより)
package main

import (
    "github.com/labstack/echo"
    "github.com/sevenNt/echo-pprof"
)

func main() {
    e := echo.New()

    e.GET("/ping", func(c echo.Context) error {
        return c.String(200, "pong")
    })

    // automatically add routers for net/http/pprof
    // e.g. /debug/pprof, /debug/pprof/heap, etc.
    echopprof.Wrap(e)

    // echopprof also plays well with *echo.Group
    // prefix := "/debug/pprof"
    // group := e.Group(prefix)
    // echopprof.WrapGroup(prefix, group)

    e.Start(":8080")
}
起動してpprof画面を開く
http://127.0.0.1:8080/debug/pprof/
profileは下記のコマンド叩いたあとに本体プログラムを動かす
あるいはベンチマークを起動する
go tool pprof -raw -seconds 30 http://localhost:8080/debug/pprof/profile
30秒間メトリクスを取った後、コンソールが立ち上がる
Fetching profile over HTTP from http://localhost:8080/debug/pprof/profile
Saved profile in /Users/aptpod-misu/pprof/pprof.samples.cpu.006.pb.gz
Type: cpu
Time: Jan 29, 2018 at 9:01pm (JST)
Duration: 30s, Total samples = 490ms ( 1.63%)
Entering interactive mode (type "help" for commands, "o" for options)
(pprof)
webコマンドでtrace graphが保存される
go
(pprof) web
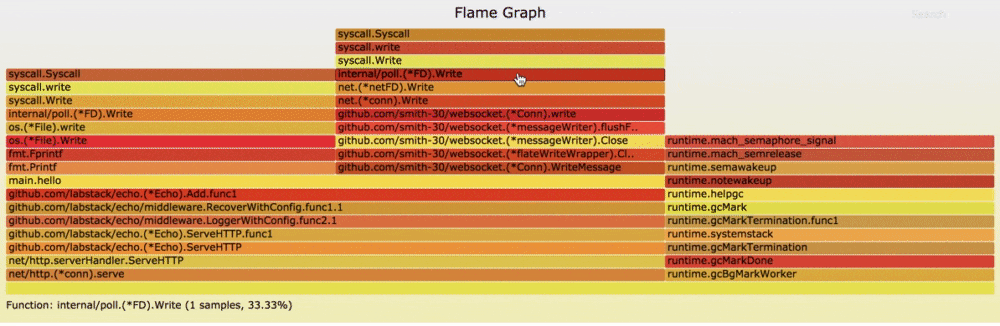
frame graphをみる
uberのgo-torch使う
$ go get github.com/uber/go-torch
$ cd $GOPATH/src/github.com/uber/go-torch
$ git clone https://github.com/brendangregg/FlameGraph.git
コマンド叩けばpprofを起動してくれるので何かしらプログラムを動かす
$ go-torch -u http://localhost:8080/ -f test.svg
INFO[00:44:21] Run pprof command: go tool pprof -raw -seconds 30 http://localhost:8080/debug/pprof/profile
あとは、保存されたsvgファイルを開くだけ
なんか色々操作できたりするので便利