概要
- chainerでDCGANを実装しました。
- 頭皮画像を生成しました。
- お食事中には,あまりおすすめできません。笑
なぜ?
同じ研究室の親友が頭皮環境に敏感で, 某毛企業で何度か頭皮チェックをしてもらっている。彼は, 毎日の頭皮環境の状態・推移が気になっていたが,そう毎日, 某毛企業に足を運べるものでもなく,困っていた。
それなら, 日々セルフチェックができ,かつ,アドバイスをくれるものがあれば,彼は喜んでくれるのではないかと思いました。そして, 彼もそれができたら嬉しいと言ってくれたので, 実際に作り始めました。
そのために頭皮画像を集めていましたが,以下の課題に直面しました。
- 頭皮画像は,割と心身にダメージを与えてくる。
- そもそも頭皮の画像が少ない。
よって, まずはGANを用いて頭皮画像を生成し,生成画像も用いて物体認識の学習データにしてみようと思い立ちました。
使用環境
- python3.6
- ubuntu18.04
- cudnn7.5
- cuda10.0
- rtx2080
アルゴリズム
画像生成には,DCGANを用いました。DCGANはGANの発展系の様なものです。GANは,教師なしで画像を生成するモデルのことです。GANは学習が不安定なことがあり,それを克服するために,DCGANはネットワークに畳み込み層を導入しています。
下記のページからの引用ですが,とてもわかりやすい例だと思います。私自身周りに伝える時は,まずこの例を話す様にしています。
GANはGeneratorとDiscriminatorという別々の学習モデルを用います。
このGeneratorとDiscriminatorの関係は、しばしば紙幣の偽装者(Generator)と、その紙幣が偽装紙幣であるかを見抜く警察(Discriminator)の関係で表されます。偽装者はできるだけ本物の紙幣に近い偽装紙幣を作り出すことで、警察の目を騙そうとします。逆に、警察も目利きスキルを上げてより本物の紙幣か偽物の紙幣かを見抜こうとします。GANではGeneratorはできるだけ本物(オリジナル)に近い画像を生成し、Discriminatorはそれが本物の画像か否かを判定するような構造をしています。
GANについて概念から実装まで ~DCGANによるキルミーベイベー生成~
データ
学習に用いた画像は,以下です。なるべくグロッキーではない画像を選択しましたが,お食事中の方は一度箸ではなくマウスを置いてください。学習には7512枚の画像を用いました。
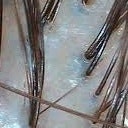
データの収集方法は, 700枚程の頭皮画像をダウンロードし,以下のプログラムを用いて,128×128の画像に整形しました。その際,トリミングをする座標をランダムに変更して,同一画像で複数回トリミングを行いました。
import cv2
import argparse
import random
import os

def triming(image_files, output, d, c):
    random.seed(0)
    for img in image_files:
        imname = os.path.basename(img).replace(".jpg", "").replace(".jpeg", "").replace(".png", "")
        #画像入力
        im = cv2.imread(d + "/" + img)
        w, h, _= im.shape
        # print(im.shape)
        if w - 128 <= 0 and h - 128 <= 0:
            continue
        else:
            i = 0
            print(i)
            while i < int(c):
                wr = random.randint(0, w-128)
                hr = random.randint(0, h-128)
                print("r:{0},{1}".format(wr,hr))
                #新しい配列に入力画像の一部を代入
                dst = im[wr:128+wr,hr:128+hr]

                #書き出し
                cv2.imwrite(output + '/{0}_{1}.jpg'.format(imname, i),dst)
                i += 1
if __name__ == '__main__':
    parser = argparse.ArgumentParser(description='triming image')
    parser.add_argument('--directory', '-i', default='',
                        help='Directory of image files.')
    parser.add_argument('--output', '-o', default='',
                        help='Directory of save images.')
    parser.add_argument('--count', '-c', default='10',
                        help='triming count')
    args = parser.parse_args()

    all_files = os.listdir(args.directory)
    image_files = [f for f in all_files if ('png' in f or 'jpg' in f or 'jpeg' in f)]
    triming(image_files, args.output, args.directory, args.count)
実装
実装にはgithubにあるchainerのdcganのプログラムを拝借し,学習画像に合うようにいじったくらいです。
- 画像サイズが128×128
- Discriminatorの活性化関数にrelu
class Generator(chainer.Chain):

    def __init__(self, n_hidden, bottom_width=16, ch=512, wscale=0.02):
        super(Generator, self).__init__()
        self.n_hidden = n_hidden
        self.ch = ch
        # 生成画像から逆算する 32*32では4
        self.bottom_width = bottom_width

        with self.init_scope():
            w = chainer.initializers.Normal(wscale)
            # Linear(in_size, out_size=None, nobias=False, initialW=None, initial_bias=None)
            self.l0 = L.Linear(self.n_hidden, bottom_width * bottom_width * ch,
                               initialW=w)
            self.dc1 = L.Deconvolution2D(ch, ch // 2, 4, 2, 1, initialW=w)
            self.dc2 = L.Deconvolution2D(ch // 2, ch // 4, 4, 2, 1, initialW=w)
            self.dc3 = L.Deconvolution2D(ch // 4, ch // 8, 4, 2, 1, initialW=w)
            self.dc4 = L.Deconvolution2D(ch // 8, 3, 3, 1, 1, initialW=w)
            self.bn0 = L.BatchNormalization(bottom_width * bottom_width * ch)
            self.bn1 = L.BatchNormalization(ch // 2)
            self.bn2 = L.BatchNormalization(ch // 4)
            self.bn3 = L.BatchNormalization(ch // 8)

    def make_hidden(self, batchsize):
        dtype = chainer.get_dtype()
        return numpy.random.uniform(-1, 1, (batchsize, self.n_hidden, 1, 1))\
            .astype(dtype)

    def forward(self, z):
        #(100,512,4,4)にreshape
        h = F.reshape(F.relu(self.bn0(self.l0(z))),
                      (len(z), self.ch, self.bottom_width, self.bottom_width))
        h = F.relu(self.bn1(self.dc1(h)))
        h = F.relu(self.bn2(self.dc2(h)))
        h = F.relu(self.bn3(self.dc3(h)))
        x = F.sigmoid(self.dc4(h))

        return x
上記はGenerator部分のプログラムで,bottom_width=16の部分を,学習に用いる画像のサイズとネットワーク構造から設定しました。詳しい計算方法は以下のページにも書いてありますが,この式を用い,生成画像が128×128(学習に用いている画像と同じサイズ)になるように設定をします。
$HoutWout=(Hin−1)×stride[0]−2×pad[0]+ksize[0]$
[Chainer, PyTorch] Deconvolutionの出力サイズの計算式
結果
本当は一日学習してほしかったのですが, 途中でgpuが認識しなくなってしまいできませんでした。nvidia-smiをすると, FANがERR!になっていました。この様なことはよくあるのでしょうか。
おそらく熱で落ちた感じだと思いますが,何か設定をする必要があるのでしょうか。
どなたか教えていただけると幸いです。
とりあえず,50epochまで回した結果です。
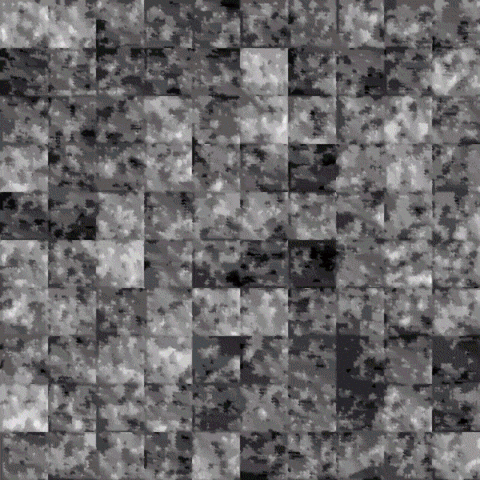
こんな感じです。
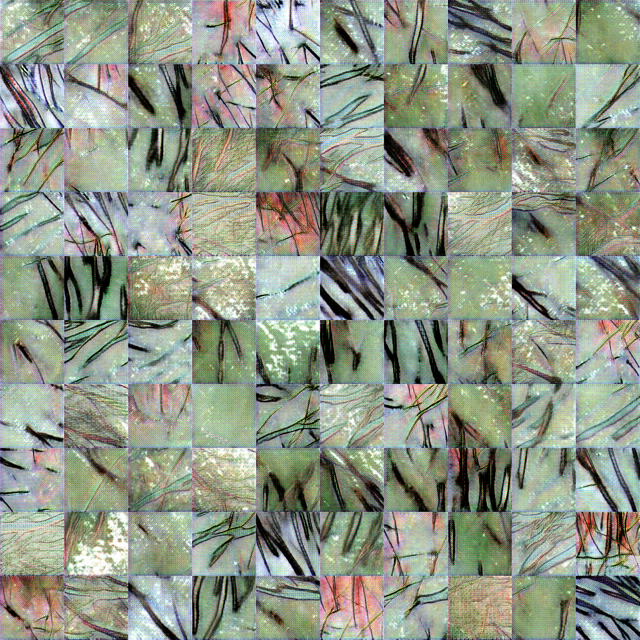
埋没している毛の部分も再現できている。。。怖い。
ニキビや角栓ができている頭皮の画像とかは別で学習させたほうがいいのかな。
それともcganと呼ばれる手法を用いればなんとかなるのかな。。。
Conditional DCGANで画像生成 - kumilog.net
今後と考えていること
アプリ関連の技術がわからないので,どなたかご教授いただけるととても嬉しいです。
- 学習画像と生成画像を用いて,物体認識(ニキビ, 角栓, ふけ)ができないかを検討中
- まずは,健康or不健康頭皮判定から始めたほうがいいのか?
- リアルタイムである必要はないので,撮って判定してくらいならアプリでもできるのか?