概要
この記事は モバイルファクトリー Advent Calendar 2017 14日目の記事です。
13日目の記事は@lycoris102さんの[Unity] BuildSettingのScene定義をよしなにしたいでした。
本記事ではGoogle Cloud Platformで提供されているAPIライブラリであるGoogle Slides APIとGoogle Sheets APIの紹介と、Google Slides APIのRubyを用いた簡単な利用方法を紹介します。
※会社で開発しているアプリ/プロジェクトとは関係がありません。
Google Slides / Sheets APIとは
それぞれ、Googleが提供しているプレゼンテーション作成アプリケーションのGoogleスライドと表計算アプリケーションであるGoogleスプレッドシートをプログラムによって作成や編集ができるAPIです。
これによりプレゼンテーションやスプレッドシートの作成を自動化することができるようになります。
Google Slides API クイックスタート
実行環境
ruby 2.3.1p112
Google Slides(Sheets) APIは公式のリファレンスが提供されています。
とりあえずRubyで動くのかどうか試してみたい!という方はRuby Quickstartからやってみるのをオススメします。
Step1でのclient_secret.jsonの取得とStep2でのライブラリのインストールは必須なので済ませておきます。
次にquickstart.rbをclient_secret.jsonと同じ階層におき、実行してみます。
すると以下のようなURLが表示されるので、ブラウザで表示してみます。
% ruby quickstart.rb
Open the following URL in the browser and enter the resulting code after authorization
https://accounts.google.com/o/oauth2/auth?access_type=offline&approval_prompt=force&client_id=xxxxxx.apps.googleusercontent.com&include_granted_scopes=true&redirect_uri=urn:ietf:wg:oauth:2.0:oob&response_type=code&scope=https://www.googleapis.com/auth/presentations.readonly
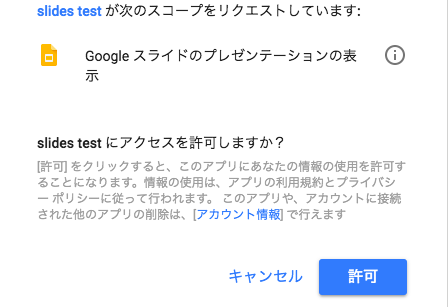
アクセスの許可を求められるので許可を行います。
以下のような画面になるので、コードをコピーし、先ほどの実行中のコマンドラインに貼り付けます。

すると、何やら処理が実行されます。
% ruby quickstart.rb
Open the following URL in the browser and enter the resulting code after authorization
https://accounts.google.com/o/oauth2/auth?access_type=offline&approval_prompt=force&client_id=xxxxxx.apps.googleusercontent.com&include_granted_scopes=true&redirect_uri=urn:ietf:wg:oauth:2.0:oob&response_type=code&scope=https://www.googleapis.com/auth/presentations.readonly
XXXXXXXXXXXXXXXXXXXXXXXXXXXXXXXXXXXXXXX(paste code)
The presentation contains 5 slides:
- Slide #1 contains 4 elements.
- Slide #2 contains 11 elements.
- Slide #3 contains 9 elements.
- Slide #4 contains 5 elements.
- Slide #5 contains 12 elements.
ここで、quickstart.rbを開いて47行目でコメントアウトしてあるURLを表示してみます。
# https://docs.google.com/presentation/d/1EAYk18WDjIG-zp_0vLm3CsfQh_i8eXc67Jo2O9C6Vuc/edit
するとBaby albumというプレゼンテーションが表示されたかと思います。
実はquickstart.rbでは、このプレゼンテーションの情報を取得し、各スライドに存在するelement(ページ要素)の数を表示するという処理を行なっていたのです。
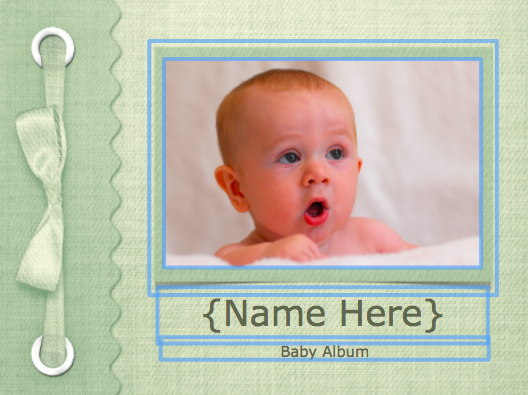
(先頭のスライド、確かに4つのページ要素が存在していますね)
quickstart.rbのコードを読んでみましょう。
20行目から40行目までのauthorizeメソッドはOAuth2を用いた認証処理を行なっています。
def authorize
  FileUtils.mkdir_p(File.dirname(CREDENTIALS_PATH))

  client_id = Google::Auth::ClientId.from_file(CLIENT_SECRETS_PATH)
  token_store = Google::Auth::Stores::FileTokenStore.new(file: CREDENTIALS_PATH)
  authorizer = Google::Auth::UserAuthorizer.new(
    client_id, SCOPE, token_store)
  user_id = 'default'
  credentials = authorizer.get_credentials(user_id)
  if credentials.nil?
    url = authorizer.get_authorization_url(
      base_url: OOB_URI)
    puts "Open the following URL in the browser and enter the " +
         "resulting code after authorization"
    puts url
    code = gets
    credentials = authorizer.get_and_store_credentials_from_code(
      user_id: user_id, code: code, base_url: OOB_URI)
  end
  credentials
end
42行目から54行目では実際にGoogle Slides APIを用いた処理が行われています。
# Initialize the API
service = Google::Apis::SlidesV1::SlidesService.new # Google Slides APIクラスをインスタンス化
service.client_options.application_name = APPLICATION_NAME # アプリケーション名を設定
service.authorization = authorize # 認証処理
# Prints the number of slides and elements in a sample presentation:
# https://docs.google.com/presentation/d/1EAYk18WDjIG-zp_0vLm3CsfQh_i8eXc67Jo2O9C6Vuc/edit
presentation_id = '1EAYk18WDjIG-zp_0vLm3CsfQh_i8eXc67Jo2O9C6Vuc' # 取得したいプレゼンテーションのid
presentation = service.get_presentation(presentation_id) # プレゼンテーションの取得

puts "The presentation contains #{presentation.slides.count} slides:" # プレゼンテーションに存在するスライドの枚数を出力
presentation.slides.each_with_index do |slide, i|
  puts "- Slide \##{i + 1} contains #{slide.page_elements.count} elements." # 各スライドに存在するページ要素の数を出力
end
それぞれの行で何をしているのかを簡単にコメントで書いてみました。
このようにGoogle Slides APIを使うことでGoogle Drive上のプレゼンテーションの情報の取得が行えることがわかりました。
ただ、これだけだと実際にプレゼンテーションの作成や編集ができるのかわかりませんよね?
次にプレゼンテーションの作成や編集を行う方法を紹介します。
Google Slides API実践編
まずはプレゼンテーションの作成を行なってみましょう。
SCOPE = Google::Apis::SlidesV1::AUTH_PRESENTATIONS # READONLYを外す

...

def create_presentation
    service = Google::Apis::SlidesV1::SlidesService.new
    service.client_options.application_name = APPLICATION_NAME
    service.authorization = authorize

    title = "Created Presentation"

    object = Google::Apis::SlidesV1::Presentation.new(title: title)
    presentation = service.create_presentation(object)

    presentation_id = presentation.presentation_id
    puts "Created Presentation URL"
    puts 'https://docs.google.com/presentation/d/' + presentation_id
end
quickstart.rbで使ったauthorizeメソッドはそのまま使わせてもらいましょう。
今回はプレゼンテーションの作成、編集を行うため、SCOPEをGoogle::Apis::SlidesV1::AUTH_PRESENTATIONSに変更しておきます。
実行してみると、先ほどを同じようにアクセス許可が求められます。
許可して、コードを入力すると処理が実行されるはずです。
% ruby slides_test.rb
Open the following URL in the browser and enter the resulting code after authorization
https://accounts.google.com/o/oauth2/auth?access_type=offline&approval_prompt=force&client_id=xxxxx.apps.googleusercontent.com&include_granted_scopes=true&redirect_uri=urn:ietf:wg:oauth:2.0:oob&response_type=code&scope=https://www.googleapis.com/auth/presentations
XXXXXXXXXXXXXXXXXXXXXX(paste code)
Created Presentation URL
https://docs.google.com/presentation/d/xxxxx
早速出力されたURLを表示してみましょう!

このようにまっさらの状態のプレゼンテーションが自分のGoogle Driveに作成されます。
次にこのプレゼンテーションにスライドを追加してみましょう。
先ほど作成したプレゼンテーションのURLのhttps://docs.google.com/presentation/d/から/editまでの文字列がそのプレゼンテーションのidです。
そちらを以下のメソッドのpresentation_idに設定して、実行してみましょう。
  def add_slide
    service = Google::Apis::SlidesV1::SlidesService.new
    service.client_options.application_name = APPLICATION_NAME
    service.authorization = authorize

    presentation_id = "xxxxx" # スライドを追加したいプレゼンテーションのid

    create_slide = Google::Apis::SlidesV1::CreateSlideRequest.new()
    request = Google::Apis::SlidesV1::Request.new(create_slide: create_slide)

    requests = Array.new([request])
    batch = Google::Apis::SlidesV1::BatchUpdatePresentationRequest.new(requests: [])
    batch.update!(requests: requests)
    service.batch_update_presentation(presentation_id, batch, {})
  end
さて、スライドは追加されたでしょうか?
Google::Apis::SlidesV1::BatchUpdatePresentationRequestのupdateメソッドにリクエストを渡すことでプレゼンテーションの更新が行えます。
リクエストの例としては、今回使用したスライドの追加を行うGoogle::Apis::SlidesV1::CreateSlideRequestの他にも、画像を追加するGoogle::Apis::SlidesV1::CreateImageRequestやshape(テキストなどが入る枠)を追加するGoogle::Apis::SlidesV1::CreateShapeRequestなどがあり、ほとんどの操作がGoogle Slides APIを通して行えます。
それらの詳細は、RubyDocをのぞいてみたりすると良いかもしれません。
まとめ
Rubyを用いてGoogle Slidesの取得、作成、編集が行えることがわかりました。
Rubyの他にもGo, Java, JavaScript, Pythonといった多くの言語で利用できるので、お好きな言語で触ってみるのがいいのではないでしょうか。
あしたは最近すっかりJenkinsにお熱な @Toriyabot さんの「Declarative Pipeline入門」です。
とても楽しみですね!