はじめに
知人の手伝いで行った同人ハードウェアフェスの立ち話でtinygoなるものを聞きました。
golangをLLVMでCに変換してBluePill(STM32F103)や micro:bitなどnrfシリーズで動作するとか!
https://github.com/tinygo-org/tinygo
https://tinygo.org/
emgoというのもBluePillやnrfシリーズに対応してて、以前ちょっと触ってみたのですがご無沙汰なので、こっちをArduino Unoで試したいと思います。
環境構築
公式ページの手順に従い必要なものを入れます。
以下2つが必要になります。
- Go 1.11+
- LLVM 7 (for example, from apt.llvm.org
$ go version
go version go1.11 linux/amd64
go はもともと入っていたのでLLVMを入れます。
※ちなみにOSはUbuntu 18.04でやってます。
$ wget -O - https://apt.llvm.org/llvm-snapshot.gpg.key|sudo apt-key add -
$ sudo apt-get update
$ sudo apt-get install clang-7 lldb-7 lld-7
$ sudo apt-get install libllvm-7-ocaml-dev libllvm7 llvm-7 llvm-7-dev llvm-7-doc llvm-7-examples llvm-7-runtime
Arduinoで試してみるので以下を入れます
- binutils (avr-objcopy) for flashing.
- GCC (avr-gcc) for linking object files.
- libc (avr-libc), which is not installed on Debian as a dependency of avr-gcc.
- avrdude for flashing to an Arduino.
$ sudo apt-get install gcc-avr binutils-avr avr-libc
$ sudo apt-get install avrdude
必要なものがそろったらtinygoをセットアップします。
$ go get -u github.com/tinygo-org/tinygo
# github.com/tinygo-org/tinygo/loader
/go/src/github.com/tinygo-org/tinygo/loader/libclang.go:16:10: fatal error: clang-c/Index.h: No such file or directory
 #include <clang-c/Index.h> // if this fails, install libclang-7-dev
          ^~~~~~~~~~~~~~~~~
compilation terminated.
失敗しました。メッセージの通りにlibclang-7-devを入れて再チャレンジ
$ sudo apt-get install libclang-7-dev
$ go get -u github.com/tinygo-org/tinygo
$ go install github.com/tinygo-org/tinygo
$ which tinygo
/go/bin/tinygo
インストールできました。
Home > Getting Started > Usage をやってみます。
/tinygo/srcに移動して、tinygo run examples/testを打ってみます。
$ tinygo run examples/test/
Hello world from Go!
The answer is: 42
5 ** 2 = 25
3 + 12 = 15
fib(11) = 89
sumrange(100) = 5050
strlen foo: 3
map length: 2
map read: answer = 42
  answer = 42
  foo = 3
map length: 1
map read: data = 3
  data = 3
len/cap foo: 4 4
len/cap bar: 3 5
len/cap foo[1:2]: 1 3
foo[3]: 5
sum foo: 12
copy foo -> bar: 3
sum bar: 7
thing: foo
is int: 5
is byte: 120
is string: foo
is Thing: foo
is *Thing: foo
is *Thing: foo
is Doubler: 6
Stringer.String(): foo
Stringer.(*Thing).String(): foo
hello from function pointer: 5
deferring...
...run as defer 2
...run as defer 1
bound method: foo
thing inside closure: foo
inside fp closure: foo 3
lower to upper char: h -> H
tiny-goがあるフォルダに移動して、make gen-deviceを実行します。
$ cd /go/src/github.com/tinygo-org/tinygo
$ make gen-device
./tools/gen-device-avr.py lib/avr/packs/atmega src/device/avr/
lib/avr/packs/atmega/AT90CAN128.atdf
lib/avr/packs/atmega/AT90CAN32.atdf
lib/avr/packs/atmega/AT90CAN64.atdf
lib/avr/packs/atmega/AT90PWM1.atdf

省略

src/device/stm32/stm32l1xx.go
src/device/stm32/stm32l4x1.go
src/device/stm32/stm32l4x3.go
src/device/stm32/stm32w108.go
src/device/stm32/stm32l4x2.go
src/device/stm32/stm32l4x5.go
$
サンプル実行
サンプルを実行してみます。
$ tinygo flash -target=arduino examples/blinky1

avrdude: AVR device initialized and ready to accept instructions

Reading | ################################################## | 100% 0.00s

avrdude: Device signature = 0x1e950f (probably m328p)
avrdude: NOTE: "flash" memory has been specified, an erase cycle will be performed
         To disable this feature, specify the -D option.
avrdude: erasing chip
avrdude: reading input file "/tmp/tinygo130840926/main.hex"
avrdude: input file /tmp/tinygo130840926/main.hex auto detected as Intel Hex
avrdude: writing flash (698 bytes):

Writing | ################################################## | 100% 0.12s

avrdude: 698 bytes of flash written
avrdude: verifying flash memory against /tmp/tinygo130840926/main.hex:
avrdude: load data flash data from input file /tmp/tinygo130840926/main.hex:
avrdude: input file /tmp/tinygo130840926/main.hex auto detected as Intel Hex
avrdude: input file /tmp/tinygo130840926/main.hex contains 698 bytes
avrdude: reading on-chip flash data:

Reading | ################################################## | 100% 0.10s

avrdude: verifying ...
avrdude: 698 bytes of flash verified

avrdude done.  Thank you.
おおお!!
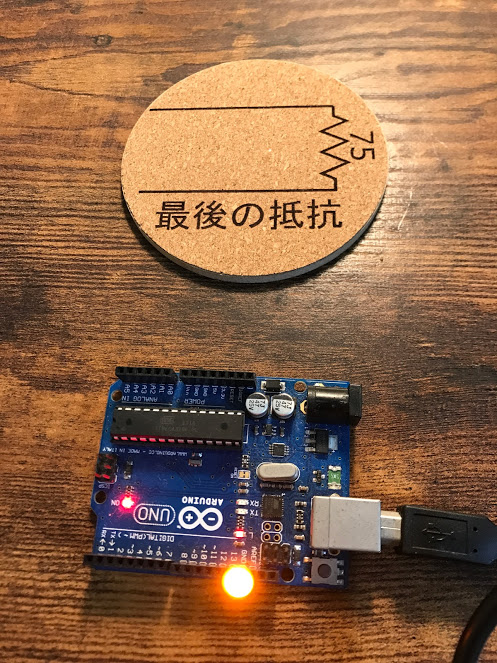
GoのコードがArduinoに書き込まれました!!!
秒数を変えると点滅の速度が変わりました。
package main

// This is the most minimal blinky example and should run almost everywhere.

import (
  "machine"
  "time"
)

func main() {
  led := machine.GPIO{machine.LED}
  led.Configure(machine.GPIOConfig{Mode: machine.GPIO_OUTPUT})
  for {
    led.Low()
    time.Sleep(time.Millisecond * 300)

    led.High()
    time.Sleep(time.Millisecond * 300)
  }
}
Goでマイコンを動かすのは新鮮ですね ![]()

