はじめに
Railsを勉強し始めて、そろそろオリジナルでWEBサービス(比較サイト)を作ろうと思い、色々と調べつつ構築していったら勉強になったのでメモしていきます。今回も、Rails,Vueを使って開発したかったので、それに合わせた環境になっています。
今回はその第三弾です。
環境
この記事では以下の環境(2018年7月9日時点)で動作確認できました。
- Ruby: 2.5.1p57 (2018-03-29 revision 63029) [x86_64-darwin17]
- Rails: 5.2.0
- mysql2: (>= 0.4.4, < 0.6.0)
- mysqlはdockerに作成してあります
- Docker version 18.03.1-ce
- yarn: 1.7.0
- webpacker: (~> 3.5)
- vue: ^2.5.16
参考にしたレポジトリ
プロジェクトを作る上で参考にした、サービスのレポジトリは以下です
前回のおさらい
前回は主に環境構築をやりました。
- normalize.css の導入
- Rubocopの対応
- StyleLintの導入
- ESLintの導入
前回の記事は下記です。
今日の目次
- RSpec の導入
- CircleCIの導入
それでは、第二弾始めます。
RSpec の導入
Rails開発をする上でもっともよく用いられているテストツールであるRSpecを導入して見ます。
必要なgemのインストール
まず、Gemfileに以下の2つをように記述してください。
group :development, :test do
  # 〜 省略 〜
  gem 'rspec-rails'
  gem 'factory_bot_rails'
end
-
rspec-rails:RSpecを含んでいるgemです。また、RailsでRSpecの色々な機能を使うときに必要になるgemです -
factory_bot_rails: テストデータを生成するプラグイン です
Gemfileを記述できたら$ bundle installしたらインストールは完了です。
rspecの必要ファイルのインストール
$ bundle exec rails generate rspec:install

      create  .rspec
      create  spec
      create  spec/spec_helper.rb
      create  spec/rails_helper.rb
上記のコマンドを実行したら、以下の4ファイルが追加されました。
.rspec , spec , spec/spec_helper.rb , spec/rails_helper.rb
Factory Botの設定
Factory Botの設定用に、spec/rails_helper.rbに以下の記述をします。
RSpec.configure do |config|
  # 〜 省略 一番下に記述してください 〜
  config.include FactoryBot::Syntax::Methods
end
rspec用のテストファイルを自動生成する記述を書く
rails gなどのコマンドでrspec用のテストファイルを自動作成するため、または、不要なファイルを生成しないための設定を、application.rbに以下の記述をします。
# 〜 省略 〜

module ProgrammingSchool
  class Application < Rails::Application
    # Initialize configuration defaults for originally generated Rails version.
    config.load_defaults 5.2


    config.generators do |g|
      g.test_framework :rspec,
        fixtures: true,
        view_specs: false,
        helper_specs: false,
        routing_specs: false,
        controller_specs: true,
        request_specs: false
      g.fixture_replacement :factory_girl, dir: "spec/factories"
    end


  end
end
これでRspecの導入の設定は以上です。試しに、テストを実行してみましょう。
$ bundle exec rspec

Finished in 0.00118 seconds (files took 0.28757 seconds to load)
0 examples, 0 failures
今は、なんのテストコードも書いてないので、0 examples, 0 failuresしか出ません。でも、これでテストコードを書けば運用できることがわかりました。
ここまでの対応に関するコミット
せっかくなので、試しに少しテストコードを書いてみた
ディレクトリ構成やファイル名はこんな感じにしました。
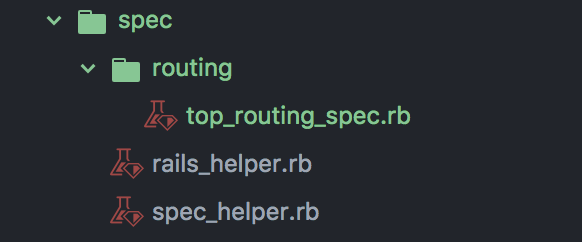
ファイルの中身は以下のように記述しました。
require 'rails_helper'

RSpec.describe TopController, type: :routing do
  describe 'routing' do
    it 'routes to #index' do
      expect(get: root_path).to route_to('top#index')
    end
  end
end
テストの内容は、getでルートパスにアクセスした場合は、Topコントローラのindexアクションにちゃんとアクセスしているかをテストしています。
$ bundle exec rspec
.

Finished in 0.01076 seconds (files took 4.13 seconds to load)
1 example, 0 failures
もちろん、エラーはなくテストをパスしました。
ここまでの対応に関するコミット
RSpec の導入で参考にした記事
- https://qiita.com/ryouzi/items/de7336e6175530723b30
- https://bagelee.com/programming/ruby-on-rails/factory_girl_factory_bot/
- https://qiita.com/ayies128/items/fa33089ca8efc090c657
- https://qiita.com/tocomi/items/2dba0de52eefdcf33fd7
CircleCIの導入
CircleCIとは、継続的インテグレーション(デリバリー)サービスです。コミットからデプロイまでのパイプラインを作成し、継続的な統合/配信を使用してソフトウェア開発プロセスを自動化できます。
それでは、CircleCIとGithubを連携させるためまずCircleCIにログインします。
CircleCIとGithubを連携させる手順
- 自分のレポジトリは、githubの
Organizationsで管理してたので、連携の仕方をこの記事を見て参考にしました - CircleCIのJOBSに任意のレポジトリを選択、ADD PROJECTSする
- そうすると設定ファイルの記述の参考が出てきます
- それを参考に設定ファイルを作成します
-
Start buildingボタンを押して連携する
この手順で連携できます
CircleCIの設定ファイルを作成
作成・修正するファイルは、以下の2つです。
- config.yml
- database.yml
1つめは、下記の記事を参考にして、mysqlに関する記述をしました。
version: 2
jobs:
  build:
    docker:
      - image: circleci/ruby:2.5.1-node
        environment:
          DATABASE_NAME: "circle_test"
          DATABASE_PASSWORD: ""
      - image: circleci/mysql:5.7-ram
        environment:
          MYSQL_ALLOW_EMPTY_PASSWORD: "true"
          MYSQL_DATABASE: "circle_test"
          MYSQL_HOST: "127.0.0.1"
          MYSQL_ROOT_HOST: "%"
          MYSQL_USER: "root"
    steps:
      - checkout

      - restore_cache:
          key: cache-bundle-{{ checksum "Gemfile.lock" }}
      - run: bundle install --path .bundle
      - save_cache:
          key: cache-bundle-{{ checksum "Gemfile.lock" }}
          paths:
            - .bundle

      - restore_cache:
          key: cache-yarn-{{ checksum "yarn.lock" }}
      - run: bin/yarn install
      - save_cache:
          key: cache-yarn-{{ checksum "yarn.lock" }}
          paths:
            - node_modules

      - run: yarn run lint
      - run: bundle exec rubocop
      - run: bundle exec rspec
- 環境を用意して
- bundleインストールして
- node_modulesインストールして
-
yarn run lintでcssとjsのLinter回して - rubocopでrubyのコードチェックして
-
bundle exec rspecでテストをパスしているかをチェックして
という一連の動作が記述されています。
2つめは、環境変数を用いて、開発用、テスト環境用、本番用で環境を変えています。
# MySQL. Versions 5.1.10 and up are supported.
#
# Install the MySQL driver
#   gem install mysql2
#
# Ensure the MySQL gem is defined in your Gemfile
#   gem 'mysql2'
#
# And be sure to use new-style password hashing:
#   https://dev.mysql.com/doc/refman/5.7/en/password-hashing.html
#
default: &default
  adapter: mysql2
  encoding: utf8
  pool: <%= ENV.fetch("RAILS_MAX_THREADS") { 5 } %>
  host: <%= ENV.fetch("DATABASE_HOST") { "127.0.0.1" } %>
  username: <%= ENV.fetch("DATABASE_USER") { "root" } %>
  password: <%= ENV.fetch("DATABASE_PASSWORD") { "root" } %>
  database: <%= ENV.fetch("DATABASE_NAME") { "programming-school" } %>

development:
  <<: *default
  database: programming-school_development

# Warning: The database defined as "test" will be erased and
# re-generated from your development database when you run "rake".
# Do not set this db to the same as development or production.
test:
  <<: *default

# As with config/secrets.yml, you never want to store sensitive information,
# like your database password, in your source code. If your source code is
# ever seen by anyone, they now have access to your database.
#
# Instead, provide the password as a unix environment variable when you boot
# the app. Read http://guides.rubyonrails.org/configuring.html#configuring-a-database
# for a full rundown on how to provide these environment variables in a
# production deployment.
#
# On Heroku and other platform providers, you may have a full connection URL
# available as an environment variable. For example:
#
#   DATABASE_URL="mysql2://myuser:mypass@localhost/somedatabase"
#
# You can use this database configuration with:
#
#   production:
#     url: <%= ENV['DATABASE_URL'] %>
#
production:
  <<: *default
  database: programming-school_production
  username: programming-school
  password: <%= ENV['PROGRAMMING-SCHOOL_DATABASE_PASSWORD'] %>
こんな感じです。これで、Githubにプルリクやプッシュしたら、CircleCIが勝手に回ると思います。。うーんDevOps
READMEにバッジを貼る
CircleCIの結果をバッジにしてREADME.mdに貼り付けることができます。詳しくは、この記事を参考にしました。
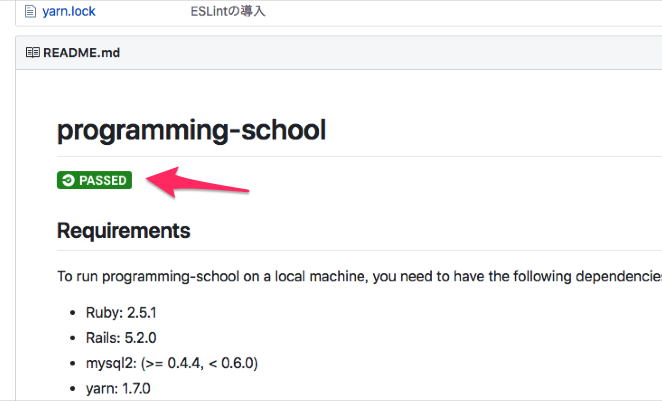
こんなん貼れました。これに関するコミットは下記です。
以上です!
この記事を読んだ方に
この記事を読んで、誤っている箇所をみつけたり、追記した方がいい内容などありましたら、編集リクエストやコメント欄で指摘していただけると助かります。