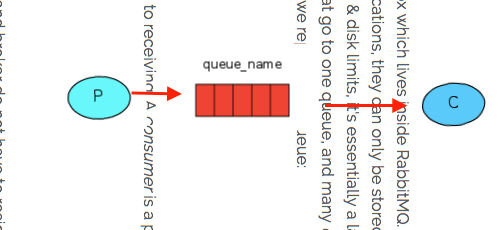
对于 rabbitmq 来说, 我想其实很多已经了解它是做什么用的, 简单说它就是消息代理, 它能够接收消息然后分发消息, 打个比方它就好比邮局. 你把写好的信扔进邮筒, 然后邮局的工作人员就会必定会把它送往你想要邮寄的对方手里. 这个过程中的邮筒,工作人员已经邮寄的过程就是 rabbitmq 它做的事情. 唯有不同的就是纸质信和二进制的消息内容. 在这里会涉及到几个对象, 一个是生成消息的人我们叫做 producer, 而producing 这个动作就好比发信. 然后邮筒就是queue, 然后邮局工作人员就是consumer.
就是这样一个过程和关系了.
首先,我们假设已经安装好了 rabbitmq 在自己的 local 环境. 具体怎么安装其实很简单, , 但是涉及到具体的自定义安装已经端口,数据存放位置还有性能调优这是高阶的话题实际场景再去查阅讨论.
这里我们一切都安装默认的安装来例子. 这里也是使用 ruby 对应的客户端bunny 来完成.
publish
#!/usr/bin/env ruby
# encoding: utf-8

require "bunny"
#then connect to RabbitMQ server

conn = Bunny.new
conn.start

ch = conn.create_channel
q = ch.queue("hello")
ch.default_exchange.publish("hello world", :routing_key=> q.name)
puts " [x] Sent 'Hello, world'"

conn.close()
ref: https://github.com/rabbitmq/rabbitmq-tutorials/blob/master/ruby/send.rb
send
#!/usr/bin/env ruby
# encoding: utf-8

require "bunny"


conn = Bunny.new
conn.start


ch   = conn.create_channel
q    = ch.queue("hello")

# 这里以上都是和 publish 是一样. 也就是我们不管干什么都应该创建连接然后连到目的 queue

puts " [*] Waiting for messages in #{q.name}. To exit press CTRL+C"
q.subscribe(:block => true) do |delivery_info, properties, body|
  puts " [x] Received #{body}"

  # cancel the consumer to exit
  delivery_info.consumer.cancel
end
这个就基本完成了基本的 publish 和 receive的动作.
