環境
OS X Yosemite10.10
Xcode6.1.1
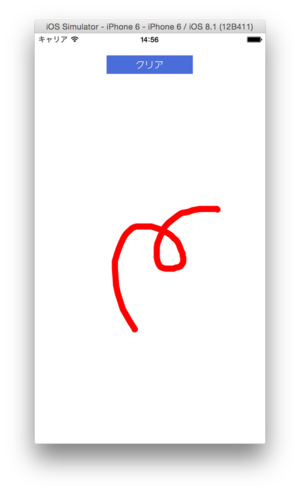
アプリ説明
・ドラッグすることで線がひける
・クリアボタンで描画した線をすべて消せる
・挙動の動画はこちらから
http://youtu.be/bnoDrccX1Tw
・GitHubにソースコードを公開しました。
https://github.com/GonKenny/Swift-Sample-drawLine2
ソースコード
viewContoroller.swift
//1.クリアボタンを設置→viewController.swiftにつなげる
//2.新規ファイル→CocoaTouch classのファイル作成(drawView.swift)
//3.Viewを設置→custom classにdrawViewを入力してつなげる
//5.swiftファイルを作成(line.swift)


import UIKit

class ViewController: UIViewController {

    //9.描画エリアを接続
    @IBOutlet weak var drawViewArea: drawView!


    override func viewDidLoad() {
        super.viewDidLoad()
        // Do any additional setup after loading the view, typically from a nib.
    }

    override func didReceiveMemoryWarning() {
        super.didReceiveMemoryWarning()
        // Dispose of any resources that can be recreated.
    }

    @IBAction func claerTapped(sender: UIButton) {      //1.
        //10.
        var theDrawView : drawView = drawViewArea as drawView    //
        theDrawView.lines = []
        theDrawView.setNeedsDisplay()
        }

}
drawView.swift
import UIKit

class drawView: UIView {

    //6.
    var lines: [Line] = []
    var lastPoint: CGPoint!


    //4.初期化
    required init(coder aDecoder: NSCoder) {
        super.init(coder: aDecoder)
        //self.backgroundColor = UIColor.blackColor() //チェック用

    }

    //7.
    override func touchesBegan(touches: NSSet, withEvent event: UIEvent) {
        lastPoint = touches.anyObject()?.locationInView(self)
    }

    override func touchesMoved(touches: NSSet, withEvent event: UIEvent) {
        var newPoint = touches.anyObject()?.locationInView(self)
        lines.append(Line(start: lastPoint, end: newPoint!))
        lastPoint = newPoint

        self.setNeedsDisplay()

    }

    //8.
    override func drawRect(rect: CGRect) {
        var context = UIGraphicsGetCurrentContext()
        CGContextBeginPath(context)

        for line in lines {
            CGContextMoveToPoint(context, line.start.x, line.start.y)
            CGContextAddLineToPoint(context, line.end.x, line.end.y)
        }

        CGContextSetRGBStrokeColor(context, 1, 0, 0, 1) //線の色
        CGContextSetLineWidth(context, 10)  //線の太さ
        CGContextSetLineCap(context, kCGLineCapRound)   //線を滑らかに
        CGContextStrokePath(context)
    }
}
line.swift
//5.line.swiftに書き足す

import UIKit

class Line {
    var start: CGPoint
    var end: CGPoint

    init(start _start: CGPoint, end _end:CGPoint){
        start = _start
        end = _end
    }

}
書き加えた順番に番号をふってあります。
もし声があれば、制作方法の動画も作ります。
ポイント
- 新規ファイルで新たなクラスを定義した後、identity InspecterのCustom Classから、新たなクラスを接続。これで、別ファイルのクラスに書いた挙動をつなげられる。
- CGContextSetLineCapで線がカクカクしないようにする
参考
Learning Swift #6 - Making a Drawing App
https://www.youtube.com/watch?v=8KV1o9hPF5E
まだまだ他の方の制作動画を見ながら真似するだけの段階です。
同じようなswift初心者の方に、少しでも役立てればいいなと思っています。