はじめに
Swift初心者です。
複数回にわたってUITableViewについて色々書いて見ます。<-- 備忘録です。
今回は、No.1ということで基本的な部分。
次の2点について書きます。
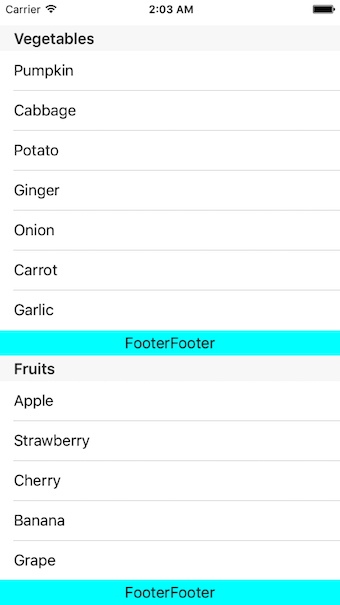
・セクション分けして表示
・ヘッダー,フッターを表示
StoryboardでTableViewを配置
まずはTableViewを配置し、更にTableViewCellを配置します。
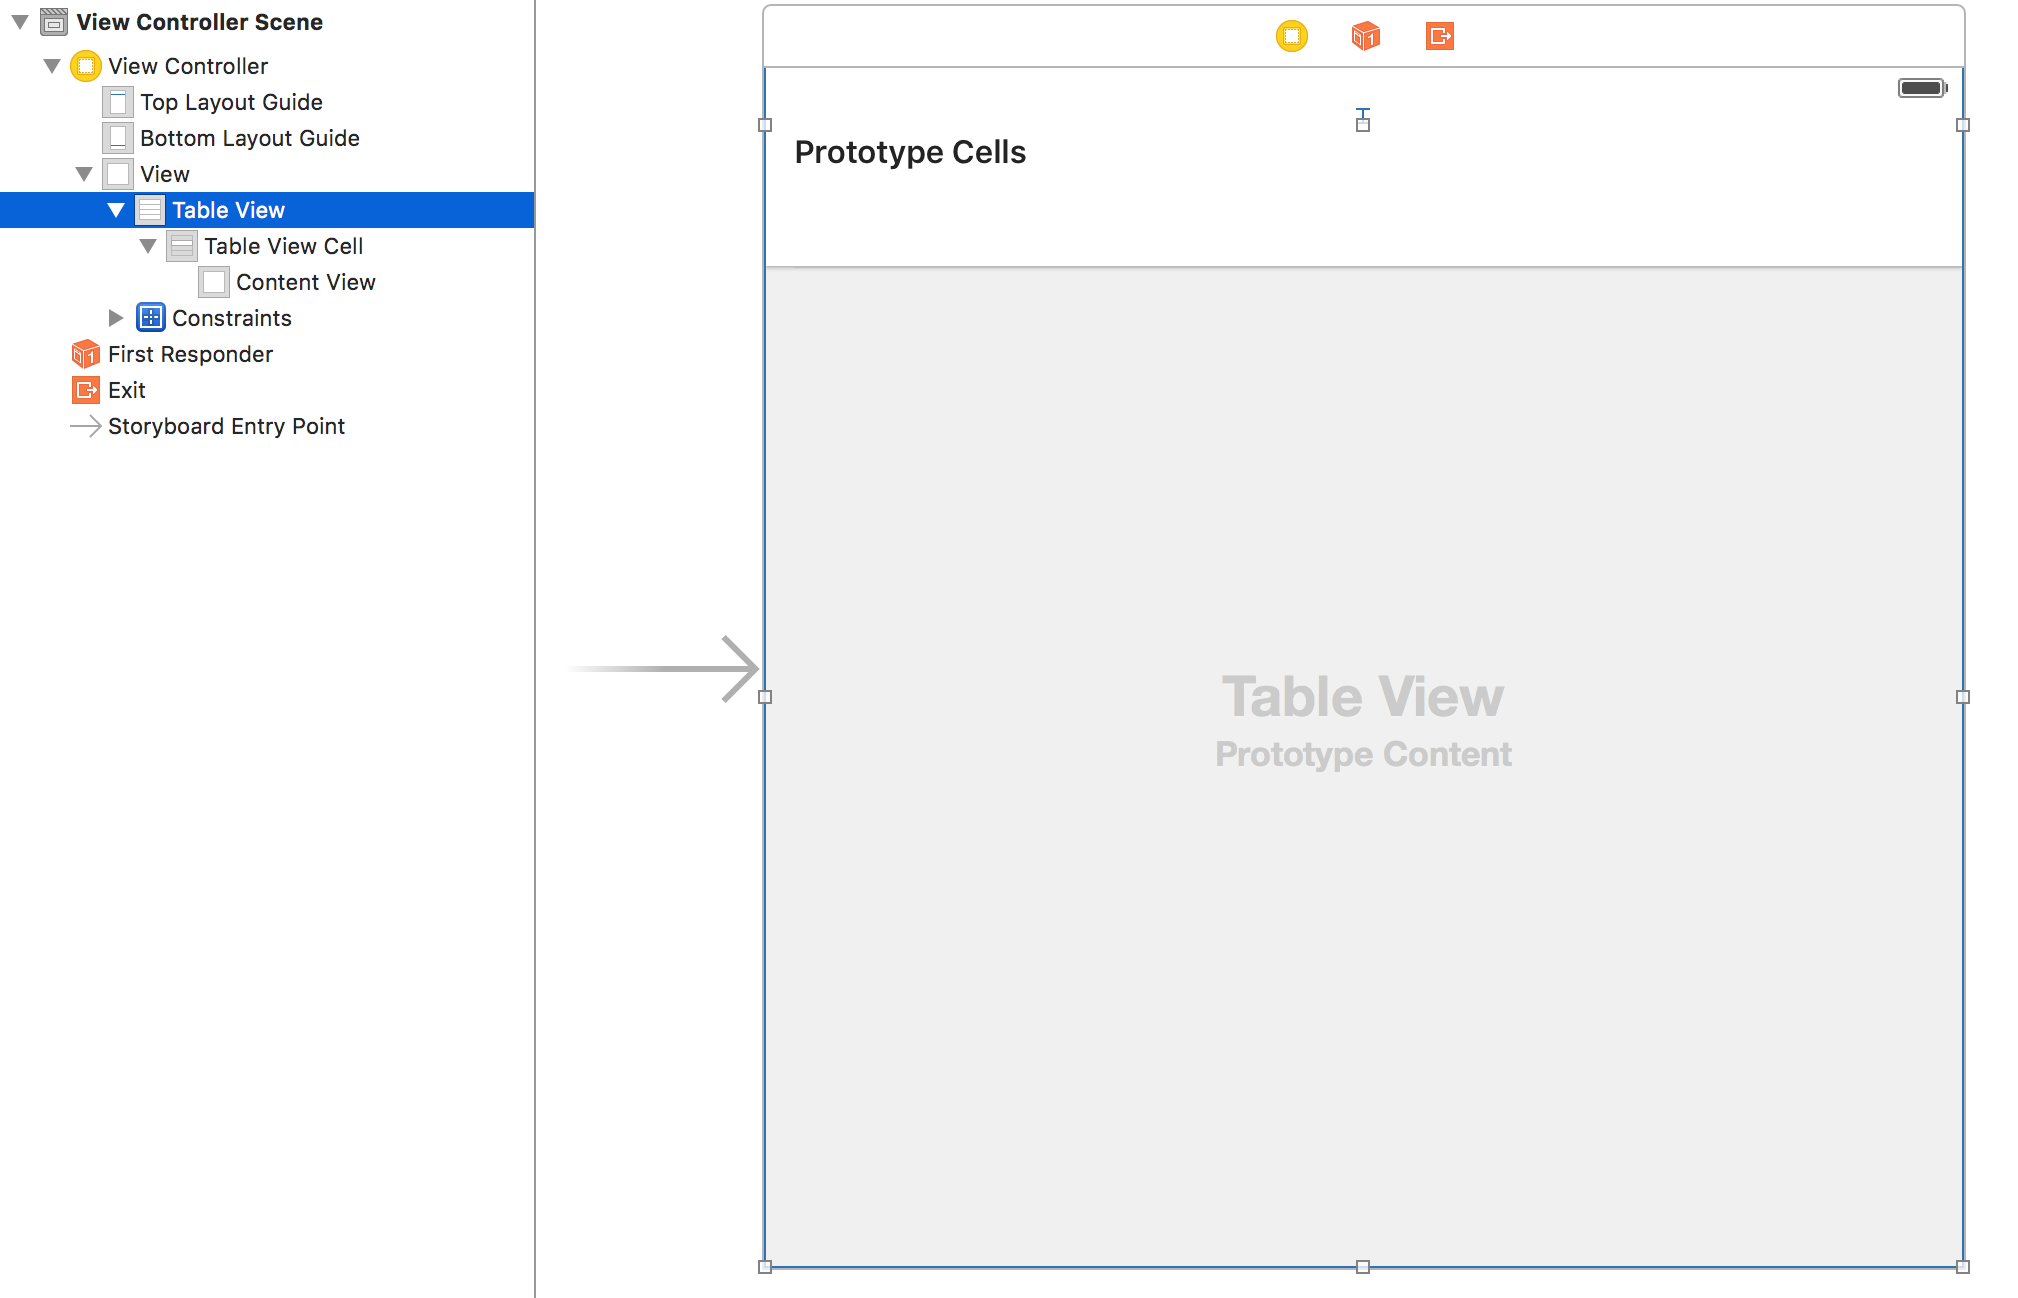
次にTableViewCellのIdentifierを設定します。(ここでは"Cell"としています。)

Source Code
1.Model.swift
UITableViewDataSource,UITableViewDelegateの実装
Model.swift
import Foundation
import UIKit

class Model: NSObject, UITableViewDataSource, UITableViewDelegate {

    let mView = View()

    // セクション名
    var foods = ["Vegetables", "Fruits"]

    // セルに表示するテキスト
    var vegetables = ["Pumpkin", "Cabbage", "Potato", "Ginger", "Onion", "Carrot", "Garlic"]
    var fruits = ["Apple", "Strawberry", "Cherry", "Banana", "Grape", "Peach", "Melon"]

//MARK:UITableViewDataSource

    /**
     テーブルビューのセクション数を返すメソッド
     */
    func numberOfSectionsInTableView(tableView: UITableView) -> Int {
        return foods.count;
    }

    /**
     セクション毎のタイトルをヘッダーに表示
     */
    func tableView(tableView: UITableView, titleForHeaderInSection section: Int) -> String? {
        return foods[section]
    }

    /**
     セクション毎のセル数を指定するメソッド
     */
    func tableView(tableView: UITableView, numberOfRowsInSection section: Int) -> Int {
        switch section {
        case 0:
            return vegetables.count
        case 1:
            return fruits.count
        default:
            return 0
        }
    }

    /**
     セルの内容を変更するメソッド
     */
    func tableView(tableView: UITableView, cellForRowAtIndexPath indexPath: NSIndexPath) -> UITableViewCell {

        // Storyboardで設定したIdentifierでUITableViewCellのインスタンスを生成
        let cell = tableView.dequeueReusableCellWithIdentifier("Cell", forIndexPath: indexPath)

        // StoryboardでCellを作成しない場合
        // let cell: UITableViewCell = UITableViewCell(style: UITableViewCellStyle.Subtitle, reuseIdentifier: "Cell")

        // セルにテキストを設定
        switch indexPath.section {
        case 0:
            cell.textLabel?.text = vegetables[indexPath.row]
        case 1:
            cell.textLabel?.text = fruits[indexPath.row]
        default:
            break
        }

        return cell
    }

//MARK:UITableViewDelegate

    /**
     Footerを設定するメソッド
     */
    func tableView(tableView: UITableView, viewForFooterInSection section: Int) -> UIView? {
        return mView.createFooterLabel()
    }

}
2.View.swift
フッターに表示するView
View.swift
import Foundation
import UIKit

class View : UIView {

    func createFooterLabel() -> UILabel {
        let footerLabelSize = CGRectMake(0, 0, 200, 20)
        let footerLabelText = "FooterFooter"

        let footerLabel = UILabel(frame: footerLabelSize)
        footerLabel.text = footerLabelText
        footerLabel.textAlignment = .Center
        footerLabel.backgroundColor = UIColor.cyanColor()

        return footerLabel
    }

}
3.ViewController.swift
コントローラ
ViewController.swift
import UIKit

class ViewController: UIViewController {

    @IBOutlet weak var tableView: UITableView!
    let mModel = Model()

//MARK:UIViewController
    override func viewDidLoad() {
        super.viewDidLoad()
        tableView.dataSource = mModel
        tableView.delegate = mModel
    }

    override func didReceiveMemoryWarning() {
        super.didReceiveMemoryWarning()
    }
}
実行結果
最後に
今回は、
TableViewの基本的な実装として
・セクション分けして表示
・ヘッダー,フッターを表示
について記載しました。
次回は、
・セルの右側にチェックマーク等のマークを表示
・タップ時のイベント処理の実装
について記載しようと思っています。