Python初心者がScikit-imageの例題を自分用に使うためのヒント
に続いて、Scikit-imageの例題を、ほんの少しだけ改変して、遊んでみるために、Python初心者向けの内容を書いてみます。
引き続き Normalized Cut を例題にとりあげます。
この例題を、さまざまな画像に対して処理することを考えます。
まずは、この例題をそのまま示します。
from skimage import data, io, segmentation, color
from skimage.future import graph
from matplotlib import pyplot as plt
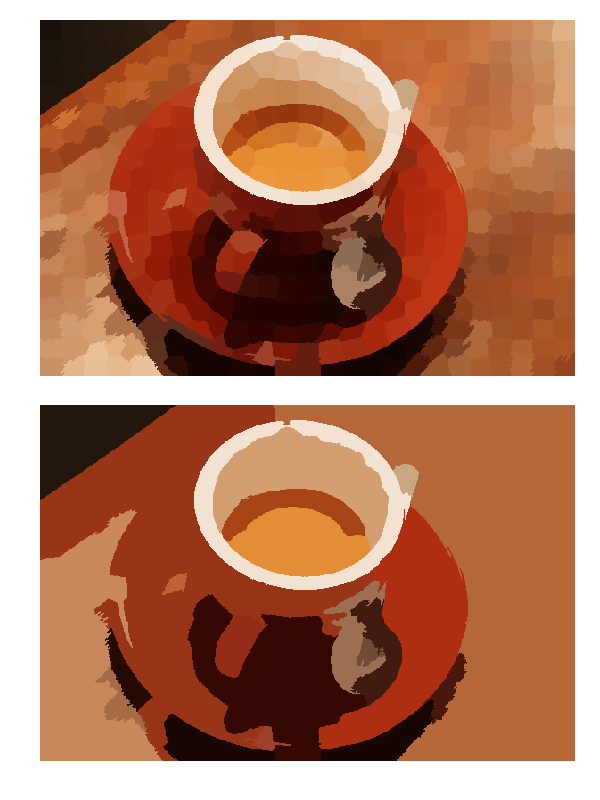
img = data.coffee()
labels1 = segmentation.slic(img, compactness=30, n_segments=400)
out1 = color.label2rgb(labels1, img, kind='avg')
g = graph.rag_mean_color(img, labels1, mode='similarity')
labels2 = graph.cut_normalized(labels1, g)
out2 = color.label2rgb(labels2, img, kind='avg')
plt.figure()
io.imshow(out1)
plt.figure()
io.imshow(out2)
io.show()
ヒント:関数の作り方を覚えよう。
この処理を、さまざまな入力画像に対して処理しようと思ったら、
何を入力として、何をして、何を返すのかを考える。
とりあえず、img画像に対して処理する部分を関数化してみましょう。
Python の標準ドキュメントの和訳 4.6. 関数を定義する
関数化後の1例
from skimage import data, io, segmentation, color
from skimage.future import graph
from matplotlib import pyplot as plt

def plotNcut(img):
    labels1 = segmentation.slic(img, compactness=30, n_segments=400)
    out1 = color.label2rgb(labels1, img, kind='avg')

    g = graph.rag_mean_color(img, labels1, mode='similarity')
    labels2 = graph.cut_normalized(labels1, g)
    out2 = color.label2rgb(labels2, img, kind='avg')

    plt.figure()
    io.imshow(out1)
    plt.figure()
    io.imshow(out2)
    io.show()

img = data.coffee()
plotNcut(img)
どうでしょうか? 関数化には
def 関数名(引数):
インデントされたコード
のように書けば、とりあえずの関数化ができます。インデントが制御構文の一部だということが、Pythonのまったくの初心者にはとまどうかもしれません。値を返さない限り、return 戻り値を書く必要はありません。、
ヒント:for name in glob.glob("*.jpg"):を使って複数のファイルに対して処理してみよう。
書き換え後のスクリプト
from skimage import data, io, segmentation, color
from skimage.future import graph
from matplotlib import pyplot as plt

def plotNcut(img):
    labels1 = segmentation.slic(img, compactness=30, n_segments=400)
    out1 = color.label2rgb(labels1, img, kind='avg')

    g = graph.rag_mean_color(img, labels1, mode='similarity')
    labels2 = graph.cut_normalized(labels1, g)
    out2 = color.label2rgb(labels2, img, kind='avg')

    plt.figure(1)
    io.imshow(out1)
    plt.figure(2)
    io.imshow(out2)
    io.show()

import cv2
import glob
for name in glob.glob("*.png"):
    img = cv2.imread(name)
    plotNcut(img)
    cv2.waitKey(100)
for文はリストなどのデータのならびに対して、1つずつ処理をするための制御構文です。
for name in names:
    print name
などのように使います。
詳しくは以下のライブラリをご覧ください。
Python 標準ライブラリ 4.2. for 文
Python 標準ライブラリ glob — Unix 形式のパス名のパターン展開
def plotNcut(img):で関数定義をしているので、for文の中の記述が簡潔になっています。
cv2.waitKey(100)は、表示をみやすくするために待ち時間を与えているものです。
ヒント:動画のフレームを取り出して処理してみよう
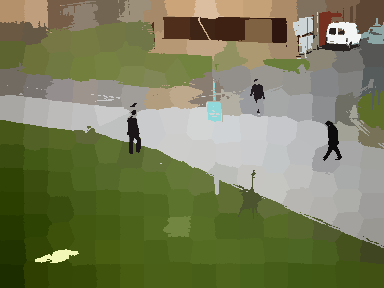
768x576.avi は OpenCVの配布の中に入っている動画データです。
この動画を使って、Normalized Cut を実行してみましょう。
OpenCV-Pythonにはcv2.VideoCapture() があり、動画から1つ1つのフレームの画像を取り出すことができます。(引数にカメラの番号を与えてやると、USBカメラから画像をとりこむことができます。)
まず、動画再生が既存のスクリプトで出来ているかを確認しましょう。OpenCV-Tutorials Getting Started with Videos
これを試みて、動画が再生できていない場合には、cap.isOpend()が最初からFalseになっている可能性が高いです。ありがちな状況は、opencv_ffmpeg2411.dllなどのDLLをpythonインタプリタが見つけられていないことです。
Note Make sure proper versions of ffmpeg or gstreamer is installed. Sometimes, it is a headache to work with Video Capture mostly due to wrong installation of ffmpeg/gstreamer.
とありますので、webで対処方法を調べてみてください。
(OpenCV2.4.11を使う場合には、(Pythonのディレクトリ)/Lib/site-packages/にOpenCV2.4.11のcv2.pyd
で置き換えます。またopencv_ffmpeg2411.dll をコピーして、スクリプトのある場所に貼り付けるなどしてffmpegにパスがとっている状態にします。)
書き換え後のスクリプト
from skimage import data, io, segmentation, color
from skimage.future import graph
from matplotlib import pyplot as plt

import cv2


def plotNcut(img):
    labels1 = segmentation.slic(img, compactness=30, n_segments=200)
    out1 = color.label2rgb(labels1, img, kind='avg')

    g = graph.rag_mean_color(img, labels1, mode='similarity')
    labels2 = graph.cut_normalized(labels1, g)
    out2 = color.label2rgb(labels2, img, kind='avg')

    return out1, out2

name = "768x576.avi"
cap = cv2.VideoCapture(name)
i = -1
while cap.isOpened():
    i += 1
    ret, img = cap.read()
    if i % 10 != 0:
        continue
    if ret != True:
        break
    [h, w] = img.shape[:2]
    img = cv2.resize(img, (w/2, h/2))
    out1, out2 = plotNcut(img)
    cv2.imshow("img", out1)
    cv2.waitKey(100)
    print i
cap = cv2.VideoCapture(name)で設定した変数capに関連する部分に着目してください。
isOpened(),read()のメソッドは
OpenCV-Python Tutorials Getting Started with Videos
の例題に書いてあるとおりです。
入力画像と結果画像の1例

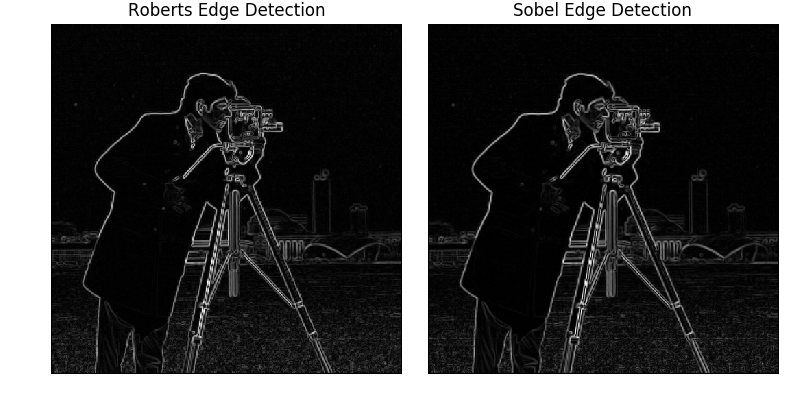
課題:cv2.VideoCapture()を用いて、Edge operatorsの例題を動画に対して処理するプログラムを書いてみましょう。
発展
処理するファイルを見つける方法としては、glob.glob(ファイルパターン)の他にos.walk()があります。階層的なディレクトリ構造の中で、ディレクトリを移動しながら、ファイルを探していくことができます。(私にはよく使う機能です)
os.walk(top, topdown=True, onerror=None, followlinks=False)
Python 標準ライブラリ os — 雑多なオペレーティングシステムインタフェース
追記:ファイルリストのシャッフル
複数のファイルを処理する別パターンとしては、ファイルリストから処理することがあります。処理によっては乱数でファイルを選択する必要があります。
次の例では、ファイルリストから行をシャッフルしてそこから100行分だけ選んで
処理することができます。
lines = open("filelist.txt", "rt").readlines()
random.shuffle(lines)
for line in lines[:100]:
    p = line.strip()
    print p