はじめに
ゆる〜く学ぶ。みんなのWeb勉強コミュニティー。 「にゅ〜ぶる会」を運用中です。
https://newburu.github.io/
そこで、何か教育用のコンテンツが欲しいなぁ〜と思い立ち、今回の企画をスタートしました!
Railsで基本情報技術者試験の過去問題サイトを作ります!
最終目標
- 問題・回答の登録は、Scaffoldで簡易でOK
- APIを用意して、ランダムに問題を抽出する機能を追加する
- TwitterBOT、LINEBOT、SlackBOTが出来たら良いな
履歴
1:構築編
https://qiita.com/newburu/items/ed59f47ac645b19620f6
2:日本語化(i18n)編
本ページ
3:親子関係、登録編
https://qiita.com/newburu/items/f2a20289be5ec1fc1b77
4:親子関係、参照編
https://qiita.com/newburu/items/51b11bd02691efc2cc0d
5:API編
https://qiita.com/newburu/items/89f9f847a2648bdd006c
6:SlackBOT編
https://qiita.com/newburu/items/aeeb9acb453da786bd59
7:Herokuデプロイ〜自動化編
https://qiita.com/newburu/items/0a8bb02e1e8c8fe737c7
今回やる事
- 日本語化(i18n)する
日本語化(i18n)する
1. デフォルトの言語を日本語にします。
class Application < Rails::Application
  config.i18n.default_locale = :ja
end
2. gem 'rails-i18n'を追加します。
gem 'rails-i18n'
$ bundle install
日本語を使う場合のデフォルトロケールファイル「svenfuchs/rails-i18n」をダウンロードしなくてもよくなります。
※「config.i18n.default_locale = :ja」を先に設定しておく必要があります。
3. i18nのロードパスを拡張する
class Application < Rails::Application
  config.i18n.load_path += Dir[Rails.root.join('config', 'locales', '**', '*.{rb,yml}').to_s]
end
4. config/locales配下にロケールファイルを配置
以下、あくまで例です。皆さんの管理しやすい構成にして貰えれば良いと思います。
config
 └─ locales
     ├─ models  # models関連のファイルはここで管理する
         ├─ answer.ja.yml  # modelは1つのファイル(model.ja.ymlなど)で管理しても良いと思います。
         ├─ question.ja.yml
     └─ views  # views関連のファイルはここで管理する
         ├─ answer.ja.yml
         ├─ question.ja.yml
     ├─ ja.yml  # 共通部分はここに
5. 日本語化していきましょう
View用
ja:
  questions:
    index:
      title: '問題一覧'
    show:
      title: '問題参照'
    edit:
      title: '問題編集'
Model用
ja:
  activerecord:
    models:
      question: '問題'
    attributes:
        question:
          id: 'ID'
          category1: 'カテゴリ1'
          category2: 'カテゴリ2'
          category3: 'カテゴリ3'
          msg: '問題文'
          created_at: '作成日'
          updated_at: '更新日'
共通用
ja:
  btn:
    new: '新規作成'
    show: '参照'
    edit: '編集'
    destroy: '削除'
    back: '戻る'
  confirm:
    destroy: '本当に削除して良いですか?'
6. では、Viewに適用していきましょう
変更前
h1 Listing questions

table
  thead
    tr
      th Category1
      th Category2
      th Category3
      th Msg
      th
      th
      th

  tbody
    - @questions.each do |question|
      tr
        td = question.category1
        td = question.category2
        td = question.category3
        td = question.msg
        td = link_to 'Show', question
        td = link_to 'Edit', edit_question_path(question)
        td = link_to 'Destroy', question, data: { confirm: 'Are you sure?' }, method: :delete

br

= link_to 'New Question', new_question_path
変更後
h1 = t('.title')  # Viewを格納しているディレクトリを起点に、相対パス指定します。

table
  thead
    tr
      th = t('activerecord.attributes.question.category1')  # tを使って、フルパス指定します。
      th = Question.human_attribute_name(:category2)  # human_attribute_nameを使って指定します。
      th = Question.human_attribute_name(:category3)
      th = Question.human_attribute_name(:msg)
      th
      th
      th

  tbody
    - @questions.each do |question|
      tr
        td = question.category1
        td = question.category2
        td = question.category3
        td = question.msg
        td = link_to t('btn.show'), question
        td = link_to t('btn.edit'), edit_question_path(question)
        td = link_to t('btn.destroy'), question, data: { confirm: t('confirm.destroy') }, method: :delete

br

= link_to t('btn.new'), new_question_path
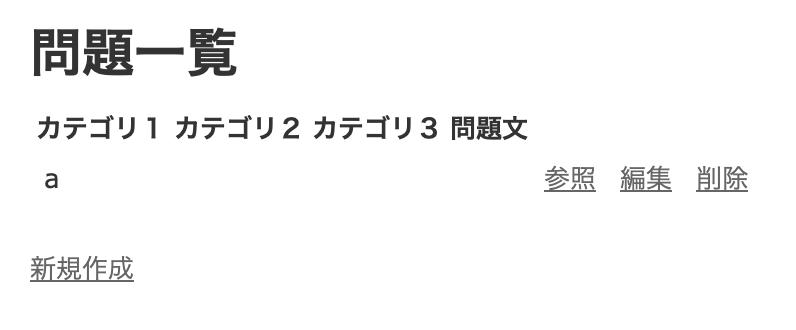
という感じで、Viewを変更していきましょう。
今回はここまで
ありがとうございました!
次回は、レイアウトを綺麗にしていこうかな。
