はじめに
Amazon EC2インスタンス(Amazon Linux)にRuby Sinatra環境を構築する手順です。
Amazon Linuxにrbenv 1.0.0-33 + ruby-build + Ruby 2.3.1 + Sinatra 1.4.7をインストールします。
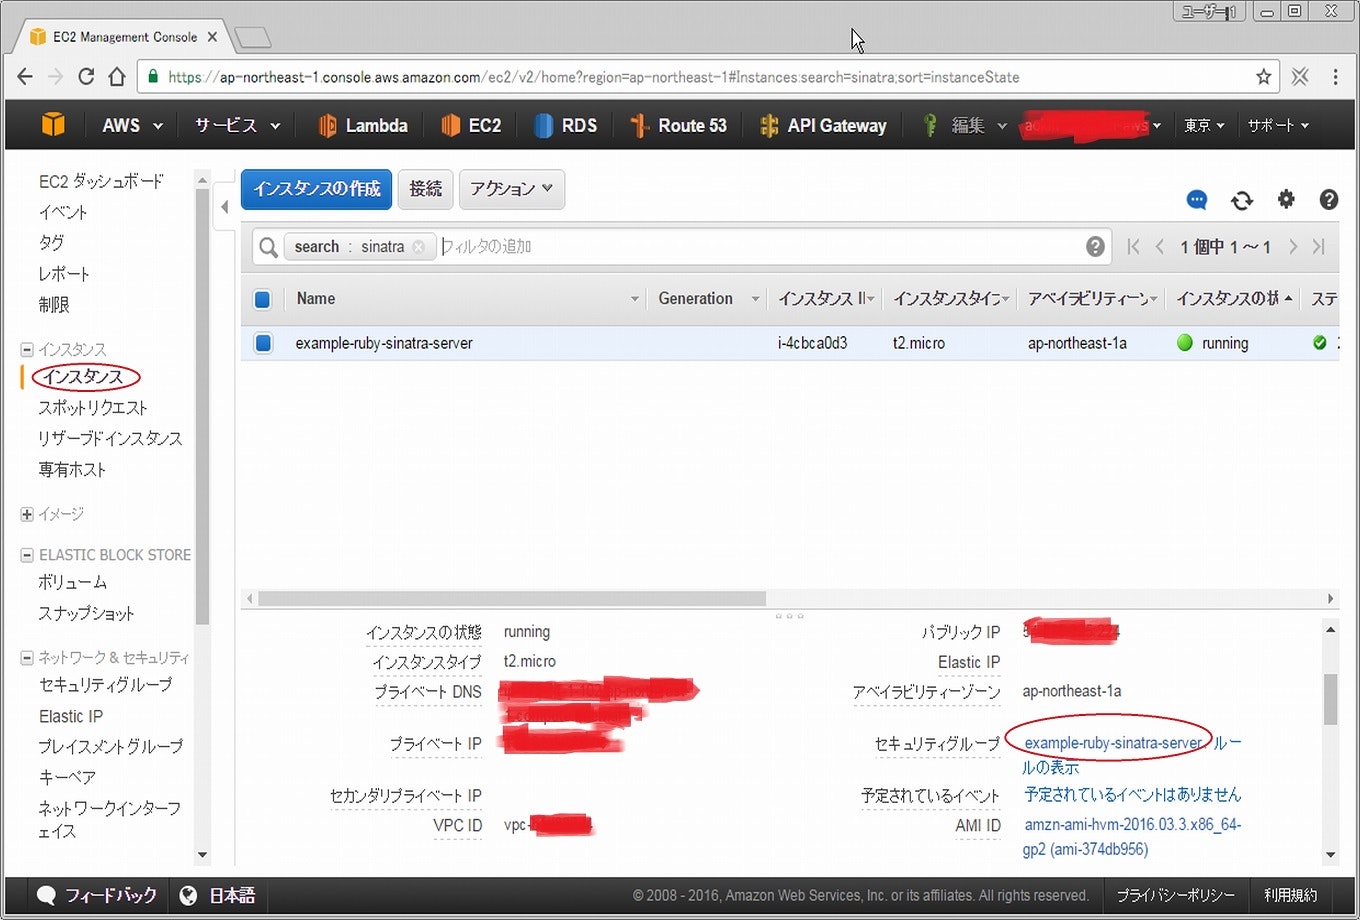
EC2インスタンス作成時に使用したAMI
SinatraをインストールするEC2インスタンスは以下のAMIで作成しました。
・amzn-ami-hvm-2016.03.3.x86_64-gp2 (ami-374db956)
Ruby Sinatraをインストールする環境
・Amazon Linux (4.4.19-29.55.amzn1.x86_64)
# uname -a
Linux example-ruby-sinatra-server 4.4.19-29.55.amzn1.x86_64 #1 SMP Mon Aug 29 23:29:40 UTC 2016 x86_64 x86_64 x86_64 GNU/Linux
#
参考ページ
以下のページを参考にさせて頂きました。
rbenvを使ってSinatraの実行環境を整えるまで
http://qiita.com/keita-nishimoto/items/8a89a176943a44adbebb
Ruby Sinatraのインストール
http://qiita.com/soushiy/items/8de8dfef5183fc3b515a
Amazon LinuxにRuby on Rails環境構築(rbenv + ruby-build + Ruby 2.2.1 + Rails 4.2.1インストール)
http://qiita.com/na0AaooQ/items/5bd62e630a2faf051a52
Amazon LinuxのEC2インスタンス作成
(1) Amazon LinuxのEC2インスタンスを作成します。
Amazon Linuxインスタンス作成時、User Dataに以下を貼り付けて、EC2インスタンスを作成します。
#!/bin/sh

echo "User Data start"

yum -y update

unalias cp
cp -f -p /usr/share/zoneinfo/Japan /etc/localtime

cat << _EOT_ > /etc/sysconfig/clock
ZONE="Asia/Tokyo"
UTC=false
_EOT_

chmod 644 /etc/sysconfig/clock

/etc/init.d/crond restart

echo "User Data end"
Amazon Linuxへパッケージインストール
(2) Amazon LinuxのEC2インスタンスが作成されたら、ec2-userでログインします。
(3) gitをインストールします。
$ sudo su -
# yum -y install git
(4) RubyやSinatraインストールに必要なパッケージをインストールします。
# yum -y install gcc-c++ patch openssl-devel readline readline-devel libyaml-devel zlib zlib-devel libffi-devel make bzip2 autoconf automake libtool bison iconv-deve
rbenvインストール
(5) rbenvをインストールします。
# pwd
/root
#
# git clone https://github.com/sstephenson/rbenv.git /usr/local/rbenv
Cloning into '/usr/local/rbenv'...
remote: Counting objects: 2542, done.
remote: Total 2542 (delta 0), reused 0 (delta 0), pack-reused 2542
Receiving objects: 100% (2542/2542), 461.51 KiB | 383.00 KiB/s, done.
Resolving deltas: 100% (1597/1597), done.
Checking connectivity... done.
#
(6) rbenvがインストールされた事を確認します。
# ls -lrta /usr/local/rbenv/
total 80
drwxr-xr-x 13 root root  4096 Oct  2 19:31 ..
-rw-r--r--  1 root root    35 Oct  2 19:31 .vimrc
-rw-r--r--  1 root root   184 Oct  2 19:31 .travis.yml
drwxr-xr-x  2 root root  4096 Oct  2 19:31 src
-rw-r--r--  1 root root 16571 Oct  2 19:31 README.md
drwxr-xr-x  3 root root  4096 Oct  2 19:31 rbenv.d
-rw-r--r--  1 root root  1058 Oct  2 19:31 LICENSE
drwxr-xr-x  2 root root  4096 Oct  2 19:31 libexec
-rw-r--r--  1 root root    97 Oct  2 19:31 .gitignore
-rw-r--r--  1 root root  3390 Oct  2 19:31 CONDUCT.md
drwxr-xr-x  2 root root  4096 Oct  2 19:31 completions
drwxr-xr-x  2 root root  4096 Oct  2 19:31 bin
-rw-r--r--  1 root root    19 Oct  2 19:31 .agignore
drwxr-xr-x  9 root root  4096 Oct  2 19:31 .
drwxr-xr-x  3 root root  4096 Oct  2 19:31 test
drwxr-xr-x  8 root root  4096 Oct  2 19:31 .git
#
RBENV_ROOT環境変数の追加
(7) rbenv用の環境変数を追加します。
# cp -p /etc/profile /etc/profile.ORG
# diff /etc/profile /etc/profile.ORG
#
# echo 'export RBENV_ROOT="/usr/local/rbenv"' >> /etc/profile
# echo 'export PATH="${RBENV_ROOT}/bin:${PATH}"' >> /etc/profile
# echo 'eval "$(rbenv init -)"' >> /etc/profile
RBENV_ROOT環境変数の有効化やrbenv init実行
(8) rbenv用の環境変数を読み込み、rbenv initを実行します。
# source /etc/profile
# su - root
# env | grep RBENV
RBENV_ROOT=/usr/local/rbenv
RBENV_SHELL=bash
#
インストールしたrbenvバージョン確認
(9) インストールしたrbenvのバージョンを確認します。
# which rbenv
/usr/local/rbenv/bin/rbenv
#
# rbenv --version
rbenv 1.0.0-33-gc7dcaf1
#
ruby-buildインストール
(10) ruby-buildをインストールします。
rbenv installコマンドを使えるようにする為、rbenvのプラグインであるruby-buildをインストールします。
# pwd
/root
#
# git clone https://github.com/sstephenson/ruby-build.git /usr/local/rbenv/plugins/ruby-build
Cloning into '/usr/local/rbenv/plugins/ruby-build'...
remote: Counting objects: 6981, done.
remote: Total 6981 (delta 0), reused 0 (delta 0), pack-reused 6981
Receiving objects: 100% (6981/6981), 1.35 MiB | 614.00 KiB/s, done.
Resolving deltas: 100% (4152/4152), done.
Checking connectivity... done.
#
(11) ruby-buildがインストールされた事を確認します。
# ls -lrta /usr/local/rbenv/plugins/ruby-build
total 56
drwxr-xr-x 3 root root 4096 Oct  2 19:38 ..
-rw-r--r-- 1 root root  474 Oct  2 19:38 .travis.yml
drwxr-xr-x 3 root root 4096 Oct  2 19:38 share
drwxr-xr-x 2 root root 4096 Oct  2 19:38 script
-rw-r--r-- 1 root root 8799 Oct  2 19:38 README.md
-rw-r--r-- 1 root root 1063 Oct  2 19:38 LICENSE
-rwxr-xr-x 1 root root  357 Oct  2 19:38 install.sh
-rw-r--r-- 1 root root 3390 Oct  2 19:38 CONDUCT.md
drwxr-xr-x 2 root root 4096 Oct  2 19:38 bin
drwxr-xr-x 7 root root 4096 Oct  2 19:38 .
drwxr-xr-x 5 root root 4096 Oct  2 19:38 test
drwxr-xr-x 8 root root 4096 Oct  2 19:38 .git
#
Ruby 2.3.1インストール
(12) インストール可能なRubyのバージョンを確認します。
# pwd
/root
#
# rbenv install -l
Available versions:
  1.8.5-p113
  1.8.5-p114
  (中略)
  2.3.0
  2.3.1 → このバージョンをインストールします。
  2.4.0-dev
  2.4.0-preview1
  2.4.0-preview2
  jruby-1.5.6
  jruby-1.6.3
  (中略)
  ree-1.8.7-2011.12
  ree-1.8.7-2012.01
  ree-1.8.7-2012.02
  topaz-dev
#
(13) Ruby 2.3.1をインストールします。
# pwd
/root
#
# rbenv install -v 2.3.1
(14) Ruby 2.3.1のインストールが完了するまで待ちます。
Amazon EC2インスタンスのt2.microインスタンスにインストールする場合、インストール完了まで5分程かかりますので少々待ちます。
# rbenv install -v 2.3.1
/tmp/ruby-build.20161002194712.3034 ~
Downloading ruby-2.3.1.tar.bz2...
-> https://cache.ruby-lang.org/pub/ruby/2.3/ruby-2.3.1.tar.bz2
Installing ruby-2.3.1...
/tmp/ruby-build.20161002194712.3034/ruby-2.3.1 /tmp/ruby-build.20161002194712.3034 ~
checking for ruby... /usr/bin/ruby
config.guess already exists
config.sub already exists
checking build system type... x86_64-pc-linux-gnu
checking host system type... x86_64-pc-linux-gnu
checking target system type... x86_64-pc-linux-gnu
checking for gcc... gcc

 (中略)

installing rdoc:              /usr/local/rbenv/versions/2.3.1/share/ri/2.3.0/system
installing capi-docs:         /usr/local/rbenv/versions/2.3.1/share/doc/ruby
Installed ruby-2.3.1 to /usr/local/rbenv/versions/2.3.1

/tmp/ruby-build.20161002194712.3034 ~
~
#
インストールしたRubyのバージョン確認
(15) Amazon EC2インスタンス環境全体のRubyバージョンをインストールしたRuby 2.3.1へ切り替えます。
# pwd
/root
#
# rbenv rehash
# rbenv global 2.3.1
#
(16) Ruby 2.3.1がインストールされている事を確認します。
# which ruby
/usr/local/rbenv/shims/ruby
#
# ruby -v
ruby 2.3.1p112 (2016-04-26 revision 54768) [x86_64-linux]
#
Sinatraインストール
(17) gemを最新にアップデートします。
# pwd
/root
#
# rbenv exec gem update --system
Updating rubygems-update
Fetching: rubygems-update-2.6.7.gem (100%)
Successfully installed rubygems-update-2.6.7
Parsing documentation for rubygems-update-2.6.7
Installing ri documentation for rubygems-update-2.6.7
Installing darkfish documentation for rubygems-update-2.6.7
Done installing documentation for rubygems-update after 30 seconds
Parsing documentation for rubygems-update-2.6.7
Done installing documentation for rubygems-update after 0 seconds
Installing RubyGems 2.6.7
RubyGems 2.6.7 installed
Parsing documentation for rubygems-2.6.7
Installing ri documentation for rubygems-2.6.7

 (中略)

RubyGems installed the following executables:
        /usr/local/rbenv/versions/2.3.1/bin/gem

Ruby Interactive (ri) documentation was installed. ri is kind of like man
pages for ruby libraries. You may access it like this:
  ri Classname
  ri Classname.class_method
  ri Classname#instance_method
If you do not wish to install this documentation in the future, use the
--no-document flag, or set it as the default in your ~/.gemrc file. See
'gem help env' for details.

RubyGems system software updated
#
(18) gemのバージョンを確認します。
# which gem
/usr/local/rbenv/shims/gem
#
# gem -v
2.6.7
#
(19) bundlerをインストールします。
# rbenv exec gem install bundler
Fetching: bundler-1.13.2.gem (100%)
Successfully installed bundler-1.13.2
Parsing documentation for bundler-1.13.2
Installing ri documentation for bundler-1.13.2
Done installing documentation for bundler after 4 seconds
1 gem installed
#
# rbenv exec gem list

*** LOCAL GEMS ***

bigdecimal (default: 1.2.8)
bundler (1.13.2)
did_you_mean (1.0.0)
io-console (default: 0.4.5)
json (default: 1.8.3)
minitest (5.8.3)
net-telnet (0.1.1)
power_assert (0.2.6)
psych (default: 2.0.17)
rake (10.4.2)
rdoc (default: 4.2.1)
rubygems-update (2.6.7)
test-unit (3.1.5)
#
(20) Sinatraをインストールします。
gemでsinatraをインストールします。
# pwd
/root
#
# rbenv exec gem install sinatra
Fetching: rack-1.6.4.gem (100%)
Successfully installed rack-1.6.4
Fetching: tilt-2.0.5.gem (100%)
Successfully installed tilt-2.0.5
Fetching: rack-protection-1.5.3.gem (100%)
Successfully installed rack-protection-1.5.3
Fetching: sinatra-1.4.7.gem (100%)
Successfully installed sinatra-1.4.7
Parsing documentation for rack-1.6.4
Installing ri documentation for rack-1.6.4
Parsing documentation for tilt-2.0.5
Installing ri documentation for tilt-2.0.5
Parsing documentation for rack-protection-1.5.3
Installing ri documentation for rack-protection-1.5.3
Parsing documentation for sinatra-1.4.7
Installing ri documentation for sinatra-1.4.7
Done installing documentation for rack, tilt, rack-protection, sinatra after 262 seconds
4 gems installed
#
(21) sinatra-contribをインストールします。
gemでsinatra-contribをインストールします。
~]# rbenv exec gem install sinatra-contrib
Fetching: backports-3.6.8.gem (100%)
Successfully installed backports-3.6.8
Fetching: rack-test-0.6.3.gem (100%)
Successfully installed rack-test-0.6.3
Fetching: multi_json-1.12.1.gem (100%)
Successfully installed multi_json-1.12.1
Fetching: sinatra-contrib-1.4.7.gem (100%)
Successfully installed sinatra-contrib-1.4.7
Parsing documentation for backports-3.6.8
Installing ri documentation for backports-3.6.8
Parsing documentation for rack-test-0.6.3
Installing ri documentation for rack-test-0.6.3
Parsing documentation for multi_json-1.12.1
Installing ri documentation for multi_json-1.12.1
Parsing documentation for sinatra-contrib-1.4.7
Installing ri documentation for sinatra-contrib-1.4.7
Done installing documentation for backports, rack-test, multi_json, sinatra-contrib after 2 seconds
4 gems installed
#
インストールしたSinatraのバージョンとgem確認
(22) インストールしたSinatraのバージョンとgem listを確認します。
# pwd
/root
#
# rbenv exec gem list

*** LOCAL GEMS ***

backports (3.6.8)
bigdecimal (default: 1.2.8)
bundler (1.13.2)
did_you_mean (1.0.0)
io-console (default: 0.4.5)
json (default: 1.8.3)
minitest (5.8.3)
multi_json (1.12.1)
net-telnet (0.1.1)
power_assert (0.2.6)
psych (default: 2.0.17)
rack (1.6.4)
rack-protection (1.5.3)
rack-test (0.6.3)
rake (10.4.2)
rdoc (default: 4.2.1)
rubygems-update (2.6.7)
sinatra (1.4.7)
sinatra-contrib (1.4.7)
test-unit (3.1.5)
tilt (2.0.5)
#
インストールしたSinatraが動作するか確認
(23) Sinatra動作確認用のコードを作成します。
# mkdir /root/example_app
# vi /root/example_app/example.rb
require 'rubygems'
require 'sinatra'
require 'sinatra/reloader'

get '/' do
  "hello world Sinatra!"
end
# ll /root/example_app/example.rb
-rw-r--r-- 1 root root 105 Oct  2 20:32 /root/example_app/example.rb
#
# cat /root/example_app/example.rb
require 'rubygems'
require 'sinatra'
require 'sinatra/reloader'

get '/' do
  "hello world Sinatra!"
end
#
(24) Sinatraを起動します。
Sinatraを起動します。
-oオプションで「0.0.0.0」を指定する事でlocalhost以外からの接続も受け付けるようにします。-pオプションでhttp(TCP/80番ポート)の接続を受け付けるようにして、Sinatraを起動します。
# pwd
/root
#
# ruby /root/example_app/example.rb -o 0.0.0.0 -p 80 &
(25) Sinatraのプロセスが起動した事を確認します。
# ruby /root/example_app/example.rb -o 0.0.0.0 -p 80 &
[1] 6316

# [2016-10-02 20:27:27] INFO  WEBrick 1.3.1
[2016-10-02 20:27:27] INFO  ruby 2.3.1 (2016-04-26) [x86_64-linux]
== Sinatra (v1.4.7) has taken the stage on 80 for development with backup from WEBrick
[2016-10-02 20:27:27] INFO  WEBrick::HTTPServer#start: pid=6316 port=80
 (Enterキーを押下します)
#
# ps awux | grep -v grep | grep ruby
root      6316  0.2  2.1 406720 21424 pts/1    Sl   20:27   0:00 ruby /root/example_app/example.rb -o 0.0.0.0 -p 80
#
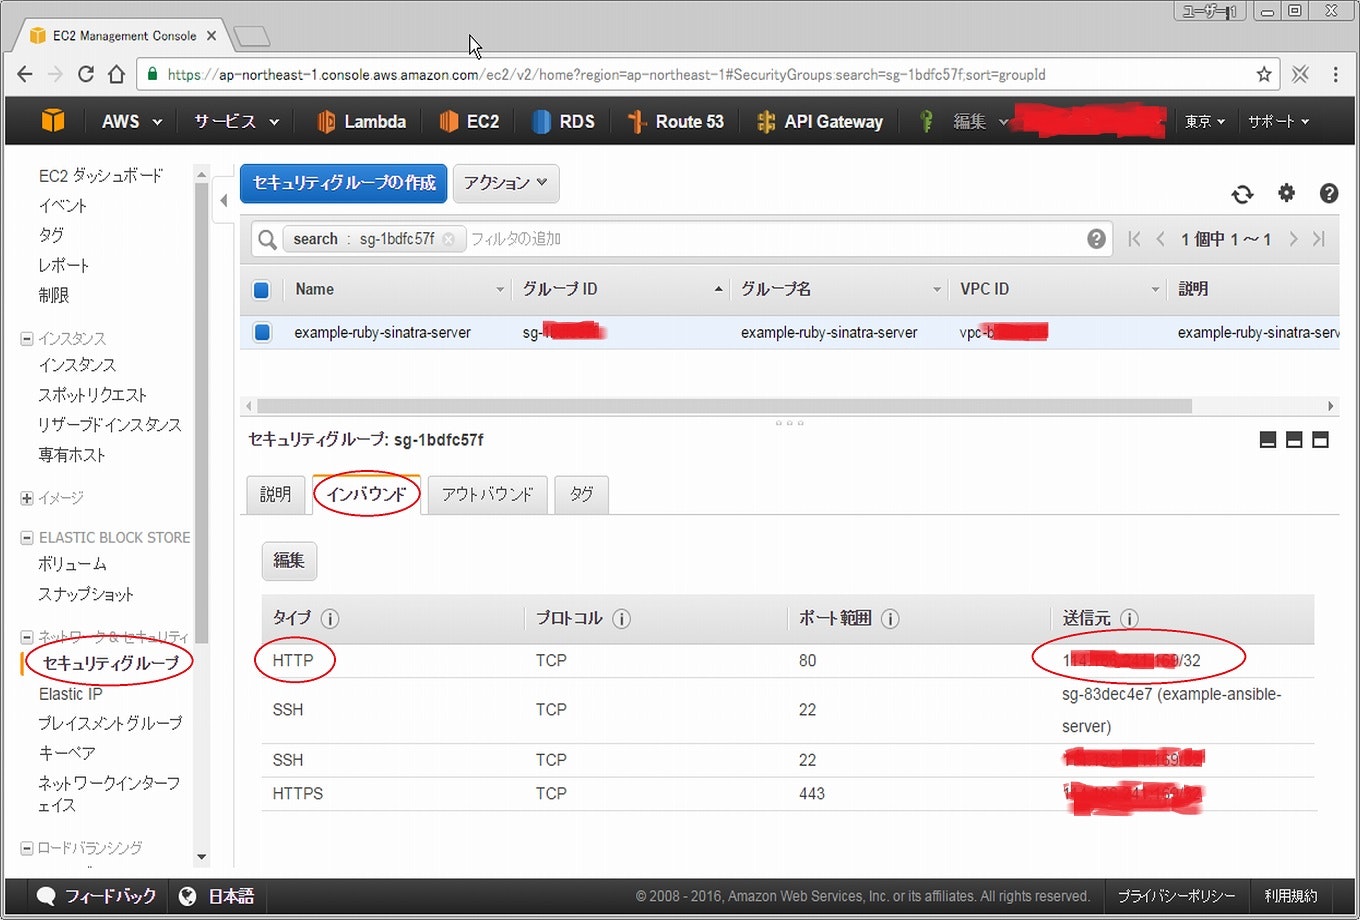
(26) WebブラウザからAmazon EC2インスタンスヘのhttp通信を許可します。
WebブラウザからAmazon EC2インスタンスにインストールしたSinatraヘアクセス出来るようにする為、Amazon EC2インスタンスに割り当てているセキュリティグループの「Inbound」ルールに対して、Webブラウザを使うPCからのHTTP(TCP/80番ポート)通信許可を追加します。
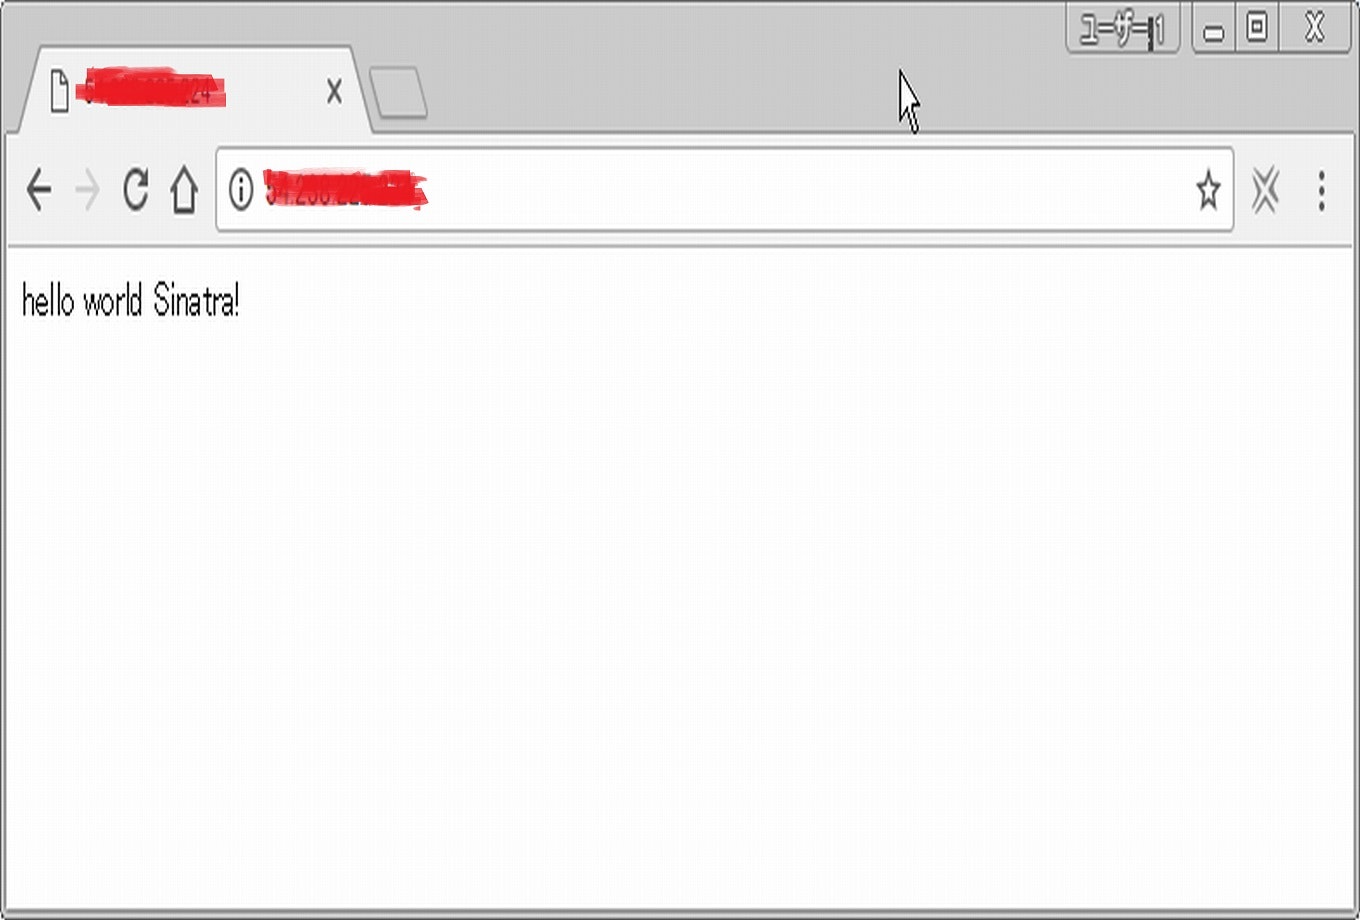
(27) WebブラウザからAmazon EC2インスタンスヘアクセスします。
Webブラウザを起動し、SinatraをインストールしたAmazon EC2インスタンスのIPアドレスを指定してアクセスします。
以下のようにSinatraのページが表示されれば、Sinatraインストールは完了です。
Sinatra停止スクリプト作成(任意)
(28) Sinatra停止スクリプトを作成します。
もし必要であれば、Sinatra停止スクリプトを作成します。
[root@example-ruby-sinatra-server ~]# vi stop_sinatra.sh
#!/bin/bash

process_count=`ps awux | grep -v grep | grep ruby | awk '{print $2}' | wc -l`

if [ $process_count -ge 0 ] ; then
  kill `ps awux | grep -v grep | grep ruby | awk '{print $2}'`
fi
Sinatra停止スクリプトのパーミッションに実行権限をつけます。
[root@example-ruby-sinatra-server ~]# chmod 755 stop_sinatra.sh
[root@example-ruby-sinatra-server ~]#
(29) Sinatra停止スクリプトでSinatraを停止します。
Sinatraプロセスが起動しているとします。
[root@example-ruby-sinatra-server ~]# ps awux | grep -v grep | grep ruby
root      3434  0.3  1.9 204016 20336 pts/0    Sl   00:56   0:00 ruby /root/example_app/example.rb -o 0.0.0.0 -p 80
[root@example-ruby-sinatra-server ~]#
Sinatra停止スクリプトを実行します。
[root@example-ruby-sinatra-server ~]# ./stop_sinatra.sh
[root@example-ruby-sinatra-server ~]# == Sinatra has ended his set (crowd applauds)
[2016-10-03 00:56:54] INFO  going to shutdown ...
[2016-10-03 00:56:54] INFO  WEBrick::HTTPServer#start done.

[root@example-ruby-sinatra-server ~]#
Sinatraプロセスが停止します。
[root@example-ruby-sinatra-server ~]# ps awux | grep -v grep | grep ruby
[root@example-ruby-sinatra-server ~]#
Sinatra起動スクリプト作成(任意)
(30) Sinatra起動スクリプトを作成します。
もし必要であれば、Sinatra起動スクリプトを作成します。
[root@example-ruby-sinatra-server ~]# vi start_sinatra.sh
#!/bin/bash

sinatra_bin="/usr/local/rbenv/shims/ruby"
sinatra_file="/root/example_app/example.rb"
sinatra_listen_address="0.0.0.0"
sinatra_port="80"

if [ -f $ruby_bin ] && [ -f $ruby_file ] ; then
    $sinatra_bin $sinatra_file -o $sinatra_listen_address -p $sinatra_port &
fi
Sinatra起動スクリプトのパーミッションに実行権限をつけます。
[root@example-ruby-sinatra-server ~]# chmod 755 start_sinatra.sh
[root@example-ruby-sinatra-server ~]#
(31) Sinatra起動スクリプトでSinatraを起動します。
Sinatra起動スクリプトを実行します。
[root@example-ruby-sinatra-server ~]# ps awux | grep -v grep | grep ruby
[root@example-ruby-sinatra-server ~]#
[root@example-ruby-sinatra-server ~]# ./start_sinatra.sh
[root@example-ruby-sinatra-server ~]# [2016-10-03 01:11:48] INFO  WEBrick 1.3.1
[2016-10-03 01:11:48] INFO  ruby 2.3.1 (2016-04-26) [x86_64-linux]
== Sinatra (v1.4.7) has taken the stage on 80 for development with backup from WEBrick
[2016-10-03 01:11:48] INFO  WEBrick::HTTPServer#start: pid=3778 port=80

[root@example-ruby-sinatra-server ~]#
Sinatraプロセスが起動します。
[root@example-ruby-sinatra-server ~]# ps awux | grep -v grep | grep ruby
root      3778  4.6  2.0 203944 20512 pts/0    Sl   01:11   0:00 ruby /root/example_app/example.rb -o 0.0.0.0 -p 80
[root@example-ruby-sinatra-server ~]#
以上になります。