サーバーサイドでSwiftが動くようになってきていますね。
あまり積極的にSwift界隈の流れを追えてはいないけど、サーバーサイドでSwiftが動くようになってきてWebエンジニアたちも今後注目されていくだろうと期待しています。
そんな感じの状況なので少し入門してみたいと思います。
ゴールはVaporでサーバーを立てるHello worldです。
※Swift環境構築周りでごちゃごちゃやってしまった気がするのでミスってる記述があるかもしれません
追記: これを先に読んだ方がいいと思います。(Swiftで書かれたWebフレームワークを試すにあたっての注意点 ) Swift 3.0-devを試すにあたり最新版というよりはちゃんとビルドできるバージョンを指定しましょう。今回は
DEVELOPMENT-SNAPSHOT-2016-04-12-aを使ってますよ。
執筆者ステータス
- 普段はNode.jsを書くことが多い
- xcodeは苦手意識がある
- swiftはさわってみたい
- Web出身
こんな人でもサーバーサイドSwiftは注目ポイントな気がしています。
環境
- Mac OS 10.11.4 El Capitan
- Swift 3.0-dev
- Xcode 7.3
- Apple Swift Package Manager 0.1
- swiftenv 1.0.0
$ swift --version
Apple Swift version 3.0-dev (LLVM 752e1430fc, Clang 3987718dae, Swift 36739f7b57)
Target: x86_64-apple-macosx10.9
$ swift build --version
Apple Swift Package Manager 0.1
$ swiftenv --version
swiftenv 1.0.0
Swift周りの準備
Swift Version Manager (swiftenv) を使う
Node.jsでいうところのnvmやnodebrewみたいな言語そのもののバージョン管理システムです。 好奇心で使ってみました。
導入方法は公式GitHubを参照しましょう。
- インストール
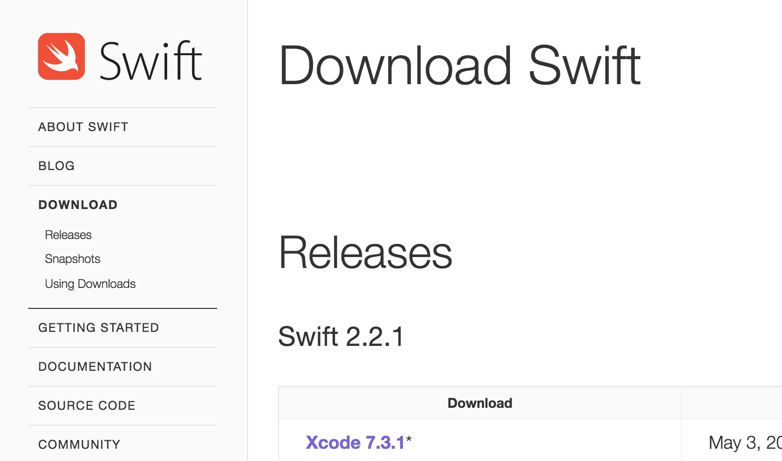
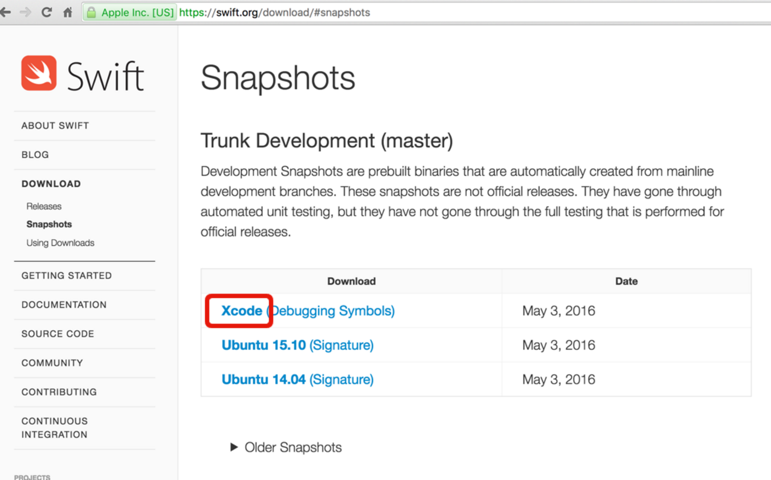
https://swift.org/download/#snapshots にあるSnapshotsのXcodeのリンクをコピーしてswiftenv installしましょう。
$ swiftenv install https://swift.org/builds/development/xcode/swift-DEVELOPMENT-SNAPSHOT-2016-04-12-a/swift-DEVELOPMENT-SNAPSHOT-2016-04-12-a-osx.pkg
今回はDEVELOPMENT-SNAPSHOT-2016-04-12-aをインストールしました。
この段階ではまだパスが通ってないのでswiftenv globalでパスを指定します。
$ swiftenv global DEVELOPMENT-SNAPSHOT-2016-04-12-a
- 確認
swiftenv versionsでインストール済のswiftのリストを確認します。 *がついてるのがパスが通っているカレントバージョンです。
$ swiftenv versions
  2.2-SNAPSHOT-2016-01-11-a
  2.2.1-SNAPSHOT-2016-04-12-a
* DEVELOPMENT-SNAPSHOT-2016-04-12-a (set by /Users/sugawara_nobisuke/.swiftenv/version)
  DEVELOPMENT-SNAPSHOT-2016-05-03-a
  2.2
swiftコマンドも確認してみましょう。
$ swift --version
Apple Swift version 3.0-dev (LLVM 752e1430fc, Clang 3987718dae, Swift 36739f7b57)
Target: x86_64-apple-macosx10.9
Vaporを試してみる
VaporはサーバーサイドSwiftのフレームワークです。RubyならSinatraや、Node.jsならExpressに似てる気がします。
以下の参考記事を見かけたので試してみました。ありがとうございます。
Swift Package Managerでのセットアップ
Swift Package Manager を使ってセットアップします。今後のSwiftの開発はSwift Package Managerを使うことが前提になっていく気がするので覚えておくといいと思います。
- プロジェクトフォルダを作成&移動
$ mkdir myswift_server
$ cd myswift_server
- プロジェクトの初期化
$ swift build --init
Creating executable package: myswift_server
Creating Package.swift
Creating .gitignore
Creating Sources/
Creating Sources/main.swift
Creating Tests/
これで必要な初期ファイルが生成されました。
- Package.swift
- Sources/main.swift
を主に使います。
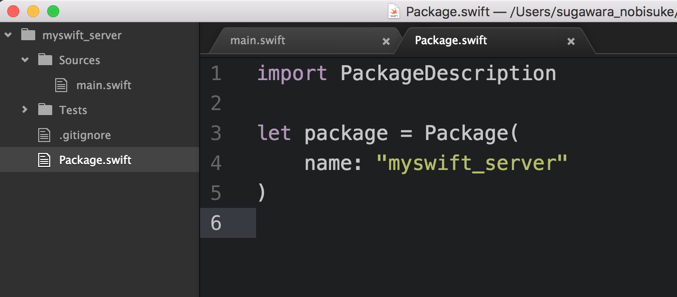

初期状態はこんな感じです。
- HelloWorld
試しにビルドしてみましょう。
$ swift build
Compile Swift Module 'myswift_server' (1 sources)
Linking .build/debug/myswift_server
ビルドに成功するとプロジェクトのルートディレクトリに.buildというフォルダが生成されます。その中に色々なファイルが生成されているのですが、.build/debug/myswift_serverという実行ファイルが生成されているので実行しましょう。
$ .build/debug/myswift_server

Hello, world!
Hello, world!と表示されたら成功です。
VaporでHelloworld
- Package.swiftの変更
Package.swiftに以下のように追記します。dependenciesに.Package(url: "https://github.com/qutheory/vapor.git", majorVersion: 0, minor: 6)を追記してるのがわかると思います。
import PackageDescription

let package = Package(
    name: "myswift_server",
    dependencies: [
        .Package(url: "https://github.com/qutheory/vapor.git", majorVersion: 0, minor: 6),
    ]
)
- main.swiftを変更
以下のコードで上書きしましょう。
import Vapor
let app = Application()
app.start()
app.get("/welcome") { request in
return "Hello"
}
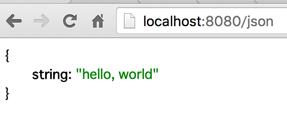
app.get("/json") { request in
return try Json([
"string": "hello, world"
])
}
app.start(port: 8080)
- build
$ swift build

Cloning https://github.com/qutheory/vapor.git
Resolved version: 0.6.0
Cloning https://github.com/open-swift/S4.git
Resolved version: 0.4.0
Cloning https://github.com/open-swift/C7.git
Resolved version: 0.5.0
Cloning https://github.com/Zewo/String.git
Resolved version: 0.5.1
Cloning https://github.com/Zewo/JSON.git
Resolved version: 0.5.0
Cloning https://github.com/Zewo/StructuredData.git
Resolved version: 0.5.0
Cloning https://github.com/ketzusaka/Hummingbird.git
Resolved version: 1.4.0
Cloning https://github.com/ketzusaka/Strand.git
Resolved version: 1.2.3
Cloning https://github.com/CryptoKitten/HMAC.git
Resolved version: 0.4.0
Cloning https://github.com/CryptoKitten/CryptoEssentials.git
Resolved version: 0.4.0
Cloning https://github.com/CryptoKitten/SHA2.git
Resolved version: 0.3.1
Compiling Swift Module 'C7' (21 sources)
Compiling Swift Module 'String' (1 sources)
Compiling Swift Module 'Strand' (1 sources)
Compiling Swift Module 'CryptoEssentials' (9 sources)
Compiling Swift Module 'S4' (23 sources)
Compiling Swift Module 'StructuredData' (1 sources)
Compiling Swift Module 'Hummingbird' (3 sources)
Compiling Swift Module 'HMAC' (1 sources)
Compiling Swift Module 'SHA2' (1 sources)
Compiling Swift Module 'JSON' (5 sources)
Compiling Swift Module 'libc' (1 sources)
Compiling Swift Module 'Generator' (1 sources)
Compiling Swift Module 'Vapor' (48 sources)
Linking .build/debug/Generator
Compiling Swift Module 'myswift_server' (1 sources)
Compiling Swift Module 'Performance' (1 sources)
Compiling Swift Module 'Development' (4 sources)
Linking .build/debug/Performance
Linking .build/debug/myswift_server
Linking .build/debug/Development
- 実行
先ほどのhelloworldと同様にビルド後の.build/debug/myswift_serverを実行してみます。
.build/debug/myswift_server
[1462407021] [INFO] Server starting on 0.0.0.0:80
[1462407021] [ERROR] Server start error: bindingFailed(13, Optional("Permission denied"))
[1462407021] [INFO] Server starting on 0.0.0.0:8080
[1462407029] [INFO] GET /
[1462407029] [INFO] GET /favicon.ico
[1462407033] [INFO] GET /welcome
http://localhost:8080 でサーバーが立ち上がりました!
おわりに
サーバーサイドをSwiftで書けるようになるのはすごく楽しそうですね :)
準備するものやパッケージの依存関係解決、(Golangなどと比べると)コンパイルの遅さがあるなど、まだ少しカジュアルさが足りない気がするのですがその辺を加味しても可能性を感じます。
以下、蛇足的な
最初かなりエラーが出てました
↑ではスムーズにできた手順を書いたのですが、実際↓のようにかなり苦戦してました苦笑
もうちょっとビルドエラーを探れるようにしたい。。。
$ swift build

・
・
省略
・
・

Compiling Swift Module 'Strand' (1 sources)
/Users/sugawara_nobisuke/n0bisuke/lab/swift/myswift_server/Packages/Strand-1.1.0/Sources/Strand.swift:29:38: error: nil cannot initialize specified type 'pthread_t' (aka 'UnsafeMutablePointer<_opaque_pthread_t>')
    private var pthread: pthread_t = nil
                                     ^
/Users/sugawara_nobisuke/n0bisuke/lab/swift/myswift_server/Packages/Strand-1.1.0/Sources/Strand.swift:40:30: error: cannot pass immutable value as inout argument: implicit conversion from 'pthread_t' to 'pthread_t?' requires a temporary
        guard pthread_create(&pthread, nil, runner, pointer) == 0 else { throw StrandError.threadCreationFailed }
                             ^~~~~~~~
/Users/sugawara_nobisuke/n0bisuke/lab/swift/myswift_server/Packages/Strand-1.1.0/Sources/Strand.swift:73:12: error: nil is incompatible with return type 'UnsafeMutablePointer<Void>' (aka 'UnsafeMutablePointer<()>')
    return nil
           ^
/Users/sugawara_nobisuke/n0bisuke/lab/swift/myswift_server/Packages/C7-0.2.0/Sources/AsyncStream.swift:4:18: warning: extraneous duplicate parameter name; 'length' already has an argument label
    func receive(length length: Int, result: (Void throws -> Data) -> Void)
                 ^~~~~~~

/Users/sugawara_nobisuke/n0bisuke/lab/swift/myswift_server/Packages/C7-0.2.0/Sources/AsyncStream.swift:5:15: warning: extraneous duplicate parameter name; 'data' already has an argument label
    func send(data data: Data, result: (Void throws -> Void) -> Void)
              ^~~~~

/Users/sugawara_nobisuke/n0bisuke/lab/swift/myswift_server/Packages/C7-0.2.0/Sources/Data.swift:34:26: error: method 'replaceSubrange(subRange:with:)' has different argument names from those required by protocol 'RangeReplaceableCollection' ('replaceSubrange(_:with:)')
    public mutating func replaceSubrange<C : Collection where C.Iterator.Element == Byte>(subRange: Range<Int>, with newElements: C) {
                         ^
                                                                                          _
Swift.RangeReplaceableCollection:16:26: note: requirement 'replaceSubrange(_:with:)' declared here
    public mutating func replaceSubrange<C : Collection where C.Iterator.Element == Iterator.Element>(_ subRange: Range<Self.Index>, with newElements: C)
                         ^
<unknown>:0: error: build had 2 command failures
error: exit(1): /Library/Developer/Toolchains/swift-DEVELOPMENT-SNAPSHOT-2016-04-12-a.xctoolchain/usr/bin/swift-build-tool -f /Users/sugawara_nobisuke/n0bisuke/lab/swift/myswift_server/.build/debug.yaml default
この辺りを参考にしてPackage.swiftのvaporのバージョン指定でminorを6に指定したらうまくビルドできました。
.Package(url: "https://github.com/qutheory/vapor.git", majorVersion: 0),
↓
.Package(url: "https://github.com/qutheory/vapor.git", majorVersion: 0, minor: 6),
またSwiftをDEVELOPMENT-SNAPSHOT-2016-04-12-aで試すまえにDEVELOPMENT-SNAPSHOT-2016-05-03-aで試していたらどうようのエラーが出ていたのでDEVELOPMENT-SNAPSHOT-2016-04-12-aに変更したらうまくいきました。
$ swiftenv versions
  2.2-SNAPSHOT-2016-01-11-a
  2.2.1-SNAPSHOT-2016-04-12-a
  DEVELOPMENT-SNAPSHOT-2016-04-12-a
* DEVELOPMENT-SNAPSHOT-2016-05-03-a (set by /Users/sugawara_nobisuke/.swiftenv/version)
  2.2
↓
$ swiftenv versions
  2.2-SNAPSHOT-2016-01-11-a
  2.2.1-SNAPSHOT-2016-04-12-a
* DEVELOPMENT-SNAPSHOT-2016-04-12-a (set by /Users/sugawara_nobisuke/.swiftenv/version)
  DEVELOPMENT-SNAPSHOT-2016-05-03-a
  2.2
蛇足
ちなみに今回はエディタはatomを使いました。
シンタックスハイライトは以下のプラグインを使ってみました。
https://github.com/freebroccolo/atom-language-swift