4桁認証機能をパッケージを使って実装
2段階認証などで、実装する機会がありそうな4桁数字認証機能を
Laravelで簡単に実装出来そうだったので試してみました。
参考
Laravel Newsの記事
4桁認証機能パッケージのgithub
環境
PHP 7.1.7
Laravel 5.6.5
準備
githubに書いてある通りにやりました。
まずはcomposerでパッケージを入れます。
composer require larsjanssen6/underconstruction
コンフィグに追加します。
config/app.php
'providers' => [
    // ...
    'LarsJanssen\UnderConstruction\UnderConstructionServiceProvider'
];
カーネルにも追加します。認証系の機能なのでrouteMiddlewareに設定
app/Http/Kernel.php
protected $routeMiddleware = [
  // ...
  'under-construction' => \LarsJanssen\UnderConstruction\UnderConstruction::class,
];
パッケージの設定をファイルに切り出すのに便利なpublishを使います。
php artisan vendor:publish

# 適切なものを選択

php artisan vendor:publish --provider="LarsJanssen\UnderConstruction\UnderConstructionServiceProvider"
設定
以下設定用ファイル
under-construction.php
<?php

return [

    /*
     * Activate under construction mode.
     */
    'enabled' => env('UNDER_CONSTRUCTION_ENABLED', true),

    /*
     * Hash for the current pin code
     */
    'hash' => env('UNDER_CONSTRUCTION_HASH', null),

    /*
     * Under construction title.
     */
    'title' => 'Under Construction',

    /*
     * Back button translation.
     */
    'back-button' => 'back',

    /*
     * Show button translation.
     */
    'show-button' => 'show',

    /*
     * Hide button translation.
     */
    'hide-button' => 'hide',

    /*
     * Redirect url after a successful login.
     */
    'redirect-url' => '/',

    /*
     * Enable throttle (max login attempts).
     */
    'throttle' => true,

    /*
    |--------------------------------------------------------------------------
    | Throttle settings (only when throttle is true)
    |--------------------------------------------------------------------------
    |
    */

    /*
     * Set the maximum number of attempts to allow.
     */
    'max_attempts' => 3,

    /*
     * Show attempts left.
     */
    'show_attempts_left' => true,

    /*
     * Attempts left message.
     */
    'attempts_message' => 'Attempts left: %i',

    /*
     * Too many attempts message.
     */
    'seconds_message' => 'Too many attempts please try again in %i seconds.',

    /*
     * Set the number of minutes to disable login.
     */
    'decay_minutes' => 5,
];
・enableで機能を使うか設定出来る。
・hashで認証キーのHASH値の元ネタを指定。
・max_attemptsで失敗回数設定
・decay_minutesで再度入力出来るまでの時間を設定
・他にもレイアウト指定などがある
以下ルーティング例
routes/web.php
Route::group(['middleware' => 'under-construction'], function () {
    Route::get('/', function () {
        return view('welcome');
    });

    Route::get('/live-site', function() {
        echo 'content!';
    });
});
設定コマンド
以下のコマンドで特定の4桁を認証数値に設定出来ます。.envにHASH値が記入されます。
php artisan code:set 1234
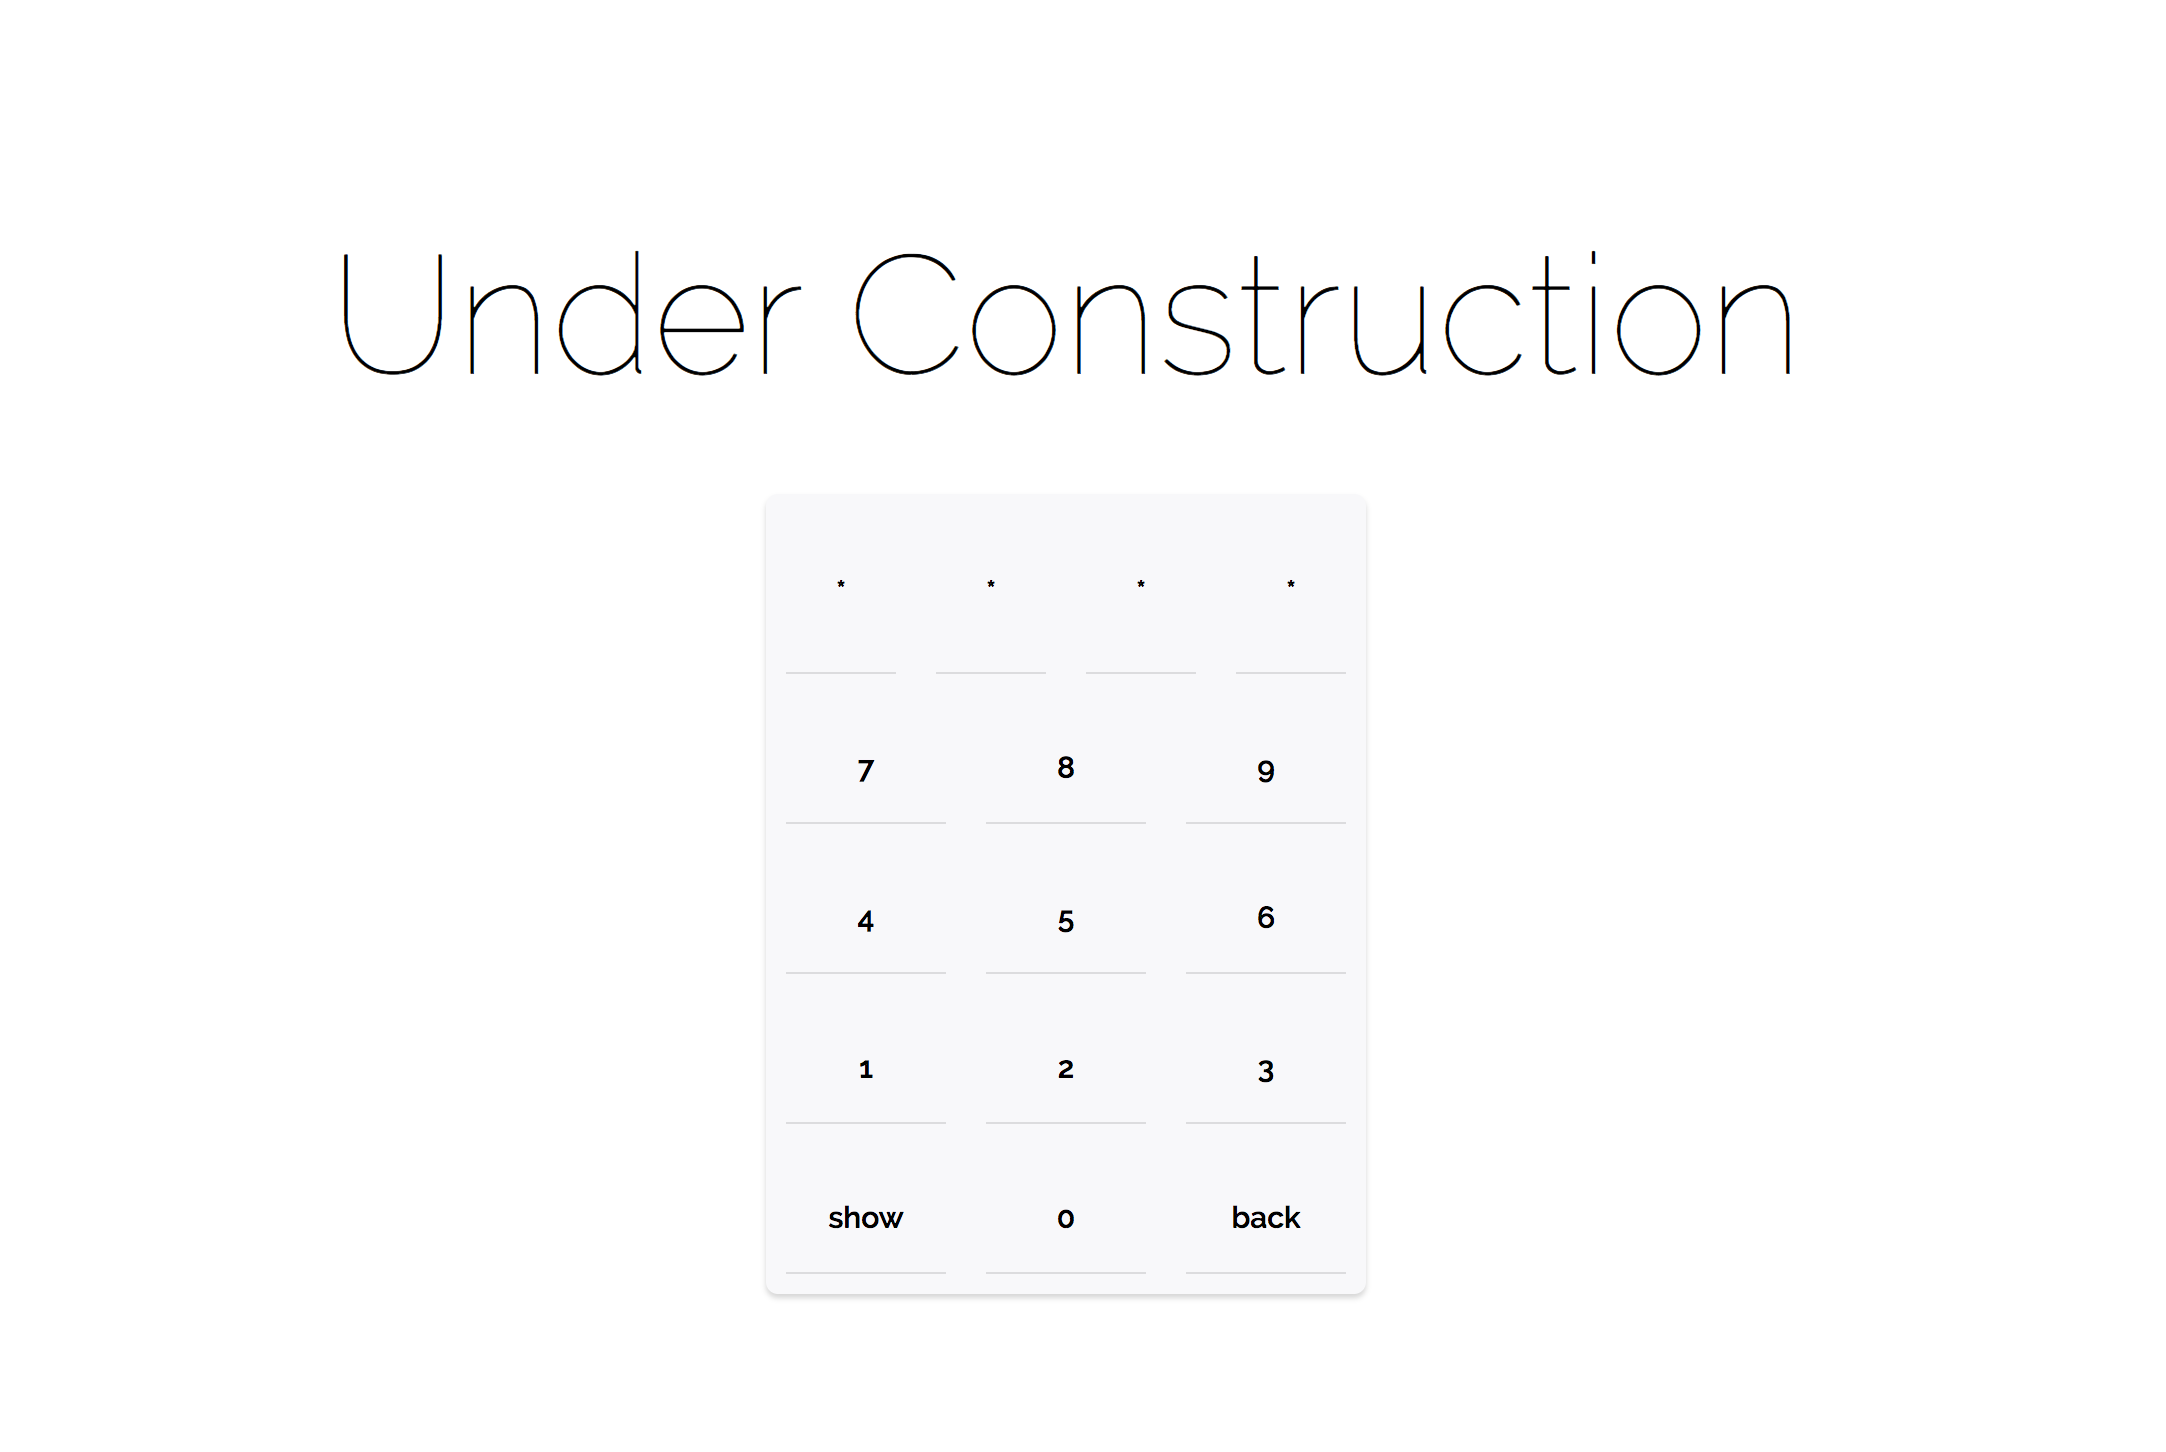
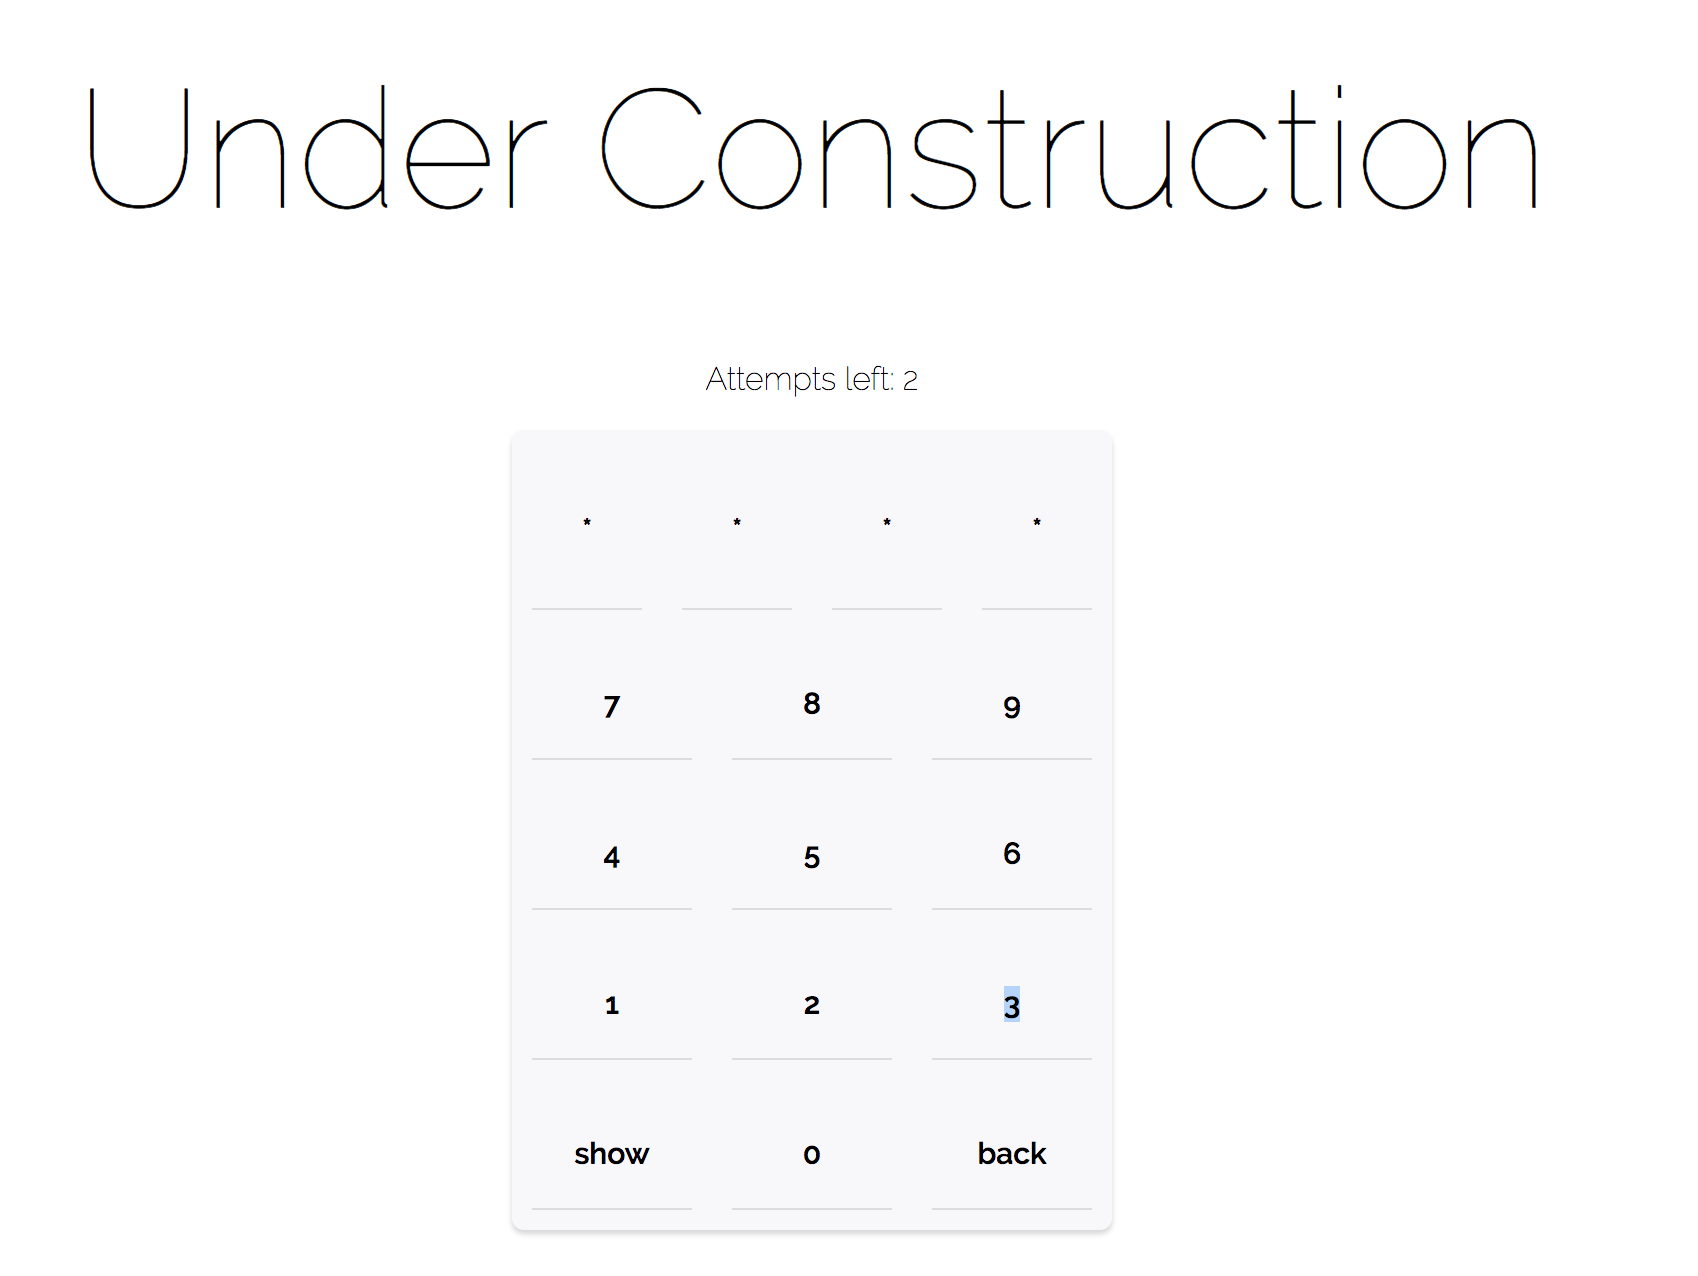
確認
出ました!
失敗するとattempts_messageのメッセージが出ます。
3回失敗するとseconds_messageのメッセージでカウントダウンが始まります。

感想
ここまでは簡単に実装できました。
あとは認証キーをユーザーごとに持たせたり、都度生成できるようにカスタマイズすれば
実際のサービスで使えるレベルになるかなぁという感じでした。