iOSの写真アプリの画面遷移
iOSの写真アプリの画面遷移は使いやすいなと思っています。
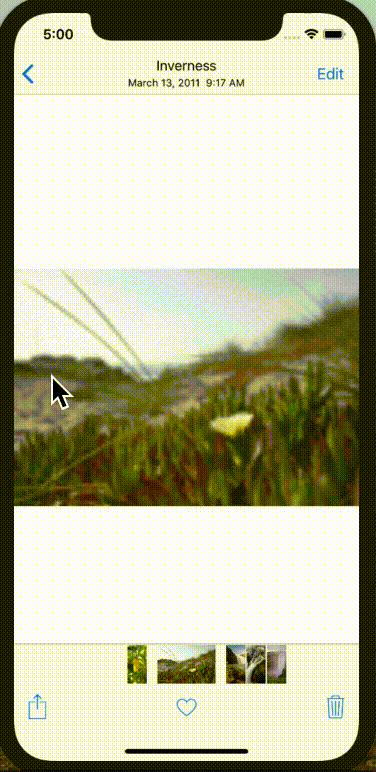
写真一覧から写真をタップするとズームして、下に少し引っ張ると戻れるというやつです。
この画面遷移とインタラクションをコピーして実装してみました。
この記事でできるもの
サンプルコードはGitHubのリポジトリに置いてあります。
masamichiueta/FluidPhoto

実装
いくつかのステップに分けて解説します。
- ViewControllerの構成を考える
- ズームするアニメーションを実装する
- パンジェスチャーで戻るインタラクティブな画面遷移を実装する
1.ViewControllerの構成を考える
ざっくりViewControllerを図示するとこんな感じです。

登場するViewControllerは4つです。
- 写真一覧を表示する
CollectionViewController - 写真のページングを行う
PageViewController - 2のページで表示する画像の拡大縮小を行う
ZoomImageViewController - 2のページをラップするコンテナの
ContainerViewController
4はなくてもいいのですが、UIPageViewControllerの上にツールバーを置いたりしたいときに、Storyboard上では置けないため、一旦4をコンテナにします。
1のCollectionViewのセルをタップすると画面遷移して、遷移後はUIPageViewControllerを使って画像のページングを行います。
2のUIPageViewControllerは、UIPageViewControllerDelegateで3のViewControllerのインスタンスを作って、画面として表示します。
実際のストーリーボードはUITabBarControllerやUINavigationControllerがあるのでこんな感じです。

2. ズームするアニメーションを実装する
アニメーションは、カスタムアニメーションを実装する際に実装するUIViewControllerTransitioningDelegateとUIViewControllerAnimatedTransitioningを使って実現します。
ズームするアニメーションは、2つのクラスを使います。
-
ZoomTransitionController:UIViewControllerTransitioningDelegateまたは、UINavigationControllerDelegateを実装していて、画面遷移を管理する -
ZoomAnimator:UIViewControllerAnimatedTransitioningを実装していて、ズームするロジックを担当する
ZoomTransitionControllerがZoomAnimatorをプロパティとして持っています。
ZoomTransitionControllerとZoomAnimatorを別のクラスにしているのは、ZoomTransitionControllerが、インタラクティブな遷移とそうでない遷移を管理するためです。ZoomAnimatorはインタラクティブではない遷移となります。
ZoomAnimator
ZoomAnimatorは、ズームアニメーションのロジックを担当します。つまり、ズーム対象のUIImageViewを取得し、遷移元のフレームから遷移先のフレームへとアニメーションを行います。
遷移時の画像とそのフレームを取得にはデリゲートを使います。このデリゲートは遷移元・遷移先となるViewControllerが実装します。
protocol ZoomAnimatorDelegate: class {
    func transitionWillStartWith(zoomAnimator: ZoomAnimator)
    func transitionDidEndWith(zoomAnimator: ZoomAnimator)
    func referenceImageView(for zoomAnimator: ZoomAnimator) -> UIImageView?
    func referenceImageViewFrameInTransitioningView(for zoomAnimator: ZoomAnimator) -> CGRect?
}
ZoomAnimatorは、以下のプロパティを持ちます。
- 遷移元のデリゲート: fromDelegate
- 遷移先のデリゲート: toDelegate
- 一覧からズームインして詳細を表示しているのか、詳細からズームアウトして一覧を表示しているのかを判定: isPresenting
- アニメーション時の画像: transitionImageView
class ZoomAnimator: NSObject {

    weak var fromDelegate: ZoomAnimatorDelegate?
    weak var toDelegate: ZoomAnimatorDelegate?

    var transitionImageView: UIImageView?
    var isPresenting: Bool = true
ここからは、ズームのアニメーションを記述していきます。
まず、UIViewControllerAnimatedTransitioningの2つのメソッドはこうなります。
extension ZoomAnimator: UIViewControllerAnimatedTransitioning {
    func transitionDuration(using transitionContext: UIViewControllerContextTransitioning?) -> TimeInterval {
        if self.isPresenting {
            return 0.5
        } else {
            return 0.25
        }
    }

    func animateTransition(using transitionContext: UIViewControllerContextTransitioning) {
        if self.isPresenting {
            animateZoomInTransition(using: transitionContext)
        } else {
            animateZoomOutTransition(using: transitionContext)
        }
    }
}
transitionDurationの方はアニメーションの長さです。
animateTransitionが実際にアニメーションを行うところになります。ここで、ズームインなのか、ズームアウトなのかを判定して、メソッドを切り替えます。
アニメーションロジック
次に実際のアニメーション部分を実装していきます。
ロジックとしては、以下のような流れです。
- 遷移元、遷移先の画像を非表示にする
- 遷移元の画像から、アニメーション用の画像を作成する
- 遷移先の画像のフレームを計算する
- アニメーション用の画像を、遷移元のフレームから遷移先のフレームへとアニメーションする
ズームイン
fileprivate func animateZoomInTransition(using transitionContext: UIViewControllerContextTransitioning) {

    let containerView = transitionContext.containerView

    guard let toVC = transitionContext.viewController(forKey: .to),
        let fromVC = transitionContext.viewController(forKey: .from),

        // 遷移元の画像を取得する
        let fromReferenceImageView = self.fromDelegate?.referenceImageView(for: self),

        // 遷移先の画像を取得する
        let toReferenceImageView = self.toDelegate?.referenceImageView(for: self),

        // 遷移元の画像のフレームを取得する
        let fromReferenceImageViewFrame = self.fromDelegate?.referenceImageViewFrameInTransitioningView(for: self)
        else {
            return
    }

    self.fromDelegate?.transitionWillStartWith(zoomAnimator: self)
    self.toDelegate?.transitionWillStartWith(zoomAnimator: self)

    toVC.view.alpha = 0

    // 遷移先の画像を見えなくしておく
    toReferenceImageView.isHidden = true
    containerView.addSubview(toVC.view)

    let referenceImage = fromReferenceImageView.image!

    // ズームの遷移に使用する画像を生成する
    if self.transitionImageView == nil {
        let transitionImageView = UIImageView(image: referenceImage)
        transitionImageView.contentMode = .scaleAspectFill
        transitionImageView.clipsToBounds = true
        transitionImageView.frame = fromReferenceImageViewFrame
        self.transitionImageView = transitionImageView
        containerView.addSubview(transitionImageView)
    }

    // 遷移元の画像を見えなくする
    fromReferenceImageView.isHidden = true

    // アニメーション後の画像のフレームを計算する
    let finalTransitionSize = calculateZoomInImageFrame(image: referenceImage, forView: toVC.view)

    UIView.animate(withDuration: transitionDuration(using: transitionContext),
                    delay: 0,
                    usingSpringWithDamping: 0.8,
                    initialSpringVelocity: 0,
                    options: [UIViewAnimationOptions.transitionCrossDissolve],
                    animations: {

                    // アニメーション用の画像のフレームを変更する
                    self.transitionImageView?.frame = finalTransitionSize
                    toVC.view.alpha = 1.0
                    fromVC.tabBarController?.tabBar.alpha = 0
    },
                    completion: { completed in

                    // アニメーション用の画像を取り除く
                    self.transitionImageView?.removeFromSuperview()

                    // 遷移元、遷移先の画像を表示する
                    toReferenceImageView.isHidden = false
                    fromReferenceImageView.isHidden = false

                    self.transitionImageView = nil

                    transitionContext.completeTransition(!transitionContext.transitionWasCancelled)
                    self.toDelegate?.transitionDidEndWith(zoomAnimator: self)
                    self.fromDelegate?.transitionDidEndWith(zoomAnimator: self)
    })
}
ズームアウト
fileprivate func animateZoomOutTransition(using transitionContext: UIViewControllerContextTransitioning) {
    let containerView = transitionContext.containerView

    guard let toVC = transitionContext.viewController(forKey: UITransitionContextViewControllerKey.to),
        let fromVC = transitionContext.viewController(forKey: UITransitionContextViewControllerKey.from),
        let fromReferenceImageView = self.fromDelegate?.referenceImageView(for: self),
        let toReferenceImageView = self.toDelegate?.referenceImageView(for: self),
        let fromReferenceImageViewFrame = self.fromDelegate?.referenceImageViewFrameInTransitioningView(for: self),
        let toReferenceImageViewFrame = self.toDelegate?.referenceImageViewFrameInTransitioningView(for: self)
        else {
            return
    }

    self.fromDelegate?.transitionWillStartWith(zoomAnimator: self)
    self.toDelegate?.transitionWillStartWith(zoomAnimator: self)

    toReferenceImageView.isHidden = true

    let referenceImage = fromReferenceImageView.image!

    if self.transitionImageView == nil {
        let transitionImageView = UIImageView(image: referenceImage)
        transitionImageView.contentMode = .scaleAspectFill
        transitionImageView.clipsToBounds = true
        transitionImageView.frame = fromReferenceImageViewFrame
        self.transitionImageView = transitionImageView
        containerView.addSubview(transitionImageView)
    }

    containerView.insertSubview(toVC.view, belowSubview: fromVC.view)
    fromReferenceImageView.isHidden = true

    let finalTransitionSize = toReferenceImageViewFrame

    UIView.animate(withDuration: transitionDuration(using: transitionContext),
                    delay: 0,
                    options: [],
                    animations: {
                    fromVC.view.alpha = 0
                    self.transitionImageView?.frame = finalTransitionSize
                    toVC.tabBarController?.tabBar.alpha = 1
    }, completion: { completed in

        self.transitionImageView?.removeFromSuperview()
        toReferenceImageView.isHidden = false
        fromReferenceImageView.isHidden = false

        transitionContext.completeTransition(!transitionContext.transitionWasCancelled)
        self.toDelegate?.transitionDidEndWith(zoomAnimator: self)
        self.fromDelegate?.transitionDidEndWith(zoomAnimator: self)

    })
}
以上でアニメーションのロジックは完成です。
ZoomTransitionController
ZoomTransitionControllerはZoomAnimatorが遷移元・遷移先をデリゲートとして参照するために、同じプロパティを持ちます。
class ZoomTransitionController: NSObject {

    let animator: ZoomAnimator

    weak var fromDelegate: ZoomAnimatorDelegate?
    weak var toDelegate: ZoomAnimatorDelegate?

    ...
ZoomTransitionControllerが遷移開始時にZoomAnimatorを返します。
extension ZoomTransitionController: UIViewControllerTransitioningDelegate {
    func animationController(forPresented presented: UIViewController, presenting: UIViewController, source: UIViewController) -> UIViewControllerAnimatedTransitioning? {
        self.animator.isPresenting = true
        self.animator.fromDelegate = fromDelegate
        self.animator.toDelegate = toDelegate
        return self.animator
    }

    func animationController(forDismissed dismissed: UIViewController) -> UIViewControllerAnimatedTransitioning? {
        self.animator.isPresenting = false
        let tmp = self.fromDelegate
        self.animator.fromDelegate = self.toDelegate
        self.animator.toDelegate = tmp
        return self.animator
    }
}

extension ZoomTransitionController: UINavigationControllerDelegate {
    func navigationController(_ navigationController: UINavigationController, animationControllerFor operation: UINavigationControllerOperation, from fromVC: UIViewController, to toVC: UIViewController) -> UIViewControllerAnimatedTransitioning? {

        if operation == .push {
            self.animator.isPresenting = true
            self.animator.fromDelegate = fromDelegate
            self.animator.toDelegate = toDelegate
        } else {
            self.animator.isPresenting = false
            let tmp = self.fromDelegate
            self.animator.fromDelegate = self.toDelegate
            self.animator.toDelegate = tmp
        }

        return self.animator
    }
}
これで、ズームのアニメーションの設定は完了しました。
あとは、ViewControllerでZoomTransitionControllerを使って、実際にズームの遷移を行います。
ViewController
ZoomTransitionControllerを使うために、ContainerViewControllerはZoomTransitionControllerをプロパティに持ちます。
class PhotoPageContainerViewController: UIViewController, UIGestureRecognizerDelegate {
  var transitionController = ZoomTransitionController()
  ...
}
CollectionView側では、セルがタップされた時にセグエを実行して画面遷移を実行します。画面遷移時には、prepareでデリゲートの設定を行います。
override func prepare(for segue: UIStoryboardSegue, sender: Any?) {
    if segue.identifier == "ShowPhotoPageView" {
        let nav = self.navigationController
        let vc = segue.destination as! PhotoPageContainerViewController

        // ナビゲーションコントローラーのデリゲートをZoomTransitionControllerに設定
        nav?.delegate = vc.transitionController
        vc.transitionController.fromDelegate = self
        vc.transitionController.toDelegate = vc

        ...
    }
}
これで、UINavigationControllerの画面遷移が起こった時にZoomTransitionControllerで設定した画面遷移が実行されるようになりました。
残るは、ZoomAnimatorDelegateを各画面で実装して、遷移元・遷移先の画像とフレームをZoomAnimatorに教えてあげれば完了です。
// CollectionView側
extension CollectionViewController: ZoomAnimatorDelegate {
    func transitionWillStartWith(zoomAnimator: ZoomAnimator) {

    }

    func transitionDidEndWith(zoomAnimator: ZoomAnimator) {

        // CollectionViewのCellの位置を調整する
        let cell = self.collectionView.cellForItem(at: self.selectedIndexPath) as! PhotoCollectionViewCell

        let cellFrame = self.collectionView.convert(cell.frame, to: self.view)

        if cellFrame.minY < self.collectionView.contentInset.top {
            self.collectionView.scrollToItem(at: self.selectedIndexPath, at: .top, animated: false)
        } else if cellFrame.maxY > self.view.frame.height - self.collectionView.contentInset.bottom {
            self.collectionView.scrollToItem(at: self.selectedIndexPath, at: .bottom, animated: false)
        }
    }

    func referenceImageView(for zoomAnimator: ZoomAnimator) -> UIImageView? {
        // CollectionViewの画像を返す
        let cell = self.collectionView.cellForItem(at: self.selectedIndexPath) as! PhotoCollectionViewCell
        return cell.imageView
    }

    func referenceImageViewFrameInTransitioningView(for zoomAnimator: ZoomAnimator) -> CGRect? {
        // CollectionViewの画像のフレームを返す

        let cell = self.collectionView.cellForItem(at: self.selectedIndexPath) as! PhotoCollectionViewCell

        let cellFrame = self.collectionView.convert(cell.frame, to: self.view)

        if cellFrame.minY < self.collectionView.contentInset.top {
            return CGRect(x: cellFrame.minX, y: self.collectionView.contentInset.top, width: cellFrame.width, height: cellFrame.height - (self.collectionView.contentInset.top - cellFrame.minY))
        }

        return cellFrame
    }
}
extension ContainerViewController: ZoomAnimatorDelegate {
    func transitionWillStartWith(zoomAnimator: ZoomAnimator) {
    }

    func transitionDidEndWith(zoomAnimator: ZoomAnimator) {
    }

    func referenceImageView(for zoomAnimator: ZoomAnimator) -> UIImageView? {
        return self.currentViewController.imageView
    }

    func referenceImageViewFrameInTransitioningView(for zoomAnimator: ZoomAnimator) -> CGRect? {
        return self.currentViewController.scrollView.convert(self.currentViewController.imageView.frame, to: self.currentViewController.view)
    }
}
これで、ズームイン・ズームアウトのアニメーションができるようになりました。
3. パンジェスチャーで戻るインタラクティブな画面遷移を実装する
iOSの写真アプリのように下に引っ張って写真一覧に戻るには、パンジェスチャーによるインタラクティブな画面遷移を実装する必要があります。
今回は、ContainerViewControllerにUIPanGestureRecognizerをつけて、下に引っ張る動作を検出し、インタラクティブな画面遷移を実行します。
iOS写真アプリのインタラクティブな遷移
iOS写真アプリのインタラクティブな遷移は
- 写真をズームしていないときに下に引っ張ると、写真が徐々に小さくなる。最小サイズが存在する
- 写真を下に引っ張ると指の位置に写真が付いてくる
- 写真を下に引っ張る量に応じて背景が透けていく
- 上に向けて指を離すと写真がもとの位置に戻る
なかなか難しそうですよね。これを一つずつ実装していきます。
全体像
まず実装の全体像です。
- インタラクティブな画面遷移のアニメーションを担当する新しいクラス
ZoomDismissalInteractionControllerを導入します。 - 先ほど実装した
ZoomTransitionControllerには、インタラクティブな画面遷移を実行できるようにZoomDismissalInteractionControllerとデリゲートメソッドを追加します。 - パンジェスチャーを使ってインタラクティブな画面遷移を実行するのは、
PageViewControllerになります。そのため、PageViewControllerにはUIPanGestureRecognizerを付けます。
ZoomDismissalInteractionController
ZoomDismissalInteractionControllerはUIViewControllerInteractiveTransitioningを実装していて、インタラクティブな画面遷移のロジックを担当します。
ZoomDismissalInteractionControllerは、ユーザーがパンジェスチャーを行うたびに呼ばれるメソッドを持っていて、現在のパンジェスチャーの状態によって写真のアニメーションを制御していきます。
class ZoomDismissalInteractionController: NSObject {
  ...

  // パンジェスチャーが実行されるたびに呼ばれる
  func didPanWith(gestureRecognizer: UIPanGestureRecognizer) {

    // 遷移元の画像の中心点
    let anchorPoint = CGPoint(x: fromReferenceImageViewFrame.midX, y: fromReferenceImageViewFrame.midY)

    // 現在の画像の移動量
    let translatedPoint = gestureRecognizer.translation(in: fromReferenceImageView)

    // 画像の縦方向の移動量
    let verticalDelta = translatedPoint.y < 0 ? 0 : translatedPoint.y

    // 背景の透明度
    let backgroundAlpha = backgroundAlphaFor(view: fromVC.view, withPanningVerticalDelta: verticalDelta)

    // 画像のスケール
    let scale = scaleFor(view: fromVC.view, withPanningVerticalDelta: verticalDelta)

    // パンジェスチャーの量に応じて画像のサイズを変える
    transitionImageView.transform = CGAffineTransform(scaleX: scale, y: scale)

    // アニメーションに使用する画像の位置を計算する
    let newCenter = CGPoint(x: anchorPoint.x + translatedPoint.x, y: anchorPoint.y + translatedPoint.y - transitionImageView.frame.height * (1 - scale) / 2.0)
    transitionImageView.center = newCenter

    // インタラクティブな遷移をスケールに応じて更新する
    transitionContext.updateInteractiveTransition(1 - scale)

    // ユーザーがパンジェスチャーを終了した時
    if gestureRecognizer.state == .ended {

        let velocity = gestureRecognizer.velocity(in: fromVC.view)

        // 上方向に話した場合、遷移をキャンセルする
        if velocity.y < 0 || newCenter.y < anchorPoint.y {

          // キャンセルの処理
        }

        // 画面遷移アニメーションを実行する
    }
  }

}

extension ZoomDismissalInteractionController: UIViewControllerInteractiveTransitioning {
    func startInteractiveTransition(_ transitionContext: UIViewControllerContextTransitioning) {
      // Contextの取得や画像の取得などを行い、アニメーションを設定する

      self.transitionContext = transitionContext

      let containerView = transitionContext.containerView

      // 遷移元、遷移先の画像やフレームを取得する
      guard let animator = self.animator as? ZoomAnimator,
          let fromVC = transitionContext.viewController(forKey: .from),
          let toVC = transitionContext.viewController(forKey: .to),
          let fromReferenceImageViewFrame = animator.fromDelegate?.referenceImageViewFrameInTransitioningView(for: animator),
          let toReferenceImageViewFrame = animator.toDelegate?.referenceImageViewFrameInTransitioningView(for: animator),
          let fromReferenceImageView = animator.fromDelegate?.referenceImageView(for: animator)
          else {
              return
      }

      animator.fromDelegate?.transitionWillStartWith(zoomAnimator: animator)
      animator.toDelegate?.transitionWillStartWith(zoomAnimator: animator)

      self.fromReferenceImageViewFrame = fromReferenceImageViewFrame
      self.toReferenceImageViewFrame = toReferenceImageViewFrame

      let referenceImage = fromReferenceImageView.image!

      containerView.insertSubview(toVC.view, belowSubview: fromVC.view)
      if animator.transitionImageView == nil {
          let transitionImageView = UIImageView(image: referenceImage)
          transitionImageView.contentMode = .scaleAspectFill
          transitionImageView.clipsToBounds = true
          transitionImageView.frame = fromReferenceImageViewFrame
          animator.transitionImageView = transitionImageView
          containerView.addSubview(transitionImageView)
      }
}
ZoomTransitionControllerにZoomDismissalInteractionControllerとデリゲートメソッドを追加する
ZoomDismissalInteractionControllerをプロパティに追加し、インタラクティブな画面遷移の時は、こちらの画面遷移ロジックを使用するようにします。
class ZoomTransitionController: NSObject {

    // 追加
    let interactionController: ZoomDismissalInteractionController

    // 追加
    var isInteractive: Bool = false

    // 追加 ZoomDismissalInteractionControllerのdidPanWithを画面から呼び出すためのラッパー
    func didPanWith(gestureRecognizer: UIPanGestureRecognizer) {
        self.interactionController.didPanWith(gestureRecognizer: gestureRecognizer)
    }
}
また、インタラクティブな画面遷移を実装するには、UIViewControllerTransitioningDelegateもしくは、UINavigationControllerDelegateのメソッドを追加実装する必要があります。
- UIViewControllerTransitioningDelegate
func interactionControllerForPresentation(using animator: UIViewControllerAnimatedTransitioning) -> UIViewControllerInteractiveTransitioning?func interactionControllerForDismissal(using animator: UIViewControllerAnimatedTransitioning) -> UIViewControllerInteractiveTransitioning?
- UINavigationControllerDelegate
func navigationController(_ navigationController: UINavigationController, interactionControllerFor animationController: UIViewControllerAnimatedTransitioning) -> UIViewControllerInteractiveTransitioning?
上記のメソッドをZoomTransitionControllerに実装していきます。
extension ZoomTransitionController: UIViewControllerTransitioningDelegate {
    ...

    // 追加
    func interactionControllerForDismissal(using animator: UIViewControllerAnimatedTransitioning) -> UIViewControllerInteractiveTransitioning? {
        if !self.isInteractive {
            return nil
        }

        self.interactionController.animator = animator
        return self.interactionController
    }

}
以上でインタラクティブな画面遷移のベースはできました。あとは実際に画面からジェスチャーを利用してこの画面遷移を実行するだけです。
UIPanGesgureRecognizerを付けて、実際にインタラクティブな画面遷移を実行する
ズームされた画像を下に引っ張って戻れるようにするには、PageViewControllerにUIPanGestureRecognizerを付けて、パンジェスチャーを認識できるようにする必要があります。
ContainerViewControllerからPageViewControllerにUIPanGestureRecognizerを付けます。
class ContainerViewController: UIViewController, UIGestureRecognizerDelegate {
  override func viewDidLoad() {
    ...

    self.panGestureRecognizer = UIPanGestureRecognizer(target: self, action: #selector(didPanWith(gestureRecognizer:)))
    self.panGestureRecognizer.delegate = self
    self.pageViewController.view.addGestureRecognizer(self.panGestureRecognizer)

    ...

  }
}
これでPageViewControllerがパンジェスチャーを認識できるようになりました。
パンジェスチャーの処理部分の流れです。
- 処理開始時にインタラクティブな遷移である設定を行う
- パンジェスチャーの実行時は、
ZoomTransitionControllerのdidPanWithメソッドを読んでインタラクティブな処理を行う - ジェスチャーが終わったら終了時の設定を行い、
ZoomTransitionControllerで画面遷移を行う
    @objc func didPanWith(gestureRecognizer: UIPanGestureRecognizer) {
        switch gestureRecognizer.state {
        case .began:
            // 1
            self.currentViewController.scrollView.isScrollEnabled = false
            self.transitionController.isInteractive = true
            let _ = self.navigationController?.popViewController(animated: true)
        case .ended:
            // 3.
            if self.transitionController.isInteractive {
                self.currentViewController.scrollView.isScrollEnabled = true
                self.transitionController.isInteractive = false
                self.transitionController.didPanWith(gestureRecognizer: gestureRecognizer)
            }
        default:
            // 2.
            if self.transitionController.isInteractive {
                self.transitionController.didPanWith(gestureRecognizer: gestureRecognizer)
            }
        }
    }
以上でインタラクティブな画面遷移の設定が完了しました。
まとめ
記事中では全てのソースコードを載せていないのでわかりにくいところもあったかもしれませんが、ぜひ実際にサンプルを動かしてみてください。
この動きを実現するために結構試行錯誤した結果なので、参考になるのではと思います。
サンプルでは、タップすると全画面にしたり、ナビゲーションバーの表示・非表示を制御したり、画像のズームを制御したりなど、色々と説明していない部分も実装してあります。
ズームする画像の動きはライブラリを使えばすぐ実装できますが、自分で実装してみると学びも多いと思います。
実際のiOSの写真アプリは
- 画像のピンチアウトで一覧に戻ったり、
- 画像を上に引っ張ると画像の撮影位置、メモリーズが出てきたり
とさらに複雑なことをしていて、ビューの構成がさらに複雑なのだと思います。
研究を重ねていきたいと思います。