はじめに
最近ブルーライトをカットしてくれるメガネが売られていますが、スマホアプリにもブルーライトカットを
(本当にカット出来ているかは疑問ですが)謳っているアプリや明るさ調整のアプリがいくつか有ります。
似たような機能は"端末の輝度を設定"+"更にフィルターを掛ける"で実現出来るのでは無いでしょうか。
今回は後者の"更にフィルターを掛ける"部分を実装してみます。
実装
acticity_main.xml
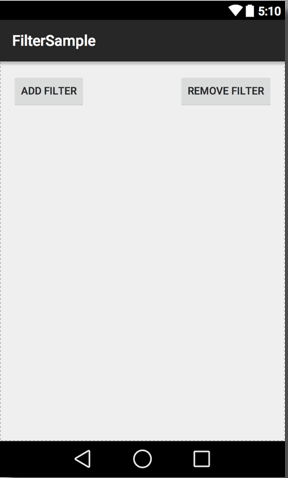
フィルターを追加するボタンとフィルターを解除するボタンの2つだけがあるシンプルなものにします。
<RelativeLayout xmlns:android="http://schemas.android.com/apk/res/android"
    xmlns:tools="http://schemas.android.com/tools" android:layout_width="match_parent"
    android:layout_height="match_parent" android:paddingLeft="@dimen/activity_horizontal_margin"
    android:paddingRight="@dimen/activity_horizontal_margin"
    android:paddingTop="@dimen/activity_vertical_margin"
    android:paddingBottom="@dimen/activity_vertical_margin" tools:context=".MainActivity">

    <Button
        android:layout_width="wrap_content"
        android:layout_height="wrap_content"
        android:text="add Filter"
        android:id="@+id/ButtonAddFilter"
        android:layout_alignParentTop="true"
        android:layout_alignParentLeft="true"
        android:layout_alignParentStart="true" />

    <Button
        android:layout_width="wrap_content"
        android:layout_height="wrap_content"
        android:text="Remove Filter"
        android:id="@+id/ButtonRemoveFilter"
        android:layout_alignParentTop="true"
        android:layout_alignParentRight="true"
        android:layout_alignParentEnd="true" />
</RelativeLayout>
MainActivity.java
2つのボタンの挙動を実装します。
それぞれ単純にサービスのスタートとストップを行うだけです。
import android.app.Activity;
import android.content.Intent;
import android.os.Bundle;
import android.view.View;
import android.widget.Button;

public class MainActivity extends Activity {

    @Override
    protected void onCreate(Bundle savedInstanceState) {
        super.onCreate(savedInstanceState);
        setContentView(R.layout.activity_main);

        Button buttonAddFilter = (Button) findViewById(R.id.ButtonAddFilter);
        buttonAddFilter.setOnClickListener(new View.OnClickListener() {
            @Override
            public void onClick(View v) {
                Intent intent = new Intent(MainActivity.this, FilterService.class);
                startService(intent);
            }
        });

        Button buttonRemoveFilter = (Button) findViewById(R.id.ButtonRemoveFilter);
        buttonRemoveFilter.setOnClickListener(new View.OnClickListener() {
            @Override
            public void onClick(View v) {
                Intent intent = new Intent(MainActivity.this, FilterService.class);
                stopService(intent);
            }
        });
    }
}
filter.xml
画面サイズいっぱいに広がったImageViewを置きます。
<?xml version="1.0" encoding="utf-8"?>
<LinearLayout xmlns:android="http://schemas.android.com/apk/res/android"
    android:orientation="vertical" android:layout_width="match_parent"
    android:layout_height="match_parent">

    <ImageView
        android:layout_width="match_parent"
        android:layout_height="match_parent" />

</LinearLayout>
FilterService.java
今回の肝となる部分。
import android.app.Service;
import android.content.Context;
import android.content.Intent;
import android.graphics.Color;
import android.graphics.PixelFormat;
import android.os.IBinder;
import android.support.annotation.Nullable;
import android.view.LayoutInflater;
import android.view.View;
import android.view.WindowManager;

public class FilterService extends Service {

    private View mView;
    private WindowManager mWindowManager;

    @Override
    public int onStartCommand(Intent intent, int flags, int startId) {

        LayoutInflater layoutInflater = LayoutInflater.from(this);

        //重ねあわせするViewの設定
        WindowManager.LayoutParams layoutParams = new WindowManager.LayoutParams(
                WindowManager.LayoutParams.MATCH_PARENT,
                WindowManager.LayoutParams.MATCH_PARENT,
                WindowManager.LayoutParams.TYPE_SYSTEM_OVERLAY,      //オーバーレイヤーに設定
                WindowManager.LayoutParams.FLAG_WATCH_OUTSIDE_TOUCH,
                PixelFormat.TRANSLUCENT                              //ウインドウの透明化
        );

        //WindowManagerを取得
        mWindowManager = (WindowManager) getSystemService(Context.WINDOW_SERVICE);

        //レイアウトファイルから重ねあわせするViewを作成
        mView = layoutInflater.inflate(R.layout.filter, null);

        //透過率80の黒色のフィルターを指定
        //パラメータは左から(透過率,R,G,B) ココをいじれば任意のフィルターに変更可能
        mView.setBackgroundColor(Color.argb(80, 0, 0, 0));

        //Viewを画面上に重ねあわせする
        mWindowManager.addView(mView, layoutParams);

        return START_NOT_STICKY;
    }

    @Override
    public void onDestroy() {
        super.onDestroy();
        mWindowManager.removeView(mView);
    }

    @Nullable
    @Override
    public IBinder onBind(Intent intent) {
        return null;
    }
}
AndroidManifest.xml
忘れがちですが、こちらにも追記が必要です。
うっかりパーミッションやサービスの定義を忘れると動きません(30分くらいハマりました。。。)。
<?xml version="1.0" encoding="utf-8"?>
<manifest xmlns:android="http://schemas.android.com/apk/res/android"
    package="sample.masaibar.filtersample" >

    <!--パーミッション定義しないと動きません-->
    <uses-permission android:name="android.permission.SYSTEM_ALERT_WINDOW" />

    <application
        android:allowBackup="true"
        android:icon="@mipmap/ic_launcher"
        android:label="@string/app_name"
        android:theme="@style/AppTheme" >
        <activity
            android:name=".MainActivity"
            android:label="@string/app_name" >
            <intent-filter>
                <action android:name="android.intent.action.MAIN" />

                <category android:name="android.intent.category.LAUNCHER" />
            </intent-filter>
        </activity>

        <!--サービスを定義しないとstartService出来ません-->
        <service android:name=".FilterService"/>
    </application>

</manifest>
動かしてみる
アプリを起動し、左側の「ADD FILTER」ボタンを押せばフィルターがかかります。
解除したいときは「REMOVE FILTER」を押して下さい。
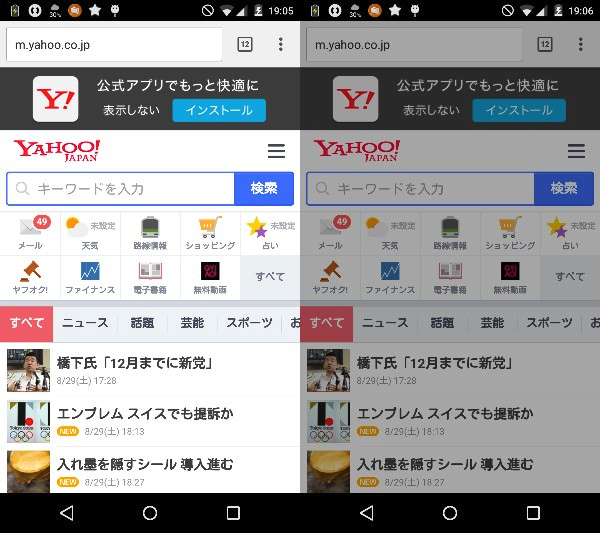
左がフィルター無し、右がフィルター有り。同じ輝度での対比です。
フィルターを掛けた分だけ画面が暗くなっているのが分かります。
実際のコードを置いておきます。
https://github.com/masaibar/FilterSample