はじめに
Raspberry Piで温度計測とGPIOでセンサー状態を取得するとき、ソフトウェア単体でデバッグできると便利です。
そこで温度計測とGPIOでセンサー状態の取得をシミュレートし、Webサイト(Flaskで作成)へ表示するデバッグ環境を作成しました。
シミュレートした温度とセンサー状態はSQLiteに保存し、Ajax経由でページを更新します。
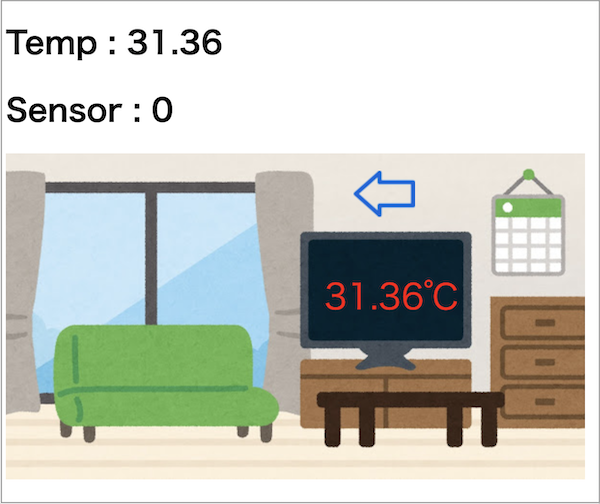
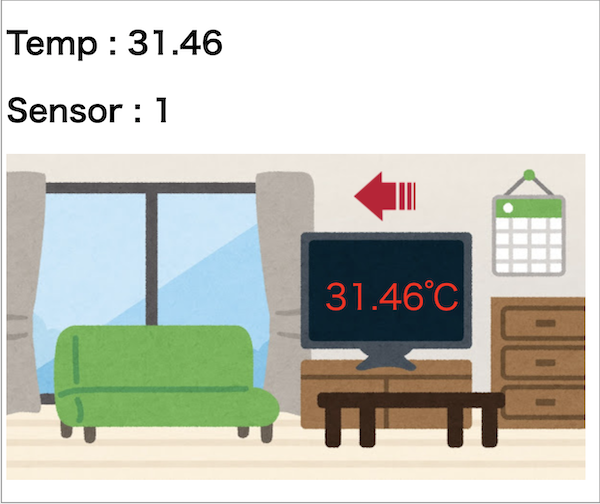
温度とセンサー状態の数値では分かりにくいので、あたかもリビングの温度とセンサーが変化したように見せています。
この環境ではブレッドボードや配線は不要です。
リアルタイム性を必要とする温度計測やセンサー状態の取得には向いていません。30秒間隔で温度が分かれば良いという程度の環境を想定しています。
動作イメージ
- 温度とセンサー状態の矢印が更新されます。
環境
- Raspberry Pi3 B
- Python 3.7.2
- Flask
- SQLite3
- Sqlalchemy
- jQuery 3.4.1
インストール
Python環境
- ここではSensorフォルダを作成し、pipenvで環境をインストールします。
- pipenv、Webサーバ(Nginx, uWSGIなど)のインストールは割愛します。
$ mkdir Sensor
$ cd Sensor
$ pipenv install --python 3.7.2
$ pipenv install flask
$ pipenv install sqlalchemy
$ pipenv shell
フォルダとファイル構成
- 下記のフォルダとファイルを作成します。
- jQueryは、jQueryから適したバージョンをダウンロードします。
- 矢印アイコン(On/Off)は、【フリーアイコン】 矢印(上下左右)などからダウンロードします。
- 背景は、かわいいフリー素材集 いらすとやなどからダウンロードします。
└ Sensor/
  ├ server.py
  ├ app/
  │ ├ app.py
  │ └ static/
  │ │ ├ css/
  │ │ │ └ sample.css
  │ │ ├ img/
  │ │ │ ├ arrow_on.png        # Onのときの矢印
  │ │ │ ├ arrow_off.png       # Offのときの矢印
  │ │ │ └ bg_house_living.jpg # 背景画像
  │ │ ├ jquery/
  │ │ │ └ jquery-3.4.1-min.js
  │ │ └ js/
  │ │   └ sample.js
  │ └ templates/
  │   └ index.html
  ├ models/                   # SQLite3定義
  │ ├ __init__.py
  │ ├ database.py
  │ └ models.py
  └ output_log/               # バックグラウンド実行のログフォルダ
ソースコード
サーバメイン処理
- init_db()でDatabaseを初期化します。(*.dbファイルが存在しない場合のみ実行されます)
server.py
# -*- coding: utf-8 -*-

from flask import Flask
from app.app import app
from models.database import init_db

if __name__ == "__main__":
    # Database初期化
    init_db()
    # アプリ起動(host=0,0,0,0で全てのアクセス許可)
    app.run(host='0.0.0.0', debug=True)
温度とセンサーのシミュレート処理
- 3秒間隔で温度とセンサーをシミュレートします。
- 温度は25度+αでシミュレートします。
- センサーは0 or 1でシミュレートします。
(参考)
Pythonで定周期で実行する方法と検証
sensor.py
# -*- coding: utf-8 -*-

import time
import threading
import random
from models.models import SensorCurrent
from models.database import db_session
from datetime import datetime

# 定期実行処理
def schedule():
    # 温度シミュレート(25度+α)
    now = time.time()
    temp = 25 + now % 5 + (now / 10) % 10
    # 小数点第2位に切り捨て
    str = "{0:.2f}".format(temp)
    temp = float(str)

    # センサー状態シミュレート(0 or 1)
    sensor = random.randint(0, 1)

    # 現在データ更新
    current = SensorCurrent.query.first()
    current.temp1 = temp
    current.sensor1 = sensor
    db_session.commit()
    db_session.close()

# 定期実行設定処理
def scheduler(interval, f, wait = True):
    base_time = time.time()
    next_time = 0
    while True:
        t = threading.Thread(target = f)
        t.start()
        if wait:
            t.join()
        next_time = ((base_time - time.time()) % interval) or interval
        time.sleep(next_time)

if __name__ == "__main__":
    # 定期実行設定(3秒間隔)
    scheduler(3, schedule, True)
アプリメイン処理
- Webサイト表示とAjax処理を記述します。
/app/app.py
# -*- coding: utf-8 -*-

from flask import Flask,render_template,request, json, jsonify
from models.models import SensorCurrent

app = Flask(__name__)

# Webサイト表示処理
@app.route("/")
def index():
    # SQliteから温度とセンサーの現在データを取得
    data = SensorCurrent.query.first()
    return render_template("index.html",sensor=data)

# Ajax処理
@app.route("/currdata", methods=['POST'])
def getCurrData():
    # SQliteから温度とセンサーの現在データを取得
    data = SensorCurrent.query.first()
    # JSONに変換して結果を返す
    json_data = {
        'sensor1': data.sensor1,
        'temp1': data.temp1
    }
    return jsonify(Result=json.dumps(json_data))

if __name__ == "__main__":
    app.run(debug=True)
データベース定義
- SQLite3データベース(sensor.db)を定義します。
models/database.py
# -*- coding: utf-8 -*-

from sqlalchemy import create_engine
from sqlalchemy.orm import scoped_session, sessionmaker
from sqlalchemy.ext.declarative import declarative_base
import os

# データベースファイル設定
databese_file = os.path.join(os.path.abspath(os.path.dirname(__file__)), 'sensor.db')
engine = create_engine('sqlite:///' + databese_file, convert_unicode=True)
db_session = scoped_session(sessionmaker(autocommit=False,autoflush=False,bind=engine))
Base = declarative_base()
Base.query = db_session.query_property()

# データベース初期化
def init_db():
    import models.models
    Base.metadata.create_all(bind=engine)
テーブル定義
- 温度とセンサーの現在データテーブル(currdata)を定義します。
models/models.py
# -*- coding: utf-8 -*-

from sqlalchemy import Column, Integer, Float, String, Text, DateTime
from models.database import Base
from datetime import datetime

# 温度とセンサーの現在データテーブル定義
# ここでは温度データ1つ, センサーデータ1つを保存
# テーブル定義は適宜設定してください
class SensorCurrent(Base):
    __tablename__ = 'currdata'
    id = Column(Integer, primary_key=True)
    name = Column(String(128))
    temp1 = Column(Float)
    sensor1 = Column(Integer)
    date = Column(DateTime, default=datetime.now())

    def __init__(self, name=None, temp1=None, sensor1=None, date=None):
        self.name = name
        self.temp1 = temp1
        self.sensor1 = sensor1
        self.date = date

    def __repr__(self):
        return '<Name %r>' % (self.name)
Flaskを使用したメインページ
- 起動時に現在データを取得して表示します。(矢印のデフォルトはOffです)
- Ajaxを利用して2秒間隔で現在データを取得してページを書き換えます。
app/templates/index.html
<!DOCTYPE html>
<html lang="ja">
    <head>
        <meta charset="utf-8">
        <title>{{sensor.name}}</title>
        <meta name="viewport" content="width=device-width,initial-scale=1.0">
        <link rel="stylesheet" type="text/css" href="../static/css/sample.css">
        <script src="../static/jquery/jquery-3.4.1.min.js"></script>
        <script src="../static/js/sample.js"></script>
    </head>
    <body>
    <h1 id="h1_temp1">Temp : {{sensor.temp1}}</h1>
    <h1 id="h1_sensor1">Sensor : {{sensor.sensor1}}</h1>

    <div class="sample-box">
        <img class="sample-box-bg" src="../static/img/bg_house_living.jpg" alt="">
        <div class="sample-sensor">
            <img class="sample-sensor-img" id="sensor1" src="../static/img/arrow_off.png" alt="">
        </div>
        <div id="temp1" class="sample-tempareture">
        </div>
    </div>
    </body>
    <script>
        setInterval(function () {
            getcurrdata();
        }, 2000);
    </script>
</html>
現在データ取得処理
- Ajaxを利用して現在データを取得します。
app/static/js/sample.js
// 現在データ取得
function getcurrdata() {
    $.ajax({
        type: 'POST',
        url: '/currdata',
        data: '',
        contentType: 'application/json'
    })
    .done( (data) => {
        // データ取得成功
        console.log("success");
        // JSONからデータ抽出
        var json_data = JSON.parse(data.Result);
        const sensor1 = json_data.sensor1;
        const temp1 = json_data.temp1;

        // 背景画像内に温度設定
        $("#temp1").html(temp1 + "℃");
        // 温度設定(確認用)
        $("#h1_temp1").html("Temp : " + temp1);

        // センサー画像設定
        if (sensor1 == 0) {
            $("#sensor1").attr("src", "../static/img/arrow_off.png");
        } else {
            $("#sensor1").attr("src", "../static/img/arrow_on.png");
        }
        // センサー設定(確認用)
        $("#h1_sensor1").html("Sensor : " + sensor1);
    })
    .fail( (data) => {
        // データ取得失敗
        console.log("error");
    });
}
メインページのCSS
- 簡易的にレスポンシブデザインに対応しています。
app/static/css/sample.css
@charset "utf-8";

@media screen and (min-width: 481px) {
  .sample-box {
    position: relative;
    display:inline-block;
  }
  .sample-box-bg {
  }

  .sample-sensor {
    position: absolute;
    left: 60%;
    top: 5%;
  }
  .sample-sensor-img {
  }

  .sample-tempareture {
    position: absolute;
    top: 35%;
    left: 55%;
    color: RED;
    font-size: 36px;
  }
}

@media screen and (max-width: 480px) {
  .sample-box {
    position: relative;
    display:inline-block;
  }
  .sample-box-bg {
    width: 100%;
  }

  .sample-sensor {
    position: absolute;
    left: 60%;
    top: 5%;
  }
  .sample-sensor-img {
    width: 70%;
    height: 70%;
  }

  .sample-tempareture {
    position: absolute;
    top: 35%;
    left: 55%;
    color: RED;
    font-size: 22px;
  }
}
操作方法
温度とセンサーのシミュレートからWebサイトの表示までを説明します。
温度とセンサーの初期値を設定
- 温度とセンサーの初期値(1件のみ)currdataテーブルへ追加します。
- Sensorフォルダでpythonを起動し、下記のソースコードを実行します。
- 1回のみ実行でOKです。
$ python
from models.database import db_session
from models.models import SensorCurrent
data = SensorCurrent("サンプル",25.3, 0)
db_session.add(data)
db_session.commit()
exit()
温度とセンサーのシミュレート開始
- Sensorフォルダから、バックグラウンドで温度とセンサーをシミュレートするアプリを起動します。
- バックグラウンドで実行するのは、サーバアプリと同時に実行したいためです。
# 下記のフォルダで実行
(Sensor) pi@raspberrypi:~/Sensor $

# 以下のコマンドを実行
nohup python sensor.py > ./output_log/out.log &
- 既にシミュレートを開始している場合は、プロセスをkillしてから開始します。
# pythonを実行しているプロセスを検索
$ ps aux | grep python
pi       22965  0.7  2.0  32200 19176 pts/2    S    16:43   0:27 python sensor.py

# sensor.pyプロセスをkill
$ kill -9 (sensor.pyのプロセスID -> ここでは22965)
Webサーバを起動
- サーバメイン処理を起動します。
# 下記のフォルダで実行
(Sensor) pi@raspberrypi:~/Sensor $

# 以下のコマンドを実行
python server.py
表示確認
- ブラウザを起動し、http://127.0.0.1:5000へアクセスします。
- WebサーバのローカルIPアドレスへのアクセスでもOKです。
- スマートフォンからアクセスした場合、簡易的にレスポンシブデザインが適用されていると思います。
おわりに
Raspberry PiでIoTを試したいけど、ハードウェアも同時開発だったり、ブレッドボードや配線が用意できないとき、簡易的にシミュレートできます。温度やセンサー数はSQLiteの定義により自由に設計できるので、これから活用していこうと思います。
参考
下記のサイトを参考にさせていただきました。
Webアプリ開発未経験者がFlaskとSQLiteとHerokuを使って1週間でサービス公開までする
Raspberry pi + Nginx + uWSGIでWebサーバーを立ち上げDjangoアプリをデプロイしてみる その1
Pythonで定周期で実行する方法と検証
バックグラウンド実行で時間短縮しよう!!