概要
pythonを用いた画像処理を用いてスマホゲームを自動化していきます.
PCを初期化したので,再度設定してきます.
前回の記事
https://qiita.com/m_tani_july/items/6691bc590693c3cf65cb
解説動画
後日,動作確認の動画をアップロードしたいと思います.
動画をアップしました.
コードの紹介
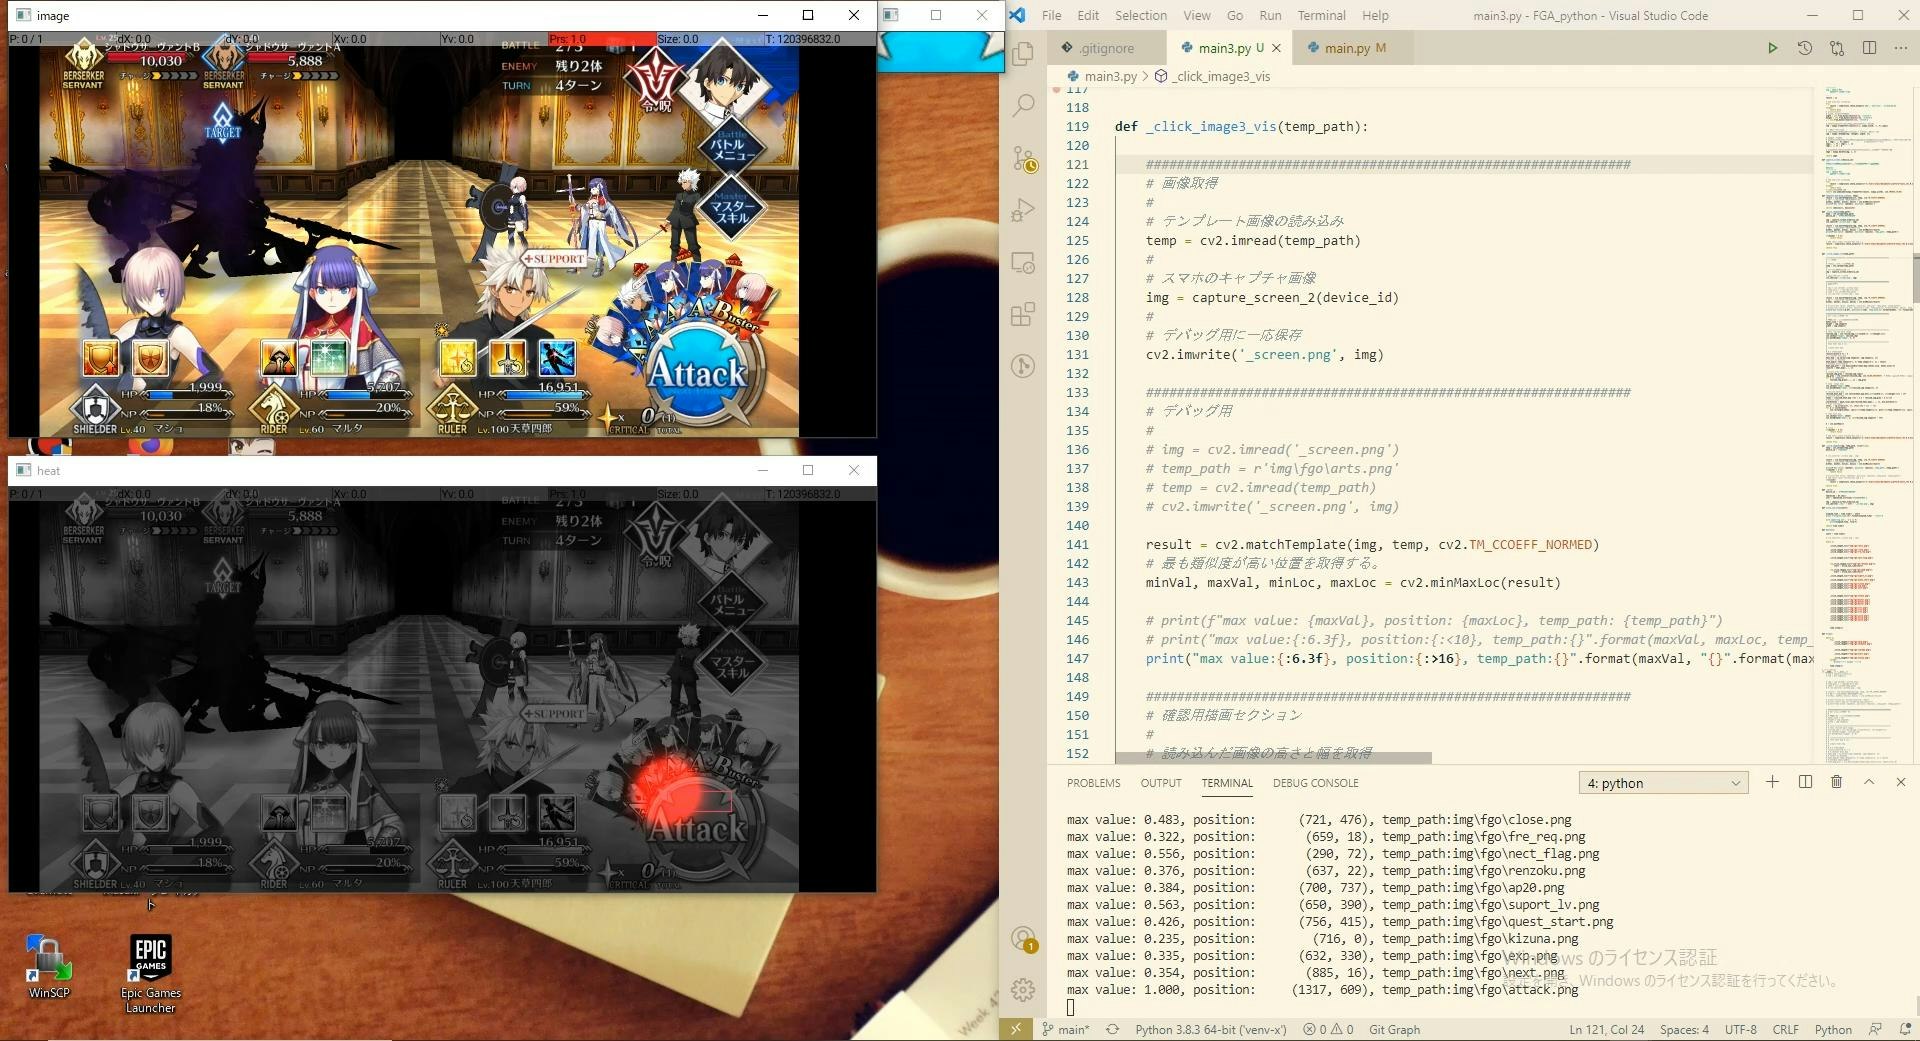
スマホから画像を取得してから,テンプレートマッチングしてその結果を可視化したプログラムです.
def _click_image3_vis(temp_path):

    ###############################################################
    # 画像取得
    #
    # テンプレート画像の読み込み
    temp = cv2.imread(temp_path)
    #
    # スマホのキャプチャ画像
    img = capture_screen_2(device_id)
    #
    # デバッグ用に一応保存
    cv2.imwrite('_screen.png', img)

    ###############################################################
    # デバッグ用
    #
    # img = cv2.imread('_screen.png')
    # temp_path = r'img\fgo\arts.png'
    # temp = cv2.imread(temp_path)
    # cv2.imwrite('_screen.png', img)

    result = cv2.matchTemplate(img, temp, cv2.TM_CCOEFF_NORMED)
    # 最も類似度が高い位置を取得する。
    minVal, maxVal, minLoc, maxLoc = cv2.minMaxLoc(result)

    # print(f"max value: {maxVal}, position: {maxLoc}, temp_path: {temp_path}")
    # print("max value:{:6.3f}, position:{:<10}, temp_path:{}".format(maxVal, maxLoc, temp_path))
    print("max value:{:6.3f}, position:{:>16}, temp_path:{}".format(maxVal, "{}".format(maxLoc), temp_path))

    ###############################################################
    # 確認用描画セクション
    #
    # 読み込んだ画像の高さと幅を取得
    kenel_size = 201
    height = img.shape[0]
    width = img.shape[1]
    #
    # =============================================================
    # show resized base image
    resized_img = cv2.resize(img,(int(width/2), int(height/2)))
    cv2.imshow("image", resized_img)
    cv2.moveWindow("image", 0, 0)
    #
    # =============================================================
    # show heat map & roi
    #
    # create heat map
    #
    # 0.5 以下は無視
    result[result<0.5] = 0
    # 3 channel heat_map
    heat_map = np.zeros((img.shape[0], img.shape[1], 3))
    # result to heatmap
    heat_map[0:-temp.shape[0]+1, 0:-temp.shape[1]+1, 2] = result
    # heatmap GaussianBlur
    heat_map_blur = cv2.GaussianBlur(heat_map,(kenel_size, kenel_size),0)
    result2 = heat_map[:, :, 2]
    #
    # create gray image
    resized_img_gray = resized_img.copy()
    img_gray = cv2.cvtColor(resized_img, cv2.COLOR_BGR2GRAY)  # RGB2〜 でなく BGR2〜 を指定
    for i in range(3):
        resized_img_gray[:, :, i] = img_gray

    # temp  image show
    cv2.imshow("temp", temp)
    cv2.moveWindow("temp", int(resized_img.shape[1]), 0)

    # resized heat_map
    resized_heat_map = cv2.resize(heat_map_blur,(int(width/2), int(height/2))) * 255
    # resized heat_map
    xheat = (resized_heat_map *255 * 0.6 + resized_img_gray * 0.4)/255
    # detect peak
    coordinates = peak_local_max(resized_heat_map[:, :, 2], min_distance=2)
    # draw rectangle
    color_ = np.array([102, 51, 255])/255 # RGB -> GBR
    for p in coordinates:
        cv2.rectangle(xheat, (p[1]+int(temp.shape[1]/2), p[0]+int(temp.shape[0]/2)), (p[1], p[0]), color_, thickness=1)

    # show heat map
    cv2.imshow("heat", xheat)
    cv2.moveWindow("heat", 0, int(resized_img.shape[0] + 50))


    k = cv2.waitKey(1)
おわりに
今回はadbコマンドと画像処理を組み合わせたコードを紹介しました.
これでオート周回するプログラムができます.
今後は別ゲームへの対応や戦略アルゴリズムの開発をやっていく予定です.
次回
「pythonでスマホゲーム自動化~ファイナルファンタジー ブレイブエクスヴィアス(FFBE)自動化編~」
https://qiita.com/m_tani_july/items/df81ea3a10a70581bb77
