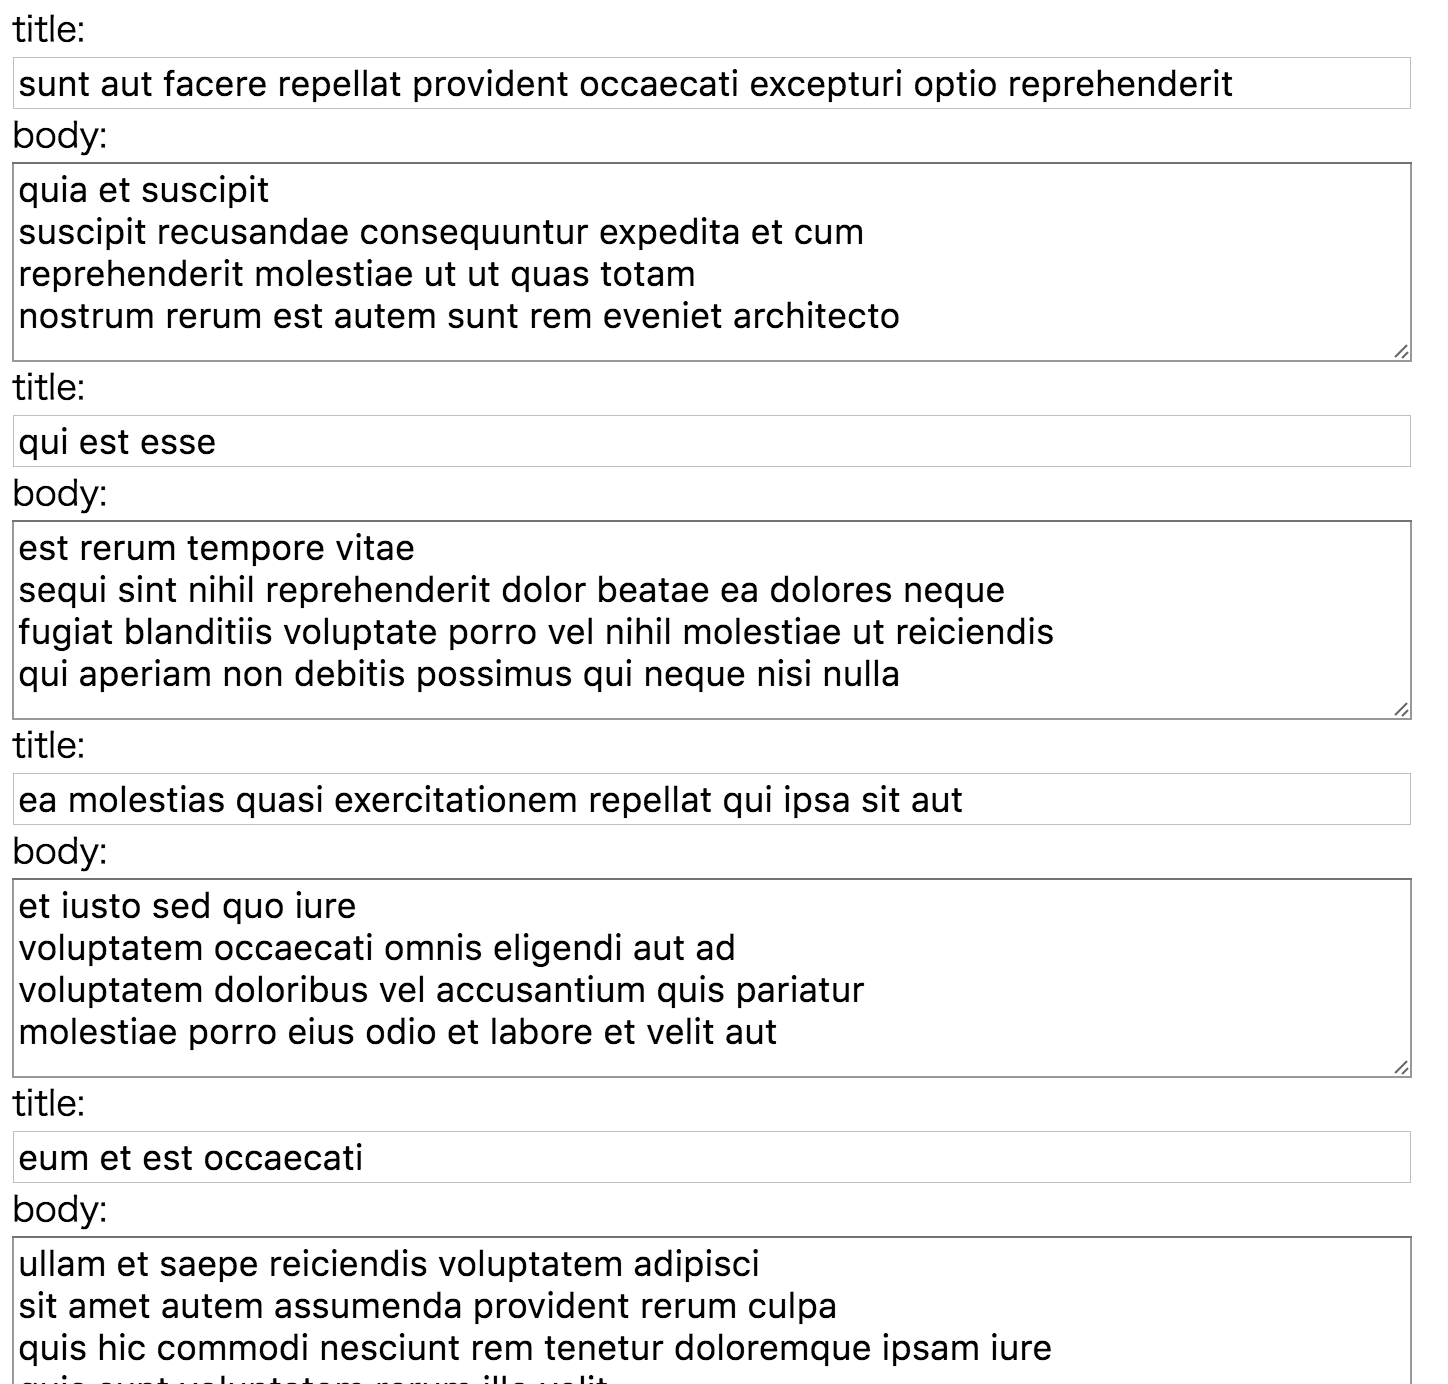
Backbone.jsを使って、RESTful APIからデータを取得して表示する画面をつくります。
Backbone.jsでModelに対応するViewをつくるの複数レコード版です。
準備
依存ライブラリ
Backbone.jsはjQueryとunderscoreに依存しています。
準備を簡単にするために、各ライブラリをCDNから取得します。
<head>
  <script src="https://code.jquery.com/jquery-2.2.2.js" integrity="sha256-4/zUCqiq0kqxhZIyp4G0Gk+AOtCJsY1TA00k5ClsZYE=" crossorigin="anonymous"></script>
  <script src="https://cdnjs.cloudflare.com/ajax/libs/underscore.js/1.8.3/underscore.js"></script>
  <script src="https://cdnjs.cloudflare.com/ajax/libs/backbone.js/1.3.2/backbone.js"></script>
</head>
RESTful API
typicode/jsonplaceholder: A simple fake REST API serverを使います。
npm install -g jsonplaceholder
jsonplaceholder
http://localhost:3000/posts からリソースを取得します。
完成画面
実装
方針
Model
一つのレコードに対応するモデルをPostModelとして実装します。
ModelのView
PostModelから表示するDOMを作るビューをPostViewとして実装します。
ModelのCollection
RESTful APIから複数のレコードを取得して、PostModelのコレクションを作成するモデルをPostCollectionとして実装します。
ApplicationのView
PostCollectionの取得したレコードをPostViewを使ってDOMに変換し、表示するビューをAppViewとして実装します。
ソースコード
<head>
  <script src="https://code.jquery.com/jquery-2.2.2.js" integrity="sha256-4/zUCqiq0kqxhZIyp4G0Gk+AOtCJsY1TA00k5ClsZYE=" crossorigin="anonymous"></script>
  <script src="https://cdnjs.cloudflare.com/ajax/libs/underscore.js/1.8.3/underscore.js"></script>
  <script src="https://cdnjs.cloudflare.com/ajax/libs/backbone.js/1.3.2/backbone.js"></script>
  <style>
    body {
      font-size: 1.1em;
    }

    input {
      font-size: 100%;
      width: 700px;
    }

    textarea {
      font-size: 100%;
      height: 100px;
      width: 700px
    }

    button {
      font-size: 100%;
    }
  </style>
</head>

<body>
  <script>
    const PostModel = Backbone.Model.extend(),
      PostView = Backbone.View.extend({
        initialize() {
          this.listenTo(this.model, 'change', this.render)
        },
        template(data) {
          return `
            <div>title:</div>
            <input value="${data.title}">
            <div>body:</div>
            <textarea>${data.body}</textarea>
          `
        },
        render() {
          this.$el.html(this.template(this.model.attributes))
          return this
        }
      }),
      PostCollection = Backbone.Collection.extend({
        url: 'http://localhost:3000/posts',
        model: PostModel
      }),
      posts = new PostCollection(),
      AppView = Backbone.View.extend({
        initialize() {
          this.listenTo(posts, 'add', this.render)
          posts.fetch()
        },
        render(post) {
          $('body').append(
            new PostView({
              model: post
            })
            .render()
            .$el
          )
        }
      })

    new AppView
  </script>
</body>
PostModel
PostModel = Backbone.Model.extend()
ただEvent Emmiter付きの箱です。
Backbone.Modelはデフォルトでchangeイベントを提供します。
Collectionに指定すると、取得したレコード毎にPostModelのインスタンスを作成してくれます。
PostView
PostView = Backbone.View.extend({
  initialize() {
    this.listenTo(this.model, 'change', this.render)
  },
  template(data) {
    return `
      <div>title:</div>
      <input value="${data.title}">
      <div>body:</div>
      <textarea>${data.body}</textarea>
    `
  },
  render() {
    this.$el.html(this.template(this.model.attributes))
    return this
  }
})
PostModelのchangeイベントに応じて、attributesプロパティをDOMに変換します。
変換したDOMは自信が管理するDOM($elプロパティ)に追加します。
PostCollection
PostCollection = Backbone.Collection.extend({
  url: 'http://localhost:3000/posts',
  model: PostModel
})
RESTful APIのURLと、取得したレコードの変換先モデルを指定します。
AppView
posts = new PostCollection(),
AppView = Backbone.View.extend({
  initialize() {
    this.listenTo(posts, 'add', this.render)
    posts.fetch()
  },
  render(post) {
    $('body').append(
      new PostView({
        model: post
      })
      .render()
      .$el
    )
  }
})
PostCollectionのインスタンスのaddイベントに応じてビューを描画します。
PostViewを使って、PostModelをDOMに変換し、bodyタグに追加します。
